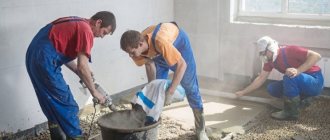
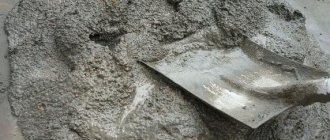
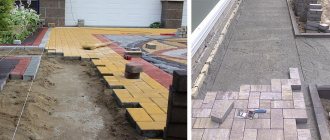
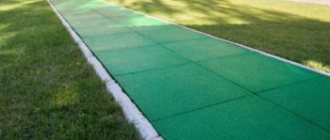
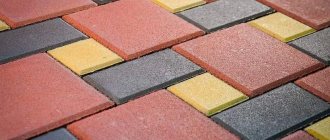
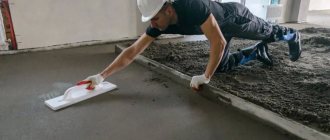
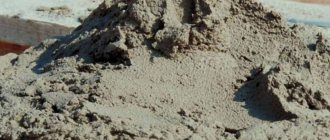
When laying paving stones or paving slabs, a sand-cement mixture with high frost resistance and strength is used, which, in turn, depends on the proportions of the components and additives in the composition of the CPS. To increase strength, a product labeled M300 is added to the mixture, but the classic option for installing paving stones or tiles on the street is the cement-sand mixture M200. It has all the necessary characteristics that allow it to serve for a long time and not crumble due to temperature changes.
Sand-cement mixture for laying paving slabs
Depending on the composition and type, sand-cement mixtures are suitable for different types of installation, masonry and repair work. For example, the M-300 mixture is ideal for creating high-strength concrete structures, and M-200 is ideal for repairs and masonry of various materials. Dry sand-cement mixture is also used for laying paving slabs.
Depending on the composition and type, sand-cement mixtures are suitable for different types of installation, masonry and repair work. For example, the M-300 mixture is ideal for creating high-strength concrete structures, and M-200 is ideal for repairs and masonry of various materials. Dry sand-cement mixture is also used for laying paving slabs.
In what proportion should the sand-cement mixture be prepared?
For these types of work, you can buy a ready-made mixture here (the M-300 brand is ideal) or mix it yourself from several components. So, in a sand-cement mixture, the ratio of sand and cement is usually 3 to 1 parts. But you need to understand that the higher the number in the cement grade, the more shares of sand you need to use. So, for the 400th you will need 5 parts, and for the 600th – already 6. Water must be added until the mixture takes on the consistency of thick sour cream. Sometimes PVA glue is also added to the sand-cement mixture for laying paving slabs to provide the masonry with maximum strength. After mixing, you need to wait 15 minutes, and the solution is ready for installation. It is ideal if it is made on a concrete base, because this will ensure the most durable strength of the path.
Laying paving stones
To begin laying paving stones on a sand-cement mixture, you need to perform several preparatory operations.
- Firstly, level and compact the soil, and secondly, cover it with a 2-centimeter layer of crushed stone.
- Next, pour 60 mm of sand onto the surface to level it, and then cover the sand with reinforcing mesh. After this, lay out the sand-cement mixture for laying paving slabs in a layer of 30-40 mm. It is necessary to lay the tiles, leaving gaps of 3-5 mm between them.
- After this, tap the tiles with a rubber hammer and fill the gaps with the mixture. If you decide to lay the mixture on a concrete screed, then instead of pouring sand, you immediately begin laying out a screed 5-10 cm thick.
And, finally, a little advice from experts: in order not to make a mistake in the proportions of the components, it is better to buy a sand-cement mixture from the manufacturer. The consumption of the finished mixture is approximately 17-22 kilograms of powder per 1 square meter with a thickness of 10 millimeters. To prepare the solution, it will be enough to add 1.6-1.8 liters of clean cold water per 10 kg of mixture. The proportions of the sand-cement mixture are calculated in such a way as to obtain maximum adhesion to the material, in this case, to the tiles. It is better to use the solution within two hours, otherwise you will need to add water. Read more here.
- People: Writer Alexander Prokhanov
superomsk.ru
Materials for filling seams
The presence of seams between each element of the tile covering compromises its integrity. Water will leak through the gaps formed, and in the cold season it will begin to freeze, causing damage to the tiles. When performing installation work, it is necessary to think in advance about how the seams will be sealed.
The next nuisance that will negatively affect the tile covering if there are seams is debris. At the same time, it can be both soft and hard. In case of vibrations that occur when moving along the surface of the tile, it will begin to destroy and scratch the material.
Often, garbage is chemically active and triggers negative reactions, including rotting. This process attracts insects and microorganisms, which begin to sharpen the paving stones.
To seal the seams on the tile surface, you need to prepare the following tools:
- Rubber spatula. For such work, it is better to choose a narrow model, but its width is determined depending on the specifics of the cracks. So, if they are long and continuous, it is better to take a wide model. The main thing is that the spatula does not damage the coating.
- Sieve. It will be used to sift sand to seal the seams.
- Concrete mixer. If the unit is missing, you can use any container and a construction mixer with an attachment.
- Shovel and container.
- Broom.
- Buckets and hose.
The materials used for sealing joints are sand or cement (you can combine materials to create a mixture of DSP or PCS), as well as water. After preparing all the tools and materials, you can proceed to the main work.
Laying paving slabs on sand with your own hands: types of tiles and step-by-step recommendations
Pavement tiles are an upgrading material that stands out among others due to its easy design and, most importantly, low cost.
Do-it-yourself laying of paving slabs on sand is one of the types of reliable and high-quality street coverings, which also has advantages over asphalt pavements or those covered with wild stones.
Arguments in favor of its choice: a rich model range, both in color palette and formats; variations and methods of its display; long service life and reliability.
Necessary tools and set of materials
Paving slabs in landscape design
Initially, we purchase crushed stone and sand.
Crushed stone will be needed to create a highly durable base, or cushion.
If sand is not available, we replace it with various types of screenings.
The required volume depends on the area of the cultivated surface; the purchase of these components is carried out in tons, but for the initial calculation it is carried out in m3, while the length is multiplied by the width, and then by the average thickness of these bedding.
The thickness of the initial slag pile should be approximately 10 cm.
The thickness of the sand mound for laying the tiles should be approximately 10 cm. The sand should be slightly moistened, of course!
We calculate the required volume of tiles in accordance with the surface to be refinished, and to calculate the m2 we need, we multiply the length by the width. In addition, you will need cement (1 bag per 10 m2) and limiters in the form of curbs.
From the tool you will need:
- Trowel, hammer or mallet, grinder, metal and wood pegs, nylon thread or twine, levels of different lengths, shovel, hose with nozzle (watering can).
- We inspect the area for work and draw up a schematic plan. Then we mark the territory.
- The mixture for laying tiles is prepared when the base has already been made, when there is a real opportunity to begin the main operation. The procedure for making the solution is not complicated, which gives you a chance to complete the work without downtime. It is better to make a concrete base; this approach will provide strength that gravel or other alternatives cannot provide.
The ingredients should be prepared ahead of time. It is recommended to filter the sand using a sieve to remove various debris (clay, debris). Dry formulations are the most successful, but they also have worthy replacements. Concrete screed, for example, or even ordinary sand without impurities. All replacements have pros and cons, it is recommended to take them into account. Let's consider in what portions the mixture should be diluted.
Proportions
Portions of the mixture for laying tiles may vary, depending on the brand of cement and other facts. Brands are usually designated by three-digit numbers; they indicate the nature of strength and other characteristics. If the numbers are 300-400, then one component of cement requires 5 components of sand, in the case of 500-500, then 6 parts. Add PVA glue to increase durability. After merging with the glue, you need to actively begin the main work.
Typically, the procedure for manufacturing a classic variety of a mixture of components is carried out according to this scheme. A small amount of cement, in one component, is mixed with water, in a set with three components. Or, in proportion, one to five. It is better to judge by density. The solution should have a fairly thick consistency.
It should be approximately the same as a sour cream product. You should wait 15 minutes, then stir again. When laying out the paving stones, they are moistened with water, on the side that comes into contact with the solution.
Consumption
Laying paving stones
It is not difficult to sum up the costs of purchasing a mixture for laying slabs; it is recommended to multiply the depth of the ditch by the length of the path, then by the width between the curbs.
We get the required volume, but we need to add a little to this amount to ensure a reserve.
After all, approximately 20 percent goes to compaction, so you should multiply the total by about 1.3. Further it will be clear how many of these components are required.
For example, if three portions of sand and one portion of cement are used, then we multiply the total by 3/4 to find out how many cubic meters of the first component need to be purchased for the successful implementation of the procedure for laying tiles for sidewalks.
Types of pavement tiles
Before you get down to business and start laying paving slabs with your own hands on sand and cement, you need to determine what types of materials are used to finish the sites.
Nowadays there are a great many types of products available, which are primarily distinguishable by their formats; the most popular are: paving stones, wave, flower, scales, clover, etc.
Main subtypes of paving tiles
Initially, this material began to be used in regions that needed durable roads, and where there was not enough stone for these purposes. With its help, roadways and then sidewalks were laid out. In the 70s, tiles were larger and less durable than paving stones in modern times.
After the advent of progressive technology in production, such as pressing, this material acquired its appearance that we are used to seeing.
Modern production involves a number of types of technological processes for making tiles. Depending on what technology is used, we get one or another type of tile. Main types of paving stones:
- vibration-cast
- vibration-pressed
- granite
Vibro-cast tiles are distinguished by the process of their birth, in which plastic compounds are used. The mass for future tiles fills special containers, “vibro-forms”. The appearance of such a product imitates a special coating of brick or wood. This type of material is used for individual construction. These tiles are used to pave paths in gardens and areas in front of houses outside the city.
Vibropressed tiles
The vibro-pressed type of tile is made in a completely different way.
In this case, a mixture of concrete is poured into molds, they are subjected to vibrations under pressure.
Such an operation will create a special vibrating press, by means of which the tiles receive a more strict shape and roughness.
This material is used to pave roads in public places.
The most durable paving stones are those made from natural stone - granite, because they can more easily withstand temperature changes and have a longer lifespan. In addition, it does not need any other special compounds to protect it from damage. Granite material will last at least 25 years.
And some types of tiles stand out depending on the material from which they were made. The most popular product is made of concrete, but clay materials are also often used. Clay pavement tiles look similar to roofing tiles. It happens that granite chips or other binding material are added to its composition. The color palette and shapes of sidewalk tiles are very large and varied.
Step-by-step layout recommendation
We carry out the first marking of the entire area, including the paths for laying out, distribute the installation of stakes, use them to mark the gaps along the width of the path on both sides, and do not forget about the turning angles. Most stakes that mark the length of the trail will make it easier to recreate the height of the berm. Next, you need to carefully examine everything, deciding whether this distribution of paths will be comfortable, and whether the work area was marked correctly.
If necessary, we make adjustments. For this purpose, you should walk along the selected section of the future path, alone, with your family, moving to the sides, etc. By such actions, the required width of the garden path is selected.
There are a number of subtleties, taking them into account, it is possible to complete the entire process without much difficulty and great problems. We will analyze in detail the technology for laying paving slabs on sand with our own hands in step-by-step instructions. Using this material, it is possible to build a special covering in a parking area, on sidewalks or in the garden. It is necessary to understand in more detail what exactly the technology in question lies under. Often, sidewalk tiles are laid on dry cement-sand mixtures.
Preparing the soil
Before we begin the tile laying operation, we prepare the work area in advance. The area for future tiles must meet certain standards. When doing the work yourself, you need to take into account some subtleties:
- Deepening. Lay the tiles in recesses, while they rise above ground level by 4 cm.
- Compacted soil. The soil should be compacted especially well.
- Leveled surface. We ideally level the area for laying.
- We provide drainage. Either we cultivate a gravel-sand layer, or we provide a non-steep slope, approximately 5 degrees per meter.
Next, we remove the top layer of soil, this will help eliminate all the tubercles, we compact the soil and prepare a gravel-sand layer. For the sidewalk, a depth of 20 cm is good, and for car entrances and parking lots you should add about 10 cm more, the depth directly depends on the purpose. Then we compact the soil: we moisten it with water from a hose with a watering can and then compact it. This operation makes it possible to eliminate the possibility of subsidence of the territory in future years.
We install curbs and drains
Laying the border
Next, it is recommended to start installing limiters, namely curbs, before starting to lay out sidewalk tiles on the sand.
They should be placed along the entire perimeter of the sidewalk.
Otherwise, if you neglect this procedure, the sidewalk under the tiled covering will soon corrode to the sides.
To install the limiters yourself, you should dig a ditch along the entire landscaped area.
It should be done a little deeper. Crushed stone is laid at the bottom of the ditch for support and covered with sand on top to compact the voids. Then we set up the curbs using the means of the level.
To fix the tiles, we mix a concrete solution, its base will be cement, sand and screenings. We fill the groove with borders with this prepared composition. When the composition dries, remove the spacers and fill the ditch with soil to the required level. In addition, we install water drainage systems. We install the drainage structure on the inside of the sidewalk parallel to the curbs. The slope should extend towards the drains from the general area.
Laying a sand bed
Laying the tile itself requires the use of gravel and sand as a substrate for this tile. Initially, we cover the soil with sand. Then we sprinkle crushed stone on it, approximately 20 cm thick, it will help distribute the load over the sidewalk area and create conditions for water drainage. In addition, add sand to fill any existing voids.
The top layer acts as a fixative, which is why it is necessary to know exactly what type of sand is required for the tiles. Its best variation is considered to be sand consisting of finely dispersed particles; it makes it possible to clog all the gaps, but it is only necessary to filter it from impurities. The area must be moistened with water and the materials allowed to dry.
After the site is leveled, we fill in the working “cushion”. Namely, a sand-cement mixture in a dry variation. It also needs to be perfectly leveled, maintaining the slope. Now let's start laying out.
Laying out the tiles
We lay paving slabs with our own hands on sand and cement in a certain way; they must be laid out, directing “away from ourselves”, this way the evenness of the sand coating will not be disturbed. It must be laid out so that some gaps of approximately 2 mm are maintained between its elements. For fixation we will use wedges made of wood or plastic.
Leveling the sand bed
The technological procedure involves deepening the tile components into the sand mixture approximately to the middle, which means that there must be enough sand for this.
Let the height of the substrate correspond to the depth of the soil.
The next row should be controlled using the level and all identified errors should be eliminated immediately on the spot.
For these purposes, as a rule, a flat block of wood and a mallet are used.
Move along the sidewalk with caution so as not to move the tiles before they are completely set.
Seal the seams
The final step is to seal the seams. In order for a tile laid on sand to maintain its stability and not move in the future, it should be fixed; this is very easy to implement. We use the same sand-cement mixture, pour it on top of the tiles, and then sweep it around the area with a brush so that the seams of the working area are completely filled with it.
Having treated the entire area, sweep away the excess composition and spray the area with water. As soon as the water has been absorbed, we check the seams for the quality of the seal. The cement composition swells and binds the elements into one common fabric. We will eliminate the spacers. Further, it is possible that the filling of the joints will need to be updated, this is especially true after heavy rainfall.
The process of adding water is necessary in order to compact the dry mixture. It is better to perform this operation several times, creating the possibility of completely filling the seams between the tiles.
So the whole secret of how to lay pavement tiles on a sand bed on your own, following all the technology, has been revealed. Provided that the work is done efficiently, we have the opportunity to obtain a smooth and durable surface of the sidewalk for many years.
How to lay paving slabs - shown in the video:
Noticed a mistake? Select it and press Ctrl+Enter to let us know.
foxremont.com
Video
In the video - laying paving slabs on a dry mixture with your own hands:
A newcomer to this field may be surprised by such an abundance of details. In order for you to have a truly reliable and safe high-quality path, the best way would be to use the services of a specialized company performing this work. A professional approach and high quality of work, well-chosen materials and reasonable prices will allow you to enjoy the sidewalk or a completely small path for a long time.
Maybe
Cement-sand mixture for paving stones
Print 02/21/2017 - Stroika.ru
For the base of the path, take sand or crushed stone. Separately, sand and crushed stone are quickly washed out from under the tiles, and the path diverges, so a mixture of cement and sand is used. Why a cement-sand mixture, and not just cement? Water will accumulate on the concrete base, it will freeze in winter, and in spring the tiles will peel off from the base. A mixture of sand and cement provides better adhesion of the material. Dry ready-made mixtures are sold in stores, but many people prefer to make the solution themselves.
Cement M-300 is suitable for creating a durable concrete surface, M-200 is suitable for repairing paths. But experts advise taking brands from M-400 and higher, preferably without mineral additives. They set quickly and are very durable. The higher the number in the cement grade, the more sand you will need. For M-400 you need to take 5 parts, for M-600 - 6 parts.
Paving slabs are laid using the “dry” and “wet” methods. The mixture is prepared after the base has been laid. Use only clean, fine sifted sand. It must be dry. Any foreign impurities impair adhesion to the tiles. The mixture is diluted with clean cold water (fresh).
"Dry" installation
Dry cement-sand mortar (without adding water) is poured in a layer 3 cm thick. When laying tiles on it, check the slope so that the tiles do not move apart. If there is a slope, add more mixture under the tiles. You will be able to walk along this path in 2-3 days. For dry installation, a cement mixture of lower density 1:3 is suitable (one part cement, three parts sand without water). You can use cement grade M-400.
"Wet" installation
For wet laying, you need a solid base, for example, concrete 13 cm thick. To do this, remove part of the earth, fill it with crushed stone, sand and fill it with concrete. With the “wet” method, a cement-sand mixture with water is prepared. Sometimes PVA glue is added to make the tiles stick more firmly, or dye to make the path look neater. Sand and cement are mixed in selected proportions. Add water and stir until the consistency of thick sour cream. Then plasticizers, dyes or glue are added. Per liter of water - 1 gram of dye. It is better to mix the mixture in a concrete mixer or with a mixer attachment for a drill or hammer drill, although you can do it by hand. You need to stir for 2-3 minutes. Leave for 15 minutes and stir again. Now the solution can be used. Spread the mixture in a layer of 30-50 mm. At the same time, lay 0.5 square meters of tiles and move on. The solution can be used within 2 hours, then you will need to add water and stir again. The finished dry mixture is consumed at the rate of 17-22 kg per sq. m, if the thickness of the path is 10 mm. The track will be ready for use in 2-3 days.
The seams between the tiles are filled with sand or grout is used for the seams. It is not worth filling the joints with a cement-sand mixture, since after rain stains appear and the path will become hard.
Reads: 5519 Print Share: Artificial stone: properties and applications
The material creates the effect of sophistication and respectability.
cement stone facing stone flexible construction of houses, cottages construction of residential buildings design of houses, cottages stone decorative artificial stone facade construction of buildings products from artificial marble interior design cement colored
07/26/2017 | Stroika.ru
Technology for high-quality and reliable coating leveling.
cement mixture trowel adhesive universal level laser machine trowel concrete mixer construction of houses, cottages construction of residential buildings installation of floors (screed, leveling) cosmetic repairs sand self-tapping screw construction of buildings floor screed overhaul rule construction trowel reinforcing fiber fiber fiber floor dismantling mesh reinforcing installation of beacons on cracks of buildings construction dacha
06/29/2017 | Stroika.ru
Aerated concrete is the most promising material for the home
It has excellent strength, minimal shrinkage, precise geometry and is very suitable for the construction of private and low-rise residential buildings.
cement block aerated concrete quartz vinyl tiles construction of houses, cottages construction of residential buildings construction of garages sand major repairs coating slab aerated concrete masonry aerated concrete glue melt autoclaved aerated concrete
03/20/2017 | Stroika.ru
The best primers: classification and tips
Dry or liquid primers are ideal for applying to metal, drywall, wood, concrete, brick, and cement surfaces.
cement wood brick ordinary adhesive for metal plasterboard wallpaper decorative plaster construction of residential houses apartment renovation office renovation cottage renovation cosmetic repairs protective composition for metal facade glue paint brush roller paint spatula tiles PVC primer primer-enamel major repairs tension wallpaper puttying walls
03/17/2017 | Stroika.ru
stroyka.ru
Which one to choose: review of ready-made mixtures with prices
The best choice is usually a standard commercially prepared dry mix. After all, the main difference between a high-quality concrete mixture is a clear balance of the number of components, ensuring the necessary grade of all components and the environmental safety of the material, since today all building materials produced industrially are subject to the strictest control. Almost all large manufacturing companies have international certificates.
How to lay paving slabs on a concrete base is described here.
The best ready-made dry mixes consist of the following components:
- Crushed granite fraction from 5 mm to 10 mm.
- Sand, fineness modulus not less than coefficient 2.
- Portland cement, preferably grade M-500.
Composition and structure
Components
The main components of the mortar (or grout) are cement and sand.
- The latter must be clean and free of inclusions in the form of pebbles, shells, and other additives.
- Cement is used of a high grade (M400 or M500), preferably without mineral additives. They provide a good setting speed and a solid margin of safety.
- Fresh water is used.
- Additional ingredients may include plasticizers (improving the adhesion properties and plasticity of the mixture).
- And adding a dye that matches the shade of the paving stones allows you to give the path an aesthetic appearance.
- To increase frost resistance, dispersants can be included.
Consumption
For paving stones, the thickness of the supporting mixture cannot be less than 3 cm. It is better to even make an even larger amount to ensure the highest possible performance. The proportions for dry laying are usually taken as 1 to 3 - for 1 share of cement (acting as a binder), 3 shares of sand are used. But the problem is that it is not very reasonable to proceed only from these proportions, since a fair portion of the mixture will be lost during the compaction process.
Let's say you need to design a path 12 m long. Let's take the width (the gap separating the curbs) to be 0.8 m. Under such conditions and with a design depth of 0.15 m, the required volume of the composition is obtained by multiplying all three figures and adding a margin of 20%. Total - 1700 kg of working mixture.
Peculiarities
Laying paving slabs on a dry mixture is a fairly practical and convenient solution. This material:
- durable;
- lasts a long time;
- tolerates even strong moisture well;
- not particularly susceptible to temperature fluctuations;
- does not produce substances harmful to humans, animals and plants;
- presented in a wide decorative texture and palette.
Vibration-cast and vibration-pressed tiles can be laid on the dry mixture. The second option is characterized by greater mechanical strength. But still only natural granite tiles can boast the greatest durability.
Typical for stacked products:
- wavy;
- wedge-shaped;
- rhombic;
- rectangular;
- square;
- Hexagonal configuration.
Laying paving stones with seams - a whim or a necessity?
The absence of seams when laying tiles is a fatal mistake in all laying works. Regardless of the type, type, production technology, any paving stones should be installed only with seams.
They are necessary to:
▪ Compensate for linear deformations. Any structure can expand under the influence of heat and contract when the temperature drops. This property should be taken into account when arranging paving. Since on a hot summer day the tiles get very hot under the sun (they experience a load comparable to the pressure of a heavy vehicle), they need additional space to expand. Without seams, paving stones will begin to expand upward under strong lateral pressure, which will damage the surface of the coating and, accordingly, its decorative top layer.
