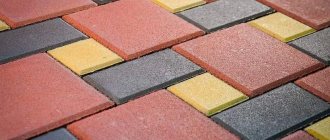
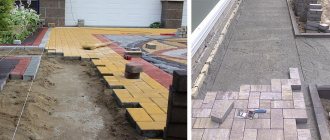
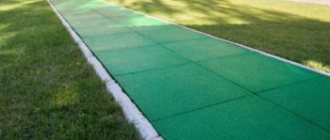
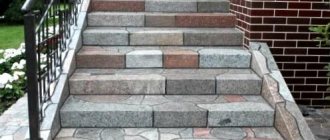
Color is an incredibly powerful and effective design tool. Colored paving slabs laid on paths and the area in front of the house can not only transform the surrounding landscape, but also emphasize and highlight the architectural merits and style of the building itself in the most advantageous way.
A huge advantage of this material, which contributes to even greater demand, is that it can be relatively easily made at home without the use of any special equipment. This activity is not only useful, but also interesting and can bring great creative satisfaction.
How to make colored paving slabs
Color is an incredibly powerful and effective design tool. Colored paving slabs laid on paths and the area in front of the house can not only transform the surrounding landscape, but also emphasize and highlight the architectural merits and style of the building itself in the most advantageous way. A huge advantage of this material, which contributes to even greater demand, is that it can be relatively easily made at home without the use of any special equipment. This activity is not only useful, but also interesting and can bring great creative satisfaction.
Recommendations before starting work
Most often, coloring of sidewalk coverings is carried out outdoors, so climatic conditions must be taken into account before processing. To do this, you can look at the weather forecast for the next 6-8 days.
It is recommended to paint tiles in calm and dry weather. The temperature should be about +10°C. Polyurethane paints can also be applied at lower temperatures. Therefore, when purchasing a product, you should carefully read the information indicated on its packaging.
The requirement for no wind is due to the fact that wind currents will sweep debris and dust onto the surface.
You need to select several days during which optimal conditions will be created on the street for applying special paint to the sidewalk surface. The procedure can be divided into several stages. In this case, the treated area can be covered each time with an improvised canopy from wind or rain. However, this method will increase the duration of the work.
How are paving slabs painted?
Usually it is not the tile itself that is painted, but the concrete from which it is formed. Pigments are used as dyes - powdery substances obtained in various ways. From metal salts (metal pigments), by grinding rocks (inorganic dyes) or from synthetic chemical compounds.
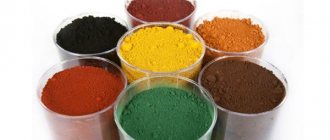
Color pigments for colored tiles
Most often, iron oxide coloring pigments are used - inorganic synthetic substances containing iron oxides. They do not dissolve in water, forming a fine emulsion. When drawing up proportions, they are guided by the amount of cement, and not by the total mass of the solution. Typically, the weight of the dye is 3-5% by weight of the cement. The higher the percentage, the more saturated the color.
To achieve the desired shade, you may have to experiment with different pigments and their ratios. But the reward will be beautiful multi-colored paving slabs, perfectly in harmony with the emerald greenery of the garden and the facade of the house.
Important. The color of the concrete mass is affected not only by the brand of pigment and its quantity, but also by the color of the cement. Gray Portland cement, for example, reduces saturation and mutes color tones. If you need to get bright and rich colors, you need to use white cement.
Pouring the mass
Before you start pouring, you need to prepare a high-quality and sufficiently plastic concrete solution.
- one part of cement M400;
- 2.2 parts fine-grained sand;
- approximately 0.6% plasticizers;
- 4% coloring pigments;
- 0.35 parts pure water.
The dosage of the plasticizer, as a rule, is selected strictly individually, in accordance with the instructions supplied by the manufacturer.
The process of preparing a concrete mixture yourself is simple and includes the following steps:
- cement and sand are poured into the concrete mixer, after which the mixture is thoroughly mixed;
- the required amount of coloring pigments is added;
- 2/3 of the total volume of water is poured;
- plasticizing additives are poured.
At the final stage of mixing the concrete solution, more water is added if necessary. Pouring is most often carried out in special greased silicone molds or plastic containers. If necessary, you can make reusable wooden formwork with your own hands.
Colored tile manufacturing technology
Do-it-yourself colored paving slabs are made using vibro-cast technology. Unlike vibration pressing, it does not require any special equipment. The solution is poured into plastic molds. Since after pouring the mixture must be kept for 2-3 days before being removed from the mold, to speed up the manufacturing process it is desirable to have as many molds as possible that can be poured at one time.
From the point of view of the coloring operation, the production of colored paving slabs can be carried out in two ways. By painting the surface of already laid tiles or by introducing dye into the solution when preparing it. In this case, a persistent volumetric coloring of the tiles is obtained. This is what is most often used.
Adviсe:
- When stirring the solution, do not pour in a lot of water at once! If the solution is too liquid, this is bad for the strength of the final product.
- Some owners of suburban areas place forms with slabs directly on the path and leave them to dry right on the spot. This option is also appropriate if there are no animals in your garden that can spoil the texture of future paving stones. In addition, in this case the path will have to be reliably protected from rain so that the tiles do not get wet.
- You can make paving slabs with your own hands without using a plasticizer. However, this component will give the tile greater strength and increase resistance to temperature changes.
- Don't be afraid if there are small stones in the sand. This will not reduce the quality of the slab, but the texture will be more original.
- For better laying of paving slabs, the surface should be compacted; for this you can buy a vibrating plate or vibrating tamper, and as a cheap alternative you can use a beam, having first attached handles to it.
The abundance of shapes and colors of decorative cement paving slabs will allow you to turn your garden into a real masterpiece. This is exactly the case when the work is worth the result. Hand-made tiles for garden paths not only look beautiful - they will provide comfortable walks around the site even in the rainiest weather!
To cast tiles, you need to assemble one or more square shapes using self-tapping screws from scraps of timber. It is optimal that its depth is at least 50 mm.
The form must be laid on a flat surface, with a film underneath it, and filled with thick concrete. To prepare it, add 3 sand and 3-4 crushed stone to 1 part of cement. Minimum water is needed.
In a separate container, you need to soak selected large pebbles in water. If this is not done, it will draw moisture out of the concrete.
Then the soaked pebbles are randomly laid out on the mold with the flat side up.
Now you have to press the pebbles into the concrete with a trowel. It is required that it is not visible at all, but there is no need to bury the stones to the very bottom. The concrete is smoothed to perfection so that only cement and sand appear on top, and all large particles sink below.
Leave the smoothed concrete in the mold to set for 2 hours. Then we take a medium-hard brush and a garden hose and begin to carefully wash the surface of the tile. The water will be cloudy right away, but will gradually wash away the cement and become clear. Actively working with a brush and adding water, you need to expose the surface of the pebbles.
Since the concrete is smoothed, crushed stone will also appear in the top layer, which is very beautiful. Now leaves the mold with the tiles until the next day.
A day later, the form is disassembled.
The surface of the tile is cleaned of dust with a soft brush. It is then coated with a protective concrete varnish. It will give it the effect of a wet stone, and most importantly, it will protect the pores from absorbing water, which will protect it from cracking in winter.
Having calculated how much concrete needs to be mixed per one fill of the form, you can devote 15-20 minutes a day to make one such tile at a time. In a couple of weeks we will be able to produce enough material to lay out a walking track. If you plan to lay the tiles tightly, then you can collect many forms and fill them in the required quantity in a couple of days.
Component ratio
Colored concrete tiles are made from the following materials:
- cement grade M500;
- coarse sand;
- water;
- pigment;
- plasticizer (optional, but desirable).
The ratio of cement to sand is usually 1:4 or 1:3. The amount of water depends on the moisture content of the sand. When using a plasticizer, the minimum amount of water per 1 kg of cement is approximately 0.5 liters. If no plasticizer is used, the volume of water is increased to 1 liter. The specific value is determined empirically. The amount of pigment, as already noted, is 3-5% of the mass of cement, plasticizer - according to the instructions.
Technology, from solution to drying
Artificial marble or stone is a big name. In fact, two concrete solutions painted in different colors are simply mixed and poured into a mold. A bizarre pattern reminiscent of a cut of natural stone is obtained under the influence of vibration.
Production begins with mixing the concrete mixture. Components are placed in the concrete mixer based on:
- 1 part cement;
- 2 parts sand;
- 1.5 parts crushed stone.
The components need to be weighed and proportions based on weight, not volume. All components are mixed in a concrete mixer without adding water for 10 minutes. After stirring the mixture dry, you need to take 10% of the total mass into a separate container.
Next, white dye (titanium dioxide) is poured into the concrete mixer and the solution is mixed dry for another 5 - 7 minutes. White color is added at the rate of 3% of the total mass of the mixture.
Important! White color is difficult to dye and is added in a proportion of 3% by weight of the solution. All other colors of iron oxide dyes are added at the rate of 5% by weight of cement.
Black dye is added to the container with the selected mixture at the rate of 5%, but this time by weight of cement. For example, if 50 kg are used in the general solution. cement, then the selection will be only 5 kg. 5% of 5 kilograms of cement is 250 grams. Consequently, 250 grams of black dye are added to the selection.
While the white solution is mixed in a concrete mixer, the black solution should be mixed manually in a separate container. You can use a trowel for this. When the solutions are mixed, it is necessary to add mixing water.
Mixing water is prepared simultaneously with the solution. To prepare it you need a plasticizer. The required amount of water is calculated using a special coefficient, which is 0.33. For example, if there are 50 kilograms of cement in the batch, then these kilograms must be multiplied by a factor of 0.33. 50*0.33=16.5 liters. This solution requires 16.5 liters of water. Next, you need to add a plasticizer for concrete to the water at the rate of 1% by weight of the cement. This batch requires 500 grams of plasticizer. The plasticizer must be stirred until completely dissolved.
Preparation of the solution
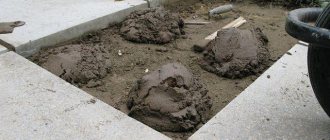
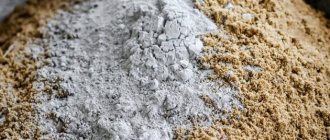
Sand and cement are poured into the mixing container, after which the mixture is well mixed. It is best to do this, of course, with a concrete mixer or a large mixer, but in a pinch, a shovel will do.
Now comes the most important moment, answering the main question - how to make colored paving slabs. Water is poured into a clean container, pigment and plasticizer are added to it, and it all mixes well. Under no circumstances should you pour the pigment into a dry solution separately, since in this case it will not be possible to distribute it evenly throughout the entire volume. The resulting colored liquid is poured into the sand-cement mixture, and the solution is thoroughly mixed.
Important. It is highly desirable that the mixture be hard, that is, not liquid, with a small amount of water. Adding a plasticizer is precisely what is needed to ensure good laying of the rigid mixture.
Error 3. Excess or lack of water
Water can significantly affect the strength of the product. If the concrete solution is too liquid, the tiles will be brittle. But if you mixed the mortar too dry, then cement balls may remain inside, which will later turn into pores on the “face” of your tile. The consistency of the solution should resemble a viscous dough; the mixture should not slide off the trowel.
If you use water from open sources, make sure that they do not contain excessive amounts of chalk, as... such water will make the tile brittle.
Filling out the form
Since the prepared mixture must be thick, it is impossible to avoid vibration when laying and leveling it.
If there is no vibrating table, you will have to create it manually - shake the form, tap it on the table, or tap something on the table. Compaction of the mixture is considered complete when air bubbles stop appearing on the surface and it becomes even and smooth. Filled forms must be covered with polyethylene to prevent water from evaporating. At an air temperature of about 20 °C, it will take at least 2-3 days for the initial hardening, when the tile can be removed from the mold. Before paving, the material needs to be kept somewhere in the shade for a couple of weeks.
Conclusion
To support the weight of a person, a tile only needs to be 30 mm thick. But what should you do if you plan to drive a passenger car on paved surfaces? There are two ways. Make reinforced tiles by placing a steel mesh when pouring into the mold. Or increase its thickness to 6 cm or more. The result will be a kind of colored paving stone that can easily withstand the weight of a passenger car.
Error 9. Incorrect storage
Some novice craftsmen keep the tiles in the mold for about two days, and then stack them in piles, covering them with cardboard. But since the tile by this moment has not yet had time to completely dry and become strong enough, it bursts. Experienced tilers advise not to stack more than three tiles until they gain sufficient strength. This will take 3-4 days.
Some craftsmen also advise storing the tiles vertically until they reach maximum strength.
Selecting a method
To organize the production of paving slabs with your own hands, it is recommended to first decide on the methodology for creating facing elements. The following types of coating production are distinguished:
- pressing (vibration) of rigid concrete compositions;
- technology for manufacturing paving slabs using vibration casting.
Both production methods allow you to organize work on the production of tiles at home, which produces a facing material with a low-porosity structure and a smooth front side. By following the rules of technology for making paving slabs at home, you can easily achieve the desired characteristics for the facing material.
There are no significant differences between both methods. But the main point that makes it possible to carry out home production of facing coatings is equipment for the production of paving slabs. To create a facing coating, paving slabs are usually cast independently. The technique is based on compacting a concrete mixture in molds using vibration. During work, various operations are performed, which determine the type of cladding production (single-layer and two-layer).
If you set a goal, you can purchase professional, expensive equipment and establish a home workflow. But, it is possible to create a machine for paving slabs with your own hands. We'll talk about this in the next chapter.
Pressing
Forms are placed on the surface of the vibrating table, which are filled with prepared concrete mortar using a trowel.
- A feature of single-layer pressing is the filling of the mold with concrete mortar, followed by compaction on the surface of the vibrating table and holding until dry. At the final stage, the formwork is stripped and the finished material is removed. Of course, with this method of production, the strength and aesthetics of paving stones are an order of magnitude lower than that of tiles produced by two-layer vibration casting, but the resulting material is affordable;
- two-layer technology consists of pouring a concrete solution with pigment dyes in a 10-20mm layer while vibrating the table, and then adding the main concrete composition. After about a couple of days, the product is removed from the mold by stripping, after which it is laid out to dry.
The final stage of manufacturing is represented by proper drying of the tiles at a temperature range of 20-35 o C.
The material removed from the mold after drying must be dried for several days in a cool room.
To make it easier to remove the tile from a plastic or silicone mold, it should be placed in a container filled with warm water for a few minutes. As a result, the casting mold expands and the material can be removed without problems.
What will you need?
To make paving slabs at home, you will need raw materials, proportions when selecting components, additional devices, and racks for drying finished elements.
When performing tasks at home, you will need the following equipment for paving slabs:
- concrete mixer, preferably in a forced action version;
- molds for facing elements. They buy ready-made products or make them themselves;
- container for solution (10 l);
- protective gloves;
- shovel for a set of mortar;
- vibrating machine for paving slabs.
The main components in the production of facing coatings are the following materials:
- crushed stone or gravel;
- sand;
- cement (grade M500);
- plasticizer;
- dyes (in the production of colored cladding);
- lubricant mixture;
- water.
When the production method has been chosen and the necessary tools and materials have been prepared, you need to make a machine for making paving slabs.
Production premises and equipment
To make paving slabs at home you need:
- room from 12m2;
- concrete mixer;
- vibrating table;
- auxiliary tool;
- forms;
- Consumables.
A garage, barn, or any building with walls and a roof is suitable as a room. It is important that the room is equipped with high-quality wiring for connecting electrical appliances. Indoors, along the walls, you need to make reliable racks for drying finished products. The recommended shelving area is 20 m2.
For production you will need two main units - a concrete mixer and a vibrating table. A concrete mixer is suitable for both a forced type and a regular pear. Typically, in home production, household concrete mixers operating on a 220 volt network are used. The recommended stirrer volume is from 180 liters. A forced-type concrete mixer is suitable only with a low shaft speed: from 16 to 24 revolutions per minute.
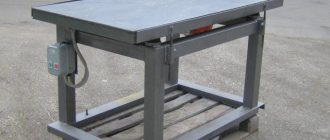
A vibration table will suit absolutely anyone. The main function of the vibrating table is to shake the solution in the mold. Its cost on the secondary market starts from 5,000 rubles. If you have welding equipment, you can make a vibrating table yourself. To do this, you need a corner or pipe, a sheet of metal, springs, and an electric motor.
Machine for making paving slabs
When creating your own production of facing coatings, you need to take care of the equipment. To create a vibrating machine with your own hands for making paving slabs, you need to start by solving the following questions:
- determine the size of the working platform;
- select the material for the equipment, find out the general dimensions of the future vibrating table.
Before you start making your own machine for making paving slabs, you need to pay attention to the following points:
- To fix the overall structure of the device, rivets are used. Such a mount is able to withstand vibration loads during the production process;
- usually the machine is fixed to a stationary part, so you will need a welding machine;
- the height of the device for making paving slabs at home depends on the height of the master and the technology used;
- the vibrating device is often fixed to the top plate using clamps.
The optimal solution for producing paving slabs with your own hands is to fulfill the following points:
- a prefabricated type of vibrating table when creating curbs and making paving slabs at home;
- The vibrator is used when leveling and compacting the finished coating. For these purposes, the tool is moved to a vibrating platform;
- the vibrating platform, if necessary, serves as a tabletop for the circular machine.
Equipment for paving slabs must be stable and comfortable to use.
Bed production
To construct the frame, you will need a grinding machine (angular) and welding. You can use any vibrating table scheme, or use arbitrary calculations. The design goes like this:
- two frames of the same size are welded;
- The stationary part of the apparatus is assembled, again by welding. 4 racks are welded to the frames.
You can make legs from a pipe. An introductory video about making paving slabs at home will help, where you will find important instructions for constructing a vibrating table.
The base of the vibrating machine for independent production of paving slabs is the following design:
- support sole with the ability to adjust the height;
- crossbars (top and bottom) with the same wall thickness;
- if the platform is removable, then bolts are welded in the corners;
- The electrical part consists of a socket and a switch located on the plate. The plate is pre-welded to the posts.
The next step in the production of equipment for paving slabs with your own hands will be the installation of a vibrating platform.
Platform
To ensure the operation of the machine and to make paving slabs at home, it is important to correctly install the removable cover to the vibrating table. Materials can include:
- steel layer;
- Chipboard, plywood made of several layers. This option is suitable for rare use of the machine.
The engine is mounted in the central part of the platform. To make paving slabs with your own hands, you need to make a machine. Use one of the fixation options:
- the tabletop is reinforced in the middle with the help of a corner and plates welded to it. It is on the plate that the motor will be placed;
- if the platform is made of steel plate, then this option is suitable. Holes are drilled in the tabletop for the fixing bolts. Or you can weld clamps at the bottom of the platform.
Production of facing coating
Before the production process itself, we advise you to once again carefully read the recommendations on the technology for making paving slabs with your own hands. It can be seen that the main work consists of the mandatory, step-by-step implementation of the following work:
- preparing molds for facing elements;
- preparing a mixture based on concrete;
- work on a machine;
- keeping finished elements in molds;
- stripping and preparing the next batch.
Let's take a closer look at the recipe for making paving slabs at home.
Preparing the molds
When creating molds for facing elements to make paving slabs with your own hands, you can use the following components:
The material chosen determines how the molds withstand a certain number of cycles during operation. The reuse of molds allows a special lubricant, which is used before pouring the mass to make paving slabs (see video). The product can be made in molds and without lubrication. In this case, an antiseptic is applied to them, and after stripping, they are washed with a composition based on hydrochloric acid.
Preparing the solution
To make paving slabs with your own hands, you need to properly mix the mixture for the products. Don't forget to dilute the plasticizer and coloring pigments (if necessary). If you plan to make gray products, then coloring compounds will not be needed.
It is important to observe the proportions of the solution when making tiles at home:
- the percentage of plasticizer from the number of all components in the dry version will be 0.5;
- cement (23%);
- sand (20%). We will tell you what sand to use next;
- plasticizer (0.5%) of the total amount of dry components of the composition;
- water (40%) of the amount of components in dry form;
- crushed stone (57%).
First, cement and sand are mixed, then a plasticizer, then a turn of crushed stone. The liquid is added gradually, in small portions.
Using a vibrating table
When making paving slabs with your own hands, when the machine is turned on and vibration begins, an empty space may form in the molds. It is necessary to add solution to the voids. The duration of operation of the vibrating table should not exceed 5 minutes. The appearance of white foam indicates that the product is ready.
Aging of finished products
In order to properly produce paving slabs, it is important to follow the step-by-step execution of the work. Therefore, the finished product is not immediately removed from the molds, but is placed on pre-prepared racks. The storage area for facing elements should be protected from sun penetration.
The finished elements remain in the molds for one or two days.
Stripping
During the work process, do not forget to check the recommendations and tips on how to make paving slabs yourself, which will help you produce a high-quality facing coating.
After the cladding elements have dried, you can begin stripping them. To knock the finished product out of the mold, you need to lower it into water for 2 minutes (water 70 degrees). We take the product out of the water and place it on a vibrating table. You can lightly tap the sides of the molds with a mallet to help the product come out.
When all the elements have been removed, it is necessary to leave them for a week in a specially designated place so that the material can finally harden. You can use pallets to store material. Storage time is about a week.
Curbs
The necessary spatial rigidity of the “trough” into which the paving elements are laid is ensured by curbs installed on the solution. Making them yourself will help reduce the budget for landscaping. You can buy molds or construct them yourself from the following materials:
- polymer resin - the factory border, which is a matrix, is completely embedded in the diluted mixture;
- lumber - edged or tongue-and-groove boards with side lintels;
- rolled metal – a channel of a suitable cross-section with capped ends.
Factory-made forms for borders.
After lubricating the internal surfaces of the mold with a soap solution and waste oil, you can fill it with a concrete mixture and make curbs using the following technology:
- compaction of concrete - bayoneting with a reinforcing bar or laying the form on a vibrating table;
- drying - after stripping, finished products are stored with an air gap.
Depending on the air temperature (+5 – + 30 degrees), curbs can be installed at the place of use for 4 – 28 days, respectively.
Storm drainage trays are constructed using a similar technology with minor additions:
- the shape is a little deeper;
- a piece of pipe is fixed longitudinally at its bottom, due to which a recess is created.
Form for storm drain tray.
Without these additional elements, it is impossible to ensure drainage in a given direction; water will destroy the soil adjacent to the sidewalks.
Alternative to curbs: How to replace the curb when laying paving slabs.
What sand do you need?
Doing paving cladding correctly means following the technology during the work process and using high-quality components when composing the mixture for the cladding elements.
How the mixture is prepared is described in previous chapters, and what sand is needed to make paving slabs will be discussed here. Usually quarry or river sand is used without additional components.
Good sand should crumble when compressed. You can determine the quality of sand by its appearance. If you choose low-quality sand, you will not be able to make paving slabs. The sand must not contain impurities.
Pros and cons of painting paving stones
Painting the sidewalk with paint has its advantages and disadvantages. The main advantages of painting work include the following:
- The composition protects the surface of the paving stones from adverse effects and increases their service life.
- The surface becomes less slippery.
- The protective layer prevents the tile from wearing off and collapsing.
- The material does not age for a long time after painting.
By painting the tiles, the appearance changes, allowing you to radically update the design of your deck or garden.
The disadvantages of painting paving stones include the following:
- The process requires time. It may take 1–2 days;
- After some time, the painted fragments will need to be renewed, since the surface layer tends to wear out.
Important! Since paints and varnishes can emit harmful fumes, it is recommended to carry out painting work wearing a respirator mask and gloves.
Manufacturing of colored paving slabs
Making colored paving slabs with your own hands is almost the same as creating gray facing material. The only difference will be in the preparation of the solution for future facing elements.
When preparing the mixture for homemade colored paving slabs with your own hands, you need to add special coloring pigments. As for the proportions of dyes, it will be from 3 to 7% by weight of cement. With an increase in the percentage of dye, the color of the future product will be more saturated.
Two coloring methods are used in the manufacture of paving slabs:
- painting the finished cladding;
- adding a coloring pigment when mixing the solution.
Usually the second coloring option is chosen, because the first is considered a rather labor-intensive process.
The most popular dyes for DIY colored paving slabs are considered inorganic.
The subsequent steps during the creation of the color coating will be the same as described above. It would be a good idea to watch the video below on how to make paving slabs with your own hands, which also talks about preparing the colored composition.
Note: when mixing the composition for colored cladding, white cement must be used. Ordinary cement is not suitable as the main component for making colored paving slabs yourself.
If you follow the rules during the work process, there should be no problems. If any difficulties arise, you can check that each step is performed correctly using our recommendations on how to make tiles at home.
Error 6. Lack of reinforcement in the manufacture of borders and large elements
When making large or elongated elements, such as curbs, many hope to do without the use of reinforcement. But in such cases, reinforcement is simply necessary. To do this, you can use a metal rod or mesh, as well as some types of wire.
The form is filled approximately halfway with the solution, then the reinforcing material is laid, which is filled with a second layer of solution.
If you don't use reinforcement, the curb will most likely have to be assembled from sloppy debris
Making colored paving slabs with your own hands
Most often, paving slabs cover courtyard paths, the area in front of the garage, parking lots, paths, walkways, and rest areas. Paved surfaces are also good for areas where greenery does not grow well. The tiles should be selected in a color that is in harmony with the overall color of the house and the surrounding landscape. And instead of neutral gray, you can choose brown, black, red, yellow, green or blue. The main thing is to achieve color harmony. For example, the numerous use of paving slabs of different colors, especially in a small area, disrupts the feeling of a single ensemble.
After selecting the optimal size and color of paving slabs, you need to decide whether you will look for and purchase them from the manufacturer, or, having the desire and time to spare, make the tiles yourself. Having chosen the second path, you will need certain information, advice and recommendations. In this review, we will try to pay more attention to the process of giving a certain color to paving slabs when making them yourself.
Types of dyes for paving slabs
Pigments are used as dyes - powdery substances obtained in various ways. Based on the production method, dyes for paving slabs are divided into three types:
- Natural paints are obtained from rocks and natural minerals. The raw materials are enriched, subject to heat treatment and crushed to a fine state.
- Synthetic dyes are obtained as a result of complex chemical reactions or the latest nanotechnology.
- Metal pigments are produced from oxides and salts of alloys of non-ferrous metals and iron.
When choosing the necessary dyes, their basic performance properties should be taken into account. Thus, the colored paving slabs you make should:
- have high heat resistance, resistance to alkalis and weak acids;
- be resistant to light and atmospheric conditions (do not lose color under the influence of light, acid rain);
- be resistant to temperature changes;
- do not change its properties under the influence of atmospheric phenomena.
Most often, in the manufacture of colored paving slabs, metallic coloring pigments are used - inorganic synthetic substances containing iron oxides. Pigments are highly dispersed and, when used correctly, are evenly distributed in the concrete mixture when stirred. Pigments based on iron oxides are inert and therefore safe for the environment.
Pigments can be produced both in powder form, and in the form of an aqueous suspension and in granular form.
Mistake 2. Poor quality sand
Often, in order to save money, summer residents bring sand from a nearby quarry and immediately use it. But in order to obtain a quality product, a visual assessment of the materials used is not enough. The sand must be sifted. Otherwise, the heterogeneous components included in its composition can greatly complicate your life. For example, small shells settle on the front side of the tile and spoil its design. If they remain inside, they are often not completely filled with concrete mixture. Subsequently, the tiles actively absorb water, which accumulates in the voids and, when temperatures fluctuate, destroys the concrete from the inside.
Unsifted sand cannot be used to prepare the mortar; this leads to the appearance of defects on the surface of the tile and its further cracking
If there were lumps of clay in the sand, which then fell into the concrete mixture, then they most likely will not dissolve completely, but during the manufacture of tiles they will hide under a thin layer of cement. When laying or using such tiles, as a rule, they burst.
Dosing pigments in concrete mixture
The resulting shade of concrete depends on the amount of pigment and color of the cement, mineral admixtures and sand. The amount of pigment that is added to the mixture depends on both the color of the pigment and the required intensity of the resulting color.
Table. Percentage ratio when working with powder and liquid pigment:
| Pigment | Powder | Liquid |
| Red, % | 2 — 3 | 5 — 6 |
| Yellow, % | 6 | 8 |
| Brown, % | 4 — 5 | 6 |
| Black, % | 4 — 5 | 6 |
| Green, % | 5 | 7 |
Liquid pigments must be added to the dry mixture before adding cement and water. It is not recommended to change them in any way by adding other materials or diluting them with water. After adding the required amount of pigment, the mixture is stirred briefly. Then cement and water are added. The preparation of the mixture is completed by stirring.
The following factors can influence the color shade of manufactured paving slabs:
- Amount of pigment. After determining the required amount of pigment using the sampling method, you must strictly adhere to the recipe for the entire batch of tiles.
- Cement color. Gray cement has many shades and never gives the opportunity to obtain a “pure color” of pigment.
- Water:cement ratio. The water-cement ratio is the ratio of the amount of mixing water in concrete and the amount of cement. Mixing water is all the water added to the concrete mixture (water in aggregates, water in liquid pigments, additional water added to the mixture). As the amount of water increases, the color becomes more saturated. When using plasticizers that support cement hydration, it is possible to obtain the desired shade without increasing the amount of mixing water and without compromising the quality of concrete.
- Compacting concrete. Proper compaction allows you to achieve a more saturated color shade, and, conversely, insufficient compaction causes a decrease in its saturation.
- Effect of concrete additives. Additives, most often in liquid form, help to better compact the mixture, reduce its adhesion to the mold, and improve the appearance and physical and mechanical properties of products. The supplement manufacturer's instructions must be followed.
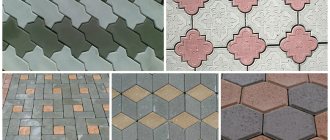
Technology for the production of figured paving elements
Making paving stones yourself is like miniature constructing a foundation slab into formwork. Filling can be done in molds made by yourself or purchased in a store.
The easiest way to make the shape yourself is from a block:
- three side walls are screwed onto a sheet of plywood of the required shape and dimensions with self-tapping screws;
- the fourth is connected to them movably for quick removal of formwork.
Rhombus, Square, Hexagon are created in the same way. Factory molds simplify the technology and are made from several materials:
- polypropylene – turnover 100 cycles maximum;
- rubber - each mold is enough for 400 tiles.
Industrial forms for paving stones.
After calculating how much lining is required for the path, you can buy the required number of forms made of propylene or rubber. You can make your own molds from silicone, polyurethane or a two-component polymer resin, having at least one factory paving slab for a sample (master model):
- the composition is mixed in the required quantity;
- the master model is placed in a limiting container (for example, made of 4 boards with a bottom);
- a solution of silicone (polyurethane or resin) is poured into a container.
Look more clearly in the video:
You just need to replace the brick with factory-made paving slabs.
Once dry, the mold is suitable for pouring several hundred tiles.
Making a vibrating table is much more complicated:
- An eccentric is attached to the motor shaft;
- the drive is fixed on a table with a metal cover;
- works from the network, is installed on a solid base, preferably outdoors.
Under normal conditions, concrete dries in 3 days, and molds are needed for the on-line production of FEM elements. Therefore, an analogue of concrete steaming technology is used - immersion for several minutes in hot water (within 80 degrees).
Important! It is impossible to dry the tiles using this method, but you can dramatically increase the speed and quality of hydration (formation of cement stone).
Mixing concrete
Having determined from the layout diagram how many solid elements and halves to make, you can calculate the approximate volume of raw materials, taking into account the following factors:
- concrete composition for the manufacture of FEM elements 1/3 (cement, sand, respectively);
- the proportions of crushed stone fraction 5/10 mm, sand and cement M500 for ready-mixed concrete are 1.5/1.5/1, respectively.
Mixing mortar for making paving slabs.
For small volumes, you can make the batches yourself using a drill with a mixer attachment. If you need a lot of tiles, use a concrete mixer and several vibrating tables.
Important! Granite or marble screenings, crushed stone in sand will significantly increase the strength and frost resistance of the tiles. If you plan to produce paving elements with an ornament on the front part, it is better to use seeded sand without large filler fractions.
Instead of a plasticizer, concentrated detergents (for example, Fairy) are often used in a proportion of 1 tablespoon per bucket of solution. But it is better to use an industrial plasticizer, for example C3, sold in both dry and liquid form.
Laying in molds
With known proportions of the mixture components, the technology for making figured FEM paving elements with your own hands is not difficult:
- the forms are placed on the surface of the switched off vibrating table;
- filled with concrete;
- are on the table for several minutes after turning it on.
This time is enough to remove air from the concrete and uniformly distribute the coarse filler fraction throughout the entire volume. The vibrating table is turned off after the appearance of cement milk at the surface, the disappearance of crushed stone inside and the cessation of bubbles.
Each tile needs to be dried, and then the mold must be used to make the rest of the paving stones. Therefore, an accelerated demoulding technology is used - after the concrete has set, the FEM in the mold is immersed in 80 degree water for 5 - 7 minutes to accelerate the strength gain of the composition.
Hot water makes it easier to remove the tiles from the mold.
The technique replaces steaming, allows you to reduce the hardening time to 1 - 2 days, after which the paving stones are powerfully laid. On the very first day of FEM production, you can estimate how many paving stones you can make per unit of time.
Advice! To reduce the labor intensity of the technology, the molds are rinsed with a saline solution - brine. The proportions for its preparation are 30g/1l (salt, water, respectively).
Source materials when using pigments for the manufacture of colored paving slabs
To produce colored paving slabs with your own hands you will need:
- Cement M 500 is not older than 3 months from the date of issue.
- Powder and liquid pigments. For powder pigments, storage conditions are similar to those for cement. Liquid pigments must be stored at temperatures above 5 degrees C.
- Concrete aggregates. It is recommended to use dense aggregates of river origin with a fraction of up to 4 mm. Also, you can use screenings with a fraction of more than 4 mm. Fine aggregates and sand can affect the color tone of the final product due to the high content of fines, the presence of which changes the color of the mixture. Dolomite aggregates are not suitable.
- Pure water.
Once you have decided on the shape, color, selected the pigment and necessary components, you can begin making paving slabs.
Shapes and materials for tiles
The tiles are cast into plastic molds, which can be purchased both used and new. The cost of new forms starts from 400 rubles per sq. m. meter. Used forms can be purchased at a price of 70 rubles per sq. m. meter. To produce paving slabs with your own hands, it is enough to buy 20 m2 of molds.
When purchasing molds, you need to know that the most practical molds are PVC products. They can withstand up to 150 castings. You can also use ABS plastic molds. They provide a smoother surface, but their lifespan is limited to 50 - 70 uses.
When purchasing molds, you need to consider where the tiles will lie. If it is laid as a garden path, then a thickness of 30 or 50 mm is suitable. If the tiles will be laid in front of the garage, then it is worth buying molds for tiles with a thickness of at least 70 mm.
To make tiles you will need:
- construction sand;
- crushed stone fraction 5 – 20;
- cement M – 400 or M – 500;
- plasticizer for concrete;
- iron oxide dye (white, red, green, yellow, black).
All these materials are available for free sale.
