A house made of wood does not always have an aesthetic appearance. The solution to this problem can be to apply plaster, which gives the house an attractive appearance. But you need to know how to plaster a wooden house outside or inside. Plaster protects wood from pests, moisture and other negative phenomena. This is the simplest and most economical option, which is well suited for various wooden buildings. It is important to properly prepare and apply the composition to the wood. Otherwise, the work performed may not give the desired result.
Photo of a plastered facade of a wooden house - easily confused with a building made of brick or blocks Source roomester.ru
Requirements for work
When working with frame buildings, various solutions can be used; when processing log buildings, it is necessary to take into account the vapor permeability, elasticity and hygroscopicity of the coatings used. It is important to remember that wood changes its size depending on the level of moisture and temperature, so using a hard coating is sometimes impractical. Therefore, it is necessary to strictly adhere to the technology of applying plaster in order to reduce the possible risks of cracks. You can immediately begin finishing the walls only when working with ready-made frame buildings, since their walls do not bear the load, which means they will not deform over time.
Standard plastering can only begin after the shrinkage process of the wooden house is completely completed Source ro.decorexpro.com
When working with reconstructed or new buildings made of timber, you need to wait for the erected walls to shrink and only then begin plastering. During the shrinkage process, the wall material becomes denser as a result of contraction and stress on the seams. The shrinkage process takes 1-2 years, but only if the box is protected from the direct action of precipitation. The necessary work is carried out during a period of optimal humidity and temperature within 10-20°C. Frost or extreme heat negatively affects the setting of the solution directly to the base, which reduces the quality of the result.
If it is necessary to carry out interior finishing, it can begin to be done even before the completion of work on the facade. In winter, the 24-hour heating system must be turned on. At the same time, using heaters specifically on walls treated with the material is strictly prohibited. Drying of all walls, both external and internal, should be carried out under natural conditions.
Photo of the house inside - finishing is carried out only on dried surfaces Source ukrsnabpro.com
Installation of beacons
Why are beacons needed?
Plaster beacons are metal guides installed on the wall, passing along which the nose of the trapezoid rule levels the applied solution into a single flat plane..
As already mentioned, beacon plaster is the most reliable way to make a smooth and perfectly flat surface, even for a non-professional. But for this you need to install them correctly.
Sequence of work
- We hang the prepared wall using a plumb line and determine its vertical deviation from the level. If the tops “sink” and the deviation from the vertical at the top is greater than at the bottom, we immediately note that when installing the beacons, it will be necessary to apply more mortar under the beacon.
- Take the beacon and cut it to size. Typically, metal beacons are produced in thicknesses of 6 and 10 mm, lengths of 3 and 4 m.
Note! 6 mm beacons are more flexible. Therefore, from an installation point of view, it is better to use 10mm structures. But in this case, the thickness of the plaster layers will be 4 mm greater.
- We apply it “pointwise” to the wall 20-30 cm from the corner. The height depends on the thickness of the façade plaster, the thicker the more. We attach our beacon and submerge it a little into the solution.
- We apply a rule with a level on top and by pressing and pulling the beacon we achieve the required verticality of the wall. We immediately clean off the deposits on the lighthouse, and smooth out the places that protrude above the required level with a spatula.
Advice! The longer the rule with the level, the more accurately the beacon will be set.
- After the solution has set, carefully fill in the remaining voids under the lighthouse.
- We carry out the same procedure on the other side of the wall.
It is best to make the distance between the beacons 1.7-1.8 m. This will make it convenient to work with the two-meter trapezoid rule when leveling.
- If the wall is more than 2 m in size, we also add guides between the beacons installed in the corners.
Advice! To align everything in the same plane, it is strongly recommended that you periodically pull the “string” between the two outer guides to check during the installation process. Thus, it will be clearly visible whether the beacon mounted in the middle protrudes, sinks, or is in the correct position.
Plastering rules
Plastering of wooden houses may not be carried out in all cases. First you need to make sure that this type of finish is suitable for a particular case. The required layer of material is determined using a fishing line, which is stretched diagonally along the wall and the level of deviation is specified. A level can be attached to the fishing line. If the deviation is more than 4 cm, plastering the walls will not be the right solution, since it may crumble over time. If a layer of several centimeters is required, then plastering will be quite justified. If it is necessary to finish a large surface area, it is recommended to use plasterboard - in this case it will be a more economically feasible solution.
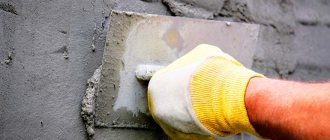
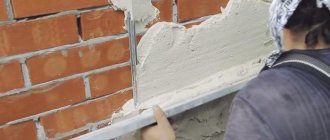
Plastering walls begins with choosing a solution. It is necessary to determine the correct composition and prepare it in accordance with the technology. Plastering wooden walls inside a heated house is carried out using lime compounds, which gives the most optimal result. This plaster adheres well and additionally acts as insulation. For non-residential buildings and external walls of houses, a composition based on cement is suitable. It withstands temperature changes and high humidity well.
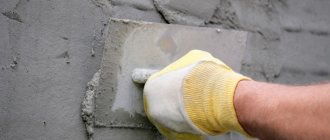
The main thing when plastering work on wood is adherence to technology Source homemasters.ru
Next you need to prepare the surface. This stage is very important and responsible; if you prepare the surface incorrectly, then the coating will not last long. At the final stage, the composition is applied. The durability of the result and the appearance of the entire surface depend on the quality level of this stage. This point is especially important for residential premises.
See also: Catalog of companies that specialize in repair work.
Differences between decorative mixtures
Silicate solutions are made liquid, that is, they can be used immediately after opening the container. But their main drawback is the small selection of colors. In addition, such mixtures must be used immediately, otherwise they will quickly dry out. This facade plaster guarantees excellent waterproofing and is not afraid of mechanical damage.
Do-it-yourself plastering of the outside walls of a house, which are exposed to the stable negative influence of high temperatures and solar radiation, is most often done with polymer mixtures. Their composition may also include synthetic resins: acrylic-styrene, polyvinyl acetate, etc. These mixtures bond well with almost any type of base.
Just like polymers, silicone mixtures can withstand the harmful effects of solar radiation and various mechanical factors for a long time. They have a long service life and storage, and are also able to provide good waterproofing.
plastering the house
Dry cement is used to make mineral mixtures. To get started, just dilute this mixture with water to the required consistency. Mineral-based plasters are non-flammable and allow the wall to breathe. However, their main disadvantage is poor adhesion, which requires additional preparation of the base. The main advantage is that you can prepare it yourself.
Preparing the walls
Regardless of the type of structure, plastering follows the same principle. Plaster sticks to wood rather poorly; additional support is required to prevent the material from falling off under its own weight. A metal or wooden mesh can be used as a support, compensating for even minimal wall movements. This is especially true for buildings made of timber, which take a long time to shrink. The mesh helps maintain the integrity of the plaster, even if it moves slightly away from the base.
Plaster does not bond directly to wood very well, so you must first fill the sheathing Source otdelka-expert.ru
The walls must be thoroughly cleaned of any remaining paint, other solutions, dirt or dust, as this can significantly reduce the level of adhesion of the plaster to the wall. In this case, the glossy surface is treated with sandpaper.
The simplest and most inexpensive way to increase the level of adhesion is to apply special notches along the entire wall. They are made at an angle of 45°, they can also be made horizontal. The cut is made to the width of the ax blade, and the depth of the notch should be up to 1 cm. The most reliable and durable method is the use of reinforcing mesh made of metal or wood. For rooms with high humidity, foam film is used as a damping material.
Plastering a wooden surface using reinforcing mesh Source bricknews.ru
If the geometry of the structure is complex and does not make it possible to fully use a factory-made metal mesh, then it can be connected directly to the base. Nails are driven into the wall at the required intervals, onto which the wire is attached. Wooden mesh or shingles are made from slats 20/5 mm wide/thick. They are nailed crosswise to the base and create a grid. Additionally, it protects the coating from possible cracking. For shingles, coniferous wood that is not affected by rot or mold is used.
The use of shingles occurs according to the following principle:
- When working in wet rooms, a layer of waterproofing made from special liquid materials, film, etc. is required. In other cases, the walls remain untouched. To prevent the slats from cracking, they are moistened along the fibers with ordinary water.
- The first layer of slats is nailed to the surface. They can be attached in straight lines or at an angle, the distance between the slats is 5-6 cm. Nails are used, the thickness of which is 2 times the thickness of the shingles. You can fix it at two points to tighten each rail.
Using slats is the most versatile method of plastering Source electroforum.su
- The second layer is attached at an angle of 90°, if the first was attached at an angle of 45°, the distance is 6-7 cm. The fastening should be more thorough, since the nails will simultaneously hold the applied material and the slats.
- Nails are driven in every 15 cm. Nails are driven in in a checkerboard pattern 1/3 from the edge of the plank, which minimizes the appearance of cracks along the wood grain.
- The extension of the slats occurs with a small gap, but not end-to-end. This method allows you to prevent changes in the boards. This is an additional insurance, since when the humidity changes, the boards change in thickness.
Upon completion of the work, a beacon profile can be installed, if necessary. After this, you can start plastering.
It takes a long time to mix the plaster by hand - craftsmen must have special mixer attachments Source otdelka-expert.ru
Necessary tool for plastering bricks
Rice.
4. Minimum set of tools for plastering brick An experienced finisher’s list of tools includes up to 30 items. Let us mention the minimum set of tools, without which it is impossible to work. These include:
- The trowel, which is used to mix the working mixture during its preparation, is applied to the wall and leveled. These operations are also performed with a set of spatulas or a falcon.
- An electric drill (perforator) with a mixer is convenient to use for preparing the solution.
- “Semi-grater” (oval or standard) for drawing out corners.
- A smoothing board, a spray bottle (brush), a building level (preferably a laser), usually a plumb line, a tape measure for leveling surfaces.
- Bubble level rules. For small ones, up to 1.5 m, the plaster is leveled. Large checks the quality of application (horizontal, vertical).
Preparation of the solution
Various solutions can be used to work with wooden surfaces. This is due to the fact that wood has a fibrous structure, which increases the level of adhesion between the plaster and the base. Plastering a wooden house inside is carried out using the following types of solutions.
Limestone and cement. At the first stage, cement and sand are mixed 1:3, mixed, and lime milk is added to the composition in the amount of 1 part. Both quarry sand and river sand can be used for the solution. But in any case, its fractions are no more than 1 mm.
Sand plaster and cement. This option is classic and is widely used for wall treatment. The basis of the solution is sand and cement according to the standard 1:3 scheme, but the proportion of filler may vary. First, mix the dry ingredients and then add water. Before using the finished plaster, it must be mixed several times and left to stand at intervals of 15 minutes.
General principles
Let's start by formulating a few simple rules that we will have to adhere to during finishing work.
- The insulation must be vapor permeable. Moreover: ideally, the permeability of walls to water vapor should increase from the inside to the outside. In this case, we will avoid the accumulation of moisture in the thickness of the wall with the inevitable decline in its thermal insulation qualities.
In addition: dampness and the accompanying fungus sharply accelerate the destruction of main walls. Mold is quite capable of feeding on inorganic compounds that are part of concrete, limestone, brick and other popular building materials.
- The insulation must be reliably protected from water flowing under it during precipitation. It will evaporate for quite a long time; the consequences in the form of the notorious fungus will not keep you waiting.
- Plastering the outside of houses is done using reinforcement over insulation and, in addition to being decorative, has a protective function. It protects the thermal insulation material from moisture and accidental mechanical damage: the rigidity of any insulation leaves much to be desired simply because most of their volume is occupied by air.
The structure of an insulated facade with a reinforced plaster coating.
Video description
How to choose plaster for interior work, see the following video:
Gypsum and lime. In this case, lime, gypsum and sand are used, their ratio should be 1:1:3. Sand and lime are mixed and water is added. The peculiarity of this solution is that it can only be used for indoor treatment; it sets quickly, so the material is prepared in small portions. It is this solution that is most often used for plastering shingles.
To properly prepare plaster using lime, it must be extinguished first - a lot of gas is released in the process. You cannot use quicklime, otherwise the coating will crack.
Insulation and leveling of walls with plaster
In log houses, leveling and insulation of houses occurs as follows:
- Cells measuring 100x100 mm are made from wire with a diameter of 6-10 mm, the mesh is attached to the wall. A factory mesh can be used, which will meet the specified parameters.
The easiest way to level a layer of plaster is using special beacons Source obustroeno.com
- Thermal plaster is prepared from clay, straw and sawdust in equal proportions. A concrete mixer can be used for the process, which reduces time and labor costs at this stage. Water is added by eye, the main thing is that the solution is thick.
- The plaster layer should be a maximum of 50 mm. Above the reinforcing mesh, the layer thickness is no more than 30 mm. Otherwise, large and deep cracks may appear after drying. Small cracks are quite acceptable.
After the plaster has dried, which may take several days, the surface can be leveled with cement mortar. When it is completely dry, the final stage of finishing is carried out with a special vapor-permeable material.
Straw and plaster when decorating walls in a country house - not very aesthetically pleasing, but effective Source www.biohouse.com.ua
How to apply plaster correctly
Plastering work is also divided into 3 main stages.
Sprinkling
The cement solution is diluted to the state of rare sour cream. If you use dry or ready-made mixtures for outdoor use, then everything must be done following the manufacturer's instructions.
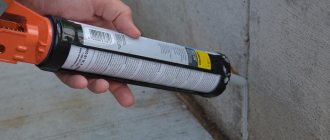
It is also recommended to add PVA glue to the cement plaster, which will give it strength and promote the most reliable adhesion of the applied layer to the prepared surface.
Then use a ladle to spray the solution onto the entire wall. The mixture should not be splashed, but thrown on, and with reasonable diligence. The more “roughness” there is, the better. We wait until it dries.
Applying the main layer
Dilute the solution to a thick cream and spread it between two beacons over an area equal to 40-60 cm in height. The maximum total thickness of all layers of plaster should be no more than 5 cm. Place the narrow side of the trapezoidal rule against the beacons and begin to move it from side to side. Try to keep the edges of the rule from leaving the beacons, while at the same time slowly moving upward.
This way, all excess will be cut off and the plaster of the external walls will become as smooth as possible. If in some places the solution was put a little less than necessary, then you need to add it and perform all the steps again.
Application of the solution
To achieve maximum effect from applying plaster, all work should be carried out in three stages.
Spray. The thickness of this layer is no more than 10 mm. A fairly liquid plaster is used, which allows achieving the maximum level of adhesion for the following layers. When the layer sets and dries, a primer is applied.
Priming. It is the main layer of the plaster used; it is used to build a wooden wall. The layer thickness is no more than 10 mm and depends on the general condition of the surface. The applied layer must dry well, after which it can be leveled with a covering.
Covering. The last layer is used for final leveling of the base. The thickness is no more than 2 mm, the layer is smoothed or rubbed, which allows you to perfectly level the wall for the use of further decorative materials.
Decorative finishing of the facade
When the insulation is covered with plaster and the walls are level, you can begin applying textured coatings. Decorative plaster facades come in the following types:
- Plaster for walls "Bark beetle". Imitates the surface of wood that has been worn away by insects. The effect is achieved due to the mineral fractions contained in such mixtures, for example, from marble. Their size does not exceed 2 mm.
During the process of leveling the solution, the grains move and leave small grooves. Their direction can be chosen arbitrarily, but more often circular movements are used to obtain a beautiful pattern.
- Pebbles. Apply a new layer over the hardened plaster. For this, a mixture consisting of marble chips and a binder base is used. The fraction size is usually in the range of 1.5-2.5 mm. The mixture is leveled using a trowel.
- Fur coat (Lamb, Shagreen). The simplest decor option. To obtain such a surface, it is enough to roll a roller over the surface of fresh plaster or create roughness with a trowel. She is pressed tightly against the wall, and then abruptly pulled away.
The mark turns out beautiful due to its roughness. If a cement-sand mixture is used, then after leveling it, you can spray a little more mortar on the wall using a broom or coarse brush. But for plastering large areas, a pneumatic bucket is used.
- Imitation of stonework. To make such coatings, cement-sand plaster is used with or without the addition of small mineral grains. The base and corners of the building are most often finished with stone. These surfaces perfectly complement smooth walls.
Finishing work
High-quality wood plaster inside the house allows you to use other decorative materials. When finishing work on the walls of a frame structure, various solutions can be used as the final stage of finishing: decorative plaster, paints and varnishes, wallpaper, and so on.
Photo of the facade of a wooden house using decorative stone and plaster Source pinotex-ua.com
In other cases, when it is necessary to maintain a good level of vapor permeability, it is necessary to use certain materials. In most cases, paper wallpaper is glued, which has a decorative function and allows you to hide small cracks that will certainly appear after plastering the walls.
To add aesthetics, you can use decorative plaster. It can be used instead of painting or wallpapering; it looks beautiful and original.
Using decorative plaster, various relief patterns are created Source nauka-i-religia.ru
See also: Catalog of companies that specialize in home insulation.
Selection of materials
How to plaster the outside of a brick house? Any work begins with procurement.
Insulation
Traditionally used in this capacity:
- Glued mineral wool slabs. They boast excellent vapor permeability; However, their installation is a dubious pleasure: small fibers are volatile and do not at all cause pleasant sensations when inhaled.
Attention: when working with glass or mineral wool, you must wear at least a gauze bandage and safety glasses. Believe me, this recommendation is not reinsurance and is based on the author’s personal experience.
- Polystyrene foam with a density not lower than C-25 (25 kilograms per cubic meter).
The thickness of the insulation is determined by the climate zone. If in the warm Crimea 40-50 mm thermal insulation is quite enough, then in Yakutia 200 mm will not be excessive.
Comparison of the properties of both insulation materials.
Reinforcement
The reinforcing fiberglass mesh should have a mesh size of 2x2 - 5x5 millimeters with a density of about 150 grams per square meter. A mesh is used that is resistant to an alkaline environment: cement is quite aggressive. The approximate consumption for a width of 1 meter is 1.1 linear meters per square of facade (taking into account the overlap of the strips).
Starting plaster
The main decorative layer usually, in addition to reinforcement, consists of a special cement-based adhesive corresponding to the type of insulation. However, ordinary tile adhesive is often used in this capacity (there are very flattering reviews of the use, in particular, of Ceresit CM17).
Decorative coating
In principle, nothing prevents you from leaving the house covered with a layer of reinforced cement plaster - with or without painting. However, much more often, after priming with penetrating acrylic primer, a decorative coating is formed on top - cement-based structural plaster. A typical solution for the south of Russia is “bark beetle” plaster with a grain size of 2-2.5 millimeters.
Decorative plaster "bark beetle".