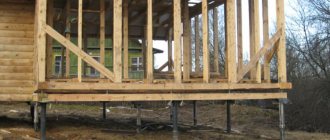
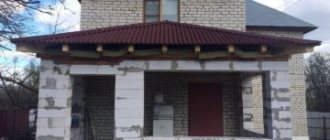
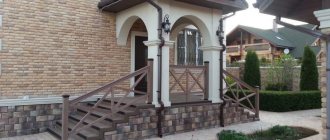
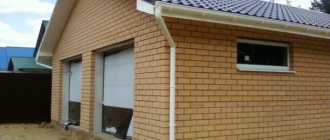
The issue of expanding the living space is often solved by constructing an additional extension, which, depending on the wishes of the owners of the house, can be a living room, an open veranda, a summer terrace, a boiler room or a bathroom. When arranging such premises, homeowners prefer frame structures that are easy to install and light in weight. In this case, the easiest way is to install such an extension to the house on screw piles. In addition, the homeowner is attracted to the cost savings when using this technology.
What is a screw pile
Screw supports are made from metal pipes of various diameters from 50 mm and more. The lower end is equipped with a point and blades. The blades are welded to a trunk with a width of 50 mm, but not more than 300 mm. The length of the pipes ranges from 1.2 m to 12 m. The developer can order the manufacturer to manufacture piles according to individual sizes.
Use supports with an open lower end. When immersed, the pile is filled with soil, which increases its load-bearing capacity. For these purposes, the supports must be coated with high-quality anti-corrosion protection (galvanized).
Recommendations
- What is an armored belt and why is it needed? The armored belt is an important reinforced concrete structure. It is designed for high-quality strengthening of external walls of buildings. The armored belt is laid along the perimeter of the external walls of the building and evenly distributes the load. With its help, the likelihood of cracking of the structure as a result of soil mobility is reduced.
- The armored belt is poured after the walls are erected. Formwork is constructed using boards; the boards are secured along the entire perimeter of the walls on the outside and inside. The lower part of the formwork is screwed to the walls with self-tapping screws, and the upper parts are connected with short wooden blocks. Along the entire length of the formwork, 3-4 reinforcing bars are laid parallel to each other. Short reinforcement is laid along the width, and the frame itself is connected using a special wire. The formwork is poured with concrete mortar.
Glass wool rolls are the most common and cost-effective thermal insulation material. - DSP floor slabs belong to a new type of building materials. Cement particle boards are made from wood shavings and wood. They are highly durable and do not allow moisture to pass through. DSP boards are more durable than chipboards and are suitable for floor finishing. They are resistant to damage by rodents and are not susceptible to mold or mildew. When working with DSP boards, you must wear a respirator and safety glasses, as the sheets become very dusty when cutting.
Advantages of a pile extension
A pile extension is a reliable and durable structure.
An undoubted advantage among various foundations is that a foundation on screw supports can be erected in a very short time. The time of year does not affect the production process of constructing a foundation on screw supports. Screw supports are used in almost all soils, except for rocky foundations and soils saturated with stones.
Installation of screw piles does not require excavation costs. Correct adherence to the technology of constructing a pile foundation on screw supports ensures the durability and reliability of house structures.
In what cases is a pile-grillage foundation necessary?
If the heads of the supports are tied with an additional horizontal beam or grillage, such a foundation is called a pile-grillage foundation. It is made from rolled metal, wood, and reinforced concrete. Its purpose is to evenly distribute the weight of the building across all supports. It complicates and increases the cost of building a foundation, but makes it more reliable and durable.
A grillage is justified when building an extension on screw piles to a brick house, especially if the extension is also planned to be made of brick.
The technology for constructing frame houses provides for uniform distribution of the mass of the structure on the foundation, so the construction of a grillage is not necessary. Wooden houses and log houses have a similar scheme.
Disadvantages of a pile extension
An extension on stilts has some disadvantages:
- Susceptibility to the occurrence of corrosion processes in metal supports;
- The impossibility of installing them on rocky foundations and in soils with large inclusions of stones;
- The need to install an insulated base to protect the ground parts of the supports.
When purchasing piles, check the quality of the anti-corrosion coating. Reliable galvanization looks like star patterns on the metal.
If you decide to add a bathhouse
With the addition of a bathhouse, everything is much more complicated than with an ordinary extension. The reason for this is the need to supply all communications.
And if, as a rule, there are no difficulties with the light, then difficulties may arise with the drainage system and the supply of water to the bathhouse.
Bathhouse as an extension
What to pay attention to:
- All materials for adding a bathhouse must be labeled “for rooms with high humidity.” All wooden elements must be processed with high quality.
- Water can come from inside the house (this often requires raising the floor or otherwise accessing laid pipes) or it can come from a separate water source - a well or borehole. Often the second method is simpler and cheaper.
- Wood for a bathhouse should not release resin when heated, so we do not use coniferous wood.
Otherwise, the extension bathhouse differs little from a regular bathhouse, the construction of which can be read here.
Conditions for installing screw piles
Screw supports are suitable for almost any soil.
The type of screw supports for the foundation of an extension is determined by the analysis of geological soil survey data:
- Depth of weak clayey, heaving soils;
- Occurrence of a dense layer of soil;
- Ground water level;
- A layer of soil subject to freezing.
Supports can be installed in most types of soil. On rocky ground or on a foundation saturated with stones, these supports are not used due to the impossibility of their immersion. The widespread use of piles is explained by their use on soft soils, clayey, heaving and sandy foundations.
Cost savings on the construction of a pile foundation attracts developers to use screw piles.
Roof construction
The best option for a frame extension is a pitched roof ; it can be combined with any main roof.
Mount it as follows:
- First, the rafters are secured on one side under the slope of the existing building, and on the other side - on the wall of the veranda. Metal corners with a pre-calculated angle of inclination are used as fastening.
- Make sure that the protrusion of the rafter legs beyond the wall is not less than 30 cm. Thanks to such a canopy, the veranda will be maximally protected from getting wet by sewage.
- The choice of roofing is made in advance. The best option would be the same material as for the roof of the house . Slate can be installed directly on the rafters or on the sheathing, and soft roofing can only be installed on OSB sheets or plywood.
- The rafter structure is sheathed with a layer of waterproofing, depending on the type of roofing.
- All roofing materials are installed from the bottom up.
- To insulate the roof, it is best to use mineral wool.
Why is it profitable to build an extension on screw piles?
An extension on screw supports can be erected quickly and easily.
For example, you need to install an extension to a house measuring 6x6 meters. It will be enough to install 10-12 screw supports on the pile base. Usually such work takes no more than 2-3 days. The same amount of time will be spent on installing the grillage.
When installing strip and column foundations, you need to spend 1.5-2 months. The cost of materials and labor costs for excavation work, installation of formwork, production of frames from reinforcement, and pouring of formwork with concrete should be taken into account.
Concrete is cured for 4 weeks. In winter, heating of the foundation will be required. All this speaks in favor of constructing a foundation for an extension on screw piles.
Construction of frame walls
Timber is used to construct the walls of a frame extension. Vertical posts and beams are made from it. First, the main frame of the walls is assembled in a horizontal position, and then it is erected vertically.
Installation rules:
- Determine the lower beams of the strapping and make a cut on them every 50 cm for vertical beams.
- Install the racks into the grooves and secure them with special screws and corners.
- Assemble the upper beams for strapping.
- They fasten the veranda together with the house using vertical beams.
- Anchor bolts are used to secure the veranda posts to the house.
- The resulting veranda frame is immediately sheathed on the outside with boards, plywood or OSB to increase the rigidity of the structure.
- Next, the frame is insulated, the roof is built and secured, and then doors and windows are installed.
Useful: Canadian technology for building a frame house
An example of the foundation of an extension on screw piles
Before starting work on laying the pile foundation of the extension, you need to know on what foundation the house is built. What is it for? Different types of foundations behave differently during operation. A strip foundation will settle less than a pile foundation or vice versa.
Extension on screw supports
Therefore, if the house and the extension have different types of foundations, then expansion joints are installed in the places where the structures of the house and the extension adjoin. That is, a small gap is left between the pile foundation grillage of the extension and the base of the house. Expansion joints are covered with strips, both outside and inside the house and extension. Otherwise, this is fraught with the appearance of cracks and destruction in places where the extension adjoins the house.
When the house and the extension stand on screw supports, the grillages of both structures, like the rest of the structure, are connected into a single whole.
Construction process
So, a small house stands on screw supports, the developer decided to attach a veranda to it.
First, mark the centers for installing the piles. Markings are made using twine and wooden pegs. The twine is pulled so that the centers of the supports are at the places where it intersects.
The support centers are located in the corners of the extension, under load-bearing walls and in centers of load concentration (for example, under a summer stove). Piles are placed in increments of 1.5-2 meters. In a site with installed supports, the verticality of subsequent piles is controlled.
After installing the supports in the design position, the tops of the piles are marked for cutting with a grinder to one level.
The depth of soil freezing reaches 0.7 m. Groundwater is located at a depth of 2 meters. Taking into account the small load from the weight of the extension structures, screw piles with a diameter of 100 mm, a length of 1200 mm with a sharp end and blades 60 mm wide are used.
The pile is screwed in by two workers using a pipe threaded through a hole in the top of the pile. If the process of immersing the support is difficult, then pieces of pipe of larger diameter are put on the ends of the lever. During rotation of the pile, it controls the verticality of its immersion. The supports must protrude at least 150 mm above the ground.
We recommend watching a video showing in detail the entire process of installing supports.
The support pipes are filled with concrete mixture. As the pile is filled with concrete, it is compacted with a pin in the form of a piece of smooth reinforcement or other available tools.
Compact the concrete until “cement laitance” appears on the surface.
Preliminary work
In order to determine the type and dimensions of the building’s foundation, a pit of 100×150 cm or 100×100 cm is dug near any wall. The strip foundation is measured in width and height. For columnar, the parameters of the pillars and the depth of their laying are important
This issue should be given sufficient attention, since marking the foundation is one of the most important stages
The size of the base is measured using a steel rod, the end of which is bent 90°. The rod is placed under the sole, placing the bent part strictly horizontally. By turning it, they detect the moment when the curved edge rests against the wall from the inside, and put a mark on the metal. The distance from the bend to the mark, measured after removing the rod, will correspond to the width of the tape.
At the time of pit development, the type of soil on the site is also determined. The data obtained will determine which foundation to choose.
If you have a design for an old house, no preliminary measurements are required. But you should definitely find out the geological characteristics. Careful planning at the initial stage of work, taking into account all the features of the area, will allow you to avoid mistakes.
After the analysis, you should decide what design the future foundation should have. There are several types of them:
- columnar;
- strip reinforced concrete;
- pile and pile-screw.
With rare exceptions, the extension has the same type of foundation as the house. This ensures the reliability of the entire structure.
Possible mistakes
Non-professional builders often make mistakes when constructing the base of the veranda.
An obvious defect of the columnar base is the unevenness of its subsidence. This can occur if the foundation depth calculations are carried out incorrectly.
The base also sags when the load on the platform supports is unequal.
Experts do not recommend making a foundation different from the foundation of the common object. The foundation supports must have the same depth of depth.
Beginners in construction may not take into account the terrain features when working, however, the depth of freezing and the height of groundwater are very important. The monolith must be waterproofed and insulated, and before shrinkage, the height of each column must be carefully measured.
It would be a miscalculation to miss the grillage, because it is this that ensures the stability of the extension. If you immediately make a wooden frame from timber, the supporting beams may break, especially in the case of log options.
Attention ! A columnar foundation is not intended for heavy buildings. If this rule is neglected, the foundation will require repairs or even replacement.
Legal requirements
For the construction of additional structures, properly executed documentation and compliance with legislative acts in the relevant area are required. Even adding a porch to a house without permission can cause conflict with the authorities and, worse, a state of emergency. Therefore, it is important to take into account all ideas already at the design stage.
The process of completing all documents for the construction of an extension to an already finished house is one-time in nature. Step-by-step instructions will help you go through all stages of the legal path :
- First, get consent from your neighbors in writing.
- Order a soil survey in the area where you plan to build a new structure.
- Prepare a project for the extension.
- Organize an assessment of the condition of the house that has already been built on the site.
- Confirm the legality of your project by obtaining permits from all necessary government agencies: utilities, electricians, fire safety, licensed construction company.
- Apply for a permit for new construction from a local architectural firm.
- When you have completed all construction work, pass the object through all the services that authorized its installation. They accept the object and allow it to be used.
- Register the building with the cadastral service and the tax office.
- Re-sign agreements with utility services, which will now record changes in area.
It is easier to entrust the development of the project to the relevant organizations in order to be sure of its correctness.
Tools and materials
It is imperative to use various kinds of tools during construction.
Each master has an individual set of them, but it is impossible to build a terrace without using:
- electric jigsaw;
- bayonet shovel;
- building level;
- hammer;
- roulette;
- chisels and screwdrivers;
- drill and marker;
- staples and paint brushes.
As for materials, you will need to use high-quality boards, cement at least M400, an antiseptic, steel blanks for structures and paint and varnish materials. A wooden terrace is relatively strong and extremely reliable, guarantees comfort and looks more attractive. In addition, construction work will proceed quickly, and costs will be significantly lower. Bricks, concrete and natural stone are much harder, but their design capabilities are worse; it will not be possible to realize a certain part of the design plans at all. The use of metal (steel and cast iron parts) allows you to create very elegant designs and decorative elements, but you will have to come to terms with increased costs.
A metal terrace will be especially expensive for those who do not know how to work with such materials on their own - and welding skills are not as common as carpentry skills, and the situation with tools is similar. The most modern options, such as wood-polymer composites, are processed more simply than traditional products, and the original PVC coating makes it possible to do without impregnations that protect against rotting. The most economical option is to use the elements left over from the construction or renovation of a house, but you will need to carefully check them for the absence of deformations and for protection from negative natural phenomena.
Combined designs
This option is even more popular than products made from only one building material. The most common:
- capital base (blocks, brick, monolith) with a light metal top;
- solid foundation with wooden frame;
- cantilever canopy over a permanent base.
The models presented above in the photo can rather be called canopies, although when organizing fences (except for the last photo) and constructing the foundation of the site separately from the foundation of the house, such structures can also be considered verandas.
Important: verandas with a solid foundation and a light frame can be glazed with no less success than completely brick or block structures.
Features of insulation
Features of insulation
Insulation of a building is one of the most important factors for a comfortable stay in it in the future. In fact, all the nuances concerning the insulation of a frame extension completely coincide with the insulation features of full-fledged houses built using frame technology. For insulation, you can use a variety of materials, both traditional and more modern: ecowool, sawdust, basalt mineral slabs, extruded polystyrene foam and much more. From the point of view of speed and ease of installation work, perhaps, mineral slab insulation is optimal. Such insulation must be tightly laid between the frame racks in several layers, but without kinks or pinches, which over time can lead to the formation of “cold bridges.” An important feature during the work is the need to shift the joints between the slabs relative to each other in adjacent layers. This principle must be observed not only when insulating walls, but also ceilings and floors.
Open area around the pool
A terrace in a private house is often located next to or around the pool. This is especially useful for pools made from large, prefabricated fiberglass tanks. In this case, the terrace performs two functions at once - it provides a comfortable place to relax near the water and hides unaesthetic details (the side of the container, pipes for supplying and draining water, aeration, cleaning devices, and so on).
The principles of arranging the structure are the same as in previous cases: screw piles as a foundation, a cellular frame as a support for the flooring. In this case, the frame is made of metal; wooden elements near water require too serious and expensive protection from moisture
The installation process is discussed in more detail in the video below, but there are some nuances that are worth paying attention to:
- such large containers must be concreted, and the first row of piles (located closest to the side of the pool) may not be screw, but ordinary - installed in concrete;
- the metal frame is necessarily protected from corrosion, galvanized screw piles and stainless steel fasteners are used;
- the frame is positioned so that the flooring hangs over the water and at the same time it is possible to line the vertical fragments of the platform;
- For flooring, a special material is used - the so-called deck board (decking). It can be natural wood with special processing (usually larch), a composite material or pure polymer. A special feature of the board is its increased resistance to moisture and textured surface;
- Built-in lighting fixtures can be mounted flush with the sheathing in the decking.
Popular articles Caring for daffodils after flowering
It is also possible to install a deck below the edge of the pool, if this edge is properly designed.
For bowls of complex shape, the flooring is also usually made with a curved contour.
If the pool bowl is not completely buried in the ground, the terrace flooring is elevated, creating a kind of podium.
How to make a frame extension to a brick or wooden house?
To build with your own hands, you will need some set of tools. The figure below shows a typical version of such a set.
Necessary tools for building a house
It is also advisable to have at least one assistant, since some work cannot be done alone, and working with someone is always more fun.
Floor arrangement
Smaller cross-section bars are installed to the bottom of the horizontal beams attached to the foundation of the extension. A rough floor made of boards is laid on top. Then the subfloor is covered with a waterproofing film and vapor barrier.
Insulation is laid on top. For these purposes, it is better to use expanded clay stone or polystyrene foam; it can be insulated with mineral wool. A second layer of vapor barrier is laid on top of the insulation. The resulting pie is covered with a layer of plywood, which will serve as the basis for laying the final floor covering of the frame extension.
How to fix damage if it occurs?
After a season of heavy rain, the columnar foundation of the veranda may become warped to such an extent that the front door may not close. In this case, the foundation can be corrected using a design using shoes.
Reinforcement is sometimes carried out, but it is not used in the construction of wooden structures. Most often, concrete is poured to the height of the building level or a new pile is installed and the grillage is restored.
Shoes are cast in the ground or in formwork. You need to install a new base under the veranda alternately with the shoes: on the outside and inside of the veranda.
The formwork is made from various available materials and filled with concrete. Subsequently, it can not be removed, but used as reinforcement for the leg. To fill the shoe in the ground, remove the turf, dig a hole of the required size and cover it with parchment. Then the reinforcement is laid out and the form is filled with concrete solution.
To build a new foundation,
you need to dismantle part of the floor, holding the walls of the extension with a jack.
After the supports are attached to the pillars, concrete lintels are attached. As soon as the concrete begins to harden, the walls of the veranda are lowered.
Old foundations need to be removed or the top part removed from them so that it does not touch the building.
Important! If the reason for raising the base of the terrace lies in the shallow deepening of the pillars during construction, it can be stopped by deepening them even more. On one side the ground is dug up and then the pillars will drop below the freezing mark.
The pillars are broken down to reinforcing bars, to which more iron is welded. Formwork is constructed on the surface and poured with concrete. After a couple of weeks, the structure can be removed and the updated foundation can be buried in the ground.
