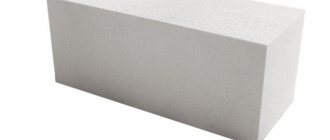
Aerated concrete is a lightweight material that does not cause mortar to be squeezed out of the joints. Unlike classic brick walls, walls made of aerated concrete blocks can be built without pause. In accordance with building codes, blocks with a thickness of 375 - 400 millimeters are used for laying external walls, blocks with a thickness of at least 250 mm are used for interior walls, and decorative partitions are constructed from blocks with a thickness of at least 100 mm. The use of the Ytong tool, designed for working with aerated concrete, greatly simplifies and speeds up the process of processing and laying aerated concrete blocks.
Laying the first row of blocks
Before you begin laying the first row of blocks when building cottages from foam blocks, the foundation is prepared. Cut-off horizontal waterproofing is installed. The waterproofing material can be roofing felt, or any other rolled polymer, bitumen material, polymer-cement solution of dry mixtures. When leveling the surface with a comb or trowel, a cement-sand mortar is applied to the waterproofing in a ratio of 1:3. The horizontalness of the base is assessed by level.
Particular attention should be paid to laying the first row of blocks. The convenience of further work and the quality of the entire construction depend on this. Control of horizontal laying is carried out using a cord and level. The first row is leveled horizontally using a rubber mallet.
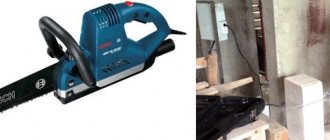
If there is still a gap in the first row of masonry, less than the length of a whole block, you need to make an additional block. In this case, cutting of aerated concrete is carried out with a special hacksaw for Ytong blocks, an electric or hand saw. The sawn surface should be leveled with a plane or trowel. The ends of the sides must be coated with glue during installation.
Features of construction in cold weather
For gas silicate blocks, air temperature does not matter. But the adhesive composition, and even more so the cement mixture, at temperatures below zero, lose their adhesive properties and do not harden. If it is impossible to stop construction, then the following original techniques are used for laying gas silicate blocks in winter:
Additives - the vast majority of them are designed specifically for glue simply because it is used in a smaller volume. The substances ensure the setting and hardening of the glue at temperatures down to -35 C, although the latter, even in winter, is still an extreme option. Warming up the masonry - for example, with a heat gun.
The tool is used to heat the air and the adhesive layer at the joining area. The second method comes down to installing heating electrodes in the seams, which is even more expensive. In this case, the price of the building increases sharply.
The combined method is more common: that is, a special frost-resistant glue is applied and heated for a very short time.
Gas silicate blocks are a material that perfectly combines useful user qualities and affordable cost. Building regulations allow the construction of buildings up to five floors high from it.
And the lightness of the blocks and the simple method of laying will allow you to cope with the construction of walls with your own hands - for the benefit of your wallet and to your own satisfaction. You just need to follow the given technological methods and the result in the form of a warm, reliable home will not take long to arrive. Good luck with your construction!
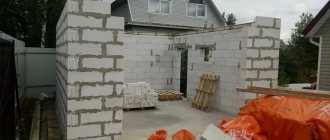
When the masonry material has already been purchased and the foundation is ready, it’s worth thinking about the process of building walls.
The easiest way, of course, is to trust the specialists. However, in order to save budget, many developers decide to carry out the work themselves. In this article we will talk about how to properly build the walls of a house from aerated blocks with your own hands. So, what is aerated concrete masonry technology?
Instructions for laying aerated concrete with glue
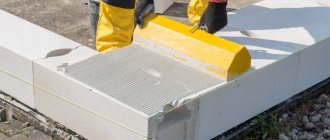
For this type of installation it is necessary to use glue of optimal consistency. The appropriate thickness of the glue should resemble thick sour cream. The glue is applied with a trowel, carriage or a special ladle with a curved edge. After the glue is applied, it is leveled with a spatula comb. After laying the first one, the surface of the blocks is leveled with a special plane for aerated concrete. Small fragments and dust remaining after leveling are removed with a brush.
Leveling the masonry should be repeated after installing each row. Changes in the level of blocks lead to the appearance of individual sources of high stress, which contribute to the appearance of cracks. Work on laying aerated concrete blocks is carried out in strict compliance with the specified technological parameters. When the glue has hardened, you won’t be able to disassemble the aerated concrete wall - you can only break it.
Types of masonry mixtures for blocks of different categories
Depending on the degree of deviation of the block geometry from the specified parameters, two categories of products are distinguished.
- The 1st category includes blocks with a maximum deviation in height of 1 mm, and in length and width - 2 mm.
- The second category includes blocks with deviations within 3–4 mm.
The Association of Manufacturers of Aerated Concrete Blocks in STO NAAG 3.1-2013 recommends:
- when laying blocks of the 1st category, use adhesives and make seams with a thickness of 1 mm to 2 mm;
- blocks of the 2nd category are laid on the central floor and seams with a thickness of 10 + 2 mm are made.
Laying the next rows
The next row begins to be laid from one of the corners. To ensure horizontal rows, you need to install wooden slats or corner ones, and if the walls are long, intermediate beacons. Laying rows is carried out with ligation of blocks, by shifting the next rows relative to the previous ones. The minimum displacement value is 8 centimeters. The glue protruding from the seams does not need to be rubbed down; it is removed using a trowel. Blocks of complex configuration and additional blocks are made using a Ytong block saw, a regular hacksaw with carbide attachments, or an electric saw.
Aerated concrete blocks are removed from the film as necessary, so as not to expose the material to precipitation. The laid wall fragments should be protected with a film of unpacked blocks.
What to use as glue?
Many builders, in the old fashioned way, lay aerated concrete blocks using a traditional cement-sand mortar, thinking that this will save money. But the low cost of this solution creates the illusion of savings. The cost of special glue is approximately twice the price of a regular solution. At the same time, the consumption of cement-sand mortar per square meter of masonry exceeds the consumption of special glue by six times.
The undeniable advantage of aerated concrete walls is the provision of high-quality thermal insulation, achieved both due to the low thermal conductivity of aerated concrete blocks and due to the small thickness of the seams. A tight fit of masonry elements is possible only if an adhesive solution is used. The use of cement-sand mortar certainly leads to an increase in the thickness of the joints and the appearance of “cold bridges”, which are a gap in the wall material. High heat transfer in places of “cold bridges” causes the appearance of cold spots on the inner surface of the walls, the formation of condensation, increased heat loss, and the appearance of mold and mildew.
In addition, conventional cement-sand mortars significantly increase the unevenness of the masonry and reduce its flexural and compressive strength.
Manufacturers of aerated concrete blocks consider the use of mortars not designed for laying aerated concrete to be a gross violation of technological construction standards, and recommend laying only with special adhesives. Modern technology for laying blocks, using glue, allows you to minimize the gap between the blocks and prevent the appearance of “cold bridges”. Thin joint mortar is sold dry. Immediately before use, it is poured into water. The mass is stirred with a mixer until it reaches a homogeneous consistency.
Regardless of the shape of the foam blocks, the load-bearing seams are completely filled with glue. Vertical seams connecting smooth blocks are also made. Interblock seams, connected in a tongue-and-groove manner, remain partially unfilled. The thickness of the seam is 1-3 millimeters. Aerated concrete walls of optimal thickness (in the Moscow region - 375-400 millimeters), laid using thin joint glue, do not require additional thermal insulation. In order to prevent the appearance of efflorescence on the walls, during winter construction they use an adhesive solution with the addition of anti-frost components.
Common Mistakes
In the process of laying gas blocks, inexperienced craftsmen often make the same type of mistakes. As a rule, there is no one to take lessons on how to work with the material, so you have to act according to your own understanding. Often users forget about important details of the process, or try to do things differently than the technology requires. The most popular mistakes are:
- lack of waterproofing cut-off between the foundation and aerated concrete;
- laying blocks without bandaging rows;
- lack of reinforcement of masonry rows at every meter of height;
- the use of inappropriate types of adhesives for aerated concrete (for example, in cold weather they use summer glue);
- lack of reinforcement of lintels over windows and doors;
- the side (vertical) joints of the masonry are not filled.
As a rule, users know what to do in a given case. Errors occur due to inattention or forgetfulness. Therefore, you need to work with the material with maximum attention and care, not forgetting about all additional procedures. This will help achieve automation and get high-quality and reliable results.
Aerated concrete U-blocks
A reinforcing belt is a structure that increases the strength of a structure and redistributes the load from the floors. U-blocks are used as formwork for monolithic beams and monolithic lintels designed to cover openings in walls and partitions. U-blocks are mounted in place of future monolithic beams in such a way that the thicker walls of the blocks are located on the outside. Temporary supports are installed under the U-blocks that form the lintel over the window or doorway. Vertical joints are glued. After this, a reinforcement cage is placed in the resulting cavity. To do this, the cavity is filled with fine-grained concrete, leveled along the edge of the masonry.
Floor installation
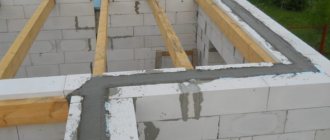
Laying the floors after pouring the armored belt
After the laying of the walls is almost completed and only the last row remains to be done, it is necessary to install a monolithic reinforced concrete belt instead of blocks. This approach will help to evenly distribute the load from hollow-core or cellular concrete slabs across all load-bearing walls.
Reinforcement of aerated concrete
Aerated concrete houses, like any other structures, systematically experience deforming loads. Uneven shrinkage, temperature changes, soil sedimentation, and intense wind can cause hairline cracks that do not affect the load-bearing capacity of the masonry, but deteriorate the aesthetic appearance of the walls.
Unlike aerated concrete, which has low resistance to bending deformations, the reinforcement is able to absorb the tension that appears when the building deforms, thus protecting the walls from cracks and guaranteeing the protection of aerated concrete blocks. The reinforcement of aerated concrete does not have any effect on the load-bearing qualities of the masonry. With proper design and construction, cracks can be avoided. To do this, the masonry must be divided into fragments using expansion joints or reinforcement. Additional protection of aerated concrete from cracks can be provided by reinforcing the finishing layers with fiberglass mesh. This measure will prevent cracks from reaching the surface.
The reinforcement project is drawn up based on the general requirements, the specifics of the building, and the specific conditions in which it will function. For example, a long wall will need additional reinforcement, since it is subject to constant wind loads.
The reinforcement must be placed in prepared armored belts. Inter-row reinforcement is not used in the construction of aerated concrete structures, as it can disrupt the thickness of the seams and complicate the laying of subsequent rows. The exception is reinforcement using stainless steel reinforcement of small cross-section. The first row of blocks located on the foundation, as well as every fourth row of masonry and the area of lintel supports, should be reinforced. Do not forget about reinforcing the row of blocks under window openings, structural elements with high loads.
When installing reinforcement in the area of lintels and window opening areas, it is necessary to perform reinforcement 900 millimeters in each direction from the edge of the opening. In addition, a reinforced ring-type beam is laid under the rafter system and at the level of each floor. To install reinforcement in the upper edge of aerated concrete blocks when using an electric or manual wall chaser, grooves are installed. After this, dust is removed from the grooves, and the cavities are filled with an adhesive solution. Afterwards, reinforcement is placed in the glue, and excess glue is removed. For the process of reinforcing a wall made of aerated concrete blocks, 200 millimeters thick, one rod of reinforcement with a diameter of 8 millimeters is enough. If the wall thickness exceeds 200 millimeters, two rods are used for reinforcement. Expansion joints do not need to be reinforced.
Expansion joints
Like reinforcement, expansion joints are designed to protect aerated concrete walls from cracks. The locations for expansion joints are determined in each case individually. As a rule, expansion joints are placed in places where the height and thickness of walls change, between warm and cold walls, in unreinforced walls whose length exceeds 6 meters, also in places where aerated concrete blocks are connected with other materials, columns, and in places where long load-bearing beams intersect walls Let us remind you that expansion joints should be sealed with mineral wool or polyethylene foam. The inside of the seams is treated with a special vapor-proof sealant, and the outside with a weather-resistant sealant.
Calculation of the required number of blocks
Before you purchase material for laying walls, you need to calculate the required quantity.
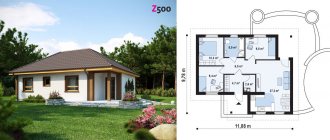
Let's look at the example of a house measuring 10*12, with a wall height of 3 meters. Let's calculate the perimeter and area: 10*2+12*2=44 - this is the perimeter.
44*3=132 m2 is the area of the walls. The area of one product measuring 600*400*250 is equal to: 0.6*0.25=0.15 m2.132/0.15=880. We will need this number of blocks in pieces to build the walls of a house measuring 10*12. Let's convert it to m3. Volume is equal to: 0.625*0.4*0.25=0.06251/0.0625=16 pieces per 1 m3.880/16=55 m3 required.
As you can see, everything is quite simple.
Flooring installation in aerated concrete houses
To create floors in aerated concrete houses, two types of slabs are used: hollow-core slabs made of heavy concrete and aerated concrete slabs. The use of aerated concrete slabs implies the mandatory installation of a reinforced belt made of heavy concrete, which ensures the building’s resistance to wind loads, temperature and shrinkage deformations, and emergency impacts.
Aerated concrete floor slabs, like wall blocks made of aerated concrete, are made using standard technology and are processed in an autoclave. The performance of this material provides excellent load-bearing capacity and fairly low thermal conductivity of aerated concrete floor slabs. The floor, with a base of aerated concrete floor slabs, always remains warm. In addition, aerated concrete floors do not need additional insulation. The impeccable geometry and smoothness of aerated concrete floor slabs simplify the finishing work of ceilings. Aerated concrete slabs also act as reliable protection against fire, limiting its spread to only one level.
Hollow-core slabs are used if the distance between load-bearing walls is more than 6 meters. In this case, the slab is supported on a special distribution belt made of sand-lime brick reinforced with masonry mesh or monolithic reinforced concrete.
Mortar for non-autoclaved concrete
Let's consider step by step what materials are needed to prepare the solution, how to calculate its composition and how to prepare it.
Materials for the mixture
To prepare a mixture for aerated concrete you need only a few components:
- water;
- Portland cement grade no less than 500;
- sand;
- plasticizer;
- gasifier - aluminum powder or paste.
We need high-quality cement because the partitions between the pores are thin, and they need to be given the necessary strength.
Also, to increase the strength of aerated concrete, polypropylene fiber fiber can be introduced into its composition; it reinforces the material throughout its entire volume. To reduce cement consumption, a plasticizer is added. Sometimes alkali is additionally introduced to increase gas formation (although the concrete mixture itself also has an alkaline reaction with a pH of about 13, but its activity may not be enough).
The requirements are the same as for the components of heavy concrete (no impurities, compliance with the standard), except for sand. The one that is brought from the quarry, and which is considered to be of high quality for other building mixtures, will not suit us. You need sand with a particle size modulus of less than 1, that is, very fine.How to determine the particle size modulus
We need sand with a fineness modulus less than one
If you find a set of sieves with mesh sizes of 2.5; 1.25; 0.63; 0.315 and 0.16 mm, then the particle size modulus can be determined independently, it is not difficult. The procedure is as follows.
Set of laboratory sieves for concrete aggregates
- We place the sieves on top of each other in order at the bottom with the smallest meshes at the top - the largest.
- We measure out a sample of sand, for example 1 kg, and begin sifting it. The operation can be considered complete if no sifting is observed when shaking any of the sieves over a sheet of paper.
- Then we weigh the residues on each sieve and determine what percentage of the sample they make up.
- The total residues are determined, which are designated A2.5, A1.25, and so on, the index after the letter is the mesh size of the corresponding sieve. Total residues are equal to the residue on a given sieve plus the sum of the residues on the sieves above it (that is, the amount of sand that would remain on it if there were no sieves on top).
- The sand fineness modulus is calculated using the formula: Mk = (A2.5+A1.25+A0.63+A0.315+A0.16)/100.
It is clear that the smaller the particle size modulus, the finer the sand; according to GOST 8736-2014 “Sand for construction work” they are classified as follows.
| Sand group | Fineness modulus (Mk) |
| Very large | St. 3.5 |
| Increased size | St. 3.0 to 3.5 |
| Large | St. 2.5 to 3.0 |
| Average | St. 2.0 to 2.5 |
| Small | St. 1.5 to 2.0 |
| Very small | St. 1.0 to 1.5 |
| Thin | St. 0.7 to 1.0 |
| Very thin | up to 0.7 |
We need to order fine, fine or very fine sand. In the composition of aerated concrete it is called dispersed filler.
Advice. If problems arise with the purchase of the necessary sand, then the standards do not prohibit the use of dolomite flour. It is sometimes easier to find; this material is used in large quantities in agriculture to deoxidize soils.
Dolomite flour, used to deoxidize soils, can replace sand
What kind of aerated concrete will we prepare?
Next we need to decide what kind of aerated concrete we will prepare. According to GOST 25485-89, non-autoclaved concrete must have the following density grades, which correspond to strength classes and frost resistance grades.
| Brand by density | Type of concrete | Strength class | Frost resistance grade |
| D400 | Thermal insulation | B0.75; B0.5 | Not standardized |
| D500 | B1; B0.75 | ||
| D600 | Structural and thermal insulation | B2; B1 | From F15 to F35 |
| D700 | B2.5; B2; B1.5 | From F15 to F50 | |
| D800 | B3.5; B2.5; B2 | From F15 to F75 | |
| D900 | B5; B3.5; B2.5 | ||
| D1000 | Structural | B7.5; B5 | From F15 to F50 |
| D1100 | B10; B7.5 | ||
| D1200 | B12.5; B10 |
A few clarifications are required here:
- In the density mark, after the letter D, the numbers indicate the density kg/m3 of the material.
- Concrete class is the strength in MPa guaranteed for 95% of samples.
- The frost resistance mark indicates in numbers after the letter F how many cycles of thawing and freezing the material can withstand without losing more than 5% of its strength when completely saturated with water.
For an example of calculation, we take the most common aerated concrete D400, and we will calculate it so that the output complies with GOST.
Calculation
You will have to calculate it manually
This is the most interesting section of our article. The fact is that even its author, having a specialty as a civil engineer-technologist (with a specialization in monolithic concrete), could not remember and find the calculation method in his student notes; it was simply not taught.
Online calculators count the number of blocks, but do not select the mixture for their production
You won’t find an online calculator either (all that is available on the Internet is the calculation of the number of blocks for construction, but not the selection of a mixture for preparing aerated concrete). I had to study the literature - several sources were studied.
Let’s make a reservation right away: in any aerated concrete production, the recipe is not only calculated, but also tested experimentally. Almost all calculation methods require adjustments by testing prototypes.
Digressing a little from the topic, we can say that, like the recipe for delicious pilaf, the quality composition of the mixture for aerated concrete depends on the cook and process engineer. When setting up production at home, the owner plays his role, experiment...
Calculation methods that were abandoned
Several methods were found - we rejected four of them:
- According to the publication: Sazhnev N.P. “Production of cellular concrete products: theory and practice”, the formula is given: Ts = PshKts / 100, where Ts is the amount of cement, Ps is the amount of dry components in the mixture in kg, Kts is the amount of cement in percent.
- According to the book: Portik A.A. “All about foam concrete” the formula is similar: Rts = Rvyazhn, here Rvyazh is the mass of the binder in kg, n is the proportion of cement in the mixed binder.
As you can see, in these two methods the amount of cement is not actually calculated, but is set:
- Next edition: Makhambetova U.K. “Refined method for selecting the composition of foam concrete” offers a calculation using the formula: P = Рsuh/(Kskh(1+Spc), where Рsukh is the mass of dry materials, Ks is the coefficient of chemically bound water, it is for preliminary calculations 1.1 is assumed, Spc is the ratio of the mass of sand to the mass of cement.
- According to the book: Kudyakov A.I. “Design of non-autoclaved concrete,” the formula is as follows: C = ρb/(1.15-Снс), where ρb is the density of concrete, Снс is the ratio of filler and binder.
After analyzing these two formulas, it is clear that the amount of chemically bound water is determined by a constant coefficient, and they also do not take into account the properties of cement, the conditions for the formation of the concrete structure, and its strength. Also, in the above methods, the introduction of fiber fiber and plasticizer into the mixture is not taken into account. Therefore, it was decided to abandon them.
Selected technique
The most clear calculation method was found in a publication by BelNIIS employees from 2010 (by the way, the author of this article completed pre-graduation internship there, although earlier than the calculation method given below was developed). Therefore, it was decided to bring and apply it. The step-by-step instructions for carrying out the calculations are as follows.
- First of all, we find the rational ratio of the mass of the filler to the mass of solids: n = Gdn/(Gbnit + Gdn), where Gdn is the mass of the dispersed filler (sand), Gbnit is the mass of the binder. To do this, we use graphs obtained as a result of laboratory tests of various proportions of the compositions. They are listed below.
Graph of the rational ratio of the mass of filler to the mass of solids
For our example with a density of 400 kg/m3, in order to fit into the strength normalized by GOST between classes B 0.5 and B 0.75, according to the graph, the most suitable value is n = 0.4.
- The strength can be adjusted if fiber is introduced. To do this, we find out the strength growth coefficient when introducing Kv fiber fiber from the table below.
| Amount of introduced fiber fiber in kg per m3 of aerated concrete | 1 | 1,5 | 2,5 |
| Strength increase coefficient Kv | 1 | 1,2 | 1,3 |
Having found out the coefficient, using the formula: R28 = (5.3x10 -3x ρb-2.1xn-0.49)xKv, you can calculate the planned strength of concrete at the age of 28 days - R28. For our example, let’s first take the amount of fiber 1.5 kg/m3, therefore, Kv is equal to 1.2 - we get: R28 = (0.0053x400-2.1x0.4-0.49)x1.2 = 0.94 MPa. This is slightly higher than class B 0.75 adopted by GOST.
You can leave everything as it is (extra strength does not interfere), or take a smaller number n, or you can reduce the amount of fiber. In our example, we take 1 kg/m3 of fiber and get a strength of 0.79, which is close to class B 0.75.
- Next, we find out the amount of binder using the formula: Gbinder=ρb/(1+αмхмхсв+n/(1-n)), where αм is the degree of hydration of the binder (for most cements 0.7), mхв is the amount of chemically bound water (assumed 0.227) .
Let’s calculate for our example: Gknit=400/(1+0.7x0.227+0.4/(1-0.4))=219 kg.
- Let's find out the amount of dispersed filler: Gdn=nxGknit/(1-n). For our example, Gday = 0.4x219/(1-0.4) = 146 kg.
- Next, the gas volume is calculated using the formula:
Vg=Vb-((αxGknit)/ρ knit+Gdn/ρ dn+(αxGvyazhmkhsv)/1000), where ρ knit and ρ dn are the true densities of the binder and dispersed filler (on average for cement 3100 kg/m3 for sand 2400 kg/ m3). For the calculation, we take 1 m3 of aerated concrete.
In our example: Vg= 1-((0.7x219)/3100+146/2400+(0.7x219x0.227)/1000)=0.86 m3.
- Next, we calculate the pressure inside the gas bubble: Pp = ρbsx9.8xhf + Ratm, here ρbs is the density of the concrete mixture, hf is the height of the mold, Ratm is atmospheric pressure (for calculation we take 101325 Pa).
Let us fill forms with a height of 0.5 m with aerated concrete, in this case the pressure in the gas bubble will be: Рп=400х9.8х0.5+101325=103285 Pa.
- Next, we calculate the amount of gas-forming agent (aluminum powder or paste) using the formula: Gg=((0.018xVgxPp)/(RxTxCal))x100, where R is the universal gas constant equal to 8.31 J/(mol x kg), T is the temperature in kelvins at which gas formation occurs, Sal is the content of active metal in the gas generator as a percentage.
For our example, we take T = 293 K (absolute zero -273 o C plus twenty degrees, we get kelvins), Sal = 85%. We count: Gg=((0.018×0.86x101325)/(8.31×293x85))x100=7.57 kg.
- Next, the amount of water required to prepare the gasifier suspension is calculated: Vsus = Ggh5, in our example Vsus = 7.57x5 = 37.85 kg.
- If it is necessary to enhance gas formation by introducing alkali, then its amount is calculated using the formula: Gsh = Gknit x0.05. For us Gsh = 219x0.05 = 10.95 kg.
- When introducing a plasticizer, we calculate its quantity: Gd = (GvyazhDd)/SD, where Dd is the dosage of the plasticizer in the ratio by weight, SD is the concentration of the plasticizer solution. For our example, we take Dd=0.005, Sd=0.4. We consider Gd = (219x0.005)/0.4 = 2.73 kg.
- This is the most interesting part of this technique. If, to calculate the amount of water in a solution of heavy concrete, tables or graphs are most often offered that take into account the required mobility and the maximum particle size of coarse aggregate, then in the case of aerated concrete these characteristics are not important. The authors (as indeed in almost all other recommendations) write that the mass of water must be determined experimentally.
For our example, let's take the optimal water-cement ratio - W/C = 0.44. Knowing the consumption of binder, we find out the amount of water: В = (В/Ц)хG binder. For our example, B0 = 0.44x219 = 96.33 kg.
By the way. Due to the fact that the amount of water is determined experimentally, all further calculations can be abandoned. But, if you have found the optimal composition, then, having made them, you can easily adjust the recipe, for example, when using sand with a different humidity or aluminum powder instead of paste.
- Next, we calculate the amount of chemically bound water: Bxw=Gvyazhαxmxw, for our example Bxw=219x0.7x0.227=34.8 kg.
- We calculate the amount of water in the dispersed filler (sand): Vdn = Wdn x (Gdn/100). For our example, we assume the sand moisture content is 5%, and calculate: Vdn = 5 (146/100) = 7.3 kg.
- Next you need to find out how much water the plasticizer contains: Vd = (1-CD)xGd. For our example: Vd=(1-0.4)x2.73=1.64 kg.
- In the same way, we calculate the amount of water in the paste (if we use dry aluminum powder, then naturally there is no need to do this): Br = (1-Sal)xGg. We calculate Bg = (1-0.85)x7.57 = 1.13 kg.
- It remains to calculate how much water is needed to prepare the mixture without taking into account the moisture already contained in the components: B = Vo- (Vsus + Vxsv + Vdn + Vd + Vg). For our example, B=96.33-(37.85+34.8+7.3+1.64+1.13)=13.6 kg.
The calculation is ready, for convenience we list the results of our example:
- Cement - 219 kg.
- Sand (fine filler) - 146 kg.
- Fiber fiber - 1 kg.
- Plasticizer - 2.73 kg.
- Gas-forming paste - 7.57 kg.
- Alkali for intensifying gas formation - 10.95 kg.
- Water for preparing the paste suspension - 37.85 kg.
- Water in solution - 13.6 kg.
Preparation of mortar for aerated concrete
Now we’ll tell you a little about the technology used to prepare a solution for non-autoclaved aerated concrete. The process includes the following operations.
- We immediately measure the water and separate out a portion of it to prepare a suspension based on powder or paste and a plasticizer solution.
Advice. It is better to heat the water - this way we speed up the gas formation reaction.
- We make a suspension of the blowing agent by thoroughly mixing the paste or powder in water.
- Next, we prepare the plasticizer solution in the same way.
- Mix the remaining water, cement, sand and fiber, accurately weighing them. Add a plasticizer solution to the mixture. If alkali (usually caustic soda) is used to activate gas formation, then we add it to the mixture.
- Let's start mixing; for aerated concrete, which does not have coarse aggregate (its particles, when falling, additionally mix the remaining components), it is better to use forced action concrete mixers (with blades) rather than the usual gravity concrete mixers.
- After all the components except the suspension are well mixed, add it. Gas formation begins and the mixture increases significantly in volume. We continue mixing for a few more minutes until the entire composition reacts.
- We place the finished aerated concrete in molds or formwork and level the surface. No need to vibrate.
Attention. The formation of pores continues after laying the mixture. Therefore, the products are obtained with a crust (similar to “brick” bread). Once the mixture has hardened, it can be cut off.
Additionally, we can offer a video in this article, which shows the process of preparing aerated concrete.
Insulation of a house made of aerated concrete blocks
Let us recall that the thermal conductivity coefficient of aerated concrete is almost identical to that of wood. At the same time, the logs used in construction have a diameter of 25–28 centimeters. The thickness of aerated concrete blocks used in low-rise construction in the Moscow region is 375 - 400 millimeters. It follows from this that a single-layer wall made of aerated concrete blocks provides greater heat retention compared to a wooden wall.
Do not forget that heat loss occurs for the most part not through the material itself, but through “cold bridges” - areas of rupture in the material. When building a house from wood or standard brick, it is impossible to avoid the occurrence of such gaps. Aerated concrete blocks are among the building materials with a smooth surface and an ideal configuration. If the masonry is made using a special glue for thin seams, the thickness of the seam will be only 1 - 3 millimeters. Such a small size of the gap areas helps to eliminate “cold bridges”, so walls made of aerated concrete do not need additional thermal insulation.
Unfortunately, heat is lost not only through walls. It can also escape through other structural elements - foundation, windows, roof, etc. When building a house from foam blocks, these elements must be thermally insulated in the usual manner.
The use of cement-sand mortar for masonry causes an increase in the thickness of the joints and the formation of “cold bridges”. It is not recommended to reduce the thickness of seams to improve thermal insulation qualities. In this case, the high water absorption of aerated concrete will cause a decrease in the strength of the masonry. The significant thickness of the joints when using traditional cement-sand mortar provokes the need to insulate walls made of aerated concrete blocks. For additional insulation, mineral wool is used followed by plastering.
Foundation preparation
A feature of aerated concrete is not only maximum lightness, but also high hygroscopicity. Any noticeable increase in the level of humidity provokes the loss of the building material’s heat-insulating properties, so houses made of aerated concrete are necessarily built on a plinth , usually made of concrete or brick.
Reference
The main purpose of the plinth is to protect the walls from precipitation, such as snow and rain, as well as from moisture that comes from the ground through capillary suction.
The height of the base for a house made of aerated concrete is determined based on the depth of groundwater, the average amount and nature of precipitation. It should be above the average snow cover for the area.
So for the Moscow region, the average snow depth reaches its maximum in February and averages 25-35 cm in open areas and 40-45 cm in protected areas. Protection can include fences, neighboring structures and vegetation. Based on this, a 40 cm base will be enough.
also influenced by the aesthetic appearance of the building, the number and height of steps, and the design of the vents . As well as the presence or absence of basements and semi-basements, the location of communications underground.
Attention!
Do not forget to perform cut-off waterproofing using any bitumen-based roll material. When using less durable roofing material, I recommend laying it in 2 layers.
A guarantee of high-quality masonry will be the use of cut-off waterproofing, which will complement the standard waterproofing of the foundation base.
Ventilated facades
The diffusion properties of aerated concrete, its ability to pass gases and water vapor through itself (vapor permeability indicators are 4–6 times higher than the similar properties of wood), provide a high level of comfort in the house. This ability also affects the choice of material for processing facades. The use of unsuitable facade materials contributes to the deterioration of the vapor permeability of the walls and, therefore, negatively affects the level of comfort in the house. In addition, if the internal walls are finished with vapor-permeable material, but the external ones are not, the steam passing into the walls from the inside does not have the opportunity to escape and remains in the aerated concrete, thereby increasing its humidity.
Aerated concrete walls should not be lined with slabs made of materials such as foam glass, foamed plastic, polymer plaster, nor should they be painted with vapor- and air-tight paints. Various ventilated facades are suitable as materials used for finishing: decorative slabs, siding, slats, etc. Traditional plaster on the external walls of a house made of aerated concrete blocks, under the influence of steam systematically passing through the walls, lags behind over time and takes on an untidy appearance. That is why when plastering, only special plasters for aerated concrete are used.
This plaster for aerated concrete has high adhesion to the wall material, high vapor permeability, minimal shrinkage, good hydrophobicity, and low water absorption. This plaster can last for a long period of time without peeling off from aerated concrete. Plastering of aerated concrete blocks can be carried out without the use of a plastering metal mesh.
Basic properties and types
Aerated concrete is one of the varieties of cellular concrete. It has a special porous structure, which is achieved during the production process. The cells are formed as a result of a chemical reaction between lime and aluminum powder.
Thanks to their special composition, manufacturing technology and some other factors, the blocks are endowed with properties that differ from other materials, which largely also depend on the type and scope of the product.
Let's consider what aerated concrete can be. In accordance with GOST 21520-89 “Cellular concrete wall blocks”, the material is divided into several types, depending on the characteristics of the material.
According to density, the material can be:
Thermal insulation. Such products have a density of 300-400 kg/m3.
They are used as a material for insulation, since they cannot withstand any loads other than their own weight. Structural and thermal insulation. This type of product is characterized by a higher density - 400-800 kg/m3. It is used in the construction of walls and partitions. Structural. The most durable type of material. Its density varies from 900 to 1200 kg/m3. It can withstand significant loads and is used in the construction of buildings up to 12 meters high.
Thermal insulating and structural thermal insulating aerated concrete, photo
Depending on the type of binder component, the material is distinguished:
- On cement binder; On lime; On slag; On ash; On mixed.
This means that the concentration of the main component is from 15 to 50%. The content of the silica component also determines the special varieties.
Products can be manufactured:
- On sand, most often quartz; On ash; On other secondary industrial components.
Also, the gas block is divided depending on the type of hardening.
Products can be:
- Autoclaved; Non-autoclaved.
Autoclaved and non-autoclaved aerated concrete
- Autoclaved aerated concrete, or synthetically hardened aerated concrete, is processed using special machines - autoclaves, in which it is exposed to high temperature and pressure. When producing a non-autoclaved product, hardening of the product occurs naturally. Sometimes they are dried in special machines in which the temperature does not exceed 100 degrees and the pressure is below atmospheric. These two types of products differ from each other: non-autoclave is grayer in color, fragile, less durable and inexpensive.
Gas blocks can have different accuracy categories.
Depending on the deviations established by GOST, products are:
- The first category of accuracy, when possible deviations in size cannot exceed 1.5 mm; The second category of accuracy. Such products may differ by 2 mm in size and 3 mm diagonally. The third category of accuracy may differ by 2-4 mm in size and diagonal, and chips of up to 1 cm are allowed.
Products of categories 1 and 2 are laid mainly on glue, category 3 - on mortar.
In the latter case, of course, there will be much more cold bridges. Therefore, such gas blocks are usually used in the construction of various outbuildings. Their prices are much lower.
Now it’s worth paying attention to the main indicators of the quality of the material. Let’s use the table and at the same time, for clarity, compare the material of the autoclave and non-autoclave curing methods.
Characteristics:
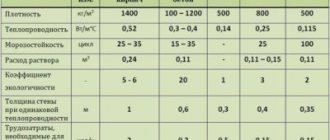
Name of the characteristic Its value for a representative of cellular concrete of synthetic hardening Its value for a hydration hardening material Frost resistance, cycles 35-15015-35 Thermal conductivity 0.096-0.1550.17-0.25 Strength in accordance with GOSTV 1.5-B5B1-B2.5 Shrinkage 0.3 mm/m20 ,4-0.5 mm/m2 Thickness of the outer wall From 0.4 m From 0.6 m Durability Up to 200 years Up to 50 years
As you can see, the performance is quite good for both types, but the autoclave still wins.
Brick cladding
If the owner of a house built from aerated concrete blocks wants to line the outer walls with bricks, he must provide for the expansion of the foundation in such a way as to provide support for the brickwork. A wall made of aerated concrete completely covered with brick will become damp, so you need to install ventilation holes under the eaves and at the base level. It is not recommended to cladding completely, since the cladding layer will interfere with the process of steam exchange through the walls. But if you have already planned such cladding, aerated concrete walls must be protected with special waterproofing materials. The brickwork must be connected to the aerated concrete wall using special flexible connections, nails or galvanized strips, which are nailed to the aerated concrete blocks on one side and placed in the seam between the bricks on the other.
Composition of the building mixture
There are two options for laying gas silicate walls. The main requirement for the material is the ability to form as thin a layer as possible. The mixtures are prepared by hand and almost identically.
Cement-sand – traditional composition. Suitable for any kind of walls.
In winter, the usual mixture cannot be used, since at temperatures below zero it does not gain strength. The adhesive composition is based on Portland cement with mineral and polymer additives. Its layer is very thin, and therefore does not form cold bridges. However, the first row of stone is fixed to the foundation only with a cement mixture.
For the construction of walls in winter, the usual adhesive composition is also not applicable. But there are some additives, for example “Antifrost will win”, thanks to which the glue hardens much faster. However, the price of the building increases.
Is it possible not to finish a house from aerated concrete blocks?
During the production of aerated concrete blocks, the raw material mass is cut into separate fragments. After this, some of the open pores appear on the surface of the blocks. When the walls get wet, aerated concrete absorbs moisture. Moisture penetrates exclusively into the surface layers and does not contribute to the destruction of aerated concrete, but can worsen the aesthetics of the building, forming dark spots on the walls. Buildings made of aerated concrete blocks do not need to be finished on the outside, but only if you don’t care what your house looks like. When using modern facade materials, the presence of external wall finishing made of aerated concrete blocks guarantees the high aesthetic appeal of the building and the preservation of the walls’ ability to breathe.
DIY walls made of silicate products
Hollow blocks and sand-lime bricks are made from natural raw materials - water, lime and sand.
They are usually white, but can also be colored. What are the advantages of walls made of silicate materials? Lime-sand or silicate products. During the production of silicate materials, no harmful additives are used; the silicate product and its individual components do not come into contact with any gases or hazardous substances during the production process. Hollow blocks and sand-lime bricks are usually painted in different colors upon request.
- Wall elements
- Facilities
- Advantages
Interior decoration of walls built from aerated concrete blocks
The owner of a house built with aerated concrete blocks, when choosing materials for interior decoration, faces a difficult choice. He can:
— perform interior finishing using vapor-proof materials. In this case, the diffusion of steam will stop or be significantly reduced, and the plastered walls on the outside will retain their attractive appearance longer. Along with this, the building will stop breathing, and staying in it will become less comfortable;
- decorate the internal walls with a special vapor-permeable material. This approach will require some effort or the use of special materials, but it will preserve one of the most important advantages of aerated concrete, which houses made from this material equate to wooden buildings - the ability to allow steam and carbon dioxide to pass out, and fresh air inside. It is important to remember that you cannot decorate external walls with non-vapor-permeable materials, and internal walls with vapor-permeable materials.
Gas silicate construction technology
Tools for laying aerated concrete
You can build a house yourself from aerated silicate blocks even if you only have basic knowledge about construction technologies, but you have hard work and enthusiasm. To build walls you will need the following tools and materials:
- To dilute the glue you need a container and a puncher.
- You can apply the glue with a special ladle or a notched trowel.
- A hacksaw with a large tooth will help you cut the block into pieces of the required size.
- Uneven surfaces can be smoothed out with coarse sandpaper.
- Scrub brush.
- Metal square, level.
- Mortar of sand and cement.
- Gas silicate blocks of the D400 or D500 brand.
- Mineral wool vapor-tight insulation.
- Masonry fiberglass mesh or reinforcing bars.
Interior decoration procedure
Protruding areas must be rubbed down, unevenness on the walls must be filled with glue or cement-sand mortar. The surface of the walls is free from dust. Aerated concrete blocks are highly hygroscopic, so they should first be treated with a primer designed for materials that absorb moisture. After 2-3 hours of applying the primer, you should begin the process of plastering the walls.
Non-moisture resistant mixtures are used for finishing residential premises. Damp rooms, as well as places exposed to constant moisture, must be treated with waterproofing preparations and moisture-resistant cement-based plaster mixtures. After an hour, the surface is leveled. When the solution is completely dry and the wall becomes dull, it is smoothed. For this procedure, in order to create a smooth surface, within 24 hours after applying the plaster, it is re-smoothed, having previously been generously moistened with water. Now the wall is ready to be painted with special vapor-permeable paint for aerated concrete.
You can simplify interior finishing work by using drywall. In this case, the surface is treated with a primer. Afterwards, sheets of drywall are glued to the walls or mounted on a frame. In rooms with high humidity, aerated concrete blocks are faced with tiles.
Three important differences between cement-sand mortar and industrial adhesive for aerated concrete
When choosing a solution, three features should be taken into account:
- The traditional masonry composition is easier to prepare - it can be sealed at any construction site. However, it is difficult to maintain proportions:
- When stored at home, cement may partially lose its bonding ability.
- Sand purchased on occasion may contain additional inclusions.
- All ingredients have uncontrolled moisture, so it is easy to make mistakes with the amount of water introduced.
- Another disadvantage of conventional mortar is its high thermal conductivity: thick seams are bridges through which cold penetrates into the house.
- Factory-made adhesives are more convenient to use.
Despite all the advantages of special mixtures for aerated concrete, builders often use cement mortars. There are many cases when you cannot do without a traditional mixture. Let's look at them.
Moisture and aerated concrete
The humidity of aerated concrete directly depends on the design features of the walls and the seasonality of the room’s operation. An increase in the percentage of moisture in the walls contributes to their rapid destruction. To avoid an increase in the humidity of the walls and their freezing, it is necessary to follow certain rules.
One of the main advantages of aerated concrete houses is vapor permeability, but it can also turn into a disadvantage if you approach the finishing of the building incorrectly. In a constantly used house made of aerated concrete blocks, the wall “pie” must be made so that vapor permeability increases from the inner to the outer layers. If this rule is violated, the steam that systematically penetrates into the aerated concrete does not find an outlet and remains in the material, increasing its moisture content. The optimal design of the wall “pie” guarantees the free movement of moisture.
Periodic exposure to humid air does not cause significant accumulation of moisture in the internal partitions. When building partitions, aerated concrete blocks are used without restrictions - sometimes even shower cabins are built from them. For external walls, the humidity level is much more important. The inner surface must be treated with a waterproofing solution.