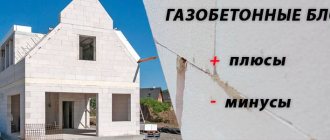
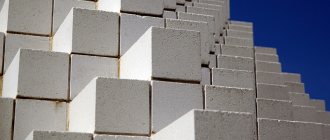
Hello, friends! Nowadays, aerated concrete is one of the most popular building materials. Although he appeared quite recently. It is already on the same level with brick and wood. According to statistics, about 25-30% of private buildings are built from it. But a prerequisite for use is the insulation of aerated concrete.
This goes straight to the question of whether it is necessary to insulate the gas block. Yes, this is necessary in most cases. Otherwise, the situation may not change for the better for the residents of the house.
I want to talk about how to properly insulate a house made of aerated concrete, how insulation is carried out, and also tell you some other important nuances.
Introduction
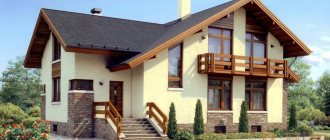
Aerated concrete is a relatively young material that in a short time has been able to reach the level of such construction mastodons as brick and wood.
At least a third of all individual buildings today are buildings made from this material. But when choosing a gas block, it is worth considering that a house made from it must be insulated either outside or inside, otherwise troubles may occur. Do you want to know how to avoid them and do everything right yourself? Give this article 15 minutes of your time, because making thermal insulation is not so difficult!
Penoplex
Insulation of aerated concrete can be carried out with Penoplex. It is sold in the “Wall” variety and does not absorb water at all. The material has a high level of thermal insulation and is completely environmentally friendly. It is ready to last 50 years or more with proper installation and operation.
Many people are interested in whether it is necessary to insulate the facade of a house made of aerated concrete if the walls are of sufficient thickness. The manufacturer of Penoplex claims that this procedure cannot be avoided, because even 400 mm walls are not able to provide a normal level of thermal resistance.
When to insulate a house made of aerated concrete blocks?
We often come across the following belief: “We need to insulate immediately. What to expect? And it's worth the wait! The reason for this is simple. Immediately after creating the blocks and drying them, the plant packs them into industrial packaging. Because of this, the gas block often contains a large amount of moisture. At low and high temperatures it can deform the material. As a result, your structure will be damaged.
When should you cover the walls with a thermal insulation layer? After complete drying! This process usually takes from 2 to 5 months. It all depends on the characteristics of the local climate. It is possible to immediately insulate a house only if, simultaneously with construction, the materials and the entire structure as a whole are protected from moisture.
How to choose insulation for an aerated concrete house?
Here it is worth dwelling on several points at once.
Firstly, the insulation you choose must allow water vapor to pass out. This is necessary so that aerated concrete can easily regulate the humidity in the room.
Secondly, the vapor permeability of the insulation should be higher than that of the gas block.
Thirdly, it is important to correctly combine the insulation with each other. Each subsequent insulation must be higher in vapor permeability than the previous one. If the selected material does not allow air to pass out well, then you need to make a ventilated gap behind it.
If all three points are met, then the dew point will move outside the walls. If the masonry is not protected by anything, the moisture inside will begin to freeze at sub-zero temperatures, leading to serious heat loss. After several cycles of freezing and thawing, the surface layer of the aerated block may begin to collapse.
“The dew point is a plane in the thickness of the wall where, due to the difference in external and internal temperatures, water vapor condenses into dew. With proper organization of external insulation, the dew point moves outward and cannot harm the walls.”
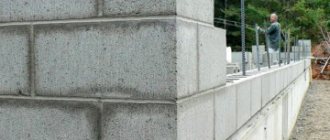
But correctly selected insulation is only a third of the way; it is equally important to make high-quality wall masonry. If the seams between the blocks are thick, then even well-carried out insulation will not give the desired effect. Today, adhesive seams with a thickness of 1.5-2 mm are valued.
Dew point
The inner surface of the sen has a temperature close to room temperature. The outside is much colder; in winter it has the same temperature as the outside air. If you consider the cross section of the wall, the heating of the internal and external surfaces is significantly different, sometimes the difference can be 40° or even 60°. That is, somewhere in the gap between the outer and inner surfaces there is an area with a temperature at which the vapor passes into the liquid phase. This area is called the dew point.
It is generally accepted that the dew point should be brought outside. This is done using a heat insulator - the walls are protected from the outside with a layer of insulation, which increases the temperature and shifts the dew point towards the outer surface. This is the generally accepted point of view, but experts approach this issue somewhat differently.
The greatest danger from the point of view of builders is not the dew point, but the zero point, that is, the area where moisture freezes and turns into ice. As you know from school physics courses, ice expands. Inside the walls, it begins to perform work similar to the action of an explosion - it destroys the bonds between particles of building material, turning it into crumbs. Experienced builders claim that a wet wall is not so dangerous, since the moisture evaporates. An icy or frozen wall is in danger of destruction, which elevates the danger to a critical level.
The situation can only be corrected with the help of insulation. This is especially true for a house made of aerated concrete blocks, since the material is hygroscopic and prone to moisture accumulation.
Features of the steam extraction process
Water vapor is absorbed into the wall, passes through it and evaporates outside. This is a somewhat simplified diagram. There is a rule according to which the vapor permeability of all layers of a wall pie should consistently increase in the direction from inside to outside. This is an important point that must be taken into account at the stage of drawing up the project and selecting materials. The interior finishing layer should have the lowest permeability, and the outer layer the highest. Any transition from one layer to another must be a transition from greater to less permeability. If this rule is violated, the steam will not be able to pass through the next layer and will begin to accumulate in the transition area. When the temperature drops (or simply due to accumulation), it will turn into liquid, the walls will begin to get wet and moldy. A damp, dank microclimate will appear in the house. It will feel cold, even if the room temperature is normal - slightly damp clothes or bedding do not cause a feeling of comfort.
The correct choice of heat insulator is one of the consequences of this rule. When purchasing material, you should first find out whether it is possible to insulate a house made of aerated blocks with it. If an impermeable material is used (foam plastic, penoplex or foamed polyethylene), the vapor is trapped at the wall-insulation transition line. There is a lot of information on the Internet where home owners describe the process of insulating brick or concrete walls with polystyrene foam. Usually not a word is said about vapor permeability and wetting of walls. At the same time, the process of moisture accumulation is inevitable, but it can only be noticed when the entire wall gets wet through or begins to collapse. Such articles or videos pose a certain threat - untrained people, unaware of the impending danger, use cheap and easy-to-use material. The consequences of such insulation of external walls can be very sad.
The role of ventilation
We found out that when insulating a house made of gas silicate blocks from the outside, it is necessary to use a vapor-permeable heat insulator. However, situations often arise when the owner is faced with a fact: a house has been purchased with a heat insulator already installed on the walls and the exterior finishing has been completed, or the work is being performed by a team of workers, whose actions the owner has no opportunity to observe. Redoing everything, clearing the walls of sheathing and insulation, is expensive and time-consuming. In these cases, the problem can be solved in another way.
Since the cause of all problems is water vapor in the internal air of the house, it is necessary to organize its removal using high-quality supply and exhaust ventilation. If you install a well-designed productive system, there will be no problems with the walls getting wet and steam escaping. At the same time, you should not rely only on ventilation - in small quantities steam will still be absorbed into the aerated concrete blocks. For protection, you can use a cut-off - for example, decorate the inside of the walls with plaster and cover them with vinyl wallpaper. The plastic layer forms a barrier that prevents steam from being absorbed into the gas blocks.
High-quality ventilation is necessary in any case. Modern plastic windows and sealed doors do not allow for natural air exchange, requiring the use of forced ventilation. This is especially important in houses with gas appliances (stoves, heating boilers). Therefore, the installation of supply and exhaust ventilation systems is necessary not only to remove excess humidity.
Which insulation material should I choose?
For external insulation, materials such as mineral wool, polystyrene foam, polyurethane foam and penoplex (extruded polystyrene foam) are often chosen.
For the last, so-called finishing layer, the following are suitable:
- Lining or siding
- Facing brick or decorative stone
- Plaster
- Grouting joints with further application of vapor-permeable paint
Now let's look at all the materials in more detail. For exterior wall decoration, siding is most often preferred. There are several reasons for this. It is durable, proven and...cheap! That is why both customers and builders choose it. In addition, siding is valued for its shape. They allow him to fill the void between the base of the wall and the plates of material with an insulating element.
When choosing insulation, experts recommend taking a closer look at polyurethane foam, penoplex and mineral wool.
- Polyurethane foam is a foam-like substance that is superior in quality to many analogues. It is tightly bonded to the surface of the wall and, due to its porosity, forms high-quality insulation from the cold. To apply the mixture you will need special equipment and at least a little experience.
- Penoplex is a dense, rough board 3–5 cm thick with high thermal insulation properties. No experience is needed for this material; it is easy to install and further use. It is due to this that penoplex has become one of the most popular insulation materials among the people.
- Mineral wool is a heat insulator with a long history, but it has a small disadvantage. It easily absorbs moisture. That is why it is used in a mix with film barriers indoors
- Styrofoam. This material has a lot of advantages, such as ease of installation, no load on the building, and very low cost. But there is one big “but”! The vapor permeability of this material is zero. It doesn't leak steam at all. And, as we said above, the vapor permeability indicator should only increase from layer to layer. Of course, you can get out of this situation if you really want to use it. To do this, you need to make a wooden single-level frame and leave a gap for ventilation.
Expanded polystyrene
Insulation of external walls made of aerated concrete is often carried out with expanded polystyrene. Surface preparation in this case only involves removing irregularities that most often arise around the seams. If potholes appear during the construction of a house, they should be filled with cement mortar. If you still haven’t decided whether to use this particular material, then you should consider its positive characteristics, namely:
- affordable price;
- long service life;
- insignificant thermal conductivity.
After completing the work of insulating the walls with polystyrene foam, finishing materials, for example, plaster, can be applied to its surface.
Foam insulation technology
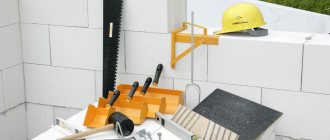
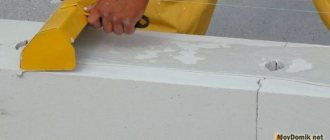
As soon as the walls have been freed from minor errors, they are coated with an antiseptic composition to prevent the occurrence of fungus and mold. This layer should dry well, a primer is applied on top of it to increase the adhesion of the materials. When externally insulating a gas block with polystyrene foam boards, an adhesive composition is applied to their back side. Ready-made powder mixtures are also suitable. Perhaps it is most convenient to work with liquid compounds or assembly adhesives, the latter of which are sold in aerosol packaging.
The outside air temperature must be suitable for the work. Typically this limit is in the range from - 10 to + 40 ˚С. There should be no wind, as the canvases have high windage and can break. You need to start working from the bottom, forming the first row. Then they begin gluing the remaining rows, moving along the perimeter. The plates should be pressed to the surface, placing them in a checkerboard pattern. Their position is checked using a level.
Adhesive for polystyrene foam
If you decide to insulate aerated concrete with polystyrene foam, you need to choose the right adhesive. When working with aerated concrete outside, it is important to take into account that the composition must be frost and moisture resistant. It should be able to withstand temperature changes well. For external work, adhesive foam, cement-polymer composition and bitumen mixture are suitable. The latter option contains a light solvent that is not capable of adversely affecting polystyrene foam. Such mixtures are very common; they are sold ready-made, which makes them easier to use.
Before use, the surface of the walls is dried and sanded. Then you need to apply a primer to the surface. The base must be freed from dirt and dust, as well as rust. It is convenient to use a comb spatula for application. With its help, an even layer of material is distributed over the back surface of the aerated concrete, and then the slab is attached to the wall of the house.
The cement-polymer composition can be used not only outside, but also inside. It is suitable for brick, cinder block and concrete walls. The glue attaches the insulation well, but requires deep priming. Such mixtures are sold in powder form, to which you will need to add water, which complicates the process somewhat.
How to insulate a house with your own hands using polyurethane foam?
3 instructions for action to choose from:
- Curtain façade. A special wooden or metal frame structure is created, the pitch of which is equal to the width of the thermal insulation material. Polyurethane foam is placed in the cells of the frame, and a decorative layer is mounted on top.
- Wet facade. The surface of the gas block is cleaned. Polyurethane foam is attached with glue and secured with dowels. After this, the wall is plastered in 2 layers using a reinforcing mesh.
- Wet façade with reinforcement. If you choose brick or natural stone, then you need to use hooks to fix the insulation. Then reinforce the surface with mesh and plaster. As soon as the plaster dries, the cladding is done. Thanks to this option, there is no need to strengthen the walls and foundation. This is the most preferred method in construction.
Regulatory documentation used
All regulatory data for the article are taken from existing documents. Information on the density of concrete, its strength class, thermal conductivity, etc. is given in STO NAAG 3.1-2013 - in the Standard of the Organization of Manufacturers of Autoclaved Aerated Concrete, introduced in 2013.
For calculations, we also used information from the following regulatory documents:
- Code of rules for design and construction “Design of thermal protection of buildings SP 23-101-2004”;
- Reference manual for SNiP 23-01-99;
- SNiP 3.03.01-87 “Load-bearing and enclosing structures”;
- SP 50.13330.2012 “Thermal protection of buildings. Updated version of SNiP 02/23/2003 (with Amendment No. 1)";
- GOST 30494-2011 “Residential and public buildings. Indoor microclimate parameters (with Amendment)";
and others.
The comparison method is as follows.
- First, we calculate the coefficient of resistance of our walls to heat transfer.
- Then, in the Gostov climatology guide, we select a comfortable temperature for living rooms.
- We determine the standard value of the maximum minimum resistance for the region of the Moscow region, taking into account the degree-day of the heating period (DHD).
- We compare the calculated coefficients with standard values - we determine the ability of the walls to retain the received heat.
The GSOP indicator is established for each region of the country separately. Standard values of heat transfer resistance by region are indicated in Table 7 of the Reference Manual for SNiP 23-01-99*.
How to insulate with penoplex itself?
Everything is done in several stages:
- Level the façade walls, seal cracks, and treat with primer.
- Glue the penoplex with glue and then fasten it with dowels.
- Apply reinforced mesh for finishing.
- “Finish” the finishing with façade plaster.
If you make the facade with siding or PVC panels, then do not forget to install vertical guides. Additionally, there is no need to cover anything with a vapor barrier, since the material will already be protected by vinyl siding.
The advantage of penoplex insulation is that you can install it yourself, even with two hands.
How to insulate with mineral wool yourself?
- Prepare the façade. To do this, clean the walls and level them with cement mortar. After this, prime the surface and, if necessary, level it with vapor-permeable plaster.
- Proceed to installing the frame. To do this, secure the guides of the frame structure taking into account the size of the material used (roll or rectangular mats). The frame will help form a ventilation gap, which will be sufficient for air circulation along the wall and steam removal.
- The next question is about fixing the mineral wool with glue, which must be applied to the slab material. Additional fixation is provided by plastic umbrella dowels.
- Prepare everything for finishing. To do this, strengthen the layer of mineral wool with mesh and glue.
- Final stage. Cover the walls with primer and plaster. Or cover with putty and paint. Important! Do not use acrylic plaster with moisture-proof properties when finishing. This will cause condensation to form.
Prices for popular types of penoplex insulation
Penoplex slabs not only have excellent thermal insulation qualities, but also have an L-shaped edge, which allows the products to be effectively joined, eliminating the penetration of cold. Among the most common varieties, “Penoplex Comfort” should be highlighted, the thickness of which can range from 20 to 100 mm. For 20 insulation boards with the smallest thickness you will have to pay 1,520 rubles.
30 mm canvases are sold in a package of 13 slabs. The cost of this material will be 1326 rubles. If you have 100 mm products in front of you, then the package will contain four slabs, for which you will have to pay 1,356 rubles. If you want to insulate aerated concrete from the outside with penoplex, you can purchase the “Wall” variety. It is offered with a thickness of 50 mm, and 7 slabs will cost 1225 rubles.
Working with Penoplex
Insulation of aerated concrete with Penoplex is carried out using one of several technologies. Dowels can be used as mechanical fasteners. In other cases, these are wet methods, for example, using cement mortar, bitumen-polymer mastic, liquid nails or polyurethane foam.
The work involves five stages.
- First, the surface should be prepared by cleaning and sealing cracks.
- At the second stage, the sheathing is installed.
- The third stage is the starting bar and its installation.
- The fourth step is installation of penoplex.
- At the last stage you will need to seal the seams.
Prices for deep penetration primer
One of the important requirements that should be taken into account before carrying out insulation, regardless of whether mineral plaster is applied, polystyrene foam boards or mineral wool are installed, is the application of a primer. You can purchase NewStaR for 340 rubles. The composition is sold in a 10 liter container. After drying, a transparent film will be formed on the wall, which eliminates the ability of the material to absorb moisture. This will not only extend the life of the building, but also reduce the consumption of glue when installing thermal insulation.
If you plan to carry out work also inside, it is best to purchase “Optimist G106” primer in a concentrated version. For 10 liters you will have to pay 1900 rubles. The walls acquire the quality of moisture insulation, and such a layer can be used in conditions with high humidity. A universal composition is also the primer “VDAK-0181M” with deep penetrating ability. For 3 kg you will pay 162 rubles. This acrylic mixture is also excellent for interior work.
Instructions for foam insulation
- Prepare the façade. If you purchased non-autoclave hardening blocks, you will need to level the surface. If the blocks are autoclaved, like ours, then the surface must be cleaned and primed.
- Attach the guides of the frame system to the facade.
- Place the foam in the spaces between the frame elements, remembering to secure everything with foam or glue.
- Proceed to fixing the slabs. Additionally reinforce the foam sheathing with plastic dowels (metal dowels cannot be used, as they create cold bridges).
- Next, apply a primer to the foam layer, secure it with fiberglass mesh on top and apply reinforcing glue. Once the glue has dried, finish with decorative or warm plaster.