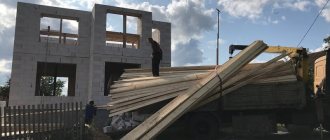
Step-by-step construction of a plinth made of blocks or bricks
The basement stage (that is, the zero level) is a completely or even partially recessed tier of the house below ground level. Typically, utility rooms or a garage for vehicles are made in such a room.
But with an individual project, you can develop a gym, steam room, swimming pool and much more in a scratch room, as long as your budget allows it. In certain cases, the construction of a basement floor is an excellent solution when the house is located on a mountain slope,
...because due to this, you can effectively expand the usable area of the building as a whole. So, let's look at how to make a base out of bricks/blocks with your own hands.
What is a plinth
Base - the foot of a building with a height of 0.2 to 2 meters, lying on the foundation. The main purpose of this structural element is protective, namely, the creation of an effective barrier to moisture and cold coming from the ground. In addition, the base performs an architectural function: for some architectural styles, the building, even with a small base of 0.5 meters, looks much better than without it. A building without a base looks squat and unfinished. This does not apply to modern minimalism, where, on the contrary, the basement of the house is lowered or made invisible.
In addition to protecting the house from dampness and cold, the structural element solves the following problems:
- Creates the desired level of the first floor, which is especially important for low or deeply recessed foundations.
- Forms a flat horizontal surface, which facilitates the subsequent laying of aerated concrete blocks.
- Evenly distributes the load from the building onto the foundation, extending the service life of the foundation and load-bearing walls.
- With sufficient height, it allows you to create a basement floor - additional space in the house where you can place utility rooms.
Expert opinion Vitaly Kudryashov
builder, aspiring author
As you can see, the answer to the question of whether a brick plinth is needed for aerated concrete is clear: Its use is determined by the hydro-geological features of the site, as well as the chosen architectural style of the residential building.
This is interesting: How to make a base as a power belt of a building: functions, materials, types and what is the best way to finish it
Details
Preparatory stage
Construction of the foundation with parallel alignment of the zero level involves conducting a soil analysis at the construction site and determining the location of groundwater. If they are located at a depth of 1.5 meters, the base should be built no higher than 1 meter. When properly planning a construction site, it may be necessary to cover it with an additional layer of earth.
If groundwater is close to the ground surface, the area will need to be drained. This problem can be quickly dealt with using specialized drainage systems. Their use makes it possible to lay the foundation much deeper. All work on creating a base from brick or other material begins with marking the construction site, and then, according to the house design, the foundation pit must be dug using an excavator.
If construction is carried out in the spring, then water may accumulate in the pit, which will then need to be disposed of using a pump. Another option is to wait until it is absorbed into the soil itself. When the required depth has been reached, the bottom of the pit must be thoroughly leveled, and the angular adjustment requires special attention. As soon as the foundation pit is completed, markings are made based on the house plan. Ditches for load-bearing walls must be dug to a depth of at least 0.3 meters. Fill the bottom of the finished ditch with crushed stone, and then install the reinforcement, and at the end you can pour concrete. It will take approximately 3 weeks for the concrete solution to dry 100%.
Requirements for the base and materials for its manufacture
We have already mentioned one feature of the plinth - it must support the heaviest loads of all the architectural structures of the building. But that's not all - the base is used in the most unfavorable conditions.
- Proximity to the ground increases the negative impact of precipitation and groundwater. If the upper part of the wall is slightly wetted during rain, then all the water from the area of the façade walls gets onto the plinth.
- Due to frequent and intense wetness, it is extremely negatively affected by temperature changes from plus to minus.
- The basement has vents for natural ventilation of the underground. This means that it, more than any element of the building, is exposed to unfavorable operating conditions.
- If the house has a basement, then the materials should have low thermal conductivity. At the same time, the requirements for strength indicators are not reduced.
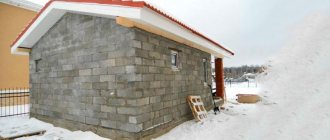
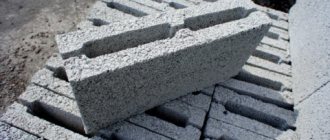
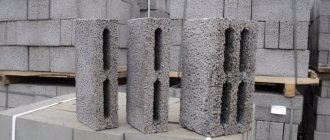
Brick base
Brick base with vents
The use of various brands of bricks makes it possible to construct structures with the required thickness and height parameters in the shortest possible time and with small financial losses. Indicators of physical strength vary depending on the thickness of the base; thermal conductivity is regulated by the special characteristics of the brick or through the use of modern insulation materials. To protect the surfaces of the plinth from the negative influence of climatic conditions, finishing of the walls is used. By the way, it also improves the design of the building’s facade. This factor must be kept in mind; not all types of bricks can be finished with finishing, and if it can be done, then expensive materials and complex construction technologies will have to be used.
Building requirements
Since part of the basement walls will be located in the ground, they must be resistant to horizontal shifts due to the pressure of the surrounding soil. Therefore, the foundation is made with a cushion of monolithic concrete and a reinforcement cage banded around it.
The basement floor cannot have living rooms if its ceiling rises below the ground below 2 m. Otherwise, such a basement will be considered a ground floor. Such walls will also experience pressure from the soil on the entire outer side.
Therefore, when constructing such walls from concrete blocks, additional reinforcement will be required in increments of 40 cm vertically/horizontally, and the reinforcement frame will have to be connected to the foundation pad.
When laying walls, it is necessary to maintain standards for the reinforcement of corners and connection points. General strengthening of the structure in terms of strength can be done by constructing partitions, which will help distribute the loads on the basement walls.
Basic requirements for the design of a plinth made of concrete blocks:
- The height of the plinth depends on the location of the premises, for technical rooms - from 1.8 to 2.2 m, for residential ones from 2.5 - 3 m with a reserve for multi-layer flooring and finishing work.
- The thickness of the walls depends on the level of groundwater. If they are not close to the foundation, the lower wall can protrude 10 cm from the building outline, and the thickness of walls up to 2.5 m can be 40 cm.
- When the base is located below the groundwater level, the base slab is reinforced with reinforcement. At the same time, it should be at least 20 cm thick and extend beyond the frame of the house by 40 cm.
- The basement walls must comply with the requirements of SNiP No. 2.09.03, issued in 1985, for retaining walls and basement structures.
- When laying small-sized concrete blocks, for example, expanded clay concrete, the walls are reinforced with longitudinal reinforcement and horizontal belts on top of the masonry.
- Prefabricated FBS must be made of concrete M150 and higher.
- In basement rooms with a length of more than 25 m, expansion joints must be provided.
Comparative characteristics of the thermal conductivity of materials
It is worth noting that a full basement made of aerated concrete blocks is a good possible, but undesirable option. The above-ground basement part of the foundation and a full-fledged basement floor are completely different structures, both in terms of material consumption and operating conditions. The ground floor is located in the most aggressive soil and groundwater conditions. In this case, it is not advisable to use brick or aerated concrete! The aerated concrete plinth is erected directly on the foundation, provided there is effective waterproofing between the base and the blocks.
Necessary tools and materials for block masonry
The most labor-intensive for installation, requiring the use of a truck crane, are FBS blocks. When using other types of block building materials, the developer will need ordinary construction tools :
- two types of shovels,
- hammer,
- roulette,
- Master OK,
- building level,
- buckets and equipment for pumping water, if necessary.
Basic building materials for the construction of a block base:
Building blocks, from 300 to 1800 rubles. a piece.- Sand, from 450 rub./m3.
- Cement, grade M 300/100, cost per bag 40 kg, from 125 rubles.
- Crushed stone, from 1800 rub./m3.
- Cement-lime mixture, in bags for 30 rubles. per bag.
- Steel mesh, price from 55 rub./m2.
- Red brick, from 15 rub./unit.
- Roofing felt for formwork, from 260 RUR/roll.
- Reinforcing bars, from 15 rub./m. and care.
Advantages of building a basement floor from FBS blocks
The FBS block material from which the basement is built has many advantages. The main ones are the following:
- construction work does not involve preparing a concrete mass, as is necessary in the case of pouring a monolith. After all, everyone knows that the slightest deviations in proportions result in a decrease in quality;
- the blocks perfectly withstand the effects of negative temperatures, since during their production additives are added to the mortar mass. This measure allows construction to be carried out in regions with difficult climatic conditions;
- The range of materials is varied. This makes it possible to select blocks for specific situations. The material differs in parameters and composition. It turns out that the technical indicators of the blocks are also different;
- FBS blocks are resistant to aggressive environments. This makes it possible to carry out construction even in places where the soils are highly acidic;
- Another advantage of block material is its reasonable cost.
Unfortunately, in every building material you can find negative aspects, and FBS blocks are no exception in this case:
- a monolithic foundation poured on your own costs twenty to thirty percent less than one built from block material;
- if construction work is to be done using large blocks, then for their installation you will have to rent lifting equipment, which will entail additional financial costs;
- When laying FBS blocks, seam areas remain that are not protected from environmental influences. After some time they become unusable. To prevent this from happening, it is necessary to install a protective layer of waterproofing materials. It should be noted that such seams allow the penetration of cold air, and in order to keep the basement warm, it must be insulated;
- a correctly poured monolith has better strength than a block structure. At its core, it resembles a strip base divided into several parts.
Advantages and disadvantages of FBS
Many people want to build a basement from conventional FBS blocks, simply weighing their advantages and disadvantages compared to their competitors. It’s quite easy to do this in advance today - information about all building materials is widely available. So what are the advantages of such blocks?
Their list is quite wide and includes:
- Low price, which is affordable even for those with a limited budget.
- Availability of material that can be easily purchased in all regions and localities.
- There is no need to work independently with concrete, where the slightest mistakes can lead to dire consequences.
- A high level of cold resistance, which makes it possible to use the blocks even in the Far North.
- Wide range of sizes.
- Resistance to the destructive influence of the external environment.
In this video we will look at a base made of FBS:
All these positive qualities appeared thanks to the FBS manufacturing technology. Thus, for their high level of frost resistance, they should thank the presence of special additives added to the concrete solution at the production stage. The use of high-quality cement grades allows us to achieve good resistance to various external factors.
But, like any material, these blocks have their drawbacks. Their number is inferior to the number of advantages, but they are still worth taking into account when choosing a building material for the construction of a basement floor.
- Despite all its cheapness, a structure made from such slabs is one third more expensive than a monolithic one.
- Construction cannot be completed without the use of special equipment - the blocks are so heavy that people cannot simply lift them.
- This design requires extremely careful waterproofing of the base due to the presence of interblock seams.
But all these disadvantages for the majority are easily offset by the above advantages.
Types of basements of low-rise buildings
Let's consider options for arranging the basement level for a building made of aerated concrete using popular materials:
Solid brick
Solid brick of grades M150...M250 is used for construction. On a slab or strip foundation, the brick plinth is laid on a roll or coating type of waterproofing. For masonry, mounting mortar M75...M150 is used.
Advantages of solid brick:
- low thermal conductivity (compared to monolith) 0.56…0.81 W/m°C;
- low hygroscopicity (up to 18%) - the structure will not “pull” moisture from the underlying soil. This property is mistakenly attributed to solid brick and is thoughtlessly theorized all over the Internet! In fact, everything is exactly the opposite - it is highly hygroscopic, much higher than aerated concrete!
- high strength up to 250 kg/cm² - reduces the load on the foundation and prevents its deformation;
- frost resistance up to 500 cycles - withstands harsh Russian winters.
We already live in the 21st century, when we are surrounded by smart technology, gadgets and robots, but “illiterate” builders are still building using technologies that still existed in the Soviet Union. There is no need to use brick to construct the basement of the house - this is a relic of the past! They built it this way because there were no other materials and technologies! To build a basement, use only reinforced concrete structures or aerated concrete!
Monolithic concrete
Monolithic concrete plinth is the most reliable and popular design in low-rise construction, both for the underground basement and for the above-ground basement of the house. The most popular and reliable design is when a reinforced concrete grillage is built onto a slab foundation. This design is necessary for areas with low bearing capacity of the soil and high groundwater levels, as well as for cases where there is a height difference of up to 1 m in the building area.
Advantages of the monolith:
- High strength - the monolith is indispensable on unstable soils;
- High speed of installation work due to the use of standard formwork;
Concreting has the following feature: for all its advantages, it has a high comparative thermal conductivity, so it must be properly insulated with polymer insulation with a thickness of at least 100 mm.
This is interesting: Laying the foundation for a frame house with your own hands: which is better? Review
Making a pillow
Due to the fact that the ground floor will serve as a foundation, its construction must be taken with full responsibility. Sand is poured along the entire perimeter of the pit, at least 15-20 cm thick. It is moistened and compacted thoroughly to prevent the formation of voids. Medium-fraction crushed stone is poured onto the sandy bottom of the pit so that the layer thickness is 15-20 cm.
After leveling, a metal mesh is laid on top of the sand and crushed stone cushion, which will serve as reinforcement. Concrete is poured (M400 cement) and distributed evenly over the entire base of the pit. To remove air from the mixture, special tampers and vibrating plates are used. In order for the pillow to acquire its load-bearing capabilities, it needs to stand for 2 weeks at positive temperatures.
Attention! In our case, the previous owner was involved in creating the pillow. In order to save money, he did the following. Markings were made along the entire perimeter of the pit in accordance with the design documentation, after which trenches were dug and formwork was installed. Sand and crushed stone were poured into the bottom of the trenches; after compaction, reinforced mesh was laid and concrete was poured. We made excavations in different places to assess the quality and condition of the pillow. During the research, it was revealed that it extends beyond the supporting structure by about ¼ of the size. The depth of the pillow, taking into account the sand and crushed stone layer, is 40 cm.
Calculation of the number of bricks
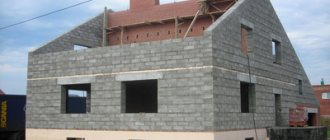
Correct brick laying when building a basement
Laying the plinth requires preliminary calculation of material consumption. With height, everything is simple - the vertical is always formed by a whole number of laid out rows. The width depends on the type of masonry: most often there is a base of two bricks, but you can make a structure of one or one and a half. To calculate the amount of material, you can rely on the area of the tape.
When carrying out the work, a dressing technique is used: the blocks are placed so that the suture areas are covered with whole briquettes. There are different schemes for installing a brick plinth on a strip foundation. The spoon method is simple to perform, but does not allow ligation of the outer and inner rows. Therefore, it is often combined with another technique. One row is laid using the spoon method, and in the next the bricks are laid across the wall axis.
Necessary consumables and tools for construction
This wall material is well suited for the construction of a basement. It is quite easy to install, has sufficient stability and is capable of restraining the movement of a significant volume of soil masses.
In order for the masonry to be done with high quality and the process to proceed quickly, the developer will need to first prepare a set of tools and consumables. This list will depend on the type of concrete blocks: FBS, expanded clay or aerated concrete.
Basic tools and supplies for laying a concrete block plinth:
Masonry mixture.- Reinforcement and reinforcing mesh.
- Protective materials: geotextiles, waterproofing films and mastic.
- Concrete mixer with a capacity of 0.25 m3.
- Containers for transferring solution.
- There are different shovels, including those for putting mortar into buckets.
- Various trowels, a spatula and a notched trowel.
- Rubber mallet.
- Cord for marking the contour, ruler, laser level, level, corner and tape measure and marker.
- Compacting tamper.
- Lifting slings for blocks.
- Bulgarian.
- Electric drill
- Hacksaw and metal scissors.
- For aerated concrete: carriage, wall chaser, grater and bucket-comb.
The type of masonry mortar will depend on the type of concrete block used; for FBS it is M400 cement, sand and clean water in a ratio of 1:4 and water according to the consistency of the mortar.
For aerated concrete blocks and expanded clay blocks, you can use a special dry glue, which is diluted with water according to the manufacturer’s recipe; such a masonry mortar is capable of creating seams of 2-3 mm.
For exterior work with foam blocks, you can use frost-resistant tile adhesive with reinforcement technology.
Brick selection
Solid ceramic blocks are best suited for laying a plinth
Not all types of bricks are suitable for arranging a connection between the foundation and walls. For example, it is definitely not recommended to make a plinth from sand-lime brick. Although this material is aesthetically pleasing, its performance qualities when applied to this design leave much to be desired. This is due to low load-bearing capacity and absorption of large amounts of moisture.
A good option would be solid ceramic blocks. Such bricks are not too expensive, but their operational parameters are best suited for this task. The use of hollow material is acceptable when working on a light construction, but solid options are preferable due to their load-bearing qualities. Sometimes you can find recommendations to use clinker bricks for the basement floor, explained by its almost zero hygroscopicity. This characteristic has both pros and cons. For good adhesion to the mixture, the ability to absorb moisture is necessary. Otherwise, the seams begin to do this. When they freeze, they increase in size, which leads to damage to the brickwork of the base.
Solution or adhesive?
It is best to use a concrete mixer to prepare the solution. In general, traditional cement mortar, which is mixed for 2–3 minutes, is also suitable for laying aerated concrete. The solution prepared for aerated concrete must be used within 1.5–2 hours after its creation. During the preparation process, special plasticizers should be added to the solution.
Most specialists for laying aerated concrete blocks do not use a solution, but adhesive compositions and mixtures. Such mixtures, when compared with traditional mortars, can reduce construction time and reduce financial costs for the basement. At the same time, the use of adhesive mixtures does not in any way affect the thermal insulation characteristics of aerated concrete walls.
To prepare the adhesive mixture, you must mix the dry base with water in accordance with the instructions indicated on the package. The resulting mixture is quite plastic and does not spread when applied to the material.
Construction of a recessed brick plinth on a reinforced concrete strip foundation
The following instructions are intended for construction on a ready-made foundation.
Setting angles when building a plinth
One of the most important rules for laying a plinth is the correct alignment of the corners, because incorrectly aligned corners will lead to further curvature of the walls and, accordingly, defects in the construction of the building.
The simplest way is this:
Place a row of dry bricks in all corners, determining the width of the planned base. Angles are set according to level.
Using a tape measure or twine, measure the lengths of all sides and both diagonals - the dimensions must coincide down to centimeters and be correspondingly equal.
It is also worth checking future walls for possible curvature, using the same twine along the inside of the line from corner to corner.
The process of constructing a plinth
Waterproofing the upper surface of the foundation
Insulation is necessary to further protect the base from groundwater.
Two layers of roofing felt are laid on the foundation in the following ways:
- on bitumen mastic or heated bitumen;
- connection with a burner, treating the surfaces of roofing material.
You can use rubemast, glass roofing material (stekloizol), euroroofing material.
Basement waterproofing
Brick plinth laying
After setting the corners, it’s time to start laying the base. To create it, bricks are usually used, bonded with cement-sand mortar. Only solid red brick is used for construction.
It is advisable to start the laying from the corners, then lay the rows opposite each other on one side with a thickness of the applied mortar of about 20-25mm.
A plumb line checks the accuracy of laying the vertical surface after 3-4 rows of bricks.
After the final check of the corners, the wall laying begins. To make the row even, a thick fishing line is stretched between two corners.
Brick plinth laying
The minimum height is at least 4 laid rows, finishing in the form of natural stone, finishing tiles or siding is allowed.
If the house has basements, ventilation holes are left in each side of the base at a height of 10-15 cm from the soil, measuring from 7 x 25 to 15 x 25 cm. If the length of the building exceeds 3 meters, the vents are in increments of 2.5 meters and covered with nets or small gratings.
Brick finishing of the base
Basement waterproofing
To protect against moisture penetration, you need to lay waterproofing materials, making a distinction between the plinth and the brick wall; for cheap construction, you can use, for example, roofing felt, folded in half. Of course, you don’t have to make do with only them; the choice of materials for insulation is now quite extensive. Double waterproofing is necessary in order to protect the house not only from the external influence of the elements, but also from the influence of groundwater on the foundation.
Basement waterproofing scheme
Beginner mistakes
Construction level and masonry
Prices for building levels
Construction levels
The base is a very important element of the structure and the only one that cannot be repaired. Even problems with the foundation can be solved; there are special technologies for strengthening it. True, this will take a lot of time and is expensive. If the base begins to collapse due to incorrect calculations, then nothing can be corrected. We focus on this not with the goal of scaring developers, but with the goal of forcing them to very carefully follow all the recommendations of professionals and technologies that have been proven over the years. We will try to answer a few questions that novice masons often ask.
Is it possible to lay a mortar more than one centimeter thick to level the base? This need arises most often on foundations made of reinforced concrete blocks. Only competent specialists under the guidance of an experienced foreman can correctly install foundations from such materials. He must constantly monitor the position of each block using a professional level. If the variation in height does not exceed 2–3 centimeters, then it can be eliminated with a solution. But be sure to use a metal reinforcing mesh with a wire diameter of at least 5 mm. No plastic materials will withstand the load on the base; they are only suitable for plastering walls.
Masonry with reinforcement
Laying out the solution
Is it possible to use bricks made without firing for the base? It is possible, but not advisable; we have already discussed this issue above. But if you really need to put these bricks somewhere, then they can only be placed inside the base; all sides must be covered with ceramic bricks. Accordingly, they can only be used on plinths with a width of at least two bricks, otherwise it is impossible to make the correct binding and fulfill the described condition.
Use quality brick
In what cases can you do without leveling the foundation strip with concrete mortar? This is a rather difficult technology, let’s look at it in detail.
Prices for cement and basic mixtures
Cement and base mixtures
- At each corner of the foundation, the foreman taps (shoots) the values by which the upper plane of the base must be raised. These measurements are made with a level. For example, on one corner of the foundation it is written +12 cm, on the second +20 cm, on the third +15 cm, etc. Such marks are made on all areas of the foundation on which the floor slabs should lie, in these places the base should face zero mark – floor level. Of course, the wide variation in the height of the foundation tape indicates that it was made by outright hacks.
- Develop a preliminary plan for reaching the desired height. You need to start from the corners, then all the rows are aligned along them. Make a plan to solve the problem in advance. If, for example, you need to raise the height of the plinth by 15 cm in two rows, then this cannot be done using mortar alone. Place approximately 2.5 cm on the foundation with the obligatory use of metal reinforcing mesh; the upper beds of bricks are equal to the pure mass. There are cases when it is necessary to use bricks of different thicknesses; you will have to purchase them additionally. It is prohibited to use bricks split with a hammer throughout the entire thickness for the plinth; they can only be cut on a special machine with a diamond disc and water cooling.
- After all the corners are made taking into account the measurements, begin laying the rows, using a stretched rope to control the position. Let’s say right away that such work is difficult, and we do not recommend that beginners do it. It’s better to invite a professional for a few days, he will lay out the corners, and it will be easier to work on them.
What types of socles are there?
Types of base
Depending on the position of the front surface in relation to the facade wall, the plinth can be:
- speakers. It is used if it is necessary to increase the load-bearing characteristics of the base; the plane of the element protrudes several centimeters beyond the plane of the wall. Disadvantage - it is necessary to take special measures to drain rainwater coming from the walls;
- sinking. The facade wall hangs over the plinth. It is recommended to use in cases where the base is made of durable building materials that do not require finishing;
- in one plane. The facade wall and plinth are located along the same line. This option is rare, most often on unsatisfactory outbuildings. The finishing of the façade and plinth is done using the same materials and using the same technology, or is not done at all.
What should the height of the plinth be? There are no special requirements, it all depends on the availability and purpose of the basement and the horizontalness of the foundation strip. If the building does not have basements and the strip is smooth, then there is no need to make a special base. As for the advice “at least 50–60–70” and so on centimeters, you should not pay attention to them. The final decision is made only taking into account the architectural features of the building.
How high should the plinth be made?
And one last thing. Do not forget to leave vents in the plinths for natural ventilation of the underground space. If, of course, the house design provides for their presence.
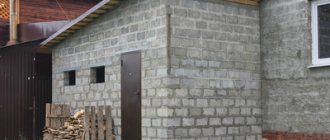
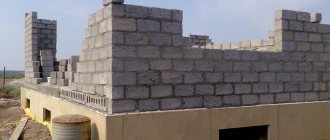
Basement brick performs both aesthetic and protective functions
Video - Laying the plinth
Main nuances
Before starting construction, it is important to clarify the nuances.
- At the basement stage, it is not necessary to install windows and doors that will be directed to the north. Since in winter there is especially a lot of snow blowing onto such a wall, this can create a large load, and doors and windows can fail.
- It is important to determine the ceiling height at zero level. The ideal parameter would be from 2.3 to 3.5 meters, and this already turns out to be a full-fledged floor, for which you need to make a deep pit. But if you arrange it lower, you will end up with a different type of room, and its functionality will be limited.
- Decide on the thickness of the walls in the base. As a rule, they are proportional to all the walls in the structure, and this is acceptable if it is located on stationary ground - in other words, on a strong foundation. When the ground is problematic, which happens very often, the wall thickness should be increased by 0.2 meters.
Depending on the type of material used, there are three main technologies for building a zero level - from wall foundation blocks (FBS), brick and monolithic concrete. We will consider only two technologies.
From FBS
This is the cheapest construction method. The blocks need to be laid as evenly as possible along the entire contour of the house to make further plastering easier. Afterwards it is important to fasten them together with a solution of cement and sand. When laying FBS, you must not forget about the holes for water and electrical wiring. If the base is only partially located under the thickness of the earth, then it is necessary to allocate the maximum area for windows so that more light enters the room during the day. For ventilation in the room, it is necessary to make holes in the blocks 0.15 meters from the ground level. Ventilation holes must be covered with mesh and covered with thick material in winter. As a result, the wall should rise 1 meter above ground level. Afterwards, a ceiling is installed on the FBS.
Made of brick
When building a zero level using brickwork, pay close attention to the brick laying patterns, since the lower rows of the masonry will take on the entire weight of the building. Therefore, the masonry must be reliable and stable.
Cost of materials and services
Work on the construction of the plinth is carried out by certified specialized construction and installation companies that have the right to carry out the relevant work. Prices across the country's regions are approximately equal, with the highest rates observed in Moscow and the north of the Russian Federation.
Approximate price level for laying basement walls by region of the country:
| Name of works | Cost per unit measurements | Moscow | Voronezh | Tomsk |
| Making a concrete/sand-cement base with filling of joints with cement mortar | RUB/m3 | 4600 | 3500 | 4200 |
| Laying blocks: aerated concrete and foam concrete | RUB/m3 | 2100 | 1600 | 1800 |
| Laying FBS with a truck crane and cementing joints | RUB/piece | 400 | 300 | 350 |
| Coating with bitumen in 1-2 layers, m2 | RUB/m2 | 100 | 60 | 100 |
| Two-layer waterproofing, m2 | RUB/m2 | 200 | 150 | 200 |
| Installation of heat-insulating panels no less than 50 mm, m2 | RUB/m2 | 300 | 200 | 250 |
You will find a lot of important and useful information about plinth laying in this section.
Work algorithm
After creating the waterproofing lining, you can begin laying bricks. You need to prepare the raw materials for mixing the solution in advance.
Preparation
Before laying, a mortar with a lower density than brick is prepared in advance
The brand of the mixture is selected so that its value is half that of the brick. For example, when using ceramic solid material M200, buy composition M100. When making the mortar yourself, you must observe the ratio of cement (grade M400 or M500) to sand as 1:4 or 1:5. Since the mixture must be used immediately after preparation, it is necessary to organize the process so that it arrives fresh on the site right before laying. If you decide to buy a ready-made composition, you need to coordinate delivery to the site and the start of work in time.
If there are elevation differences and other uneven places on the base, it must be corrected in advance with cement mortar. After it has completely dried, prepare the waterproofing layer and begin laying.
Construction
The initial row is laid out in a transverse position along the length. Sometimes it is advised to do it without a solution, in the belief that it does not adhere to the roofing felt. In fact, the degree of adhesion is quite satisfactory. In addition, the mixture allows you to make a binder for vertical seams. Longitudinal rows alternate with transverse ones according to the dressing principle.
The corner parts are first laid out without mortar for testing. This allows you to evaluate the severity of right angles and the horizontality of the surface. After placing the control laces, “finishing” installation begins using the mixture. It is necessary to ensure mutual ligation of corner bricks. One vertical seam should not be allowed to be located under another. The accuracy of right angles helps to evaluate the comparison of the values of the diagonals (they must be the same).
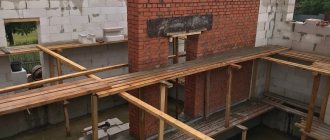
Construction of the blind area
The blind area protects the foundation from moisture
This design is needed to protect the foundation tape from contact with moisture. If the blind area is installed correctly, precipitation and melt water will not penetrate into the gaps of the filled trench. The structure itself is a concrete casting adjacent to the outer wall of the foundation or plinth. The width of the blind area can reach 0.6 m and slightly exceed that of the protruding part of the roof. The formwork for it consists of vertically placed planks. Mesh reinforcement is laid between them and the wall to increase strength and protect against cracking. The soil is covered with geotextiles.
A layer of mixture is applied to the last row of bricks, followed by leveling. After it dries, waterproofing is installed, similar to that between the base and the foundation: 2 layers of roofing material with mastic applied between them. Insulation and vertical moisture protection are installed. The masonry can be lined with artificial or natural stone.
Basement installation
The decision on the type and height of the plinth should be made already at the design stage. The height of the plinth has a fairly wide range and can range from 30 cm to 1.5 m above the surface level, which, in fact, plays a role mainly from an aesthetic point of view. But the care and conscientiousness with which the construction of the basement floor from FBS blocks was carried out is important for the safety and durability of the entire building. It is necessary to first determine the type of soil, establish at what depth the groundwater lies and, based on this data, make a decision on the depth of the pit, the type of foundation and waterproofing. After this you can start working.
Before the start of construction, it is necessary to carry out organizational and liquidation work - removing garbage, preparing the access road, and you should also agree on hiring equipment so as not to look for it at the last moment.
Excavation
The best option is to build semi-basement walls on a strip foundation. Other options are either too expensive (monolithic slab foundation) or unreliable (installation of FBS blocks directly on the ground).
The preparation of a pit for the basement floor is preceded by the removal of the top layer of soil, the so-called humus, with a thickness not exceeding, as a rule, 0.3 m. The depth of the foundation is taken in accordance with the project. It depends on:
- soil type;
- groundwater level;
- depth of the soil freezing zone, which, as a rule, ranges from 0.8 to 1.4 m, this value is determined according to established standards.
After removing the humus, they begin to lay out the building on the site in accordance with the project. It is advisable to use an excavator to dig a pit; this will significantly reduce labor costs and save time. The excavated pit must be processed manually (level the walls, clean the corners).
Digging a pit in the private sector
At the bottom of the pit they dig a trench under the strip foundation. It should be 5-10 cm wider than the blocks and at some distance from the walls of the pit, so that later it is possible to waterproof the walls. If necessary, formwork is installed to strengthen the trench. Then the bottom is covered with fine gravel, reinforcement is laid and knitted, and the “ribbon” is filled with concrete.
After two weeks, horizontal waterproofing of the foundation is done and the installation of walls begins.
Walling
There are no particular difficulties with installing the blocks - by and large, it (except for the size of the “bricks”) differs little from brickwork.
You should prepare a sufficient amount of solution so that the tap does not stand idle. The blocks are laid with a crane on a layer of mortar 1.5 - 2 cm thick, taking care to bandage the seams. Vertical seams are sealed with mortar. Blocks with a length of 2.4 m are mainly used, shorter ones (0.9 m, 1.2 m) are used as additional elements. In addition, the blocks are easy enough to break to get the necessary fragments. To do this, at the site of the supposed break, make an incision (5-10 cm deep) with a grinder, then, throwing a loop of sling over one end, lift the block with a crane until it slides off the sling. Having fallen on an obstacle placed in advance from below, the block will burst at the point of the cut.
It is advisable to use only whole blocks at corners and joints of internal and external walls. And under no circumstances forget about bandaging.
This short video shows the construction process of the basement:
Waterproofing walls
A very important step is to protect the basement from moisture; how insulated the base of the blocks is from water largely determines the service life of the entire building. Different waterproofing is used in different conditions:
- light or medium type insulation is used when laying the foundation of buildings above the groundwater table;
- heavy type insulation, used in case of hydrostatic pressure.
In the construction of individual residential buildings and low-rise buildings, as a rule, protection of foundations and basements is used with light-type insulation. In this case, the vertical planes are covered with bitumen emulsions, dispersive asphalt masses, bitumen or PVC films. The surface for insulation must be carefully primed with bitumen primer or asphalt emulsion. The thickness of the bitumen coating, applied in at least two layers, should not be less than 3 mm. It is recommended to protect these coatings from damage, for example, with a layer of polystyrene foam at least 20 mm thick. Horizontal insulation should also be provided on the strip foundation and under the ceiling above the basement.
Bathroom in the basement
You can also use roofing felt insulation, and you should not lay two layers of roofing felt “dry” - bitumen mastic should be used. In order to properly connect the horizontal insulation to the vertical insulation and allow wastewater to be quickly drained away from the vertical insulation, the foundation must be sloped, for example, the waterproofing runs down from the wall onto a strip foundation with a slope.
In soils with low water permeability (clay sands, cohesive soils, etc.), it is also recommended to drain the soil adjacent to the basement walls. Dehydration is carried out by replacing the native soil with gravel or a similar material that is easily permeable to remove water by drainage.
To insulate the outside of the wall, it is best to use moisture-resistant foam or extruded polystyrene boards. These materials do not require additional protection from moisture and can be in direct contact with the ground. They are glued using solvent-free adhesive directly onto the waterproofing layer (provide additional protection for the waterproofing from mechanical damage).
Construction of a basement requires increased responsibility. If miscalculations were made during the design or construction process, it will be very difficult (if not impossible) to correct this. However, with proper attention, the basement is worth all the expense.
Do you need a brick plinth for aerated concrete?
For house projects where a basement structure is needed, future owners of aerated concrete ask a reasonable question: why can’t a basement be made from aerated concrete blocks? Aerated concrete is cheaper and more practical than brick, and besides, the material is still purchased for the construction of the “box” of the house. Not only is it possible, but it is also necessary! All the advantages of aerated concrete for which it is valued in the construction of load-bearing walls, namely thermal conductivity, vapor permeability , are also added by another advantage - aerated concrete is less hygroscopic than solid ceramic bricks! After all, the main purpose of the basement structural element is to protect against moisture and retain heat inside the house. This effect can only be achieved by using a material with high load-bearing capacity, high vapor permeability and low thermal conductivity. These are the characteristics that an aerated concrete block has.
Ventilation system
A feature of any basement floor is an increased level of humidity, due to which condensation forms, mold appears, and microorganisms harmful to health develop. To minimize such unpleasant consequences, ventilation communications should be installed during the construction stage.
When installing foundation blocks, you need to remember to create exhaust ducts, since subsequently it will be extremely difficult or completely impossible to create natural ventilation.
The basement should have two channels located at different heights:
- 15cm-30cm from the floor;
- 15cm-30cm from the ceiling.
Natural ventilation will cope with the problem of humidity only in the summer. With the arrival of cold weather the situation will worsen. That is why experts recommend installing supply and exhaust systems that combine the functions of forced and natural ventilation.
Calculation of the width and height of the base
Before you start laying the base, you need to decide on its dimensions. The width depends on the thickness of the grillage and wall structures. The following types of plinth are possible:
- Protruding outwards - in this case its thickness exceeds the wall thickness. Because of this, precipitation falls on it, destroying the brick. This design must be protected with a special trump card and casing.
- Located on the same level with the wall plane. After installing the sheathing, it thickens and begins to protrude slightly.
- Sunken - with a slightly smaller thickness than that of the wall. After laying the base, it can be sheathed, ensuring alignment with the plane of the wall.
The width is chosen by comparing the load-bearing qualities of the materials and the dimensions of the foundation. The latter create certain restrictions on the possible thickness of the structure. The height depends on the floor level and the severity of snow cover in winter, characteristic of the area.
Option without a plinth with brick cladding and a ventilation gap
It is worth noting that if concrete floors are planned on the ground for a strip shallow foundation, then backfilling will be required, and the higher the level of the base, the more cubic meters of sand will need to be filled, and this is an additional cost.
Step-by-step instructions for laying a plinth
Step 1. Calculate the required amount depending on the width and height of the masonry. Take the approximate quantity data from the table.
How many bricks are needed for 1 m3 of base.
| Brick sizes | The quantity and parameters of seams are not taken into account | Quantity including seams |
| Standard size | 512 | 394 |
One and a half brick size | 378 | 302 |
Double size | 242 | 200 |
If you are working with bricks of non-standard sizes, you will have to independently calculate the volume of the base and divide it by the volume of one brick. The calculations are not complicated; there is no need to describe them.
Foundation plinth
Step 2. Check the horizontalness of the foundation strip. If the foundation was made by responsible builders, then the deviation from the horizontal at the corners of the structure will not exceed two centimeters; such a spread can be easily eliminated without additional operations during the preparation of the base of the first row of the plinth. You need to check the horizontalness of the foundation using a water or laser level. Are there significant deviations found? You'll have to straighten the tape.
- Secure level slats at the corners of the foundation in a vertical position. The sizes are arbitrary, there is no need to take long ones.
- Beat off a horizontal line on one of them, transfer the value of the horizontal line to the second staff.
- Pull the rope according to the marks, do not allow it to sag. Measure the distance between the rope and the foundation plane along the entire length of the tape. This way you can estimate the approximate amount of work and calculate the amount of materials.
- If the unevenness exceeds 2 centimeters, you will have to prepare a concrete mixture; the spread is smaller - you can use ordinary cement-sand mortar. One condition - during the manufacture of the material, increase the amount of cement, it should be at least three parts to one part of sand.
- Place the finished solution on the surface of the foundation tape and level it along the stretched rope. The work can be done by eye; in the future, the bricks of the base will be installed according to the level and all flaws will be eliminated.
- It will take at least two weeks to harden. If the weather is very hot and dry, then the solution should be moistened generously with water at least three times a day.
Do not rush to start laying the plinth right away; strictly adhere to the recommended technology.
Step 3. Place two layers of roofing felt on a flat strip to waterproof the bricks. This is very important; without waterproofing, the base will quickly collapse.
Roofing felt insulation
Step 4. You need to start laying by laying two corners. The technology depends on how many bricks are in a row in width. You can lay corners from one, one and a half, two, two and a half and three bricks. If you do not have experience in producing such work, then practice. First lay the bricks without mortar, then work with mortar. The movements should become automatic; during training, constantly use control tools. Be sure to bandage, alternate spoon and butt rows. Now that you have experience, place the corners directly on the foundation strip. The height of the corners is 5–7 bricks. To begin with, the height is enough, so it is easier to control the correctness of the masonry and timely correct possible deviations in the position of the base.
Chain ligation system for laying the plinth
Step 5. At the height of the first row of each corner, drive in nails and pull the rope. Make sure that the rope lies exactly on the edges of the bricks. At this point, the preparatory work on laying the corners of the plinth is completed; start working on the straight sections.
Basement brickwork
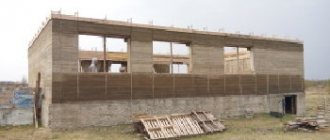
Brick plinth laying
Laying the plinth
Leveled brick of the basement row
Further work on the base is no different from work on the wall; the rows are constantly being bandaged. If you use clinker bricks for external surfaces, use them only on the visible side.
Waterproofing
An indispensable step after laying the basement walls is waterproofing. This is done in 2 stages:
- vertical;
- horizontal.
Today the market offers a large number of materials for waterproofing:
- coating;
- impregnating;
- coloring, etc.
However, the best solution is roll waterproofing; it is highly reliable and durable. It is laid on both horizontal and vertical surfaces. This type of waterproofing is glued to a special type of mastic or fused using a gas torch. In addition, there are materials on a self-adhesive basis.
Important to know: do-it-yourself basement waterproofing technologies.
Is it possible to do without a base?
The height of the base of 50 cm was fully justified in Soviet times, when the walls of houses were often left without external decoration, and many waterproofing compounds simply did not exist at that time.
Now, the construction market offers various materials that can reliably protect aerated concrete from the influence of water from the outside.
Such materials include:
- Cladding with panels (screens), for example, siding.
- Hydrophobic plasters.
- Water repellents.
- Non-wet insulation (foam, EPPS, PPU).
Using high-quality methods of protecting aerated concrete from getting wet, you can neglect the recommended height of the plinth and begin laying aerated concrete from the very level of the blind area.
Option for an insulated base flush with the wall
According to their design, all plinths are divided into 3 types:
- Speaker. The most common design, as a rule, characterizes the base-wall structural units and the corresponding “pies” of the systems that are not fully developed by the design. The plinth protrudes relative to the plane of the facade - therefore it needs to be additionally waterproofed in the upper part and covered with ceramic or metal drips, which worsens the appearance of the facade and increases the material consumption of the structure, and therefore the estimated cost. This is how non-professionals build.
- Level with the wall. This “flush” option is more complicated in terms of designing the unit design and requires professional concreting of the foundation and monolithic grillage, because any deviations of the foundation plane make this design of the unit impossible! Therefore, only professionals build this way. In addition, this requires an accurate thermal engineering calculation of the “pie” of the basement part of the foundation and the load-bearing wall and the correct choice of insulation so that there are no cold bridges. This version does not require additional installation of droppers. The wall facade looks more aesthetically pleasing!
- Sunken. This is the highest level of design for a structural plinth-wall assembly. Plus, it requires precise (to mm) execution of all concrete work. It is necessary to select insulation in such a way that it is thinner (usually PIR boards), but at the same time corresponds to the thermal engineering calculations. With this design, the plane of the aerated concrete façade can overhang by about 5 cm relative to the plane of the base (made of a monolith), without taking into account the insulation on the aerated concrete. Only selected builders can make such a plinth (at Full House, this is the only way they build).