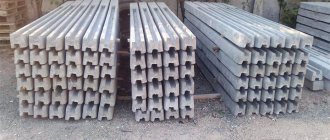
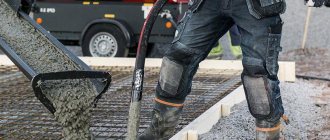
Homemade garden sculptures are made from plaster, polymer concrete, fiberglass (polystone) or concrete. They can be either monolithic or hollow. They are sold at almost every turn, but if you want, it’s not difficult to make a cat or Baba Yaga with your own hands. The manufacturing process involves casting a mixture of concrete with various additives into special molds with continuous compaction on a vibrating table. If this is not the case, the mold must be shaken to compact the mixture. In addition to the actual garden sculptures, the craftsmen themselves cast balusters, fence elements, wall panels, and tiles. The main disadvantage of this hobby is the serious investment at the stage of making the mold.
- Mold for garden sculptures
- Solution for making garden sculpture
- Entry level garden sculpture
- Advanced Garden Sculpture
- Bringing it to mind
- Progress
Mold for garden sculptures
The simplest figures are made by pouring concrete mixture into an elastic mold - silicone, latex, polyurethane, fiberglass on a metal frame. In forms with a complex texture, there is an insert made of non-shrink rubber inside. Forms are sold ready-made or made to order according to sketches. As a rule, two forms are made for one sculpture: for the front and back, which are subsequently connected. To ensure the strength of the connection, there are special protrusions on the surface that act as locks.
The final service life is determined by attitude and care. After each pour, the mold must be unmolded, washed, cleaned with a spatula, wiped with a rag, do not pour new solution over the remnants of the previous pour, so as not to damage small parts. Store in a dry, frost-free place. If you clean the mold after each pour, do not hit or drop it, it will last more than 10 years.
Issue price . A mold with a non-shrinking rubber insert for fine texture costs about 40 thousand and can withstand 10 thousand castings. Cheap molds made of silicone and ABS plastic cost several times less, but they also withstand less pouring.
Pay attention to the quality and price of concrete sculpture molds
Many experts call the production of sculptures a separate area in the casting of concrete products.
A well-made element can indeed be called the same as an artificial stone made of concrete, a kind of copying of the real work of a sculptor. This type of casting has existed for a long time. Few people would think that the numerous sculptures that stand, for example, at the entrances to museums, are the works of real sculptors. But still, this direction of casting concrete products deserves special attention, both from large manufacturers and those who would like to decorate their local area with this method. Assistance in this is provided by the Molds Factory, which offers a large number of forms for sculptures to buy. And, the most important thing for the buyer is that the products he will purchase will be of good quality and at a low price. This is indeed possible. Production continues to prove this.
The price of a mold for sculptures depends on many factors. This is influenced by production and economic circumstances in relation to a specific product manufacturer. It is necessary to explain to the buyer why the Mold Factory is able to restrain the rise in product prices within acceptable limits for the mass buyer:
- The first and, perhaps, most important thing is that the company is not an intermediary seller, but a manufacturer of forms for pouring concrete and independently, without the help of trade organizations, sells the manufactured product.
- The production has existed for more than ten years and is in the stage of optimal development, which does not require additional financial investments, which stabilizes prices for the product.
- Agreements with suppliers of consumables are at the level where the manufacturer of a given product sells it to the plant at special prices, akin to wholesale prices.
- The company approaches customers on an individual basis, which is characterized by the fact that the customer may express a desire to make molds for figurines according to his personal sketch design, then prices are negotiated in a special manner.
- Products are sold using a developed system of our own Internet resources, which also saves money and does not increase the cost of the final product.
- The absence of bureaucratic barriers when registering goods saves man-hours, and therefore the company’s funds.
- The buyer, using the services of the site, can independently calculate the cost of transporting goods across the territory of our state and neighboring countries.
The system shown above allows you to set the price of molds for figurines at a level acceptable to the mass consumer. In this situation, in order to maintain the optimal price-quality ratio for the buyer, quality becomes of great importance. And this characteristic of the manufactured products is treated with special attention at the plant.
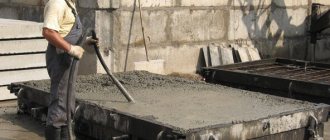
Solution for making garden sculpture
The main raw materials for preparing the mixture are cement of a grade of at least M400, water, sand with screenings of hard rocks of a 5 mm fraction, a plasticizer, and, if desired, resin and colored pigments.
As a rule, the proportion is as follows: 3 parts sand, 3 parts crushed stone, 2 parts cement.
The higher the grade of cement used for the mortar, the stronger the products will be.
The sand must be sieved to remove small debris from it. Water is poured into the mixture of dry ingredients little by little, stirring gently. The finished cement-sand mixture should be thick enough to hold its shape.
After filling the mold for the hollow figure, the internal space is filled with rags (preferably greased with something greasy - for easy removal). The displaced solution is removed. The rag is removed when the solution hardens slightly and holds its shape.
The use of a hyperplasticizer improves the quality of the concrete mixture, prevents the shapes from cracking, ensures rapid hardening and frost resistance, and minimizes the formation of bubbles during compaction. The cast mixture easily fills the mold and forms an even, smooth surface that does not require finishing.
Attention! Plasticizers reduce the setting time of cement.
Concrete carving
Choose the tools for yourself. It is necessary to find cutting tools - knives, scrapers, loop stacks, etc., which are used when working with clay sculpture, they are best suited for cutting concrete. You can find these tools at any art store.
You can look for medical instruments that are sold in specialized stores. Most likely, you will pick up something from it.
The main thing is that you can make any of these tools yourself, or come up with any convenient for you
Prepare a sketch that will help you follow the idea. Draw outlines onto the surface using a pencil or chalk.
Prepare the concrete mixture. You can use the instructions on the bag. Mix the mixture in a trough or wheelbarrow. Typically, 36 kg of mixture requires about 2.8 liters of water. Add about two-thirds of the water to the concrete mixture.
Set aside two 0.5 liter cups of dry mixture. You will most likely need it if the consistency becomes too runny.
Continue adding water until you reach a thick, oatmeal-like consistency. The finished concrete mixture should hold its shape when you squeeze it into a fist.
Make sure you have the correct water to dry ratio
The amount of time you need to wait will depend on the thickness of the concrete surface being applied. Concrete is ready for cutting when it is dense enough, but still pliable and holds its shape well.
Before the concrete is completely dry, start carving your design using your prepared sculpting tools. Work must begin at the top and move smoothly down. You need to work quickly, because... concrete dries quickly. Try to finish a single section within an hour of applying the solution.
If you are working with bare hands, apply Vaseline to your hands to help protect your skin.
Avoid damaging fresh surfaces. It will harden in 24 hours, and the initial strength will last 7 days.
Coloring. After 7 days you can start painting the product. Use acrylic paints, they are brighter.
Entry level garden sculpture
The simplest and most popular garden figure is a mushroom. For the mold, a plastic bottle will go under the leg; before pouring, place a reinforcement rod in the middle so that parts of the rod stick out from above and below. Cast a cap into any deep mold and insert several long nails.
Work in a shady area to prevent the concrete from cracking in the sun. The cement must dry so that it can be cut with a knife and make a recess for the leg (approximately 7–8 cm). When the solution has hardened, dig the leg of the sculpture into the soil and place the cap on the top of the rod. After 4–5 days, when the mushroom is completely dry, it can be painted.
Particular attention to the high quality of molds for concrete figurines
We can immediately say that the forms are made of ABS plastic, which has specific qualities. They come with a list of remarkable features necessary in concrete production. This allows the molds to withstand heavy loads, remaining in working condition for a long time - up to one hundred production cycles.
At the same time, each new model undergoes a series of tests in concrete production, using the capabilities of the Mold Factory. The forms are adapted to the specifics of heavy use using vibration casting technology. Marble from concrete. In principle, it is not complicated and is well suited for mastering by an unprepared person who wants to make a sculpture or figurine out of concrete on their own:
- Traditional mineral fillers - sand and granite screenings - are cleaned of foreign impurities; the more thoroughly, the better the quality of the final product.
- When creating a concrete mixture, in addition to traditional materials, a plasticizer is used to quickly gain concrete strength and, if necessary, a coloring pigment.
- When pouring solution into molds for figurines, it is better to use any available vibrating platform to compact it.
- When using a plasticizer when making a solution, it is recommended to deform the concrete product after 18 hours.
Schematically, this is exactly what the technology of vibration casting Marble from concrete looks like and its development does not take much time. And, if you want to start making sculptures yourself, then you need to buy molds for figurines at the Mold Factory. You can do this directly on this site, which will not take you much time. Select the form you need from the catalog and place your order using the shopping cart button.
The managers of the enterprise will receive your signal and get in touch to clarify the necessary nuances regarding the purchase and competently talk about the product itself and how to deliver it to the right place.
Advanced Garden Sculpture
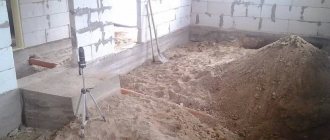
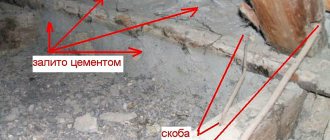
Creating more complex figures (such as magical creatures with arms and legs) requires sculpting ability and spatial imagination. For strength, first install a frame made of thick wire or a welded frame made of reinforcement rods. To prepare a hollow creature, the frame is wrapped in construction mesh. For large sculptures, a log wrapped in wire mesh can serve as a base. The solution is made from the same components as for casting, but in a ratio of 1:3, and diluted with water to the consistency of plasticine.
Beginners are advised to add PVA to the solution - this will make it easier to correct errors. To create a monolith, concrete is laid with a spatula in layers, with incomplete drying between layers. First, the general contours are sculpted; after creating the required volume, small details (nose, lips, mouth) are worked out. The remaining cracks are filled with polyurethane foam.
You can paint, glaze, and varnish after about 10–12 days, when the concrete has finally set and dried.
How to make molds for garden figures with your own hands
To create a three-dimensional form, you need a model (matrix) of the future figurine. This could be a finished garden sculpture or another element of landscape design. In addition to the finished model, you will also need:
- A sealed box made of any material, for example wood. It must accommodate the product with a reserve.
- Sculptural plasticine. The unused part of the model will be placed in it.
- Soap solution, wax, paraffin, cream for lubricating the model.
Silicone forms
Step-by-step casting technique:
- Fill the box halfway with sculpture clay. Level the surface.
- Place half of the model in plasticine.
- Lubricate the top of the model with soapy water.
- Pour the silicone in a thin stream.
- Wait for the silicone to dry completely, carefully separate it from the model and repeat the process with the other half of the figure.
Plaster products
In order to make garden crafts with your own hands from scrap materials at home, gypsum is often used, which is inferior to silicone in strength. Instructions:
- Place the finished model, flat side, on a piece of sculpting clay.
- Lay out formwork around the model with plasticine or pieces of wood - high sides. Their height should be twice the size of the future product. You will end up with a bathtub or pot with a garden shape template at the bottom.
- Dilute plaster with water in a 1:1 ratio.
- Carefully pour the plaster into the tray. Using a brush, “disperse” the mixture over the surface of the model, as if painting. Tap the bottom with your fingers to expel any air bubbles, and then go over with a brush.
- After hardening, first separate the formwork, and then the figure itself.
- Repeat the same steps with the second half of the matrix.
If the garden figure template has a complex configuration, then first one half of it needs to be “drowned” in sculptural plasticine, which covers the bottom of the bath. The procedure for casting the mold is similar to making silicone impressions.
Made from polyurethane
This material is strong and durable, has an elastic, pliable structure. Do-it-yourself garden sculptures can be made in several copies using polyurethane casts. The manufacturing process using artificial stones as an example:
- Place designer stones on an MDF sheet. There should be 1-2 cm of space between the products.
- Make formwork from the same MDF. Its height should exceed the size of the stones by 3 cm.
- Fill the cracks with sealant.
- Lubricate the inside of the stones and formwork with wax.
- Fill everything with liquid polyurethane and wait until it dries.
- Carefully separate the stones from the finished cast.