Pouring concrete at an angle is a fairly common task, especially when it comes to individual construction and landscaping of the local area. Most often, platforms, driveways to garages, blind areas and floors in different rooms are poured on a slope.
The process differs significantly from conventional pouring of cement mortar and has a number of features. In this case, the concrete screed compensates for the difference between two mating surfaces, which are at different levels. And to ensure sufficient strength and reliability of the inclined mass, eliminating the risk of cracking and deformation, it is necessary to strictly adhere to the established rules.
Where inclined concreting is required
Concreting inclined surfaces is not done as rarely as it might seem. If a flat screed is usually installed in premises for different purposes and operating conditions, then filling an inclined plane most often becomes necessary on the street. However, the need to lay concrete on a slope may be relevant: when arranging interior work inside utility and residential premises, when carrying out outdoor events in natural conditions.
Where is an inclined screed needed:
- Floors in baths, saunas, shower rooms
- Paths, sidewalks, areas on the territory
- Creation of blind areas running along the perimeter of the building
- Arrangement of entrances to the territory of industrial structures and private facilities
- Drain trays for water drainage
- Arrivals for freight transport
- Access to underground garages and parking lots
- Wheelchair ramps
The main task performed by arranging an inclined screed is the formation of a reliable, durable monolithic coating with the required strength characteristics.
Non-leakage floors
Layout of a leak-proof floor with a slope
Laying wooden floors with a slope is required only if a leak-proof base is installed. How to lay floorboards at a certain angle to the drain?
- The rough coating is cleaned of dirt and a drainage system is installed;
- Then the concrete screed is supposed to be poured, which is done using the technology described below;
- After the screed hardens, the tongue and groove board is laid;
- The finished floorboards are positioned at a slight angle to the drainage system due to the previously formed screed slope.
Unlike pure concrete, wooden floors can be installed in a sink, steam room or shower, as they are not prone to dust formation.
Required materials and tools
Before pouring concrete on an inclined surface, you need to take care of all the tools, fixtures, and building materials that will be needed for the work. The process of pouring concrete at an angle is not easy and requires the most precise adherence to the proportions, conditions, norms and standards that make up the pouring technology.
Tools for pouring concrete at an angle:
- Construction level and cord for marking the surface and controlling the tilt height
- Concrete mixer for preparing mortar
- Several beacons installed as a guide during the concreting process
- Vibrating bar, mop or surface leveling rule
- Steel reinforcement to strengthen the screed
- Buckets and entrenching tools
Materials for pouring concrete at an angle: high-quality cement mortar (made independently from sand, cement, crushed stone and water or mixed from a purchased dry mixture).
Pouring
For pouring thin layers of 1-2 centimeters (we start from the thinnest ones), a regular cement-sand mortar will not work. We need special mixtures that allow such thin layers; there are currently a great variety of such mixtures. Both tile adhesive and special floor levelers, allowing a layer of 0-5 mm, are suitable.
As a rule, you can use a section of the PN profile, placed with sharp edges on the beacons. The convenience lies in the fact that at any time the rule can be shortened with minimal effort, but this will definitely have to be done.
An improvised rule from the profile is taken with a small margin in length, so only the first plane or half of the entire screed is leveled (in the first method). In order not to damage the already formed adjacent plane, the rule should be cut almost “end-to-end” in width between the beacons, with a margin of only 1-2 centimeters. When pouring with the second method, the rule is shortened many times as you move from the edge to the drain.
On this note we end our publication. We received a ready-made screed with slopes for drainage, and in the next publication we will tell you how to tile our creation.
Source
Stages of work
Before pouring concrete at an angle, you need to study the main stages of the work and strictly follow the order of their implementation. Ignoring even minor operations can ultimately lead to poor quality of the sloped covering and its inability to perform its functions.
Sequence of actions when pouring concrete at an angle:
1) Preparation of the base: thorough cleaning, marking the area
2) Installation of beacons, fixing them at the required distance from each other
3) Performing reinforcement to strengthen concrete
4) Preparation of a solution of the required brand, the consistency and strength of which are adequate to the degree of load of the future site
5) Pouring the concrete mixture at an angle, creating conditions for its effective setting and drying with strength gain
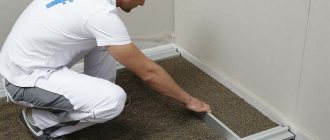
Fixing beacons
This stage and the choice of a specific beacon option will depend on what methods of filling the screed are chosen. If the drain is located in the central part of the bathroom or shower, then the sequence of work is as follows:
- Initially, the beacon is installed in the direction from the existing drain hole to the far corner from the entrance to the room.
- Regarding this lighthouse, marks are made on the walls using a level for subsequent elements. It will be very difficult to apply a long rule in your work, since the area of the room is small. In this case, a wide and narrow spatula will be optimal.
Lighthouse installation diagram: 1 - frieze lighthouse row;
2 — intermediate auxiliary beacons; 3 — reference beacon on the wall; 4 — lighthouse rows; 5 - mooring cord for laying the lighthouse row. It is more problematic to install beacons when the drain hole is located in the dressing room or bathtub in the corner. Here attention is drawn to the fact that there will be different lengths of beacons. Of course, no difficulties should arise. The main thing is to approach the installation with all seriousness.
Preparatory stage
The main task of preparing the base when pouring concrete at an angle is to remove everything that will interfere and mark the site. Remove stones, vegetation, debris and, if possible, dust. Then the surface is compacted, markings are made, and covered with sand up to 5 centimeters thick. It is advisable to compact crushed stone into the sand cushion in a layer of about 5 centimeters.
Now you need to install the beacons: you should definitely use a level so that the screed is made at the correct angle. The beacons act as landmarks and are located at different edges of the site, then a nylon cord is pulled between the beacons. It will form the geometry of the inclined concrete, showing the correct location of the screed and the correct angle of inclination.
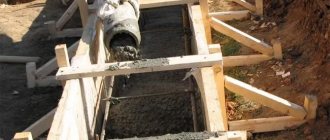
To make formwork, take plywood or boards, cutting them according to surface measurements. The side walls should be in the shape of a triangle. They are installed on the sides of the platform, supported by supports made of boards and wooden stakes. If the difference is small, you can start filling.
When the difference in slope is significant, the upper part of the formwork structure will have to be additionally sheathed with plywood, which prevents the solution from leaking out. In this case, it will not be possible to obtain an ideal, even coating, but it can be corrected with cement mortar after dismantling the formwork. Such options are suitable for arranging a ramp for an entrance, entering a garage, etc.
Complex structures are made for pouring inclined floors. In such cases, as a rule, collapsible metal formworks are used, which are sold ready-made.
Criterias of choice
In addition to choosing the design of the shutter, it is advisable to select the size of the mesh so that it is convenient to lay the tiles on the floor: it is desirable that the size of the drain be a multiple of the size of the tile (including mosaics). Pay attention to the material of the case. For a shower stall in an apartment or house, plastic is quite suitable. These are the most affordable options. Floor drains made of polypropylene are more expensive, and stainless steel is even more expensive.
It is also worth choosing the height of the ladder. The minimum value is about 6-7 cm, the maximum is up to 20 cm. Among the technical characteristics, this equipment only has a maximum throughput - how many liters it can dispense per minute. Select depending on the maximum pressure that your shower can produce: the throughput of the drain ladder should not be less than the maximum amount of water dispensed. Both parameters are measured in liters per minute (L/min), so there shouldn't be any problems.
wall mounted tv cabinets
Gain Setting
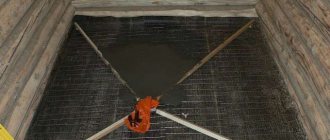
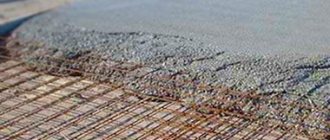
Reinforcement allows you to increase the strength of the concrete screed at an angle, provide better adhesion to the base, and will not allow the layer to deform and slide off this surface. Strengthen inclined surfaces using steel reinforcement with a cross-section of 4-5 millimeters. First you need to cut the blanks to the size of the future concrete base.
Then the reinforcement frame is assembled from the blanks using knitting wire, connecting the rods located perpendicularly. The result is a grid with a cell of 50-80 centimeters. You can also use a ready-made mesh for reinforcement.
The structure is laid between the beacons, on prepared non-metallic pads, which will ensure the required distance between the concrete and the reinforcement. The concrete will be evenly distributed under and above the reinforcement, which will protect the frame from corrosion and the effects of external negative factors.
Reinforcement
Additional strengthening of cement through reinforcement is an important process, since the use of steel rods prevents cracking and destruction of concrete over time. The simplest and most practical option for increasing the strength of a cement screed is to lay reinforcement in concrete between the beacons. Instead of steel rods, you can use a metal mesh. The reinforcement stage is mandatory for dosed concreting.
Return to contents
Preparation of concrete solution
To pour concrete at an angle with your own hands, you need to use high-quality materials. The grade of concrete is determined by the operating conditions of the surface and the magnitude of the load.
Selecting a concrete grade according to the intensity of use:
- Cement grade M400 – for indoor screed
- Brand M500 – for paths, blind areas, recreation areas
- M600 mixture – for driveways in areas where there is constant traffic movement and garages
To fill inclined surfaces, cement, fine crushed stone, sifted river sand and water are used. If M400 cement was chosen, then the following proportions are followed: part of the binder to four parts of a mixture of gravel and sand. There is no point in saving on cement, because it provides strength and other characteristics - this is important so that the base does not crack and can withstand all loads in the future.
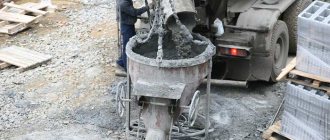
First, mix all the dry ingredients, then pour in water portionwise until a thick paste is obtained. It is best to mix concrete using a concrete mixer - this way you can make a large volume of the mixture at once. Visually, there should be no noticeable inhomogeneous inclusions or sand in the finished concrete.
Example
Let's calculate what the sewer slope should be for shower pipes in a bathroom measuring 1.7 by 1.7 meters.
- Given: The base floor of the bathroom is considered zero;
- The riser level d=50 is raised above the base by 30 mm (we count the bottom of the pipe);
- The distance from the riser to the ladder is 1500 mm;
- This means that at the place where the drain is installed, the sewer pipe should be raised by: 1500 × 0.03 + 30 = 75 mm.
- If this is critically high, you can reduce it by 1500×0.02+30=60 mm.
- This means that the screed in the shower tray will be around 6-8 cm, which is quite acceptable.
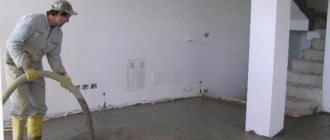
Formation of concrete surface
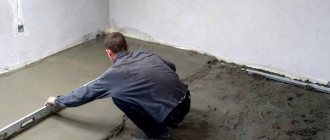
When arranging a concrete screed at an angle, it is best to pour concrete in two layers: first, use a mixture with a large content of crushed stone without careful leveling, in the second go, cover it with concrete after a maximum of 24 hours, pour the mixture almost without crushed stone, in a layer 2-4 centimeters thick - the concrete should be liquid and easily distributed over the surface. This will reduce the consumption of materials and significantly reduce the cost of all work.
The procedure for pouring concrete at an angle is simple: when the solution is ready, it is unloaded between the beacons, evenly distributed over the base so that the level of concrete does not exceed the height of the beacons. Excess mortar is removed with special vibratory slats: they are placed on the formwork and driven along the concrete, as if on rails, performing reciprocating movements and gradually compacting the mixture. The procedure is repeated at least 2-3 times.
Poorly mixed concrete is immediately visible - it does not want to shrink properly. Therefore, the next batch must be prepared with a large amount of water. A poorly mixed mixture will also be immediately visible. Compacting the concrete must be done to remove air bubbles.
After pouring at an angle, the concrete is left to dry, periodically spraying water to moisturize and prevent the appearance of microcracks.
Main advantages
Installation of a flat roof, installation of a roof
Self-leveling flooring for a bathroom has its positive features, which is why it is gaining immense popularity. These include:
Low layer height. At the same time, all characteristics of self-leveling floor technology are maintained at the highest level. This type of floor can withstand a load of 10 MPa. At a minimum, a filled bathtub will look easy on the frozen solution. It can even be arranged over old tiles if it is difficult to remove. The main thing is that the surface is carefully prepared for installation. It is very important to coat the base with a primer before pouring the self-leveling floor to increase the level of adhesion. It is not uncommon to have a “warm floor” in the bathroom. It is sometimes difficult to hide it. But a self-leveling floor for a bathroom is perfect for these purposes. According to the technology of laying tiles, it is allowed to cover the heated floor immediately with tile adhesive. But subsequently, the spatula used in the work can damage the entire structure. Even minor damage to the cable will lead to failure of the entire system.
But these are only some of the positive qualities characteristic of a room such as a bathroom. In general, self-leveling flooring has a large number of advantages, due to which it is in demand on the market among construction companies and customers.
Features of arranging a screed slope in a shower room
In shower rooms and baths, screeds at an angle are performed with certain nuances. Here it is important to take care of laying a heat and waterproofing layer under the concrete. For the thermal insulation layer, use penoplex with a thickness of 30-50 millimeters with a density of at least 35 kg/cm2. Foam plastic with a thickness of 50-100 millimeters and expanded clay 150 millimeters are also suitable. It is better not to use mineral wool.
To protect concrete from moisture, roofing felt or waterproofing film (thickness more than 200 microns) is usually used. And plasticizers are added to the concrete mixture to make the inclined plane more durable and resistant to moisture.
Before pouring concrete at an angle in such rooms, a reinforcing frame is also made - a good choice would be a polymer or metal mesh with a cell of 50-80 centimeters, made of a rod with a diameter of 3-4 millimeters. Clamps or knitting wire are selected for it. It is also worth taking care of the drainage elements in the inclined surface, which are planned to be installed in the shower.
The nuances of laying ceramic tiles at an angle
Before laying tiles in the shower on a sloped floor or in any other bath room, professionals always first create a waterproofing layer on an already prepared base. Thanks to additional protection, water will not wash away, for example, a concrete structure.
Usually craftsmen lay tiles away from the walls. If there is a horizontal frieze, its lining is first performed. Only then do they lay the ceramics on inclined surfaces along which water flows into the drain.
The “envelope” type layout begins with the sides representing the bases of triangular or trapezoidal surfaces. First, be sure to fix the tiles that do not need to be cut.
Laying the material begins exclusively from the center of the base. If an even number of ceramic pieces are placed in one line, the triangular inclined surface is divided into two equal parts. Each of them is lined separately.
Laying tiles on a slope on the floor with a drain Source mega-santehnika.ru
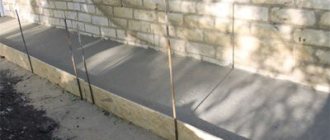
Features of arranging an inclined entrance to the garage
The inclined approach to the garage is arranged in the same way as creating a ramp for the entrance or blind area. In this case, we are talking about pouring a gently sloping platform for the passage of cars and other vehicles from one high-altitude level to another. The flatter the ramp, the easier it is to make; the entrance can be direct or with a descent, a turn, or an ascent (curbs are installed).
The width of the ramp is usually made equal to the width of the garage door + 30 centimeters; to simplify entry, the inclined platform is widened at the far end. The optimal length is 5 meters, but the owner decides everything here. A drainage system is installed in the ramp, a surface slope is installed, and a groove with a grate is installed in front of the threshold (to drain water). A gentle ramp (counter ramp) is often installed on the side of the garage floor.
When pouring an inclined driveway to a garage, a blind area in the form of a concrete or asphalt strip at an angle from the building is required to drain water. Usually they create an inclined floor with an angle of 15-20 degrees, the width of the blind area ranges from a meter to the optimal value.
The entrance slope should be no more than 10% - that is, if there is a height difference of 10 centimeters, then the lower part of the entrance should be 1 meter long. For shallow foundations on heaving soils, part of the soil under construction is removed and replaced with materials that allow moisture to pass through, with additional installation of expanded polystyrene. Optimal standards: entry height of 20 centimeters, slope at an angle of 25 degrees.
Stages for concreting an inclined ramp:
- Excavation of soil by 40 centimeters according to the size of the inclined screed.
- Laying the first layer of sand 15 centimeters thick, compacting, spilling with water, laying a second layer of sand of the same thickness, compacting, spilling with water.
- Laying fine crushed stone to the top of the pit (about 10 centimeters).
- Separating the foundation and screed with a strip of linochrome (if the screed will not be tied to the base of the garage). You need to leave a gap of about 3 centimeters between the gate frame and the screed.
- Production of three-sided formwork from plywood or boards with a thickness of at least 25 millimeters. Installation of the structure.
- Laying insulation on a crushed stone cushion - usually extruded polystyrene foam 5 centimeters thick.
- Installation of the reinforcement cage, pouring the bulk of concrete 15 centimeters thick with a vibration compactor. Concrete is prepared from materials in the following proportions: part cement, 3 parts sand, 5 parts crushed stone.
- Installation of a mesh with a cell of 5 by 5 centimeters, pouring with concrete without crushed stone (proportion: part cement, 4 parts sand). Leveling with a board, ironing the concrete (sprinkling dry cement onto a wet screed).
- Concrete will gain strength within 15 days; for the first 5-7 days it is advisable to water it with water, again covering it with film. Then you need to install a drainage system near the inclined screed.
Types of drains
The drains for draining water are cast according to the type of installation. There are three types:
The wall drain for draining water has a different design
Most often, to make a floor with a drain, point drains are used, much less often - linear ones. The installation of wall drains is generally quite a rare occurrence, since installation is possible only at the stage of major repairs, not only of the floor, but also of the walls. In addition, such devices are much more expensive.
Valve types
In addition to different design solutions, the water drain to the floor (point or linear) has different types of valves. A seal is a device that prevents sewer odors from entering a room.
The simplest seal is a water seal. In these devices, there is a bend in the outlet pipe in which water remains. It blocks odors. The disadvantage of such a system is the possibility of drying out. This happens if the water has not been drained for a long time. Drying out can also be caused by incorrect installation (the slope is chosen incorrectly) or the presence of floor heating - a warm floor in the bathroom “dries out” the water in the water seal.
Dry gates for ladders are more reliable in this regard. There are several types:
Dry drains are made mainly of plastic, gratings are made of stainless steel or also plastic. There are models with a built-in check valve. It prevents water from rising when the drainage pit overflows. When installing a floor with a drain in an unheated bathhouse, look for models that can be used in cold weather (there are some).
Pour concrete floors in a bathhouse with a slope for drainage - step-by-step instructions
To perform a high-quality inclined surface, you first need to remove the fertile layer of soil, clean everything, and compact it. The hole in the drain pipe is plugged with a plug, and a fence made of boards or roofing felt is mounted around it. The area needs to be covered with sand in a layer of 10-12 centimeters and compacted. Pour gravel or crushed stone on top so that it is compacted into the sand (layer thickness is about 15 centimeters).
Next, you need to dismantle the box that encloses the sewer drain pipe and fill the space around it with concrete and foam chips. Cover the roofing felt (or waterproofing film at least 200 microns thick) with an overlap of 12-15 centimeters, coat the joints with warm bitumen mastic, add a layer of roofing felt, glue it along the perimeter of the room to the wall at a height of about 20 centimeters. For the drain pipe, leave a hole in the waterproofing and immediately install the lower part of the drain ladder.
A metal mesh is mounted on the roofing felt with knitting wire for reinforcement with cells of 5-8 centimeters. Beacons are placed on the grid (on a gypsum slide) with a level step of no more than 2 cm.
To fill an inclined surface, concrete is prepared with special additives - the construction industry today offers high-quality waterproofing additives (Crystal, Penetron, etc.) that will improve the structure of the solution and protect it from moisture.
Concrete is poured at an angle, the solution is leveled with a rule and a trowel, and distributed among the beacons. Concrete must be compacted to remove air pockets. Then the inclined screed is given the opportunity to gain primary strength (about 7-10 days) and insulation is laid, and another layer of reinforcing mesh is placed on it. Then the beacons are installed again and the leveling screed is poured with a layer of concrete of 50-60 millimeters and compacted.
Waterproofing impregnation is applied to the dried concrete, and decorative finishing is laid (usually ceramic tiles).
What to consider?
Sloped floors in the bathhouse allow you to quickly dry the surface of the floor materials. To properly organize your work, you need to adhere to the following recommendations:
- First of all, you need to calculate the height difference between the drain and the contour coverage area;
- To ensure the correct degree of inclination of the ramp, cords are pulled from the corners of the room to the ladder;
- The tiles are laid according to the following principle: its perpendicular side must correspond to the direction specified by the cord, and the horizontal side must be parallel to the ladder.
Briefly about the main thing
Floor screed is required in almost every room, as it is a leveling layer and the basis for installing a finishing coating made of different types of materials. The screed can be wet, semi-dry or dry, and the installation of each of these types requires a set of special tools, as well as compliance with a step-by-step algorithm. The most practical is considered to be a semi-dry screed, since it is installed using special equipment and requires minimal labor. At the same time, such a subfloor has increased porosity and is not recommended for outdoor use or for rooms with high humidity. In living rooms, modern dry screed made from bulk materials is also popular, which provides increased heat and sound insulation of the floor structure.