Beton-House.com
Website about concrete: construction, characteristics, design. We combine the experience of professionals and private craftsmen in one place
In order for the fence to be perfectly level, you need to firmly place the posts
Today we will figure out how to correctly and reliably install load-bearing elements for fences of any type. The review examines different options: driving in elements, dry concreting of fence posts and the traditional method of pouring mortar.
Each solution has its pros and cons, but still the last option is used most often, as it is reliable if the work is done correctly.
- Hammering the pillars
- Materials and tools
Installation options and their features
The question of whether to concrete or hammer fence posts causes a lot of controversy both among ordinary developers and among specialists. There is no definite answer here, since each option has its own pros and cons; let’s look at them in more detail.
Installation methods
Three technologies have proven themselves best; they have the following features:
- Hammering supports . An option that does not require digging holes, preparing a solution and pouring it. The work is performed by driving a pole into the ground mechanically: using special equipment or manually. The second option is quite labor-intensive, especially if you have dense soil - hammering in an element is much more difficult than it seems at first glance;
When deciding whether fence posts should be concreted, remember that driving in is an unsafe and labor-intensive process
- Dry concreting . An option that involves digging a hole at least 120 cm deep, waterproofing it and then filling it with a cement-gravel mixture. Essentially, this is the installation of fence posts without concreting, although the technology is almost the same as the standard one, the only difference is in the mixture used. The technology is not suitable for all regions, and below we will tell you why;
You can strengthen the supports with dry mixture
- Traditional concreting of fence posts is a technology well known to most people. It involves digging a hole and pouring a concrete solution, which, after hardening, firmly holds the element. This option is suitable for most regions, but to get a good result, you need to do the work efficiently and accurately.
If you need a durable fence, concreting the posts will be the best solution.
Pros and cons of installing a concrete fence (table)
| pros | Minuses |
| Durable | Requires constant care, treatment and preventative measures against damage |
| Wear-resistant | Heavy |
| A huge number of textures and a wide range of colors | No resistance to mechanical damage |
| Easy to install | Requires installation of the fundamental part |
| Fireproof and frost-resistant | High price |
| Impenetrable | Creating a “concrete box” effect |
| Screens out noise |
Pros and cons of each option
Let's look at the advantages and disadvantages of technology so that you can figure out whether fence posts need to be concreted or whether you can do without it.
Hammering the pillars
The hammering method has the following advantages:
- High speed of work if the process is carried out with special equipment. If you drive the supports manually, it will take a lot of effort and time;
- Elements are not pushed out when the soil freezes if they are packed below the freezing level;
- Installation costs are low, since you do not need to buy a solution or prepare it yourself.
The process of driving in supports with a special tool is quick.
As for the minuses, they are as follows:
- The technique is not suitable for heaving soils and places where groundwater is located close to the surface. It is impossible to ensure reliability in such conditions;
- If you hammered the support crookedly, then correcting its position or removing the post will be problematic;
- In spring and autumn, when the soil is saturated with moisture, the structure may tilt or even fall under the influence of strong winds.
Here's what strong winds can do to clogged poles
Dry concreting method
Dry concreting has the following advantages:
- Ease of work. There is no need to use a concrete mixer and prepare a solution; the dry mixture is much lighter and easier to compact;
- This option is well suited for clayey areas, since the hole is waterproofed with roofing felt. You don’t need to think about how to concrete fence posts into clay, just pour the compound and compact it well, it will hold perfectly.
Waterproofing pits is an important aspect of dry concreting work
This solution also has disadvantages:
- Not suitable for very wet and unstable soils. In general, the strength of fixation of pillars with this technology is lower than that of other options, so it makes sense to use it on stable soils;
- It is necessary to make a hole with an extension at the bottom so that the supports do not bulge when the soil freezes;
- The posts must have a wide base welded on them; if there is none, you will have to do it yourself.
Concreting columns
As for traditional concreting, there are the following advantages:
- The technology is suitable for any type of soil. The main thing is to follow the technology; below we will look at how to properly concrete fence posts so that they can withstand any load and serve for decades;
- The design is designed for any weight and can withstand even high wind loads, which is very important for fences made of metal profiles with a large windage area;
- If the elements are positioned correctly, they will maintain their ideal geometry for many years and will not become loose over time.
Concreting fence posts is ideal for difficult terrain
The disadvantages include the following:
- Labor intensity of the work process. It is necessary to make fairly deep holes, after which a large amount of concrete is prepared, which weighs a lot;
- The need for perfect adherence to technology. If you initially did not align the elements exactly, then after the solution hardens, you will no longer be able to correct their position;
- Deformations due to shallow laying. If you have heaving soil, and you have not poured the pillars deep enough, then when the soil freezes, the supports will simply be pushed out.
Whether or not to concrete the fence posts is up to you. But if you decide to do the work yourself, then it is better to choose the option of pouring the solution - it gives the best result.
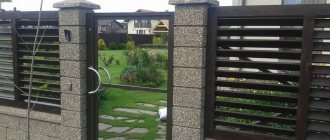
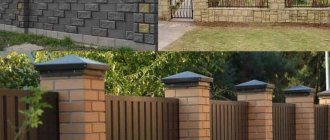
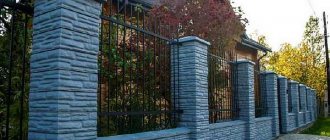
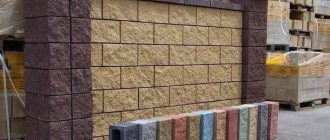
What types of concrete fences exist and what to choose?
- Monolithic fences are heavy reinforced concrete elements, which are installed using a crane. They require a powerful strip or column base underneath. They are distinguished by the highest strength. Most often, it is not used for personal purposes, but is used to protect industrial workshops, warehouses and enterprises.
- The stacked type of fencing is very popular among owners of suburban areas. To install such a fence, you need to hire help. Its sections must be inserted into pre-prepared grooves in the support pillars. There are blind, openwork and combined versions of fence sections.
- The double-sided fencing option has the same appearance on both sides.
- Unilateral organization is the cheapest. A pattern or texture decorates only one side of it.
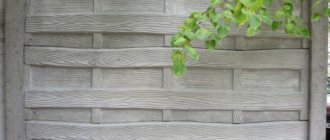
Types of concrete fences
Factory-made concrete barriers are usually blocks or horizontal slabs, 200 cm wide, 30 to 50 cm high and weighing 25 to 70 kg. They are made from M500 cement, fine crushed stone, sand, reinforcement and superplasticizer. These designs come in a variety of colors and can be finished with any finishing material. Compared to monolithic structures, they are easy to transport and their cost is much lower.
Cinder block slabs are also produced. They tolerate winter frosts well. A little expanded clay or pebbles are added to their composition.
How to carry out work
Let's look at the technology for installing supports, which will ensure that the structure will stand for many years. This option is used in Finland.
Materials and tools
Before you start work, you need to collect everything you need.
Let's start with the materials that will be used:
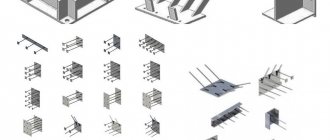
| Illustration | Description |
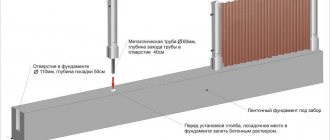
| To avoid problems with the structure, the depth of concreting of fence posts should be below the freezing point. Usually the standard is taken to be one and a half meters, this eliminates any problems during operation. Since our fence will have a height of 2 meters, the total length of the elements is 3.5 meters. For supports, a 50×50 mm profile pipe with a wall thickness of 3 mm is used.
|
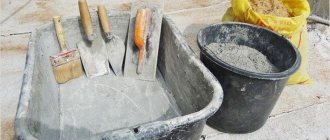
| The solution for concreting fence posts is prepared from the following components:
|
| To work, you will need a plastic sewer pipe with a diameter of 110 mm. For each support there is a piece approximately 75 cm long; the easiest way is to purchase meter-long elements and cut off the excess. Calculating the required quantity is simple: one piece of pipe goes per column. |
Before concreting the fence posts, carefully assemble all the necessary tools:
| Illustration | Description |
| Drill for pillars with a working part diameter of 160-180 mm. Its length should be about 2 meters, this device is convenient to work with, usually an extension cord is included in the kit to select the soil to the desired depth. The tool can be borrowed or rented; after installing the fence, you are unlikely to need it. |
| To cut the posts you need a grinder. It is better to include several metal cutting discs in the kit, as they wear out quite quickly during use. |
| The easiest way to cut plastic pipes is to use a regular hacksaw. With its help, work is done quickly and accurately. |
| Measuring tools require a level with a length of 60 to 120 cm, a tape measure with a length of at least 5 m and a marker for marking; you can also use a pencil, but it does not write well on the metal surface. |
| When we concrete fence posts, it is very important to align them so that the fence is level. The easiest way is to place the two outermost elements and stretch the construction cord between them; this will be a clear guideline along which it will not be difficult to perfectly align the supports. |
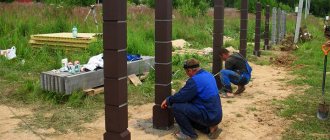
Installation process
We will analyze the concreting of metal fence posts using Finnish technology. This option is one of the most reliable and durable.
The work instructions look like this:
| Illustration | Description |
| Columns are prepared:
|
| For ease of work, you need to make a mark on the support at a height of 80 cm from the bottom end. It is at this level that the concrete will be poured, so as not to constantly check, it is easier to stick duct tape. |
| Using a drill, a hole is made under the post, 150 cm deep. If the groundwater is high, then water will begin to collect at the bottom, but this is not a big deal. |
| Most likely, soil with clay will be removed from the hole; it is better to load it into a wheelbarrow and take it away so as not to pollute the area. |
| Before pouring concrete, it is better to remove excess water from the hole. To do this, you can make a simple device as in the photo. A cutout is made in the side of the bottle, and the neck is placed on a long stick. |
| Let's figure out how to properly concrete fence posts. First of all, the two outermost elements are installed, most often these are corner supports. |
| Concrete is prepared using 1 part cement, 3 parts sand and 4 parts crushed stone. First, sand and cement are mixed, then water is added, and finally crushed stone is added. The easiest and fastest way to do the work is with a concrete mixer. You can order ready-made concrete, its price is higher, but you don’t have to prepare the solution.
|
| Tamping the solution is done with a board or any other available object. Simply compact the concrete around the entire perimeter. |
| When figuring out how to concrete fence posts, one cannot miss such an aspect as their initial alignment. After the concrete has filled the hole to the mark, you need to level the element on both sides so that it is perfectly level. You can put temporary supports and leave the outer columns for several hours so that the solution sets. |
| The pipe is put on a post and placed on the set concrete. It should be positioned so that it protrudes slightly above the ground. |
| A fairly liquid solution is made, which is poured into the pipe through a trench curved from tin. During the pouring process, make sure that the concrete is distributed evenly around the entire perimeter. |
| The outer part of the pit is filled with a cement-gravel mixture and carefully compacted. This option eliminates the support being pushed out, since the thicker part of the base is located below, and the smooth surface of the pipe allows the soil to move unhindered. Now you know how to properly concrete fence posts; there are only a couple of nuances left, which are discussed below. |
| When pouring, you do not need to fill the pipe to the top, leave about 5 cm. During the setting process, the concrete will shrink, the next day the cavity is filled to the top and an ideal result will be obtained. |
| To protect the column from the inside, cement-sand mortar is poured into it. To do this, a funnel is made and the element is filled to the top. Such protection will ensure the best safety of the elements. |
| A cord is stretched between the outer elements, after which the remaining fence posts are placed - you already know how to concrete them, the main thing is to align the structure evenly. |
Selecting material for fence supports
Asbestos-cement pipes as support pillars
You can use the following as fence supports:
- wooden poles;
- steel pipes;
- concrete supports;
- asbestos-cement pipes.
Steel poles
Steel posts are most in demand when constructing fences. They have excellent strength and performance characteristics. Stainless steel supports are especially reliable; their service life can exceed 50 years. However, such pipes are quite expensive and not every landowner can afford their use.
Asbestos cement pipes
Asbestos-cement pipes are used as supports for fences quite often. They have the following advantages:
- ideal geometric shape;
- high strength;
- durability - pillars are not subject to rotting.
However, asbestos-cement pillars are highly fragile and require attention during installation. To strengthen their internal cavities, it is recommended to fill them with concrete. To attach the logs, you will need to make special brackets and long studs.
After installation, asbestos-cement pipes must be protected from water ingress, since in winter frozen moisture can destroy them.
Wooden pillars
Wooden poles must be waterproofed.
To make wooden poles, timber with a rectangular or square cross-section, as well as rounded logs, are traditionally used. Wooden posts made from softwood are inexpensive, so they are often used as fence posts. To prevent them from rotting, the lower part of the pillar must be treated with an anti-corrosion compound. The main disadvantage of such supports is their short service life (no more than 3 years). Oak posts can last for decades, but their high price significantly limits their use as fence supports.
Concrete pillars
Concrete posts are a good alternative to metal posts and wooden beams. They are made from a special solution based on M-400 cement. The prepared solution is poured into a box-shaped formwork, which contains a reinforcing frame. The outer surface of such pillars is coated with a special primer or decorating paint. Structurally, concrete pillars can be:
- monolithic;
- compound.
Monolithic supports are much stronger than composite ones and maintain their integrity when exposed to heavy loads. They are used when installing massive fences.
Concrete panel casting technology
Crushed stone is loaded into a concrete mixer, filled with water and washed to remove dust and impurities. Then the water is drained and sand, cement and water are loaded. The exact proportions of the solution for the selected brand of cement are usually written on the packaging.
Currently, there is a wide range of plasticizers on sale - special additives for imparting certain properties to concrete or for accelerating (slowing down) the setting of the solution. When making a concrete fence, plasticizers are used to give the solution mobility, non-delamination and additional strength.
The casting mold is placed on a vibrating table, lubricated with mineral oil to prevent the solution from sticking, and the fittings are prepared. The reinforcement scheme must be thought out in advance, based on the characteristics of the shape. Ideally, the reinforcement should extend across the entire thickness of the panel without protruding on the surface.
The mold is filled to half the volume and the vibrator is turned on. Then the reinforcement is laid, the solution is added to the top of the form and the concrete is compacted again with a vibrator.
At the stage of pouring the form, fasteners should be provided to connect the panel with other parts of the fence - above or below the panels or posts.
After the solution has dried, stripping is carried out - separating the finished panel from the mold. Then the product is rubbed manually or with machines to a standard appearance, the form is cleaned of concrete residues and prepared for the next pour.
Tape installation of poles
Tape installation of concrete pillars involves partial casting of the fence. In addition to the holes for the posts, a trench is dug along the entire length of the future fence, 40 centimeters deep and 10-40 centimeters wide, this depends on the material of the future spans. We do this already for a slate fence and a fence made of corrugated sheets. If you plan to build brickwork, then we make it wider, according to the size of the brick. The depth of the holes for load-bearing supports can be halved, since the wind and weight load will be partially absorbed by the strip foundation.
We build the formwork for the structure, fill the bottom of the trench and the holes for the pillars with a cushion, the composition of which is similar to that used for point installation, 10 centimeters high. Every half a meter we drive steel rods into the ground in a checkerboard pattern. The length of the rod should be such that after deepening it does not wobble, and its upper end does not rise above the casting level. We place the pillars and secure them strictly vertically.
Assembly of the entire structure
The finished panels are placed in the grooves of the pillars or the reinforcement of each panel and pillars, previously brought to the surface, is welded together.
At this stage, the installation work of the reinforced concrete fence can be considered complete. The finished structure is additionally finished with decorative materials - plaster, facade paint for concrete, tiles. Be sure to paint all welded parts with weather-resistant paint to prevent corrosion.
Fences made in this way retain all the advantages of a concrete fence. They do not absorb moisture, have low windage, excellent sound insulation, and are extremely durable. A solid concrete fence in rural areas can become a reliable barrier to ground fire during spring grass burning, which leads to huge fires and human casualties.