“Question: How to throw an egg on a concrete floor without breaking it?
Answer: No matter how hard you try, you can’t break a concrete floor with an egg.” Hello, dear readers!
A concrete screed on the floor in a bathhouse is considered the best option. It is durable. No matter how you look after the wood, after 5-10 years the floors need to be re-laid. Do you understand the humidity...
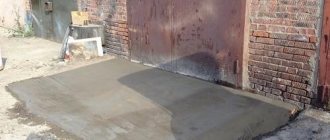
Concrete does not rot, does not deform, does not require special care, and lasts for more than 40 years. Today we’ll talk about how to fill the floor in a bathhouse with a slope for drainage. It is not easy to do the work of arranging such a floor with your own hands, but it is possible if desired.
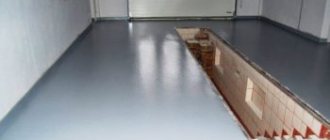
Pouring the floors in the bathhouse can be done both in the washing room and in the steam room. A concrete floor is essentially a concrete screed on top of which a waterproof, non-slip coating is laid. Typically, tiles are used for these purposes. When laid on the ground, the slope of the floor is ensured by creating a slope of the very base of the ground. For small areas - due to changes in the thickness of the underlying layer.
Features of the drainage system
First of all, I would like to draw attention to the fact that the installation of sewerage in the bathhouse should be carried out even before the work on laying the floor https://techengroup.ru/pomesheniya/dlya-parkovok/.
At the same time, it does not matter much what material the floor in the bathhouse will be made of. Regardless of your choice of drainage device, before creating a sewer system, you must perform certain preparatory work.
Many people mistakenly hope that all the drainage from the bathhouse will be absorbed by the soil. However, this option for wastewater disposal leads to the soil being polluted and the soil being eroded. If you abandon the idea of creating a water drainage system, then after a short time from the moment the bathhouse begins to operate, you may encounter shrinkage of the structure, its main structures will begin to deform.
If the erected structure for paired procedures is intended for a family of three, and it is used only once a week, then in this case you don’t have to worry about installing a sewer system in the building if the bathhouse is built on sandy and sandy loam soils. In this case, a leaky floor is created to drain water. This work involves fixing the floor boards loosely. They are laid freely with a gap of 5 mm.
This allows you to lift the floor and dry it at any time. The drains that pass through such a floor are absorbed into the ground. If the amount of drainage from the bathhouse is large enough, then in this case it is worth installing a leak-proof floor in the building and creating a sewer system.
Relevance of the pouring process
Pouring the floor in a bathhouse is a rather serious process. There is a misconception that anyone can cope with this task. It would seem that he dug a hole, poured concrete on the base, leveled the covering and the floor was ready! With this approach, you risk getting a damp, cold base that does not perform its intended functions. After all, the floor in the bathhouse should:
- Be strong and durable.
- Provide good thermal insulation.
- Have the ability to drain water.
To get maximum pleasure from your bathing holiday, study the available materials for flooring before starting work, and consult with specialists.
We fill the floors in the bathhouse with our own hands
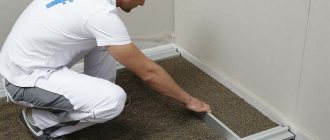
The technology for pouring floor screed in a bathhouse, in general, is no different; it is quite simple and accessible to anyone who decides to do it themselves with their own hands. A regular aluminum profile can be used as beacons. It must be remembered that in the bathhouse the entire floor from beginning to end is sloped, in the direction of the intended place of concentration and discharge of water. The guide beacons are set by measuring the slopes with a long rule and a level. Beacons are placed with a meter interval from each other. A pair of trowels of mortar are placed on the base, a guide beacon is installed on them and, measuring with a level, gradually pressing on the desired side, the inclination of each beacon is set to the same level. After the solution has hardened, the beacon settings will no longer be lost and you can safely begin applying the screed. As with most decorating projects, it's best to start at the far corner. The solution is poured directly between the beacons and, if necessary, leveled along them. Professionals, as a rule, do not do these types of work alone, because the solution must be constantly poured and immediately leveled. Therefore, if you are pouring the floor in a bathhouse with your own hands, it is recommended to call someone for help, this will speed up the whole process significantly.
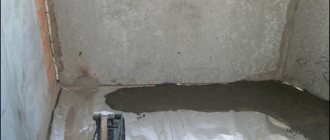
Waterproofing the floor in a bathhouse: general information about floors in rooms with high humidity, the nuances of waterproofing wooden and concrete bases
General leveling of the screed is carried out using a long rule, which is carried out along the guide beacons, smoothing out all the unevenness. If necessary, you will need to add mortar somewhere with a trowel so that there is no hole, and remove the excess somewhere so that there are no bulges in the floor.
Strengthening of the screed occurs in about 2-3 days, but it will finally take place only after 2 weeks. To avoid the occurrence of cracks during this period, the screed should be wetted 2 times a day. This is done so that light spots do not appear - areas in which the cement for some reason dries faster than the rest of the floor, which can lead to cracks. After wetting, the floor is covered with a film so that the water does not evaporate immediately.
Self-filling - simple rules
Having weighed all the pros and cons, have you come to the conclusion that you can arrange the floors in the bathhouse yourself? Absolutely right! The technology for pouring a floor is not complicated; any technically competent person can master it. Follow the recipe, the sequence of preparing solutions and carrying out construction activities. We have no doubt - you will succeed! We offer the following sequence of work to ensure that the final filling of the floor in the bathhouse is completed quickly and efficiently:
- First, carefully calculate the required amount of cement and sand for the screed. Construction reference books will help you with this. Purchase materials, prepare tools.
- Decide on the decorative coating of the base.
When using tiles, use a self-leveling solution. It quickly acquires operational strength and has a smoother surface compared to concrete screed. The technology for pouring floor screed in a bathhouse, in general, is no different; it is quite simple and accessible - You need to pour the screed from the far wall of the room, gradually moving towards the exit. Prepare the solution in portions, but non-stop. Gradually move the remaining mixture to the area of the floor where the solution has not yet been poured. Maintain continuity of the operation while laying each layer of mortar.
- Allow the screed to dry for at least three weeks by periodically moistening the floors in the room. This helps ensure the process of concrete hydration and maintain the integrity of the massif.
- Form the base in a bathhouse with a slope using plasticizers that increase the durability of the base and its strength characteristics. The use of special components when preparing the mixture will prevent the appearance of cracks and speed up the hardening process of concrete.
- Evaluate the quality of the work performed after the screed has dried. Check the uniformity of the coating, focusing on the color, which should have a uniform gray tint. Using a hammer, test the strength of the base by striking the concrete with the tool. The absence of impact marks indicates the hardness of the coating.
These are simple recommendations for filling the floor in a bathhouse.
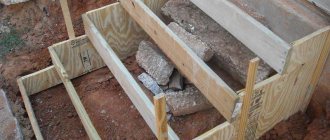
Floor with drain over concrete screed in a timber bathhouse
Here a drain hole has already been installed in the concrete screed and the floor beams have been installed. All that remains is to insulate the underground with sheets of extruded polystyrene foam.
Prev 1of1 Next
Prev 1of1 Next
Prev 1of1 Next
Prev 1of1 Next
The insulation boards are fastened together with sealed foam and laid with a slope towards the drain. A layer of roofing felt waterproofing is laid on the crowns of the log house, on top of which a reflective vapor barrier for the walls of the steam room will be installed in the future.
Finally, the simplest elementary technology for draining a wooden floor from our ancestors. The floor is divided into two parts by a wooden channel running down the center. It is made of three boards and has a cross-section of an inverted letter P. This design with three walls resembles a square pipe without one plane and is installed in the center of the steam room with a slight slope towards the drain. The remaining floor boards on one and the other side of the gutter are mounted so as to form a slight slope towards it. The floor is made solid, without cracks, and all the water flows to the center and exits through the gutter into the sewer system.
Options for installing inclined floors
Example of a floor arrangement with an Envelope type drain
Designing a base with a ramp always begins with choosing the type of slope, which can be of two types:
- “Envelope” is a special type of base cladding in which the drainage system is located in the center of the room. For normal water drainage, the base is conventionally divided into 4 parts in the form of an envelope, making a slight slope towards the ladder;
- From two planes - a design in which the base is divided into two parts and made with a slight inclination relative to each other. At the lowest point of such a system, a drain is installed into which liquid from the floor covering flows by gravity.
Installation of a concrete floor with a drain in a bathhouse
Before pouring the floors in the bathhouse to drain the water, let's look at the sequence of installation of the entire floor structure in the washing compartment.
If your bathhouse building is built on a slab foundation, then you can start pouring the screed directly on the concrete base. Naturally, the slab must have a hole for the fan pipe equal to its outer diameter.
If your bathhouse is on an MZFL foundation or on a columnar / pile foundation, then the floor pie design will be relatively standard for this option.
First of all, floor joists are installed, which will perform three functions at once in this scheme:
- The logs will serve as the basis for the finished floor, which will be concrete in the washing area and wooden in the steam room.
- A subfloor will be attached to the joists, which will support the insulation underneath.
- The insulation you have chosen to insulate the bathhouse floor will be laid between the joists. For example, if you chose standard mineral wool slabs with a width of 60 cm, then it is worth making the distance between the logs 59 cm to simplify the installation of insulation in the bath floor.
After the logs are installed in place, a drainage system from sewer pipes is installed. Pipes with a cross section of 50 mm run from the washing compartment. If you are making a toilet in a bathhouse, then pipes with a cross-section of 110 mm will go from the toilet. After the toilet, wastewater should go either to a cesspool or to a septic tank - a house one or a separate bathhouse.
Should wastewater from the toilet and washing compartment be combined in a bathhouse? You can and should combine them. In this case, wastewater from the washing compartment will clean the pipe coming from the toilet and provide enough water for the operation of the septic tank, if it is equipped separately for the bathhouse.
After the pipes are installed, you can begin installing the subfloor. The subfloor in the bathhouse can be made from either boards or any suitable slab material. It can be DSP, plywood, OSB. If plywood is used, it will need to be impregnated with bioprotective compounds such as Senezh Bio.
After this, a floor insulation is installed between the floor joists, which will rest on the subfloor. As mentioned above, it is better to install the insulation between the joists.
Next, let's look at how to pour a screed in a bathhouse under the drain so that water is guaranteed to collect in one corner near the drain. For this purpose, any slab material is mounted on wooden logs. DSP is best suited for these purposes. Of course, cement particle boards are very susceptible to deformation if they swell from moisture. However, under a concrete screed this material will feel quite tolerable.
The slope of the floor in the washing compartment can be 0.3-0.5 cm per meter. In this case, moderately polluted water will be drained, so there is no longer any reason to make a slope.
After the screed has been made and the drain has been installed, you can begin installing the final floor covering. The best options for this scheme would be to use ceramic or porcelain tiles.
As you can see, a poured concrete floor in a bathhouse with a drain can be made with your own hands and according to a very simple scheme.
Step-by-step instructions for the device
Installing a drain in a bonton screed for a bathhouse floor is not an easy job, which is best left to professionals.
If this is not possible, when installing a utility network with your own hands, strict adherence to the following technological map is required (using the example of a standard drain in a screed).
A sewer drainage and drainage design is being carried out with the determination of slopes, connection points and elevations for each element.- The base is prepared for the pipe - if the screed is placed not on a reinforced concrete slab, but on a soil foundation, it is compacted or partially replaced with a layer of ASG.
- On the wall, in the form of a mark with a marker, or using a string, the required drainage mark is fixed, as well as the direction of laying the pipe with the required slope.
- The horizontal section of the pipeline is assembled on a compacted base, according to the design.
- At the location of the funnel, a branch is made, which ends with a vertical section of pipe that exceeds this level by 10-40 cm.
- The sewer network is checked by spilling it.
- The area around the future funnel is fenced off with a small box made of wooden flanging.
- The screed is poured, observing all layers - hydro- and thermal insulation, reinforcement, as well as slope. Wait time for the concrete to harden.
- In the void intended for the installation of a funnel, the pipe is cut so that the future grate is strictly at the level of the planned final floor covering.
- The funnel is mounted in a layer of high-strength cement-sand mixture with the connection of the pipe to the vertical outlet. A layer of polymer waterproofing is also placed under the drain. Wait time for the solution to set and dry.
- The seam between dissimilar materials is treated with sealant.
After installing a finished floor, for example, porcelain tiles, a drain grate is installed on the funnel. At the final stage, the seam between the tile and the grate is sealed with silicone compound on a dry surface.
Features of wooden floors
Despite the strength and durability of any wooden structure, over time, under the influence of humidity and ambient temperature, it changes its linear dimensions, which causes shrinkage. In addition, wood is a “breathing” building material, so cracks begin to “spread” along the wooden beams. That is why you should never pour screed onto a fresh wooden floor immediately after building a house. Leveling can begin no earlier than 3 years after the wood base has completely dried and settled.
It is recommended to lay a monolithic concrete slab on wooden joists (on which the floorboards are supported) if the beams are installed on brick columns with a height of at least 300 mm. If the logs are laid directly on the floor slabs (which is most often the case), then you can only install a “floating” screed. In this case, some advise removing the floor boards and pouring the concrete slab in the traditional way, but in this case the screed will be fastened to a wooden base, and at the slightest deformation the flooring will crack. Therefore, we will consider the most reliable technology for laying a “non-cohesive” screed that will not connect to the walls and ceiling.
Finishing the concrete surface
Before concreting the floor, it is worth deciding on the cladding. The most common options are ceramic tiles and wood-polymer boards.
It is important to consider its surface. It is better to choose a textured, rough one, since a smooth one increases the likelihood of falling. Before laying, the base is treated with a primer.
You can make a warm concrete floor using water heating or using electric mats. The first option is intended for buildings located next to the pipeline. Due to this, heat loss is minimized. The popularity of infrared material is due to its ease of installation and the possibility of laying under tiles.
The coating finished with a composite board is tactilely pleasant, does not contain harmful substances, is protected from moisture and is heat-resistant. Another variety with similar properties is garden parquet. Its huge advantage is its quick dismantling if necessary, thanks to the locking connection.
Arrangement is possible without the use of finishing materials. It is enough to simply iron it by rubbing in dry cement. As a result, the base has a simple appearance and is short-lived.
Source
Preparatory activities
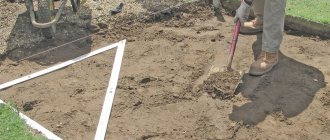
To make a poured floor in a bathhouse, the base is prepared as carefully as possible. Otherwise, the base will not have the necessary strength characteristics, which will significantly reduce the service life of the finished floor. The work is performed in the following sequence:
- Removes a layer of soil 40–45 cm thick. This allows you to get rid of organic residues present in the soil;
- The surface is carefully leveled. A pit is installed in the center of the room, in which water will collect during the operation of the bath;
- A drainage pipe with transverse dimensions of 10–20 cm is installed. The pipe is placed at a slope to ensure the outflow of liquid under the influence of gravity. To prevent accidental clogging of the drain pipe, cover it with a lid or simply plug it with a rag. A fence made of boards or pieces of roofing material is erected around the drain pipe itself. This will allow, if necessary, to replace the installed element if the pipe head does not meet the requirements for it;
- The quality of the work done is controlled. For this purpose, a regular or laser construction level is used.
The soil is removed to a depth of 0.5 mSource googleusercontent.com
Before pouring the concrete solution, the base is thoroughly compacted. To sufficiently compact the soil, a vibrating plate or manual tamper is used, depending on the area of work and the configuration of the bathhouse. A layer of sand 5–10 cm thick and gravel is poured onto a carefully compacted base. The thickness of the second layer is 10 cm. The pillow is carefully compacted.
Installation of waste septic tanks
With intensive use, the sewer system requires periodic cleaning. The most effective cleaning method is septic tanks, which do not require the use of sewage disposal equipment.
A septic tank provides for the sequential purification of wastewater in various ways. First, the water is purified from contaminants, then disinfection occurs, and at the final stage, the water is discharged into the ground or used for irrigation.
Instructions for setting up a simple septic tank with 2 chambers for private needs:
A pit up to 3 meters deep is dug at a distance of 2 meters from the bathhouse. Filter layers of sand (up to 15 cm high) and crushed stone (10 cm) are placed on the bottom and compacted thoroughly. Concrete rings are immersed on the sand-crushed stone layer to impart rigidity to the future structure. The walls of the well are reinforced with brickwork. Next to the main well, a pit is dug for a well of smaller depth and diameter, which is equipped in a similar way. The bottom of the first well and the gaps between the rings are filled with concrete mixture to ensure complete tightness of the structure. Drain holes are made in the upper part and the rings of both wells are connected using pipes
In this case, it is important to maintain a slight slope of 2.1 cm per meter towards the deep well. The joints are covered with cement mixture. A sewer pipe is supplied with a drain from the bathhouse to a smaller well. The wells are closed from above with reinforced concrete slabs or hatches, in which small holes are made for installing ventilation pipes.
The first well is intended for rough water purification, the second - for eliminating organic waste using earthen bacteria.
If you have available funds, you can use ready-made septic systems available for sale. The process of installing such equipment consists of digging a pit and supplying a sewer pipe.
This is the most expensive option for organizing a drainage system for private baths. It can operate in automatic mode, with cleaning quality reaching 97%. The removal of purified water from the septic tank in the finished system is carried out using a drainage pump. This water can be used for irrigation of a personal plot and technical needs.
High-quality drainage for a modern bathhouse is a fairly important and responsible process that requires technical training, financial investments and free time.
We fill the floors in the bathhouse with our own hands
The technology for pouring floor screed in a bathhouse, in general, is no different; it is quite simple and accessible to anyone who decides to do it themselves with their own hands. A regular aluminum profile can be used as beacons. It must be remembered that in the bathhouse the entire floor from beginning to end is sloped, in the direction of the intended place of concentration and discharge of water. The guide beacons are set by measuring the slopes with a long rule and a level. Beacons are placed with a meter interval from each other. A pair of trowels of mortar are placed on the base, a guide beacon is installed on them and, measuring with a level, gradually pressing on the desired side, the inclination of each beacon is set to the same level. After the solution has hardened, the beacon settings will no longer be lost and you can safely begin applying the screed. As with most decorating projects, it's best to start at the far corner. The solution is poured directly between the beacons and, if necessary, leveled along them. Professionals, as a rule, do not do these types of work alone, because the solution must be constantly poured and immediately leveled. Therefore, if you are pouring the floor in a bathhouse with your own hands, it is recommended to call someone for help, this will speed up the whole process significantly.
General leveling of the screed is carried out using a long rule, which is carried out along the guide beacons, smoothing out all the unevenness. If necessary, you will need to add mortar somewhere with a trowel so that there is no hole, and remove the excess somewhere so that there are no bulges in the floor.
Strengthening of the screed occurs in about 2-3 days, but it will finally take place only after 2 weeks. To avoid the occurrence of cracks during this period, the screed should be wetted 2 times a day. This is done so that light spots do not appear - areas in which the cement for some reason dries faster than the rest of the floor, which can lead to cracks. After wetting, the floor is covered with a film so that the water does not evaporate immediately.
Construction of a brick drain
A brick cesspool is the most ancient option for arranging sewer walls. It can be sealed or with an open bottom. To facilitate construction, it is necessary to prepare a foundation pit with smooth walls so that the brick can be laid close to them. This will significantly speed up the work, especially if there is not enough experience in this area. A home cesspool made of bricks is placed on cement mortar. You cannot use light sand masonry, because in conditions of constant humidity, a collapse will be inevitable.
The masonry is done in half a brick in a circle. This way the corners hold each other tightly. With this method, additional modernization is possible to improve tightness. To do this, you need to plaster the walls and fill the bottom. You can use old bricks taken from destroyed buildings. This construction method takes the longest. A brick cesspool is one of the most reliable, and if you use a strong mortar, its destruction will not happen soon. You just need to prepare a hole for the inlet pipe in advance, since it will be difficult to break through the wall later.
Concrete floor in a bathhouse - drainage diagram
It is possible to install a drain concrete floor in a bathhouse, through which water will be drained during bathing procedures, only in the washing department. Why there?
Because if you install a concrete floor in a steam room, the following disadvantages of this material will immediately manifest themselves at high temperatures:
- The floor will become dusty with cement dust during heating, while the atmosphere in the steam room is extremely dry.
- Concrete will become extremely hot, and unlike wood, this heat will not be pleasant to the feet of steam room visitors.
- Concrete screed does not have the same plasticity as wood. As a result of sudden cooling when water spills, the screed will crack.
As you can see, there is a place for a concrete floor in the bathhouse, but it is located in the washing section of the bathhouse.
So, how to fill the floor in a bathhouse with a drain in the bathhouse compartment so that the drainage system works flawlessly?
Before making a screed in a bathhouse to drain water, let's look at how water collects in a bathhouse sink and how it is discharged.
Concrete floors in a bathhouse with a drain work according to the following scheme:
- The floor is arranged with a slope, which allows you to collect all the water in one of the corners of the washing compartment.
- An assembly ladder is installed in this corner through which the water will leave the sink. The ladder is at the lowest point.
- From the drain, wastewater is transported through a drain pipe, which can have a cross-section of 32 or 50 mm. It is not worth making a drain pipe with a cross-section of 110 mm, since no solid fractions flow from the washing compartment into the sewer, but only moderately contaminated water with residues of soap and shampoos.
- The wastewater flows through the pipe into a pit or container under the bathhouse, where a crushed stone filter is usually installed. The crushed stone fraction taken for these purposes is 40-80.
Why is it necessary to use this particular fraction of crushed stone to purify soapy water? Small crushed stone will become washed out too quickly and will stop cleaning wastewater from the bathhouse. Large crushed stone will not provide a sufficient degree of cleaning from the very beginning, since waste water from the sink will “spill” between the large stones.
Which coating should you choose?
We briefly described how to fill a bathhouse floor with concrete. But leaving it in this form is not aesthetically pleasing, so we suggest dwelling on the question of what material to choose for flooring in a bathhouse with a slope. The optimal solution is tiles with a rough coating that prevents slipping on the floor. You can opt for small mosaics. It is easy to lay on the floor and adjust to the desired size.
Laying should begin from the drain:
- make sure that the ladder grate is flush with the tiles;
- carry out the work with a special glue that has increased adhesive parameters;
- Seal the seams with moisture-resistant grout that matches the color.
For a small bathhouse in a summer cottage, a simple covering of a pre-polished concrete floor with wooden or cork panels is suitable. It is important to choose the “right” wood, which, when exposed to high temperatures, will saturate the surrounding air with pleasant and healthy aromas.
Installation of a drain hole in different baths
There are not very many drain designs. They differ rather in the place of application. The design of the drain may be different for different types of baths.
Sauna drain
The floor drain in a sauna may not have the same throughput as in a steam bath: there are no water flows from the tubs, and the font has its own drain. In addition, as a rule, the sauna itself does not need a drain, and the sauna washing area does not need a tiled floor. This means that a classic drain with a drain is used there.
In a sauna with a tiled floor, you can use a classic drain with a drain and a water seal
It is not much different from a sauna drain.
Viega Advantix drain for installation in hammam and sauna
Drain in a Russian bath
Draining in a Russian steam bath is necessary in two rooms - the steam room and the washing room. Bath drains are different, which primarily depends on the design of the floor in the steam room and washing room. They are no different in design if the floors are the same in both. Let's look at different floors and different drains for these floors.
A steam drain can also be ordinary, with a drain
Pit against sewer
When deciding what is best to install on the site - a cesspool for a bathhouse or a stationary septic tank (which is a variant of an autonomous sewerage system) take into account the following
Advantages and disadvantages
these devices:
- service life - for septic tanks it is many times longer;
- environmental Safety;
- practicality, ease of use;
- volume of devices (septic tanks have a whole “model range” that best suits the different needs of consumers).
Septic tanks have only one drawback - high price. But the cesspool has many more disadvantages. This includes silting, the need for regular cleaning, and the inevitable release of harmful substances into the soil, which are not all “fertilizers.”
Floor layout and basic requirements
The main thing in organizing a wooden floor with a drain is, oddly enough, not the technology for making the finished floor layer, but the proper preparation of the underground space. It is errors in the organization of the underground that become the most common reason that the tree begins to rot ahead of time.
Particular attention should also be paid to ventilation of the space under the floorboards; there must be either special holes for ventilation, or the possibility of raising the boards in order to dry them faster
In addition to the fact that a wooden floor is not as cold to the touch as a tiled floor, it is also noticeably cheaper and easier to organize than a tiled floor, which requires the obligatory arrangement of a layer of concrete screed at least 5-7 cm thick. If necessary, construction the most budget-friendly construction, it is wooden floors that are laid most often, and a small drainage hole is installed directly under the bathhouse as a space for water drainage.
Scheme of organization of design details:
Prev 1of1 Next
The second option using roofing felt:
Prev 1of1 Next
Option number three from an old Soviet book:
Prev 1of1 Next
Next, we will look at examples of various schemes for installing a wooden floor in a bathhouse with water draining through the cracks between the floorboards, the so-called “flow floor”. Also, using the example of finished structures, you will be able to see different approaches to the implementation of the three basic principles of durable wooden floors with a drain:
- The presence of a slope at the surface of the underground so that the water does not linger anywhere, but completely flows into the drain hole.
- A properly organized sewer system that ensures the flow of water without its accumulation in places not intended for this purpose.
- Take measures to ensure ventilation in the underground space in order to effectively dry out the floor wood and support beams.
Why is tilt necessary?
If the degree of inclination is too small, not all the water accumulating on the surface will enter the drainage system.
Tilt of the base towards the drain allows you to quickly remove water from the washing room or steam room in the bathhouse. A rather complex design performs several tasks:
- Prevents fluid accumulation;
- Prevents damage to floor materials;
- Provides quick drying of floors;
- Significantly reduces the chances of developing fungus and mold.
The design of a rough foundation with a slope must be carried out taking into account many technological nuances. If the degree of inclination is too small, not all the water accumulating on the surface will enter the drainage system. If you make the floor slope too large, this will affect the material component of the issue, since it will lead to unnecessary expenses.
Main stages of floor construction
Upon completion of the arrangement of the drainage and sewer system, we begin to form the foundation for the future floor. For this:
We create a cushion for pouring concrete mortar, which allows us to limit heat loss. We deepen the soil by 50 centimeters. Three quarters of the total volume is filled with construction waste that is not subject to rotting processes. We cover the resulting surface with clay and, after drying, pour a fifteen-centimeter shock-absorbing layer of sand with fine gravel or crushed stone. This level will allow the absorption of moisture that results from temperature changes. We carefully compact the layer, maintaining the slope specified by the project. Pour the first layer of concrete mortar. If possible, we use perlite additive - an excellent heat insulator.
When working with perlite, pay attention to its properties - especially fine fraction and minimal weight. When mixing the concrete solution, use a room protected from the wind to avoid increased dust formation.
The thickness of the first layer of concrete when pouring the base should not exceed 4-6 cm. We isolate the joints between the base and the walls from moisture penetration with bitumen. We wait for the solution to dry. It depends on weather conditions, the period ranges from several days to 2-3 weeks. We lay thermal insulation material. To prevent it from being damaged by moisture, it is advisable to additionally use roofing felt for insulation.
The next stage is pouring the floor in the bathhouse with a second layer of concrete mortar. At this stage of work, a reinforcing mesh is used to protect the cement base from cracking during operation. We compact the concrete, trying to get rid of air cavities as much as possible. Leave the surface alone until completely dry. To ensure that concrete sets evenly during the hot season, we moisten the base using a sprayer.
The final stage is applying the cement mixture to the entire surface and leveling the concrete according to the rule. Make sure that the slope of the covering is correct towards the drainage hole. Apply deep penetration waterproofing impregnation to the finished base.
We would like to focus your attention on the fact that if you do not plan to use the bathhouse during the cold season, then when mixing the concrete solution, you can exclude perlite from the recipe. Use the usual cement-sand composition of one to three, adding 1/10 of lime
This will reduce financial costs without reducing the strength of concrete.
Required tools and materials
Having decided what types of coatings will be used when arranging bath rooms, you can begin to implement the pouring project. Let's look at how to properly fill a floor and what tools you will need. Concrete floors are recommended for washrooms and steam rooms.
Having given preference to concrete, do not forget that the high temperature of the steam room will lead to strong heating of the floor, and walking on it will not be comfortable. To optimize the temperature balance, additionally cover the concrete floor surface with cork or wooden panels. When improving the washroom area, leave the concrete uncoated or lay floor tiles - this is beautiful and aesthetically pleasing.
A concrete floor is essentially a concrete screed on top of which a waterproof, non-slip coating is laid.
To organize the workflow for pouring a floor, you will need the following tools:
- tape measure for taking measurements;
- building level to control base deviations during pouring;
- beacons necessary when forming the slope of a concrete surface;
- containers with which the concrete composition will be transferred from the mixing site to the room;
- concrete mixer;
- construction mixer or electric drill with a special attachment (when making concrete mortar manually);
- a device for compacting concrete mortar and removing air inclusions;
- trowel, a rule for leveling the surface of a concrete pavement.
The quantity and completeness of materials is determined individually for each construction project. To install a heated floor in a bathhouse with a slope, you will need the following materials:
- Crushed stone, medium gravel or expanded clay for backfilling the base.
- Portland cement, quarry sand, industrial water used when mixing concrete mortar.
- Additives, plasticizers that increase moisture resistance and strength characteristics of concrete.
- Waterproofing material (film 200 microns thick, roofing felt).
- Insulation material.
- Durable steel reinforcing mesh.
- Plumbing pipes, plugs, valves to form a system for draining water from the room.
When laid on the ground, the slope of the floor is ensured by creating a slope of the very base of the soil
Well with a filter at the bottom
The design of a drain pit with a filter bottom is used primarily to purify wastewater from dirt and chemical elements, as well as to retain bacteria. Subsequent filtration of water is carried out directly by the soil layer. But at the bottom of the well, crushed stone, crushed brick or sand are used as a filter.
To ensure the outflow of water from a bathhouse designed for 3-4 people, a well with a diameter of 1.5 m and a depth of 2 m is sufficient. It can be either rectangular or round in shape - the latter option is preferable due to the uniform distribution of pressure on all walls. The cylindrical design will need correction much less often.
Since it is necessary to drain the bathhouse at the dacha without damaging the building itself, it is advisable to retreat from it at a distance of about 3-5 meters. Such a gap will ensure, first of all, the safety of the bathhouse foundation from being washed away, and will also prevent the penetration of unpleasant odors from the well into the bathhouse. But if you locate the drainage hole further, you will inevitably have to purchase additional pipes for water drainage. In addition, it is difficult to ensure the correct angle of inclination over a long distance.
If the soil on your site is dense enough, then simply dig a hole for drainage and lay filter materials at the bottom - sand, crushed stone and broken brick. Additional strengthening of the walls is not required.
According to the drainage diagram in the bathhouse, a trench can be dug from it to the pit, through which water will randomly flow by gravity into the well. However, it is best to equip the drain with pipes made of asbestos, metal, plastic or ceramic, with a diameter of 50-100 mm. In this case, a trench is also necessary, but its depth will depend on the depth of soil freezing, but not less than 50 cm. The pipes are laid at a slope of 20 mm at every meter of distance.
At the design stage, the future design of the drain and the features of the floor organization are thought out in detail. An economical option for draining a bathhouse in a country house is to make the floor sloping towards the drain hole. With this design, wastewater enters the pipes and is discharged directly into the drainage pit.
An alternative to a drainage pit is to use a sealed septic tank, such as one made of plastic. Such a device will be especially relevant in cases where the bathhouse is equipped with a toilet, that is, the nature of the wastewater will require more thorough cleaning.
How to prepare concrete mortar?
A simple option is to buy a ready-made dry mixture. If you decide to prepare it yourself, then you will need cement, water and sand. For the solution you need to use cement M-400 or higher. For 4 portions of sand you need 1 portion of cement and water. The solution should not be liquid, as in this case the concrete will not be strong enough in the future.
Instead of regular sand, you can use perlite. It has high thermal insulating properties. The disadvantage of the material is its low weight, which makes the sand very dusty, so you can’t work in windy conditions.
To prepare the solution you need to do the following:
- Fill in 2 buckets of perlite or sand and 10 liters of water.
- Add 5 liters of cement.
- Stir, add another 5 liters of water. Stir until the mixture becomes homogeneous.
- Add 1 bucket of perlite and 2 liters of water. Mix.
- Leave the mixture for 10 minutes to make it more flexible.
When the solution is ready, you can proceed to the main work.
Bath design
It all depends on what kind of soil is used under the building itself. If these are materials that easily absorb moisture, for example: sand; then you can build a house right on the ground
It is worth paying special attention to the place where you plan to install the shower, since twice as much water will drain there as in the steam room itself. You also need to make sure that your floor can heat up quickly and retain heat for as long as possible.
This is important because the most important thing in a bathhouse is warmth. If the floor reflects the cold from the ground, the heat will not be sufficiently saturated
This is especially important during cool seasons, because at this time the earth cools down as much as possible.
Some mandatory points during floor construction:
- Construction of a drainage pit. It is necessary in order to pump out accumulated drained water from time to time.
- Creating a cushion on your soil for the primary screed.
- Filling, filling the first layer of your floor covering.
- To preserve heat, you need to lay special insulation and waterproofing of the floor.
- The wording of the second screed.
- A tightening table is installed.
Next we will describe all the points in more detail, so if you are interested, stay on this article.
Construction of a drainage hole
In fact, there will not be as much water in the steam itself as in the shower, but, naturally, although in small quantities, it will be present. Typically, the water receiver is located in the corner of the building. It looks like a grate in the floor, but sometimes people just dig a hole to save money. If you have dug a hole, you must line it with clay or concrete. As you already understood, according to the simple design, there will be a slope towards this part of the bathhouse so that all the water flows there.
Water removal can occur in many ways. The most common of them, which we advise you, is to lead an exit from the pit itself to the central sewer system, using sewer pipes. To prevent an unpleasant and unexpected odor from penetrating into the bathhouse through this pipe, you can simply block the access with a specialized shutter. But the holes and pipes don’t end there. Our pit will need not only a pipe that will drain water from time to time, but also a pipe facing the street, so that it will, as it were, ventilate our pit. Thus, ridding it of unnecessary excess odor and moisture.
If your sauna was installed not on the street, but, say, in the basement of your house, which is quite rare, the drainage hole is a small depression on the floor, from which you simply remove water with a bucket after using the sauna.
In fact, to prevent the drainage pit from looking too terrible and out of the style of the bathhouse, people often decorate it with stones, or use it as a small well to give it beauty.
Cushion for primary screed
This stage takes place so that as little heat as possible goes into the ground. A small depression is made about 50 cm from the ground level, which you must fill with materials such as bricks and various large stones. Trees should not be used, as after backfilling they may simply rot due to moisture. Backfilling occurs in the following way: it is necessary to cover it all with durable clay, and pour a little fine crushed stone and sand “about 15 cm” on top. Afterwards it is necessary to level the entire surface, thereby preparing it for the first pour.
Water drainage
When designing a bathhouse building, it is worth deciding on the location of the steam room and shower. Floors on the ground in a strip foundation or any other in these premises must be made taking into account the installation of drainage. To do this, provide a pit in the central part of the room. The self-leveling floor with a drain is connected using drainage pipes to a pit located outside the bathhouse. The pipeline is laid with a slope towards the drain step by step with digging a trench 3 meters deep and 1 meter wide. Installation is carried out according to all the rules, the walls of the pit are reinforced with bricks or precast reinforced concrete rings. When making floors for drainage, to ensure warmth, the pipes should be protected, for example, with foam insulation.
Installation of a drain hole in different baths
There are not very many drain designs. They differ rather in the place of application. The design of the drain may be different for different types of baths.
Sauna drain
The floor drain in a sauna may not have the same throughput as in a steam bath: there are no water flows from the tubs, and the font has its own drain. In addition, as a rule, the sauna itself does not need a drain, and the sauna washing area does not need a tiled floor. This means that a classic drain with a drain is used there.
In a sauna with a tiled floor, you can use a classic drain with a drain and a water seal
It is not much different from a sauna drain.
Viega Advantix drain for installation in hammam and sauna
Drain in a Russian bath
Draining in a Russian steam bath is necessary in two rooms - the steam room and the washing room. Bath drains are different, which primarily depends on the design of the floor in the steam room and washing room. They are no different in design if the floors are the same in both. Let's look at different floors and different drains for these floors.
A steam drain can also be ordinary, with a drain
Dependence of the design on the floor of a Russian bath
The floors in a Russian bath are different.
- Leaky or torrential wooden floors - horizontal boards are not laid tightly, but with cracks for free flow of water over the entire floor area. This is a traditional design that has long been used in Russian baths. The main disadvantage is the need for thorough initial and subsequent regular treatment of boards with hydrophobic impregnations.
- Leak-resistant wooden floors - the boards are laid closely at a certain angle of inclination towards the drain hole so that water flows freely. The slope is carried out using slightly wedge-shaped logs.
- Tiled (only possible in the washing room). They are also laid with a slight slope towards the ladder. The slope is carried out either by creating a concrete base, or by using different thicknesses of mortar.
The drains for different genders of a Russian steam bath are strikingly different in design. But the largest variety of drains is found on pouring or leaky floors.
pouring floor
With the simplest method of water seeping through the entire floor into a drainage pad located under the entire bathhouse, there is no drainage device at all.
Drain through the pouring floor into the drainage pad; no drainage device
A more complex subfloor design: it slopes towards the concrete channel, preferably with insulation and screed. There is also no drain.
When draining into a concrete channel, there is also no drainage device
When draining into a concrete pit, the role of a water seal is performed by the pipe itself, located in a special way - with the possibility of air access.
The pipe in such a pit plays the role of a water seal
If the underground has a drain into the sewer, then in addition to insulating and waterproofing the underground, you need a simple drain with a water seal to prevent unpleasant odors from entering the underground, and from there into the bathhouse through the cracks in the floor.
When draining into the sewer from under a pouring floor, a simple drainage device is required
Non-leakage floor
The only possible solution here is a classic drain. It can be of different designs - from a complex modern drain to an ordinary, familiar siphon. The ladder is a compact and reliable design.
The drain will last a long time and is easy to clean
The siphon is cheap and familiar.
Scheme of drainage on a non-leaky floor in a bathhouse using a siphon
The question is your financial capabilities and the availability of space under the floor.
Available materials for building a drainage pit
The choice of suitable material for the construction of a drainage pit under a bathhouse depends on the design features of the structure, the volume of wastewater and the financial capabilities of the owner of the site.
Barrel pits
Tanks can be constructed from barrels, metal and plastic, of various sizes. Such a system involves the use of one or two drainage containers:
- One container. The bottom of the prepared pit is covered with a drainage mixture of crushed stone and gravel, then a plastic container without a bottom and with a perforated surface is lowered into it. The distance between the barrel and the pit is filled with drainage. A waste pipe is connected to the barrel at an angle. Some of the liquid will flow through the drainage holes into the soil for further cleaning.
- Two containers. Such a system involves the use of two barrels, with the first being installed 25 cm above the second. The containers are connected to each other by an overflow pipe. The wastewater enters the first container, in which foreign impurities and solid waste settle. Next, the purified liquid is poured into a second tank, to which perforated pipes are connected for drainage. Drainage elements are installed in trenches filled with drainage material and a dense layer of soil.
Brick pits
To construct drainage pits, ceramic bricks are used, the masonry of which is carried out with small gaps - they ensure the drainage of wastewater into the drainage pad and soil. The operating principle of such a drainage system is no different from the previous one, the difference lies in the material used. The distance between the brick reservoir and the earthen base is filled with drainage material designed to clean the wastewater and distribute it around the perimeter of the pit.
A brick pit is considered more durable and practical compared to a structure made from plastic barrels.
Concrete pits
Given the technical equipment and financial capabilities, it is possible to build a drainage pit from concrete rings with a perforated surface, which are mounted in a prepared pit. After the installation of the rings is completed, the bottom of the structure is covered with a drainage cushion of gravel and crushed stone.
In the case when the depth of the pit is at least 2 meters and the bottom of the tank is concreted, such a structure can be used both for drainage of wastewater from a bathhouse and for sewerage of a residential building.
Tire pits
Cesspools made from used tires are designed to drain liquid waste, so they are well suited for the needs of a bathhouse.
The arrangement of a drainage system when installing tires can be carried out in various ways, including lateral perforation of the walls, maintaining a technological gap between the installed slopes, cutting off the outer walls while maintaining the internal structure of the tires.
This is the simplest and most popular option for organizing drainage under a bathhouse, according to which the work can be done with your own hands.
Choice of insulation
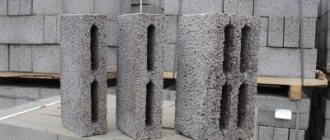
In order to insulate the floor in a bathhouse, the following materials can be used:
- mineral, fiberglass or basalt wool;
- expanded clay;
- expanded polystyrene;
- construction felt;
- aerated concrete.
The insulation is laid between a layer of steam and waterproofing, which are located between the rough and finishing concrete floor. If the floor is made on joists, then the insulation is installed between them.
To ensure normal thermal insulation of the floor, the thickness of the insulation layer must be at least 150 mm, it all depends on the material used and the climatic conditions of your area.
If you use expanded clay, then it must be laid carefully, since those granules that are broken lose their high thermal insulation characteristics. Despite the layer of insulation, such a floor in a bathhouse will still be cold, so now many people decide to make heated floors.
Basic tips for creating a drain for a bathhouse
If there is at least some possibility of connecting your drainage system to the central sewer system, then this is the most optimal and most effective option for organizing wastewater. If the site is located in an area that is not suitable for this, then you will have to carefully study the soil characteristics, the slope of the site, internal communications, the presence and level of groundwater, and correctly calculate the materials and energy costs. Bathhouse owners are often faced with a choice: septic tank or well? Both options have their pros and cons. Setting up a well, for example, will take more time than installing a septic tank. But the right well provides the best filtration of water and virtually eliminates the appearance of unpleasant odors. A septic tank is more suitable for frequent use of a bathhouse, as it provides faster absorption of water. In financial terms, the organization of a septic tank and a well are almost the same. Everything will depend on the materials used, because you can always replace, for example, an expensive plastic container with old tires, arranging them in such a way that they form a cylindrical container.
The drainage ditch, which was described in the last, fifth method, is permissible only in the case of a small volume of water and the absence of cultivated plants on the site. Otherwise, they will simply be poisoned by detergents coming from the drains, although the water will undergo filtration to some extent. However, this is the cheapest and fastest option for organizing a drain.
In general, despite the apparent ease of performing the task of organizing a drain, it is not so easy to calculate all communications correctly. Therefore, if you do not have experience in construction, it is better to hire a team of builders - today this service is not too expensive.
Source link
Preparing the base
Alignment
Before starting work, remove a layer of soil from the base along with any remaining organic matter. Usually 40-50 centimeters is enough. Then the surface is leveled, making sure to make a pit in the center of the room where the water from the bathhouse will go.
Drainage from the pit is carried out beyond the foundation and is realized through a drainage pipe with a cross-section of 10-20 centimeters dug in the corner under a slope. Thanks to this design, it will be possible to ensure maximum comfort in the operation of the bath and avoid the accumulation of large volumes of water.
Characteristics for choosing a drain method
When deciding how wastewater will be discharged, you need to rely on the following parameters:
- Frequency and intensity of use of the bathhouse. The depth of the drainage structure, as well as the methods of its arrangement, depend on the indicator.
- Proximity to fertile, usable soil. If the area is small and there is a vegetable garden next to the bathhouse, then just a drainage hole is not enough. For drainage, you will need to equip a septic tank to purify the water.
- How deep does groundwater go? The depth of the trench under the outlet pipe depends on this characteristic.
Having decided on the primary parameters, you can begin installing the water drainage system. It is divided into two stages: draining the interior of the bathhouse, which includes a certain floor structure, and installing a pipe to drain the liquid outside the steam room.
Basic installation diagram for water drainage from a bathhouse
Applying a tightening layer
At this stage, it is necessary to make the surface perfectly flat and smooth, so apply a small layer of cement-based mortar and smooth it. Since the top layer of the screed has not completely hardened, adhesion will be good, which means that the coating will not be in danger of cracking.
After completing the arrangement of the tightening layer, the floor surface is allowed to dry completely, while continuing to wet the concrete and, if necessary, covering it with film.
Wood floors
Wood floors can be made in two versions - leaky and non-leaky. In the first case, under the boardwalk there is a concrete screed, which is poured with a slope towards the water drain hole. This type of floor takes a very long time to dry, so it often deteriorates very quickly.
More preferable in operation is a leaking type floor. The design of such a floor assumes that under the boardwalk there is a pit from which a pipe extends for the outflow of water into a drainage hole, equipped with a water seal to prevent foreign odors from entering the premises.