Cement-sand and concrete screeds withstand compressive loads well, but if another type of load occurs, cracks may occur in the concrete slab. If pressure is applied to concrete that exceeds its strength characteristics, it does not deform, like plastic or other plastic materials, but cracks. Cracking can also occur under the influence of internal stresses in concrete, which cause shrinkage deformations during the hardening process and temperature changes.
Cracks in a concrete screed can appear as a result of exposure to loads on the floor that exceed the strength of the concrete.
To protect the floor from such damage and control the places where cracks appear, cutting is carried out in the concrete screed.
They come in three types:
- insulating;
- shrinkage;
- structural.
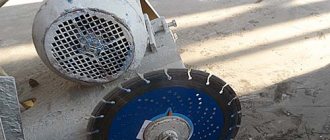
To cut in concrete you will need the following tools:
Compact joint cutters are used for cutting concrete floors.
- joint cutters;
- rope for marking;
- chalk;
- wide range;
- mechanical brush or sandblaster.
You will also need:
- insulating material;
- sealant;
- metal cones (for structural ones);
- special slats (for shrinkage).
Insulating
The structure of a building is subject to various deformations during its operation. Their main reasons include:
- environmental influences;
- temperature changes;
- soil movement;
- operation of equipment inside the workshop, etc.
To prevent the transfer of deformations from the walls and foundation to the concrete floor, insulation is performed in places where the concrete screed comes into contact with the floor and other building structures. During the hardening process, concrete usually shrinks; therefore, if the screed with a fixed object has a rigid adhesion, it will most likely crack.
Insulation is made in places where the floor comes into contact with the building structures, i.e. along the walls and around the columns. The shape around the column can be square (a) or round (b), without insulating seams the screed will crack (c).
Insulation is done around all columns in the building and along the walls. If there is a screed that borders another foundation, it must be done around the entire foundation. Around columns they can be round or square. In the latter option, the seam must be turned 45° relative to the column section and made directly opposite its corner. If equipment will move through the insulation, then in this case it is better to make the screed thicker by about 25%, and then, using a wedge, reduce the thickness to the original with a slope of no more than 1:10.
Installation material
After pouring the screed, formwork is made along the line around the columns. After the concrete has set, insulating material is laid instead of formwork.
Filling is done using insulating materials, which must not be destroyed under the influence of elastic deformations. When calculating the thickness, the coefficient of linear expansion of the screed is taken into account. Usually it is 13 mm. Most often, insulation is filled with sealant or prepared fiber, and it is important that the insulation material does not protrude onto the surface of the screed. The screed concrete must not come into contact with the concrete of other structures in the building, because the insulating concrete will not perform its functions, and cracking may occur at the point of contact.
Adhesive sealant for seams, brown
CEMMIX Adhesive-sealant for seams is a one-component polyurethane sealant for sealing various seams, junctions of steps and walls, entry of pipes and ventilation systems and rigid-elastic gluing of various materials.
More details
Cemmix polyurethane sealants offer the following benefits;
- high elasticity (Clear Fixa can withstand lengthwise stretching without breaking up to 400%, so it can also be used in flexible structures);
- excellent adhesion to various types of building materials (concrete, glass, brick, stone, plastic, glass, wood and others);
- thixotropy - a quality that allows you to work not only on horizontal surfaces, but also on vertical and ceiling ones;
- low shrinkage during curing;
- suitability for both external and internal work;
- wide temperature range for application;
- no foaming;
- resistance to vibrations and mechanical stress;
- resistance to temperature changes, atmospheric influences, ultraviolet radiation;
- water resistance;
- inertia;
- no reaction with metals, foam;
- versatility;
- ease of use;
- rapid curing due to air humidity;
- environmental Safety;
- durability (service life 20 years or more).
Thus, Adhesive-Sealant for Seams and Adhesive-Sealant Clear Fixa are among the best modern representatives of the family of polyurethane sealants.
They have some differences:
- Cemmix joint adhesive sealant is designed for joints 10–20 mm wide;
- Cemmix adhesive-sealant for seams is available in several colors (black, white, gray, brown);
- Seam sealant adhesive can be painted;
- Clear Fixa adhesive-sealant is ideal for joints with a width of 20–30 mm, produced in gray color.
Shrinkage
Shrink joints are cut along the column axes, butt-joint with the corners of the insulating seams around the columns.
The shrinkage of concrete during the drying process is 0.32x30 cm. The concrete screed dries unevenly, from top to bottom, so its upper part dries out and, accordingly, shrinks more. As a result, internal stress forms in the concrete, which leads to the formation of cracks. To avoid this problem, shrinkage pipes are cut. They create straight planes in the screed. As the strips dry, they open slightly, and cracks do not appear randomly, but in predetermined places. Shrinkage can be done using special slats that are inserted into still plastic concrete, or cutting can be done after finishing the concrete.
Shrink joints are cut along the axes of the columns and joined to the corners of the seams that run along the perimeter of the columns. The distance to the column should be equal to 2-3 times the thickness of the screed. Floor maps formed using shrink joints should be square, and elongated or L-shaped shapes should be avoided. Shrinkable ones must be made straight and preferably without branches. In driveways and passages, they should be located at a distance that is equal to the width of the screed. If the tracks are wider than 360 cm, it is necessary to make a longitudinal seam in their center.
Layout of insulating and shrinkage joints in concrete floors.
It is important to consider that if the card is small in size, then the likelihood of cracking will also be minimal. Shrinkage must also be done on the outer corners, otherwise cracks may develop from them. If the screed area has a very sharp angle, there is a high probability that it will crack. Therefore, it is advisable to avoid such angles. But if this option is not possible, it is important to make sure that the base is well compacted, and in those places where there is a high probability of cracks forming, cut shrinkage joints.
Crack problem
The formation of cracks in concrete can be reduced by reducing the volume of water used for mixing. But concrete, even with a low water content, shrinks, and, in addition, concrete made with some fillers can shrink more than concrete with other fillers. Since it is impossible to eliminate shrinkage of concrete made from traditional cements, the best solution is to allow the crack to appear in the place where its appearance is desired and, moreover, in the form of a straight line. This is an expansion joint. Joints can be made in freshly laid concrete using a special cutter. In dry concrete, the seams are sawn through. But even in screeds with cut or sawn expansion joints, cracks sometimes appear in other places. The likelihood of such cracks occurring can be reduced by doing the following:
Cut seams on time.
If the joints are cut in freshly laid concrete, then time does not matter. But if they are cut later, then random cracks are likely to appear. Cutting joints in freshly laid concrete is carried out immediately after grinding the surface. On dry concrete, cutting joints should be done as quickly as possible so that the edges of the joints do not begin to crumble. It is usually recommended to do this after 12 hours at normal temperatures, and at low temperatures - 24 hours after laying the concrete.
Cut seams to the required depth.
Seams cut with regular seam cutters should be 1/4 to 1/3 the thickness of the screed. Joints made by special cutters on freshly laid concrete may have a shallower depth. Cut seams at the required intervals. Typically, the cutting interval for seams is chosen within the range (24-36) x (thickness of the screed). On a 10cm screed, the seams are cut at a distance of 240cm to 360cm from each other. For concrete with greater cone slump and shrinkage, it is preferable to have a cutting interval closer to 240cm.
Exclude internal corners.
Cracks are most likely to appear on the inside corners. The seam grid should be such as to prevent the formation of internal corners.
Avoid T-shaped intersection of seams
T-shaped intersection of seams leads to the formation of a crack passing through the crossed seam. When planning the seam grid, T-shaped intersections should be avoided. Areas bounded by seams should have a shape close to a square. If the length of the area is 1.5 times greater than the width, then the crack will most likely appear in the middle of the long side. The seam pattern should be such as to prevent the formation of long and narrow sections.
Avoid the formation of triangular areas with sharp corners
Triangular-shaped areas with sharp corners usually crack at the end of the sharp corner. In general, triangles should be avoided, but if this must be done, the seams should form an equilateral triangle.
Sometimes cracks form in concrete that has not gained strength. These shrinkage cracks usually occur in dry, hot and windy weather. If such weather conditions are expected during the laying of concrete, then concrete with synthetic fibers should be used, and during the process of laying and grouting the concrete, the surface should be wetted with water.
Features of structural protection
In practice, during the installation of concrete floors, screed is rarely poured without long breaks. This option is possible in a room with a small area and if the concrete mixture is supplied continuously. Most often, pouring is carried out with technological breaks, so the laid concrete hardens and acquires a certain strength. In places where concrete laid at different times comes into contact with each other, it is advisable to cut structural ones.
Diagram of the tongue-and-groove device.
These joints are made in those places where the day's concrete placement has been completed. It is advisable to perform them at a distance of at least 1.5 m from other types that are located in parallel. For structural purposes, the shape of the edge of the screed is made according to the “tenon and groove” technology. When the side projections are made of wood, then for a screed having a thickness of 12-20 cm, a 30° cone is sufficient. Metal cones are also quite often used, which are installed according to the manufacturer’s instructions.
Why are seams cut, and is it possible to do without them?
Let's look at what concrete or cement mortar is, from which concrete floors and screeds can be made.
For the production of concrete for floors, it is necessary to follow GOST 26633-2015 Heavy and fine-grained concrete. Technical specifications, as well as GOST 24211-2008 Additives for concrete and mortars. General technical conditions.
The composition of concrete mixtures and solutions includes:
- binder;
- fillers;
- chemical or mineral additives;
- water.
Each of these components plays its own important role:
- The binder - in this case cement - is a component whose components, entering into hydration reactions in the presence of water, form new compounds that have a crystalline structure, which determines the strength of concrete. Reactions produce heat (that is, they are exothermic).
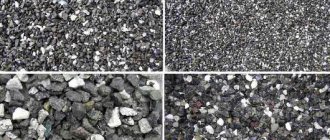
- Aggregates can come in different sizes. Fine aggregate is sand (usually medium fractions, with a grain size from 1.5 to 3 mm). Large - crushed stone and gravel, with a maximum grain size in the range of 5–20 mm (If floors of industrial facilities with a thickness of more than 500 mm are installed, then crushed stone of a fraction of 20-40 mm is used). If the grain size of the aggregates does not exceed 5 mm, we are dealing with a cement-sand mortar; if the grain size of large aggregates is more than 5 mm, it is a concrete mixture. Fillers structure concrete and give it additional strength, and for builders it is also important that they are much cheaper than cement.
- Water is a necessary participant in hydration reactions. Its quantity is determined by the water-cement ratio. The process of concrete gaining strength occurs only in the presence of water, this is especially important in the first few days after laying.
- Cemmix chemical additives give the concrete or mortar the necessary characteristics for workability (anti-frost Cemfrio and HotIce, increasing water resistance CemAqua, increasing mobility CemPlastCemBase, for installing screeds and heated floors - CemThermo).
Slicing technology
All cut seams must be clean and straight. The worker who performs this procedure must know the optimal cutting depth, their sequence, and be able to prevent rapid wear of the blade when using very hard aggregate in concrete. Joints should be made when the concrete is stronger to avoid damaging it with a blade, but before random cracks appear in it. Cutting into a concrete floor begins no earlier than 24 hours and no later than 72 hours after finishing is completed.
Expansion joints are cut to a depth of 1/3 of the thickness of the screed, which allows you to create a “slack” zone in the screed.
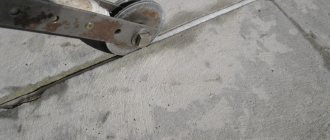
The location of each seam is usually marked using chalk along a stretched rope. The guide for cutting is a special ruler or board with a width of at least 4 cm. During the cutting process, spare equipment should always be available; it will be useful if the main one fails.
If there is a risk of premature cracking of concrete, for example in hot weather, it is necessary to cut every third or fourth joint before cutting intermediate ones. They are performed in the same sequence in which concrete is laid. Their depth should be equal to 1/3 of the thickness of the screed. This creates a zone of weakness in it, and when the concrete shrinks, it cracks in this very place. The edges of the crack that appear have a rough structure, which eliminates the possibility of their vertical displacement - as a result, the crack does not become too wide.
Relatively recently, an easy dry cutting method was invented, which is performed immediately after finishing the concrete. If you use a long handle while working, it is possible to cut up to 10 m even without moving along the floor surface. To cut long seams, a worker in special boots with smooth soles can move along the screed and use a 2 m handle. This type is cut to a depth of no more than 2-3 cm.
https://youtu.be/jfAXC2WYa8E
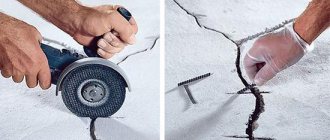
Installation and repair of gaps in the finished coating
The location of the gaps in the concrete coating is determined by the design documentation. The concrete surface is marked in accordance with the drawings. Using an electric wall chaser, cuts are made along the marked lines. Between the slots, the concrete is destroyed with a hammer drill. Using a grinder with a special casing and a diamond cup, the surface of the pipe is leveled. Bonded profiles are placed in the seam. Then holes are made in the profiles for fasteners. The profiles are secured with special fasteners (anchors). After installing the bolts, the temporary jumpers are dismantled.
Then a sealing gasket made of elastic material is installed. Decorative strips are used to secure the gasket. The grooves of the decorative strip are placed on threaded rods. The planks are fixed by tightening the studs with nuts. To protect the decorative part from the solution, use an overlay in the form of a galvanized metal casing. The pads must be pressed to the base. After embedding the profile, the protective casing is removed and the seam is sealed. Excess sealant is removed.
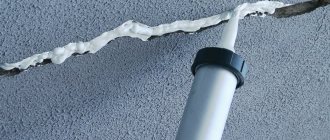
Sealing
Expansion joints are filled with sealant, and then sealant is applied.
To facilitate the cleaning process and provide support under various loads, the seam needs sealing. Sealing allows you to effectively protect against moisture, aggressive environments and clogging. The type of sealant is selected depending on the operating conditions and the strength of the load. For example, if the floors will need to be washed frequently or will be driven over by heavy trucks, then a sealant that is fairly hard and flexible will be best.
In industrial premises, seams must be filled with appropriate material that can support the seam and withstand heavy loads. The material is applied no earlier than 28 days after laying the screed. Before sealing, the seam must be cleaned of contaminants by blowing it with compressed air and using a mechanical brush or sandblaster. If you use a processor for this purpose, you must first make sure that it does not leave an oil film in the seam.
To summarize, we can conclude that in order to obtain a durable concrete floor that is resistant to pedestrian, transport and other loads, as well as temperature changes and corrosion, it is necessary to use high-quality materials, accurately perform the necessary technological operations, correctly cut expansion joints and maintain concrete floors.
Which self-leveling floor to choose?
The most important thing in the installation of self-leveling floors is the correct determination of the requirements for floors and the resulting correct choice of self-leveling floor.
The ProfiPol Group company offers you all the necessary materials to make self-leveling floors. The materials offered for the installation of self-leveling floors (polyurethane floors, epoxy floors) can satisfy any operational requirements. Sections of our website will help you choose a self-leveling floor, where detailed information about self-leveling floors is provided (how to make a self-leveling floor with your own hands, a description of floor installation technology, choosing a self-leveling floor, etc.). We ask you to call or write to us. The specialists of the ProfiPol Group Company will help you choose a self-leveling floor covering based on your technological specifications and will always advise you on the design and choice of coating. Attention!!! We do not carry out work in apartments and residential premises!!! Work in existing production facilities and warehouses by appointment only!!! Order work on floor installation tel. 8-495-227-78-10
to full list of articles
What is an expansion joint
A seam is a cut (an artificial gap) in a monolithic concrete slab, which divides it into sections that can move independently of each other within small limits.
Why do you need a cut in a floor screed? Essentially, it is a monolithic concrete slab that is subject to such serious loads as pressure from the entire structure, shrinkage, thermal expansion, and swelling. The heterogeneous structure of a large monolith causes uneven expansion (compression) of different areas, which causes internal stresses leading to cracking.
Cutting a large slab into several elements reduces internal stresses. Each block can move relative to the neighboring section, regardless of it. As a result, the likelihood of cracking is reduced.
I. SCOPE OF APPLICATION
1.2. This TTK provides instructions on the organization and technology of work when cutting expansion joints in a concrete floor covering with their subsequent sealing.
The composition of production operations, requirements for quality control and acceptance of work, planned labor intensity of work, labor, production and material resources, industrial safety and labor protection measures have been determined.
1.3. The regulatory framework for the development of technological maps is:
building codes and regulations (SNiP, SN, SP);
factory instructions and technical conditions (TU);
standards and prices for construction and installation work (GESN-2001 ENiR);
production standards for material consumption (NPRM);
local progressive norms and prices, norms of labor costs, norms of consumption of material and technical resources.
reducing the cost of work;
reduction of construction duration;
ensuring the safety of work performed;
organizing rhythmic work;
rational use of labor resources and machines;
unification of technological solutions.
1.5. On the basis of the TTK, as part of the PPR (as mandatory components of the Work Project), Working Technological Maps (RTK) are being developed for performing certain types of work (SNiP 3.01.01-85* “Organization of construction production”) for cutting expansion joints in the concrete floor covering with their subsequent sealing.
The design features of their implementation are decided in each specific case by the Working Design. The composition and degree of detail of materials developed in the RTK are established by the relevant contracting construction organization, based on the specifics and volume of work performed.
The RTK is reviewed and approved as part of the PPR by the head of the General Contracting Construction Organization.
1.6. The TTK can be tied to a specific facility and construction conditions. This process consists of clarifying the scope of work, means of mechanization, and the need for labor and material and technical resources.
The procedure for linking the TTC to local conditions:
reviewing map materials and selecting the desired option;
checking the compliance of the initial data (amount of work, time standards, brands and types of mechanisms, building materials used, composition of workers) with the accepted option;
adjusting the scope of work in accordance with the chosen option for carrying out work and a specific design solution;
recalculation of calculations, technical and economic indicators, requirements for machines, mechanisms, tools and material and technical resources in relation to the chosen option;
design of the graphic part with specific reference to mechanisms, equipment and devices in accordance with their actual dimensions.
1.7. A standard flow chart has been developed for engineering and technical workers (work producers, foremen, foremen) and workers performing work in the third temperature zone, in order to familiarize (train) them with the rules for carrying out work on cutting expansion joints in concrete floor coverings with their subsequent sealing, using the most modern means of mechanization, progressive designs and materials, methods of performing work.
The technological map has been developed for the following scope of work:
Prices: Diamond cutting (diamond blade)
| Thickness of structures (cm.) | Brick | Concrete | Monolith | Asphalt |
| Up to 12 | 400 | 700 | 900 | 500 |
| 13-15 | 600 | 900 | 1300 | 650 |
| 16-19 | 800 | 1200 | 1600 | 800 |
| 20-22 | 1200 | 1600 | 2000 | 1200 |
| 23-25 | 1600 | 2000 | 2300 | — |
| 26-30 | 2000 | 2300 | 2800 | — |
| 31-35 | 2300 | 2800 | 3300 | — |
| 36-40 | 2800 | 3300 | 3800 | — |
| 41-50 | 3300 | 3800 | 4300 | — |
| 51-60 | 3800 | 4300 | 4800 | — |
| 61-70 | 4300 | 4800 | 5300 | — |
| 71-80 | 4800 | 5300 | 5800 | — |
If we are talking about deformation in a non-residential building, then most likely the culprit will be equipment and various devices. To prevent cracks from spreading from the wall to the floor, experts do insulation work where concrete meets concrete. This process allows you to slightly protect the floor from processes occurring with the walls and partitions of the building. It is this method of saving the floor from cracks that will be discussed in the article.