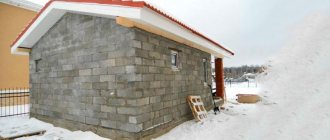
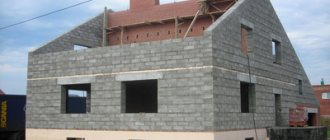
Aerated concrete is a very widespread material in construction.
Aerated concrete is very popular in construction, as it combines the properties of a thermal insulation and structural material. Let's consider the question of what the solution for aerated concrete blocks is prepared from and how to choose the right recipe. We will also touch upon the technology features of this material.
Which composition to choose?
When constructing load-bearing structures using ceramic stone, a special connecting mixture is used. It differs from CPR in its minimal thermal conductivity and is more plastic when applied. The composition is saturated with additional low-density components. What kind of solutions are used for ceramic blocks:
- A dry, finely dispersed mixture prepared on special equipment based on expanded clay chips and perlite.
Additionally, frost-resistant plasticizers are added to it, giving the material flexibility and retaining moisture.The powder just needs to be diluted with water in the ratio indicated on the package.
- The solution is prepared with your own hands. To create, crushed perlite and cement are used in a ratio of 1:3. To maintain flexibility and mobility, plasticizers are added to the mixture. The solution is mixed with a concrete mixer, which breaks up the lumps. They form quickly due to the properties of perlite.
- The most common cement-sand mortar made from Portland cement, the only advantage of which is its low cost.
Advantages of a special connecting mixture for laying ceramic stone:
- Light weight of the finished substance, the overall load on the foundation is lower.
- Together with ceramic blocks, excellent sound insulation is created, a high level of sound absorption, sounds from the street do not penetrate the walls.
- Increased level of indoor comfort, absence of cold bridges.
- Low consumption of material due to its plasticity, saving money and time for mixing, reducing the time for laying.
- Fire resistance, thanks to which the composition can withstand prolonged heating and does not ignite.
- Decorative properties, the ability to make joints for jointing and make the wall surface part of the finish.
- The price for the mixture is affordable.
There are no disadvantages to the ready-made solution for ceramic blocks, since it was created specifically for this material and matches its properties as closely as possible.
Frost-resistant additives in the mixture
If construction is carried out at temperatures below +5 ° C, then the life time and setting speed of the installation mixtures is reduced. At temperatures below 0 °C, the use of mortars without frost-resistant additives is prohibited.
Adhesive compositions labeled “winter” or “winter” already contain antifreeze additives, so there is no need to purchase or add them additionally. Most winter adhesives for aerated concrete can be used without restrictions at temperatures down to -15. -20 °C.
Cement-sand mortar requires the use of frost-resistant additives, which are introduced into the finished mixtures. Purchased additives must comply with GOST 24211. Chemical antifreeze additives are available in the form of powder, granules, liquid or suspension. The most common additives are produced under the following brands: “ Cryoplast ”, SIKA, CEMMIX.
What kind of mixture is needed?
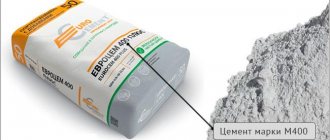
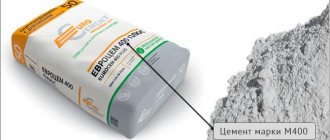
For laying expanded clay concrete blocks, only durable cement mortar is used. For its production, Portland cement of a grade not lower than M400 is used. This is a finely ground powder consisting of clinker and gypsum. He has won the trust of consumers, since in many cases he is simply irreplaceable.
Advantages of the cement composition for laying expanded clay blocks:
- High compressive strength. This means that even if cracks appear and the building deforms, the mixture does not collapse or crumble.
- Rapid hardening and onset of setting.
- Resistance to mechanical stress, moisture, corrosion.
- Minimal shrinkage.
- High elasticity.
- Frost resistance. If the proportions and construction technologies are observed, the solution does not lead to the appearance of “cold bridges”.
- Affordable price.
- Can be used for expanded clay concrete blocks with uneven surfaces and chips.
Disadvantages of cement mixture:
- Lack of use during the cold season.
- The need to purchase or rent a concrete mixer.
- Short shelf life. The finished composition must be used within 2 hours. When opened, even dry cement can be stored for no more than 45 days.
How to choose glue for gas blocks?
The solution to the issue is complicated by the significant variety of adhesive compositions on the market.
The easiest way to decide is to conduct small tests.
Test 1
. Take several types of glue and glue two aerated concrete blocks with each. After a day, break the connection and look at the location of the break. If the fracture goes along the seam, this glue is not suitable for use. If partly along the seam, and partly the blocks themselves are deformed, then the use of such glue is questionable. If the seam remains intact, but the aerated block is damaged, this is the best adhesive for aerated concrete. This is the glue that should be preferred.
Test 2
. Prepare for use 1 kg of each type of glue being tested. Fill identical containers with them. After hardening (24 hours), weigh. Preference should be given to glue from the container that weighs less. Low weight indicates that most of the moisture has gone, which means the mixture is less thermally conductive.
Anticipating a healthy dose of irony from readers, we note that testing several adhesives is, of course, troublesome and expensive. But it will be useful for those who have a couple of types of glue and don’t know which one to choose.
We will indicate those brands of adhesive for aerated concrete blocks that have been tested by professionals and have earned their approval.
Ceresit CT 21
Adhesive for aerated concrete Ytong-economy
Adhesive for aerated concrete Osnovit Selform MS112
Bonolit aerated concrete adhesive
Adhesive for aerated concrete Baumit PorenbetonKleber
Winter aerated concrete adhesive AEROC
Manufacturers and cost of aerated concrete adhesive
Today you can buy adhesive for aerated concrete in many online construction stores. Before placing an order, we suggest that you familiarize yourself with the top three, according to the number of positive reviews (the table shows manufacturers and average prices at the end of 2015)
| Manufacturer | Glue cost | Glue consumption kg per 1 sq.m. with a layer of 2 mm | Seam thickness, mm |
| Ceresit CT 21 (+ “Winter”) | 300 RUR/25 kg | 2,6 | 2-10 |
| Baumit PorenbetonKleber Baumit PorenbetonKleber Winter (winter) | 200 RUR/25 kg 270 RUR/25 kg | 2,5-3 | 2-3 |
| KREISEL 125 (Kreisel) | 250 RUR/25 kg | 2,5-3 | 1-3 |
| Good reviews about glue for gas blocks (second three) | |||
| Found Selform MS112 (T-112) | 199 RUR/20 kg | 2,6 | 1-5 |
| AEROC winter | 240 RUR/25 kg | 2-3 | 1-5 |
| Ytong-economy (winter solution) | 260 RUR/25 kg | 3-3,2 | 1-3 |
| Bonolit | 220 RUR/25 kg | 2,6-3 | 2-8 |
As you can see, adhesives are presented in different price categories, despite approximately the same composition and purpose.
Adhesive foam for aerated concrete H+H LimFix It is worth noting that a modern adhesive material for laying blocks made of cellular concrete has appeared - polyurethane adhesive foam in cylinders.
The unique technology of using foam allows you to make a very thin seam and eliminate cold seam bridges, along with incredible efficiency (1 cylinder = 1 cubic meter of masonry) and high adhesion.
The new product is still being treated with caution. Due to the lack of time-tested confirmation, manufacturers are limited to recommendations for the use of adhesive foam for internal self-supporting walls. In European countries, foam is already actively used for laying blocks.
Material prepared for the website www.moydomik.net
Adhesive consumption for aerated concrete
A 25 kg bag of dry mixture is dissolved in 5-6 liters of water, resulting in 18 liters of finished glue from the bag.
Consumption of glue (dry masonry mixture) for thin-seam masonry (seam 1-3 mm) per cubic meter. is 16-17 kg.
The lifespan of the finished adhesive mixture is 2-3 hours. The time for adjusting blocks after laying is 10-15 minutes.
The consumption of aerated concrete adhesive directly depends on the dimensions (the indicated calculation data are based on blocks 600 mm long and 300 mm high) and the quality of the aerated block surfaces (poor geometry, chips and defects increase consumption), as well as on the professionalism of the mason. Therefore, calculated values may differ from actual ones. It is better to calculate with a reserve.
Formula for calculating glue consumption
Where:
P – consumption of dry adhesive mixture kg per cubic meter of aerated concrete masonry; L – length of aerated block (m); H – height of aerated block (m); d – seam thickness (mm); 1.4 – calculated value of dry mixture consumption for glue (kg/m2 with a layer thickness of 1 mm).
What affects the price of aerated concrete adhesive?
- place of purchase (retail store, wholesale warehouse, online store);
- delivery (pickup);
- purchase volume (pieces, wholesale);
- brand awareness.
Technology for preparing adhesive for aerated concrete
Each manufacturer puts instructions for use on the packaging. But as general rules we indicate:
- the required volume of water is measured;
- the mixture is poured into water in small batches;
- mix with a mixer until a homogeneous mass is obtained for 5 minutes;
- the mass should “rest” for 5-10 minutes, during which time the polymer additives will open;
- mix the solution again;
- Stir the solution periodically during operation.
The optimal consistency of the glue is such that the teeth that appear on the surface after applying the glue with a notched trowel (comb) do not spread.
Advice. It is unacceptable to add water to the mixed adhesive solution during work, as this will reduce its adhesive properties. Therefore, you should prepare a small portion of glue, sufficient to work for half an hour.
When can you lay aerated concrete?
When deciding on the choice of adhesive for aerated concrete, you should remember that external factors also affect the adhesive ability of the adhesive. Many people are interested in whether it is possible to lay aerated concrete in winter, in frost, in rain, at what temperature, etc.
External factors:
- ambient humidity
. Laying walls made of aerated concrete should be done in the dry season. Then the glue will harden at the optimal speed. During rain, snow and strong winds - not possible. Actually, it is also undesirable to work with dirty, wet and icy blocks;
- air temperature
. The hotter it is, the faster the hardening process will occur, which can lead to shrinkage cracks. During the cold season, the glue will harden more slowly.
Advice. If you are laying blocks in winter, use summer glue to cover the container with glue and seal it with hot water.
How to correctly lay aerated concrete with glue
- block preparation. An aerated concrete block suitable for work must be of the proper size and free of contamination (dust, dirt, snow are not allowed). Excessive moisture in the block is also undesirable;
- the block is not moistened before applying the glue (!);
- to reduce glue consumption, it is applied to the surface of the aerated concrete block with a notched trowel or carriage;
- Excess glue is removed after hardening. They are cut off with a trowel (the exception is spreading glue over the front surface of the block).
Having thus compared adhesives for aerated concrete and a cement-sand mixture, one can make an unambiguous conclusion in favor of using ready-made adhesive solutions.
Solution consumption
Before starting construction, you need to know the need for certain materials. Mortar consumption significantly affects the costs associated with the purchase of cement and sand. With a large volume of construction, water delivery will also cost a certain amount of money.
The amount of mortar for laying KB walls depends on the thickness of the vertical and horizontal joints between the blocks and the width of the walls. The standard thickness of seams ranges from 6 to 8 mm. Laying CB on adhesive compounds allows you to make seams 3 mm thinner.
Having calculated the total area of laying the mortar, multiply it by the average thickness of the seam. The total volume of consumption of the binder mixture is obtained. Taking into account involuntary losses of the binder mixture, the solution consumption is increased by 7 - 10%.
Knowing the specific gravity and proportions of the components, the total need for cement, sand, water or a ready-made adhesive mixture is determined.
Thermal insulating heat-saving masonry mortar
For laying single-layer block walls, it is recommended to use adhesive solutions. The use of glue allows you to lay walls with a joint thickness of only 2 mm.
But, the use of glue for filling joints when laying single-layer walls made of aerated concrete, gas silicate blocks, as well as ceramic, expanded clay concrete, wood concrete blocks, and blocks made of other materials, is only possible when using blocks with a height deviation of no more than +/- 1 mm.
(category 1 for deviation of geometric parameters).
Not all manufacturers produce such blocks. And blocks with height deviations of no more than +/- 3 mm are more affordable.
(category 2). These blocks must be placed in the wall on a mortar with a joint thickness of 8-12 mm.
The use of conventional cement-sand mortar for laying external single-layer walls made of blocks significantly reduces their heat-shielding properties. The thermal conductivity coefficient of masonry increases to 30% compared to masonry with glue (for D400-500 blocks). It's too much.
Therefore, for laying external single-layer walls made of blocks, heat-insulating lightweight warm mortars with a dry density of less than 1500 kg/m3 should be used.
Cement consumption
Usually, when constructing private houses, builders use cement-sand mixtures. And the main component in them is cement. Moreover, it is also the most expensive. Therefore, in order to save money again, you need to know the consumption of cement per cubic meter of brick laying.
Firstly, there is a dependence on the brand of cement that it was decided to add to the masonry mortar. Usually this is either M300 or M400. The first will have to be added in larger quantities than the second. But the second is more expensive than the first. So this indicator has little effect on saving money.
Secondly, the brand of the solution itself. The lower it is, the less cement is required. For example, there is a classic solution, which is determined by the ratio of binder to sand as 1:3. That is, to make such a mixture, one part of cement and three parts of filler are required.
Masters do this in different ways, most often using buckets. Because the specific gravity of the two materials is the same and equal to 1400 kg/m³. That is, one ten-liter bucket is filled with 14 kg of material. If you count it into bags of cement, which is 50 kg, then one bag fits 3.5 buckets. Based on this, you can accurately calculate the required number of bags.
Cement consumption for different types of mixtures Source greenbuilding.rf
There is another way. Here, the calculation of cement consumption for masonry is based on the volume of each material. To do this, take one cube of sand as the main ingredient. And the required volume of cement is calculated: 1:3 = 0.333 m³. In liters it will be 333. Or 33 buckets.
Now about the consumption of cement and mortar in general. As mentioned above, for laying 1 m³ of wall, where ordinary solid stone is used, 0.221 m³ of solution is required. And if a mixture of the classic ratio of 1:3 was used for this, then cement was added to it: 0.221:4 = 0.055 m³. Let's convert the figure into kilograms: 0.055x1400=77.
The video shows the proportions of cement for masonry mortars:
Which solution for aerated concrete is better to choose?
To determine what solution is needed for laying aerated concrete blocks, let’s turn to the “Technological map”. The TTK establishes the criteria that the mounting solution must meet. Let’s compare how much the glue and cement-sand mixture meet these criteria:
Laying an aerated concrete block on a cement mortar does not have any advantages over the use of adhesive compositions and, at the same time, reduces the heat-protective and strength characteristics of an aerated concrete wall. Using special adhesive for aerated concrete is the best choice in terms of quality, price and ease of use.
Briefly about the main thing
The consumption of mortar for the construction of a brick wall depends on the type and brand of the mixture, geometric evenness, type and size of the brick, and the thickness of the joints.
Calculation of consumption during the construction of a private house is carried out either in cubic meters or kilograms.
Cement, as the main component of masonry mortar, is the main expense item in the construction of walls. Its consumption depends on the brand and the amount applied. For example, when mixing cement and sand in a ratio of 1:3, ¼ cube of the solution is added as a binder. That is 0.25 m³.
Adhesive cement-sand compositions for the second and subsequent rows
Important advice - how to lay a gas block:
- The wall should be laid out in complete rows.
- Each stone is leveled with a rubber mallet, first in a vertical plane, then in a horizontal one.
- Finally, the straightness of the laid block along the mooring cord is corrected.
The surface of each row is checked for level and ground. After all, even blocks of the first category differ in height - up to 1 mm. To ensure a joint thickness of 1–3 mm in each row along the entire height of the wall, each row of aerated concrete should be sanded. For this purpose, special planes, sanding meshes or sandpaper are used.
The glue is applied with a special carriage that combines a storage hopper and a trowel. For small volumes of masonry, you can use a notched trowel.
The adhesive strips must be continuous, without breaks. The ends of the stones are also lubricated - the vertical seams are made continuous. The foam block is placed so that the excess mixture comes out. The roller should not be rubbed, so as not to disturb the uniformity of the wall surface. The dried glue is cut off with a spatula.
When working with aerated concrete of the second category, a light or heavy solution is used. Heavy mixtures can be applied to the row in two stripes. Their thickness should not exceed 15 mm. Place the CPR with a trowel. A heat-insulating elastic gasket is placed in the interval between the strips.
What does the material contain?
The composition of the adhesive for expanded clay concrete blocks includes the following components:
- Portland cement. It acts as the main binding agent.
- Sand. To produce high-quality glue, fractionated sand that has undergone purification is used. It is necessary to give the mass plasticity. When there is a temperature difference, it is the sand that prevents the wall from cracking.
- Polymers. They are needed to fill chips and unevenness on the blocks. Thanks to polymers, the adhesion of the adhesive to the surface increases.
- Modifiers. They prevent the formation of cracks in the adhesive base and prevent heat from leaving the room.
How to cook it correctly?
In order for the glue to fully exhibit its adhesive properties, it must be properly prepared. Depending on the manufacturer, the instructions may differ, but significant deviations from the universal algorithm are rare.
The procedure is as follows:
- Water is poured into a suitable container in the amount needed to prepare the adhesive mixture. The exact proportions are indicated on the packaging. The water must have the optimal temperature, which is indicated in the instructions.
- Pour dry glue from the pack into the water.
- Mix the mixture until a uniform base is obtained. To ensure that there are no lumps left in the glue, it is recommended to use a construction mixer. As a result, the sticky mass should resemble sour cream. When applied to blocks, it should not flow or spread.
- Let the mixture brew. This will take about 10 minutes.
If it was not possible to use the entire composition, you should not leave it for storage. After hardening in the container, the glue loses its properties, which do not return when re-moistened.
Advantages and disadvantages of adhesive mixtures
Adhesive mixtures for masonry of cellular concrete are produced in ready-made form; the packaging contains detailed instructions for preparing the solution, it indicates the composition and ratio of the components.
Important! It is necessary to strictly follow the instructions; the strength and other performance properties of the masonry depend on this.
The adhesive solution contains the following components:
- High quality cement, grade M400 - it ensures the strength of the finished material;
- Fine-grained purified sand - a small fraction of quartz allows you to apply a thin layer of the mixture without loss of technical properties - strength, adhesion;
- Modifiers and plasticizers - protects the seam from cracks and increases the moisture resistance of the solution;
- Polymer powder – increases glue adhesion.
Manufacturers offer two types of adhesive mixtures depending on the time of use - winter and summer solutions; they have certain differences.
Winter view - used for work at temperatures from +5 to -10 degrees. The manufacturer has added special anti-frost components to the composition; they provide resistance to temperature changes. This mixture hardens quickly, so it must be used within half an hour.
Summer type adhesive mixture is used in the warm season, the available temperature range is from +5 to +30 degrees. The setting time of the solution is 2 hours.
Advantages of laying foam blocks on the mortar:
- Thin interblock seams;
- Easy to prepare;
- The speed of block laying increases;
- Moisture resistance;
- The time spent is reduced;
- Thermal insulation;
- Minimum production costs;
- Resistance to fungi and mold;
- Does not require additional processing;
- Environmental friendliness;
- Soundproofing.
The main negative side of the adhesive solution purchased in the store is the high price.
How to place it correctly and what is the pattern?
The main rules for laying expanded clay concrete blocks are:
- performing a sequence of actions based on the drawing;
- use of fittings;
- arrangement of the lower and upper layers of the wall with cement mortar;
- maintaining the thickness of the pie;
- arrangement of external and internal waterproofing with a ventilation gap of at least 20 cm;
- the use of insulation and exterior finishes that increase the heat-saving properties of the material.
The layout of expanded clay concrete blocks may look like the photo below:
The regulatory documents used in masonry work with expanded clay concrete are as follows:
- GOST 32488-2013 – External walls;
- SNiP 23-02-2003 – Thermal protection;
- STO 501-52-01-2007 – Design of residential concrete structures;
- STO-NO "SPKiK" -001-2015 – Structures made of expanded clay concrete.
- southern regions – 20-40 (cm);
- central regions – 40-60 (cm);
- northern regions – 60 (cm).
The thickness of the walls largely depends on the climate, landscape, number of layers of pie and finishing. But the builders indicated that the maximum thickness standards reach 65 cm. The layers of the cake are clearly shown in the photo below:
Composition and specificity of the solution
The solution in foam block masonry not only acts as a connecting link, but also helps improve the thermal insulation properties. Therefore, it is not the usual sand-cement mixture in a ratio of 4 to 1, but a mixture with the addition of a small amount of additives, amounting to approximately 1% of the mass of the finished solution.
So, the classic solution for foam blocks consists of:
- cement;
- sand;
- foam additive;
- plasticizer;
- slaked lime;
- and water.
All ingredients, except water, are arranged in descending order of their quantity.
Let us explain the purpose of each of the not quite familiar elements:
- Additive for foam formation . It is precisely that miraculous element that increases the thermal insulation properties of the seam. In other words, these are air-entraining surface substances, of which liquid resin is a representative, as in the photo below.
- Plasticizer . It significantly increases the service life of both the seam and the foam block itself.
- Slaked lime . It will reduce the overall volume of concrete while improving the thermal properties of the joint. This element is like an addition to the foam.
As you can see, all these additional elements are easy to find on the domestic market. The price for them is quite reasonable, but under no circumstances use them in too much quantity. This will only harm the structure.
Note! Do not use an additional ingredient such as clay. It is destructive for foam block masonry and will inevitably lead to a critical reduction in strength.
Alternative options
If you are not afraid of the difference in cost, then you can use ready-made dry adhesives for foam blocks, diluting them in water.
There are several proven brands suitable for laying foam blocks:
- Unis-Uniblock;
- Ivsil Block;
- Knauf LM-21
- Weberbat Block;
- Founder of T-112.
The above dry mixtures have proven themselves to be an excellent option for masonry and even for interior finishing of foam block structures. They are used when laying internal partitions, and even for repairing chips.
The whole point is that they have physical parameters very similar to the masonry material itself. They cope well with thermal insulation and make it possible to lay thin joints of 3 mm.
Such a thin seam will eliminate the possibility of freezing and will not deteriorate upon contact with moisture.
A few words about cinder block
Cinder block, which is also in good demand, cannot remain without our attention. Due to the discrepancy in the compositions of the two materials we took, the solution for cinder block is made somewhat differently.
You can, and even need to, add red clay to its composition.
One of the mixture options for laying cinder blocks looks like this:
- cement grade M 400 or M 500;
- sand, no matter river or quarry;
- red clay;
- water;
- plasticizer (optional).
To illustrate the proportions of the solution, we will give an example. Take 1 bucket of cement and 3 buckets of sand. Add 1/3 of a bucket of clay to the general “pile”. Then, while stirring, pour in the water, paying close attention to the consistency.
Note! This solution must be used up no later than an hour and a half later. It is absolutely incapable of remaining in an unfrozen state for a long time.
Preparation of the solution
Masonry can be done using a mortar of sand and cement or using a ready-made mortar.
Consumption of mortar for masonry photo
- The masonry mixture is made from sand, cement and water, in the following proportions: 3 parts sand, 1 part cement, 0.7 parts water. In this case, the grade of cement must be no lower than M400.
- Part of the water is added depending on the moisture content of the sand and the consistency of the solution, which may vary depending on the material being laid and the ambient temperature. For this purpose, water is added last and in small portions. By the way, a properly prepared solution is first mixed dry without water, and only then water is added.
- For expanded clay concrete blocks, you should prepare not a liquid solution, but a somewhat steep one, but having a certain plasticity. This is due to the fact that concrete-based materials do not absorb moisture well and an incorrectly prepared solution will leak out of the joints.
- To give the mortar the required characteristics that make the mortar convenient for laying, quarry sand can be added to river sand, which may contain a small amount of clay, making the mortar more plastic. A more plastic solution can be obtained without reducing its basic characteristics by adding various plasticizers to the solution.
- If it is not possible to bring sand and cement, and there is no container for preparing the solution, then you can purchase a ready-made mixture in dry form, to which you just need to add water and stir. Such mixtures have good plasticity and are capable of producing joints with a thickness of 3-5 mm, while cement mortar with sand produces joints of 6-9 mm. You can immediately say that the finished mixture will cost half as much, but still, it will not be cheaper.
- To prepare a high-quality solution and in the required quantity, you should get a concrete mixer or find a trough. It is only desirable that there are no stiffening ribs along the edges.
- This is especially true when construction is carried out from scratch and a lot of cement mortar will be needed. Do not mix a large amount of solution at once. It should be prepared as much as can be used within 1-2 hours of operation. When mixing in a concrete mixer, you should not keep the solution in it until it is completely used up, but you should immediately throw it out of the concrete mixer into some container and immediately rinse the concrete mixer.
- If the solution is not used quickly, it begins to separate: sand and cement settle to the bottom of the container, and water rises to the top. To ensure that the solution is always homogeneous, it must be stirred from time to time.
- Ready-made dry mixtures are not prepared in a concrete mixer. To prepare them, all you need is a container and a drill with an attachment.
- It should be noted that the technology for preparing the solution manually is somewhat different from the technique for preparing the solution in a concrete mixer. Here, the operations have the opposite sequence: if you first need to manually stir the solution in a dry form, and then add water, then when preparing it with a concrete mixer, water is first poured into it, cement is added, and sand is added only last. All this happens during constant operation of the concrete mixer. In other words, the consistency of the solution is controlled by the amount of sand, although you can add water at the end.
Attention: The more cement you add to the mixture, the stronger it will be when dry. At the same time, the consumption of mortar for masonry made of expanded clay blocks will remain the same
The technology for laying such blocks does not have any special features, and anyone who wants to do it with their own hands can do it.
Cement-sand mixture
The preparation process, requirements for materials, and proportions of mortar for laying aerated concrete are established by GOST 28013-98.
You can obtain a cement-sand mixture (cement-sand mixture) in one of three ways:
- Buy dry composition and dilute with water.
- Order the ready-made mixture from the factory.
- Prepare the CSP yourself.
Although regulatory documents allow the laying of aerated concrete with cement mortar. This is most likely due to the fact that the documents were written long before the advent of high-quality adhesive solutions and service stations of manufacturers, which describe recommendations and technology for performing work on aerated concrete masonry. At present, laying aerated concrete on cement mortar, in principle, should not even be considered as an alternative! The only technologically correct option for masonry is laying blocks with special adhesive solutions!
The number of components for preparing 1 cube of CPS is given in the table:
The components are mixed until a dough-like mass is obtained. The presence of delamination, lumps, and foreign inclusions in the cement-sand mass is not allowed.
Features of using cement-sand mixture:
- it is necessary to independently add frost-resistant additives when performing work in sub-zero temperatures;
- thick seams 6-10 mm, which are cold bridges;
- fast setting and slow strength development.
Laying aerated concrete on cement mortar at present is a gross violation of the technology for constructing load-bearing walls made of aerated concrete. It doesn’t matter whether professional builders are working on site or beginners, laying aerated concrete blocks should be done exclusively with special glue! The lifetime of the DSP is 1-1.5 hours depending on the air temperature. To increase the mobility of the material, additives can be introduced, but then the price of 1 cubic meter of material immediately increases by 10-30%.
Preparation of the solution
Types of mixtures for laying expanded clay concrete blocks:
- Ready-made powder solutions;
- DIY prepared mixtures.
Two types of solution are popular among consumers. The main thing is the correct selection of the manufacturer’s brand or ingredients in order to prepare the composition.
To prepare the concrete mixture yourself, it is recommended to use a concrete mixer; this unit will allow you to thoroughly mix all the components. The quantity and quality of cement mortar affects its strength. In addition to cement, lime is used as a binding component, but such an element can collapse under unfavorable environmental conditions. Lime has the properties to increase the thermal insulation qualities of the solution; for this you will need to take one part of lime and one part of dry cement, add 4 parts of sand. It is better to use purified fine sand. This method is the simplest and most popular.
The mortar for laying expanded clay concrete blocks differs in density:
- If you need to prepare a mixture of 25 strength, then the ratio of sand and cement will be 5:1.
- For the M 50 mixture, the components are selected 4:1.
- For higher strength M 75 the ratio will be 3:1.
It is recommended to add cold and pre-purified water for making solutions. Its consumption will depend on the required volumes and the container intended for mixing the solution. Approximately 25% of it should be part of the total volume of the mass.
Adviсe
- the solutions are prepared before they are used;
- there is no need to prepare the workpiece long before starting work, since the solution has the properties of rapid hardening - literally in 1.5-2 hours. The necessary qualities will be lost.
Work progress
- A small amount of water is poured into the expanded clay concrete mixer.
- Then the required amount of sand and concrete is poured.
- Everything is thoroughly mixed, this method does not allow the formation of lumps.
- After mixing is completed, add the remaining water to the mixture.
On average, the consumption of solutions per 1 cubic meter of masonry blocks made of expanded clay concrete will be 40 kg.
Laying foam blocks on the solution
Foam blocks are an excellent option for the construction of small residential and non-residential buildings. The size of the blocks allows you to quickly erect the necessary structure, and their low weight reduces the load on the foundation.
Laying of cellular concrete blocks occurs on a cement-based solution and special adhesive mixtures.
Necessary tools and materials for masonry:
- Foam concrete blocks;
- Masonry mortar;
- Waterproofing material;
- Building level;
- Rule;
- Rubber hammer;
- Mesh for reinforcement;
- Grater for grouting and leveling masonry;
- Saw for cutting blocks;
- Master OK;
- Notched trowel;
Before installation begins, it is important to carry out certain preparatory work.
First, check the evenness of the surface with a building level; if necessary, level the foundation - for this, the selected solution is used. Clean the foundation and blocks from dust and dirt, grease and oil stains.
The process of laying foam blocks on a solution with your own hands:
- A layer of mortar 2 cm thick is laid on the cleaned surface of the foundation;
- A layer of waterproofing is laid on top; to make the work easier, it is better to take rolled material. The width of the insulation should exceed the width of the block by several centimeters on each side;
- Apply a thick layer of mortar over the waterproofing and spread evenly over the entire surface with a notched trowel;
- The first row of masonry is formed, work begins from the corner - it is worth installing all the corner elements at once.
- Stretch a cord or twine between the corner blocks; further masonry will be laid along it along the perimeter of the building;
- Each laid foam block is checked with a building level; if uneven, the position is corrected with a rubber hammer;
- A reinforcing mesh is laid every 3-4 rows; it increases the strength and durability of the wall and reduces the load on the foundation.
The average consumption of mortar for laying foam blocks per 1 m3 is 30-40 kg. The average thickness of the seam when using ready-made glue is from 2 to 5 mm, when using cement mortar it is 5-15 mm.
The thickness of the seam is of great importance for the finished structure; the smaller the layer, the better, and here’s why:
- There are fewer cold “bridges”, which means the building’s thermal insulation is better, as well as better moisture resistance;
- less waste of solution - significant savings in time and money;
Brick laying mortar
The quality of the masonry also depends on what mixture is used; there are different types. Consider the proportions for bricklaying mortar:
- The most common mortar is made from cement and sand, it has increased strength, but is intolerant to changes in proportions; a slight deviation from the recipe will lead to the appearance of cracks.
- If you replace the cement in the mixture with lime, you will get a lime mortar; it is very plastic, but completely unsuitable for external walls, as it is easily washed out by rain.
- Mixed, using both lime and cement. By changing the proportions you can increase strength or ductility.
- Cement mortar with the addition of plasticizers, the use of polymers improves the quality of the entire mortar, strength, ductility, and is easier to apply.
- for M500 cement, the recommended ratio is 1 part cement to 4 parts sand;
- for M300 you can use proportions of 1 to 2.5 parts;
- for cement M400 – one part cement to 3 parts sand.
You can purchase ready-made mixtures; they also differ in purpose and in the ratio of their components. All information must be indicated on the packaging.
self-preparation of mortar grade hardness cement M200 or higherAverage consumption of mortar per 1 m3 of foam block masonry: how to calculate it
We all understand perfectly well that each building material has certain physical parameters. Some are more flexible, others are more rigid. One copes well with moisture, while for the other it is destructive.
Depending on many criteria, masonry mortars can vary significantly in composition.
In this material we will tell you about the solution on which foam blocks and cinder blocks are placed, and we will give some practical tips that will certainly simplify this process.
Devices for laying expanded clay concrete blocks. Important nuances
- You need to lay the block to the block butt-to-block, leaving a gap of 5 mm between them.
- A little solution should collect between the pokes. The joint is then quickly created before the mortar hardens. The thickness of the vertical seam is 10 mm.
- Upon completion of the masonry, the reinforcing belt should be poured. The purpose of this reinforced concrete structure is to additionally strengthen the wall.
Follow all the rules for laying expanded clay concrete blocks with your own hands to get the desired result - a durable and warm building. Expanded clay is very fragile only at first glance, but if the technology is followed, walls made of this material will withstand almost any load.
(Visited 6,381 times, 1 visits today)
Technology of laying expanded clay concrete blocks
Expanded clay concrete products are used in the construction of permanent walls, agricultural buildings, utility rooms, and soundproofing partitions. Laying expanded clay concrete blocks is an accessible, not very difficult operation that can be done independently.
This surface is an excellent basis for subsequent finishing. The walls are characterized by a high level of thermal insulation, resistance to temperature fluctuations, and are easy to process.
At first glance, expanded clay concrete blocks seem fragile. However, if you follow the rules discussed in the article and know the characteristics of the material, then the walls erected in compliance with the technological features will be able to withstand significant loads from the weight of the building.
Method of laying foam blocks
Simple instructions for laying on sand-cement mortar with additives:
- clean the surface of the foam concrete from contamination;
- Apply the solution to the foundation insulation under the foam block house with a notched trowel. Recommended thickness – up to 5 mm;
- lay the first layer of foam concrete on the solution;
- Wet each corner block with water;
- control the amount of mortar in the joints - add if necessary; if excess is found, remove without waiting for it to harden;
- Check each next row for compliance with the level; if small defects are found, remove them by grinding;
- After the first row, laying blocks in 2 rows is most often used. This will block the vertical seams and reduce possible heat loss;
- after laying several rows, a concrete reinforced belt up to 20 cm high is cast;
- The belt is used as a basis for laying floors and insulation.
All of the above actions are only the basis for laying foam concrete. Each building has its own nuances, and they can always be found in the project.
Block foundation
To build a foundation of expanded clay concrete blocks, it is necessary to prepare some materials and tools, including:
- tape measure; shovel; boards; concrete mixer; building level; waterproofing material; empty container; reinforcing mesh.
The structure will be a prefabricated strip structure. First you need to prepare a pit or trench, the parameters of which should be slightly larger than the width of the blocks.
Sand is poured into the bottom, compacted well, and a concrete cushion is created above. Blocks should be laid according to the principle described above. You need to start from the corners, not forgetting about the dressing.
It is important to provide openings for laying future utilities. An armored belt is formed on top of the products, which is a durable layer of monolithic reinforced concrete
It can be used to connect the blocks at the top. This layer is necessary for the rigidity of the base
An armored belt is formed on top of the products, which is a durable layer of monolithic reinforced concrete. It can be used to connect the blocks at the top. This layer is necessary for the rigidity of the base.
The outer side wall of the tape must be tightly covered with waterproofing. If the design includes a basement floor, then it is necessary to lay floor beams. At the final stage, the base is backfilled.
What mistakes can be made during work?
There are mistakes that are made most often:
- Incorrect placement of the starting row. Mistakes that were made during masonry can lead to serious problems when working with the following ones. As a result, the walls of the building will have deviations;
- Laying foam blocks in high humidity or rain, at a temperature of – 10;
- Poor quality filling of joints and careless application of the mixture. When laid, blocks absorb moisture from the mortar, which ensures stronger adhesion. If the adhesive was applied incorrectly, this may affect the thermal insulation properties and strength of the wall;
- Neglecting such a stage as dust collection. Dirt interferes with the normal connection of blocks. Over time, flaws may form in these places;
- If you forgive the moment of reinforcement, it can weaken the structure. As the soil shrinks, cracks will begin to form on the walls. Do not forget that the opening of windows and doors must be reinforced;
Construction of partitions
To lay this element indoors, blocks with a thickness of fifty to one hundred and fifty millimeters are used.
Making a partition
- The masonry is done in the same way as for external walls. The lines of future partitions are applied to the ceiling, walls and floor using dye thread. This process must be approached very seriously, because even a slight deviation from the vertical can affect the stability and strength of the entire structure. You can make guides, stretch a rope, or make a frame from a drywall profile.
- We clean the junction surface and treat it with a primer. Apply the solution to the marking line on the floor and lay out the initial row.
- We check the quality with a level and correct inaccuracies with a rubber hammer. The next row starts from half
- To enhance the strength of the entire structure, anchors can be inserted into the load-bearing walls in advance or every third row of internal partitions can be secured to the load-bearing wall with anchors.
- The space between the ceiling and the last row is blown with foam along the perimeter of the masonry forty-eight hours after the construction of the partition.
Component proportions
If all the requirements for the components are met, then there will be no problems with preparing the solution. The main thing is to maintain proportions and not let the mass harden too quickly. Some manufacturers improve the composition of the mixture by adding special plasticizers to it. They make the mixture more pliable for pouring and also prevent it from hardening right away.
When making expanded clay blocks, the following proportions of components are used:
- 1 part Portland cement;
- 2-3 parts sand;
- 0.9-1 part water;
- 5-6 parts of expanded clay.
Everything is mixed in a certain order and only then poured into molds for the block. For example, to produce 1 cubic meter of expanded clay concrete you will need 430 kg of M400 Portland cement, 510 kg of expanded clay, 420 kg of sand and 140 kg of water. If you add less sand and cement, the specific gravity of the finished mixture will decrease. If it is necessary to make a lighter mixture for pouring, then reduce the amount of cement, remove the sand, and increase the proportion of expanded clay.
Consumption depending on wall thickness
When laying blocks, the mortar consumption will be approximately two times less than for brick walls. In construction, blocks with dimensions of 39x19x18.8 cm, 39x30x18.8 cm and for partitions 39x19x9 cm are used. Two types of products are produced - solid and hollow. At the same time, cement consumption when laying hollow blocks will be increased by 20%.
The average consumption of mortar per 1 m3 of masonry made of expanded clay concrete blocks is 0.12 m3, such indicators will be met with a uniform joint thickness from 8 mm to 12 mm. Since expanded clay concrete blocks are not particularly uniform in overall dimensions and errors in length and height can range from 2 cm. In this case, it will be difficult to determine the amount of mixture for laying work.
Masonry mixture for foam block: types, advantages and disadvantages
On the building materials market, masonry mixture for foam blocks is presented in two main types - cement mortar, which you can make yourself, and a ready-made adhesive mixture, which can be purchased at any hardware store.
This article will discuss in detail the questions of what solution foam blocks are placed on, the types and advantages of each solution. Experts still cannot give a definite answer as to what kind of solution is needed for laying cellular concrete blocks, since they have similar indicators and characteristics.
Properties and functions of mortar for laying cinder block
Cinder block has become very popular recently. This is due to the fact that its price is quite low. In terms of cost, this material is first in the ranking, as it is the cheapest. Varieties of cinder block:
- Full-bodied.
- Hollow.
- Standard material dimensions: 190x188x390 cm.
- There is hollowness in relation to the entire mass of the cinder block of 30% and 40%.
The most important component for making a cinder block is slag. Also added:
- Wood sawdust or pine needles.
- Brick chips or scrap.
- Crushed stone or gravel.
- Sand.
- Expanded clay and water.
Thanks to this composition, the cost of cinder block is very low. Not everyone knows that you can prepare with your own hands not only the mortar for laying this material, but also the material itself.
The following are built from cinder block:
- Garage and other utility rooms.
- One- and two-story houses.
- Ground floors of the building.
The material is very light and does not require too deep a foundation.
Material Specifications
Builders who use cinder block in their work are attracted not only by its cost, but also by the good technical characteristics of the material. Cinder block:
- Moisture-resistant and does not burn even from direct exposure to a fire source.
- Not exposed to sunlight.
- Calmly tolerates temperature changes.
- Withstands both very high and very low temperatures.
- Its service life is at least 30 years.
- Due to the fact that the cinder block is quite large in size, less material can be used in the construction of a building compared to brick.
- It is able to withstand very heavy loads. This applies to a greater extent to solid cinder blocks.
What function does the solution play?
The main function for laying cinder block is to securely fasten the material. The solution itself must have a certain structure. It should not be too liquid or too thick. As a rule, the consistency of the product should resemble the structure of plaster.
We suggest you read How to make a floor board with your own hands
The solution should be:
- Viscous.
- After hardening, it is durable.
- Fits freely on the surface of the material.
How to make mortar for laying cinder blocks? Everything is quite simple. The principle of its preparation is similar to the preparation of mortar for laying simple bricks or other building materials. Only in this case, due to the small mass of the cinder block, is it possible to save on the quantitative indicator of ingredients. Composition of the mortar for laying cinder block:
- Water.
- Sand.
- Portland cement grade no less than 400.
- Means for the thickness of the solution and for its quick drying.
Before making a solution for laying cinder blocks, you need to prepare:
- Concrete mixer.
- All ingredients.
- Buckets and other available tools: shovels and containers for pouring solution from a concrete mixer.
Other means to increase the strength and increase the speed of drying of the solution are added after the solution is thoroughly mixed in a concrete mixer. To add a certain amount that would correspond to all proportions of the solution, there are special instructions on the packaging. According to it, all such actions are performed.
Useful tips
What you should know if you do the work yourself:
- Do not prepare a large amount of solution at once. If you use special glue, then it is worth considering that it must be used up within fifteen minutes;
- The optimal temperature at which to lay blocks is considered to be five to twenty-five degrees. If it is higher, then the material should be constantly sprayed with water;
- It is best to apply cement or glue with a toothed comb or trowel - as a result, the seams will be smoother and thinner. Apply the adhesive solution to the side and horizontal surfaces of the block;
- After the foam block is installed, it is pressed firmly. Then we put a level on it and level it horizontally and vertically, tapping it with a rubber hammer. Excess solution is removed using a simple spatula;
- After laying every third row, you need to check the vertical deviation of the plumbs and the corners with a level;
- Also, don’t forget about reinforcement. We place the reinforcement in the grooves on the mixture, apply the solution on top and lay the next row;
- Before laying the next row of blocks, the surface of the previous one is thoroughly cleaned, we remove all irregularities with a construction float, sweep away the dust with a brush or use a vacuum cleaner for this purpose;
- If the block does not fit completely, it is sawed using a simple hacksaw, after which we carefully clean the cut;
- The laying of foam concrete blocks should be carried out with dressing. Each next row is shifted relative to the other by at least 10 cm, ideally by half.


