Plaster intended for facade work must meet the criteria of quality, strength, and durability.
Plaster for exterior decoration is popular precisely because of its improved quality indicators.
In addition, facing materials of this type have a long service life, are produced in a wide range, and also withstand natural influences well.
Plaster for facades comes in different textures (“bark beetle”, “lamb beetle”), has different compositions (silicone, acrylic), and also has certain functions (decorative, heat insulating). To increase the thermal insulation of walls, warm plaster is used.
What is thermal insulation plaster
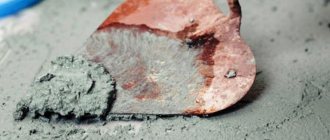
New building materials that perform a specific task are also being developed in the field of building decoration. The main purpose of using heat-insulating plaster is to ensure thermal conductivity of no more than 0.175 W/m-K with a bulk density of up to 500 kg/m³. If this condition is not met, the material does not insulate heat sufficiently. Ideally, a plaster coating that retains heat should be an analogue of classic facade insulation, that is, it should be sufficiently strong, durable, and fireproof. The developers were able to solve the problem by replacing fillers that conduct heat well with components that have low thermal conductivity. That is, sand and stone chips in gypsum or cement compositions were replaced:
- expanded vermiculite;
- foam glass;
- sawdust;
- expanded clay;
- straw cutting;
- perlite, etc.
The result was various types of warm plasters that meet the specified requirements, which differ in their area of use:
- warm plaster for interior work;
- heat-insulating facade (for external use).
In addition, the compositions were modified, giving additional properties, resulting in heat and sound insulating plaster. This type of finish serves as both an acoustic and thermal barrier.
Thermal insulating compounds are used both for rough work (leveling) and for finishing.
Another class of components are modifiers. They are added to increase the lifespan, increase the elasticity of the solution, and prevent drying cracks. Manufacturers use proprietary plasticizers when creating mixtures. When making the composition with your own hands, detergents or PVA glue, ready-made modifiers available in construction stores, and microfiber are added to it.
Let's sum it up
Warm plaster is used as a leveling building material, similar to its conventional counterparts. The mixtures are also used for treating facades and walls indoors with any humidity. A characteristic feature of this plaster is its heat-insulating property, along with which the coating does not allow noise to pass through.
The affordable cost of warm plaster and a wide range of applications have a clear advantage over analogues. In addition, you can prepare warm plaster with your own hands .
Advantages and disadvantages of warm plasters
In order to reduce heat loss, various materials are used in construction: mineral wool, expanded polystyrene, etc. They are laid on the walls outside.
Compared with such home protection, warm compounds have the following advantages:
- simple application that a beginner can handle;
- the material is highly plastic, it can be used to seal hard-to-reach areas of structures;
- no surface leveling required;
- no special fastening is needed; surface wetting is practiced to improve adhesion;
- the use of mesh reinforcement not over the entire area, but at corners and to repair cracks;
- a high adhesion rate allows the composition to be applied even to a metal base;
- the material is microporous, which makes it breathable and helps dry the walls;
- fire safety of most compositions;
- an additional benefit is good sound insulation of the insulated room;
- resistance to biological damage;
- the coating is frost-resistant, not afraid of temperature fluctuations;
- environmental friendliness;
- use of waste for the production of plaster composition (reducing the polluting load on nature);
- does not crack from vibrations and does not change under the influence of UV rays;
- thin-layer application provides additional insulation when using mineral wool and other insulation materials.
Warm compositions have their disadvantages:
- the compositions are more expensive than insulation materials (taking into account the reduction in the cost of work and the reduction in costs for related materials, such as mesh, the cost is comparable);
- the increased dead weight of the coating with the additional load from absorbed water requires a strong foundation;
- a protective coating is necessary, since porosity promotes rapid absorption of moisture (compositions with foam glass and expanded polystyrene do not have this disadvantage);
- compositions with organic components (sawdust, straw) are limited in use (only indoors);
- The insulation layer is thick, so it takes a long time to dry;
- some fillers are flammable (polystyrene).
Calculation of the thickness of the layer of warm plaster
To make such a calculation, use SNiP 02/23/2003.
Thermal conductivity of plaster is the ability of a material to conduct heat. If the room temperature is higher than the street temperature, then when the heating is turned off, the heat “leaves” outside through the walls (35%) and other structures. The intensity of heat loss depends on the area, thermal conductivity of the wall material, the difference between street and home temperatures, and other parameters. To quantitatively express the thermal conductivity of plaster coatings, λ is used - the thermal conductivity coefficient of the plaster (how much it is capable of conducting thermal radiation through an area of 1 m2, a layer 1 m thick with a difference of 1 ° C). For example, for plaster compositions the value of the coefficient λ in descending order (W/(m*°C)) is as follows:
- cement with sand – 0.93;
- cement-lime with sand – 0.87;
- lime with sand – 0.81;
- clay with sand – 0.69;
- gypsum – 0.35;
- clay with sawdust – 0.29;
- gypsum with perlite – 0.23;
- cement with perlite – 0.3.
Types of heat-insulating mixtures for plastering
Thermal insulation compositions are classified by the type of binder: gypsum, cement, etc., as well as by the type of insulating filler.
Straw based
The material used for a long time is insulating plaster made of clay with straw grain. Straw in clay coating acts as reinforcement and creates voids.
As a result, the plaster coating can be thicker without delamination or cracking. It is applied as a rough layer on the wall over shingles by hand. The coating is breathable, absorbing excess moisture from the air and returning it when the room is dry. Before application, the walls are moistened or sprayed with clay mash. The main disadvantage is the long drying time. The main advantage is a favorable microclimate and low cost.
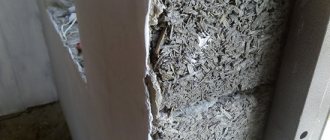
Sawdust based plaster
Sawdust has long been used for home insulation. They covered the rubble and ceilings. They were added to clay and lime mixtures for coating walls. Sawdust retains heat better than wooden beams, since the thermal conductivity coefficient of sawdust is 0.06 - 0.07 W/(m2•°C), and wood - 0.18. In terms of heat retention, sawdust is much closer to polystyrene foam.
Compositions with sawdust can have a different mineral base - clay, gypsum (Armenian plaster: 3 parts of gypsum, 1 part of sawdust), cement and lime. The main application is indoors. Before mixing the composition, sawdust is sifted through a sieve with a cell diameter of 5 mm.
Polystyrene as filler
A type of polystyrene foam - expanded polystyrene - is used for various purposes, for example, as a filler for anti-stress toys, upholstered furniture, and sleeping pillows. The material is ultra-light (up to 98% air), does not absorb water, and is not food for microorganisms. It is used in cement screeds for floor insulation (1:4:4 - cement/polystyrene granules/sand), and also as a heat-insulating leveling layer (1:3) laid under the screed.
Plaster mixtures with polystyrene are used for work on facades and indoors. They are produced on the basis of cement or cement with lime. Although they do not burn, they can release toxic substances when ignited.
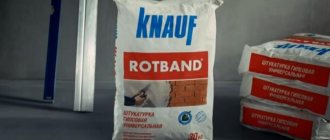
The best brands
Perlite plasters are produced by almost all companies involved in the production of building mixtures. For example, the Teplon gypsum composition from Unis is of excellent quality, acquires a snow-white color after drying and is suitable for wallpapering and other types of finishing.
Extra Gips “Izo” plaster is also intended for indoor use, as it contains gypsum. It can be applied in a layer of up to 7 cm, and it sets in just 30 minutes. There are also perlite compositions on sale from Knauf, Perlitex, In-Tek, Gaia, Kwik-Mix, etc. All perlite-based mixtures have heat-insulating and noise-proof properties and are an excellent choice for houses and apartments.
Basic rules for applying warm plaster
To make a truly heat-insulating plaster screen, you need to follow certain rules:
- It is important to properly prepare the foundation.
- To mix the dry mixture (SS), take the amount of water according to the instructions.
- In a large container, mix the entire volume contained in the package with water, so it is guaranteed that each portion will contain the required proportion of components.
- The SS is poured into the poured water, being careful not to create dust. The mixture is stirred for 5 minutes with a mixer at low speed (areas close to the sides and bottom are treated). Then give the solution 5 minutes to “ripen” and stir for another 2 – 3 minutes.
- Work quickly, trying to use up all the solution before the end of its life. A solution that has begun to set for application to the wall is unsuitable.
- Work is carried out at temperatures above +5°C, below +30°C. Drafts, direct exposure to sunlight and rain are not allowed. During facade work, a canopy is made.
- Before plastering, turn off the power to sockets and switches.
- Use safety glasses to protect your eyes.
- Used beacons are removed after applying the solution. You cannot leave them in the wall, as they serve as cold bridges.
- The use of primers is necessary to ensure adhesion sufficient to hold a thick plaster coating on the wall.
- The insulating layer should be no thicker than 25 mm. If greater thickness is required, apply several layers intermittently to dry. The surface of the overlapping layers is not smoothed for better adhesion.
Material consumption
Before starting work, it is worth calculating the approximate material consumption. If the walls are smooth, it is recommended to take a layer thickness of 1 cm as a basis. You need to calculate the area of the walls to be processed and multiply it by the consumption of plaster (it is always indicated on the packaging of the building mixture). The approximate flow rate for a given formation thickness is 9 kg/sq.m. m. The total is increased by 5-10% in reserve.
For uneven walls the figure always increases. To calculate the consumption, place 2-3 beacons in one vertical plane, measure the thickness of the future plaster layer at three points. The indicators are added and divided by 3, obtaining the average rate. It is multiplied with the area of the walls and the approximate volume of the mixture that will be consumed is obtained.
Making warm plaster with your own hands
Commercially available CCs are not cheap. There is an alternative. Craftsmen prefer to create warm plaster solutions with their own hands. All components can be purchased for almost nothing. Clay or lime can be used as a natural plasticizer. Liquid soap is also suitable, which is added at the rate of 2 - 3 spoons per 20 liters of mixture. You can purchase a hydrophobizing agent in the store (use according to the instructions).
We offer you several recipes for thermal insulation compositions.
Recipe 1. Mixture for facades:
- 1 part – cement from M400;
- 1 part – foamed polystyrene 1 – 3 mm;
- 3 parts perlite;
- 50 g – polypropylene fiber;
- plasticizer (add according to instructions).
Mix the dry ingredients and add enough water so that the solution has a paste-like consistency and does not run off the trowel.
Recipe 2. Indoor mixture:
- 1 part – white cement M400;
- 4 parts – filler (vermiculite or perlite);
- 50 g/bucket of cement - PVA glue or factory plasticizer (adhere to the proportion recommended by the manufacturer);
- water.
Recipe 3. Thermal insulation from perlite-sand mixture:
- 1 volume part of cement;
- 1 part sand;
- 4 parts perlite.
Recipe 4. Warm composition with sawdust and paper (for rooms and facades):
- 1 part – cement;
- 2 parts – paper pulp, soaked into porridge;
- 3 parts – sawdust;
- water.
Recipe 5. Lime-sawdust composition:
- 1 part sawdust;
- 10 – 15 parts of dry slaked lime;
- Water.
Lime is a strong biocidal agent that is not attacked by rodents, mold and mildew. Quicklime cannot be used with sawdust, since mixing produces a lot of heat. The solution has a short lifespan, so it needs to be produced quickly. The dry ingredients are mixed, then cement or other binder is added (if desired). Water is added last.
Tips: how to avoid mistakes
Mixing perlite plaster should not be done manually; it is better to use a power tool for this purpose. The rotation speed of the nozzle should not be more than 600 rpm.
There are other recommendations that will allow you to complete all the work efficiently:
- carefully prepare the base, remove all crumbling areas;
- do not make the solution too liquid, but add water in small portions;
- strictly adhere to the recommended proportions of components;
- expansion joints must first be filled with polyurethane sealant and then covered with plaster.
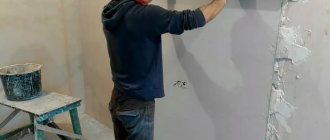
Do-it-yourself technology for applying warm plaster
preparing the solution
first layer
second and subsequent layers
finishing coat
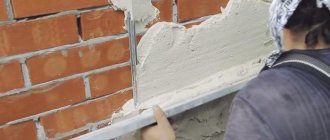
- The wall is moistened with a spray bottle.
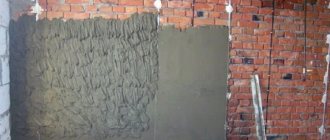
- The mortar is applied in a layer of up to 1 cm with a trowel or spatula, pressing the mortar mass against the wall to increase adhesion. This primary layer is not smoothed over. If the coating thickness is large, a recessed reinforcing mesh is applied to this layer.
- The second and subsequent main layers (primer) are applied up to 2.5 cm thick. They are leveled (without trying to make them smooth) using a grater.
- When the total thickness of the coating reaches 4 cm, a second reinforcing mesh is applied. The edges of the mesh sheets are overlapped with an overlap of 10 cm.
- When the entire volume between the beacons is filled, the surface of the top layer is leveled by the rule.
- After the top layer has set, the beacons are removed and the remaining grooves are filled with solution.
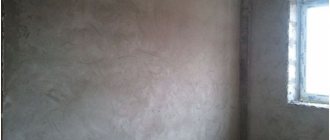
- After the solutions have completely dried, a finishing finish is applied over the rough coating.
Closer to the finish line.
Warm plaster “Umka” or another finally dries after three days. It gains maximum strength after twenty-eight days. The highest level of thermal insulation properties is observed after two months. You can paint the finished coating with paint, decorative plaster, apply primer to it, or simply treat it with an abrasive material.
For exterior work, the plaster can be covered with a ventilated façade. When it is planned to glue tiles over it, the finished coating is reinforced with a polypropylene mesh, which is attached to the wall using long dowels.
Work on the reinforcing layer
The reinforcing plaster layer is intended for internal strengthening of a thick coating, applying it to the facade insulation, at the joints of layers with different shrinkage characteristics, as well as in the case of plastering a building before its shrinkage is completed. For example, a reinforcing layer is made where part of the wall is made of gas silicate blocks, and part of it is made of brick. This section of the plaster coating must be reinforced. It is carried out using a plastic or fiberglass mesh, which has sufficient strength and is not afraid of the internal alkaline environment of the insulating plaster coating. Reinforcement work is carried out inside the solution. A layer of the mixture is applied to the ceilings and walls, then the mesh is laid out and recessed. On the facade walls on top of the insulation, the reinforcement work is slightly different. First, the solution is applied in strokes, then the mesh is attached, and then plastered. They work with spatulas and polishers. When the layer has dried, apply the next one on top of it in the usual way.
Surface preparation.
Important point: If you want to make a plaster layer on top of another insulation, it is first covered with a fiberglass mesh. Then you can apply the mixture as you would on concrete or brick.
Before the solution begins to cover the walls, they need to be prepared. The scheme is standard. First, the surface is cleaned - old wallpaper, paint, and other materials are removed. Then all irregularities are smoothed out. Apply a primer to a dry wall: it should be selected in accordance with the type of plaster used. Then you need to let the primer dry for at least 24 hours. If there are no large depressions, you don’t have to putty. Small irregularities will be hidden by plaster. If the walls are riddled with potholes, it is better to cover them with pre-reinforcing mesh.
Manufacturers and prices
The list of companies and the thermal insulation mixtures they produce is long. Popular ones:
- Umka UB-21 (Ecotermogroup company) is a warm plaster made of lime, cement, sand and foam glass for the northern regions, which requires finishing. With reinforcement, up to 10 cm is applied. Other insulating mixtures are UB-212, UF-2.
- Cement Knauf Grűnband is made with expanded polystyrene. The permissible layer is up to 30 mm.
- Unis Teplon has a gypsum-perlite composition that does not require finishing.
- Au Benputz Perlit based on Portland cement with perlite filler. You can't do without finishing.
- The Teplolux DeLuxe cement mixture retains heat using foam glass. It is also not final.
- Thermo Um is universal - used for facades and rooms. The mixture is hygroscopic.
Prices vary. On average, the price of 1 kg of dry mixture ranges from 11 to 21 rubles.
As practice shows, for the main areas of our country, heat-insulating plaster is not yet a panacea. However, its use allows not only to reduce heat loss, but also to reduce the noise level in the premises. For the southern regions, it is an excellent option for insulating houses.
Reviews
Svetlana, 42 years old, Vladivostok
I live in an old house made of wooden beams. My husband and I began to notice that it had become damp and drafts appeared. In addition, heating costs have increased. We decided to insulate the house. We chose plaster with polystyrene foam for this. After the solution had dried, the walls were painted and then the house was sheathed with siding. The situation has improved. The cost of heating the house was almost halved, and dampness and drafts disappeared.
Irina, 28 years old, Astrakhan
About 5 years ago we purchased a house that looked quite strong and warm. In winter, some of its shortcomings were revealed, incl. high heating costs. We decided to carry out external insulation. Since we were planning to improve the façade, we settled on heat-insulating plaster. We were able to carry out all the work ourselves. We used a composition with perlite. The effect is good. The walls do not freeze in winter, so heating costs have been reduced.