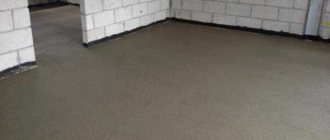
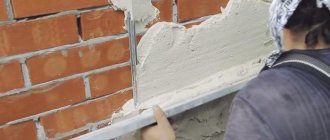
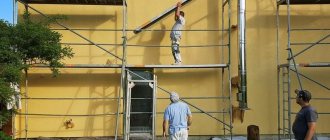
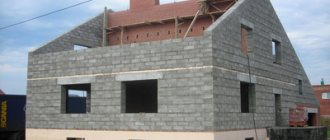
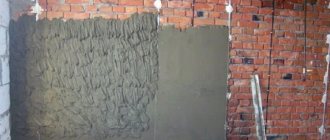
If the brickwork makes the front of the house attractive, then the gray concrete walls are simply asking for finishing touches. Especially if they have sagging and unevenness. Plastering concrete walls is a popular finishing method that can be done with your own hands, without any special financial costs. How to properly plaster concrete yourself, with what compositions, in what sequence - information is not secret, but so necessary for a beginner in the plastering business.
Do I need to plaster concrete walls?
Concrete is a high-strength, durable material that is most often found in construction. The surfaces of concrete structures are unsuitable for wallpapering or painting, as they cannot boast of evenness. The best option for finishing concrete, leveling and smoothing out unevenness, is plaster.
This is a material with sufficient strength, forming a monolithic, even coating.
Advantages of plaster finishing:
- versatility;
- workability;
- possibility of additional insulation, sound insulation;
- it is possible to create the creation of various textures or structures;
- wide selection of materials (both in price and in other parameters);
- maintainability;
- environmental friendliness, etc.
By plastering concrete walls, they are protected from moisture, mechanical stress, mold, efflorescence, UV rays, and other destructive factors.
Finish plastering can be done with decorative mixtures, thus imparting originality to the facade or interior, which corresponds to the aesthetic taste of the owner. Since a long life for plastered structures is ensured by adherence to technology and the right choice of plastering materials, it’s time to talk about them.
Sealing seams, cracks and other defective areas.
- Seams between blocks, cold concreting joints, joints, and abutments should be cut along the entire length, regardless of their width, using jackhammers or hammer drills.
- The cutting depth is 25–30 mm with a seam width of 20 mm or more. For seams of smaller width, the cutting depth is 10–20 mm.
- Cracks with an opening width of more than 1 mm should be cut to a depth no less than its width. Wash cracks with an opening of less than 1 mm using high-pressure apparatus. If it is impossible to remove leaching products from them, cut along the crack with a mechanized or hand tool to a depth of up to 6 mm.
- Remove dust from cut seams and rinse with water (preferably with high-pressure cleaners). Immediately before sealing, moisten the seams until the surface is completely saturated with moisture.
- Leaks with a constant flow of water should be eliminated with the quick-hardening composition KALMASTOP. After blocking, after about an hour, this area of the surface is additionally isolated with the penetrating composition KALMATRON or KALMATRON-ECONOMY.
- Seal seams, cracks, chips more than 1 mm in width with KALMATRON-SUVNY waterproofing compound. Cracks with an opening of less than 1 mm should be sealed with KALMATRON.
- In some cases (according to the survey), with significant restoration work on building structures that need additional reinforcement, repair work should be performed with the compositions HYDROBETON SRG-1, SRG-2, HYDROCRETE SRG-F1, SRG-F2. If necessary, these areas should be additionally isolated with KALMATRON penetrating compound.
- Ceiling joints between floor slabs have a dense, smooth surface from under the metal formwork, often with traces of formwork lubricant. After cutting, pin the edges of the seams. Clean the surface of the seams with metal brushes. After wetting, 15-20 minutes before sealing with KALMATRON-SUVNYY, prime the seams with liquid-diluted KALMATRON-D (W/C = 3:1)
How to plaster concrete walls
The general word “plaster” hides a great variety of different materials. To make it easier to navigate this diversity, it is customary to classify plaster compositions by type of base, place of application, additional functions, etc.
By purpose (in relation to a concrete base):
- conventional (used for rough leveling of concrete walls, sealing holes, cracks, joints, cracks);
- decorative;
- special (X-ray protective, noise-reducing, sanitizing, etc.).
By place of application: façade, universal and interior.
Since concrete can be different, for example, gas and foam concrete structures are often found in private homes, not all plaster mixtures are suitable for plastering. To solve the question of how to plaster concrete structures, you need to get acquainted with the main types of compositions.
Cement-sand mixture
More often than others, cement-sand mixture (CSM) is chosen as plaster on concrete for exterior work. Cement is a binder that, when the solution hardens, forms a high-strength artificial stone that is resistant to frost. Sand filler does not reduce the strength of this stone, but it can significantly reduce the amount of cement used. The size of sand grains affects the workability of the mixture and the texture of the cement coating.
In addition to these two components, the cement mixture contains additives that give the solution the necessary qualities. They are used to increase the plasticity of the solution, increase frost resistance, water resistance, as well as other parameters of the working mixture and finishing coating. For some coatings, white cement is used.
Main advantages:
- strength (depends on the brand of cement used, the ratio of components);
- durability;
- frost resistance;
- waterproof;
- versatility (used outdoors and in various types of premises);
- ease of preparation and application of the solution;
- maintainability;
- availability, low price of components;
- manual or mechanical application possible;
- fire resistance;
- good adhesion.
The cement composition is not suitable for use in areas with seismic activity, as well as for houses located close to railway lines. Mineral plasters do not withstand vibration loads and building shrinkage. Therefore, for new buildings it is more rational to choose mixtures based on polymer bases.
Preparation of compositions
Materials of the KALMATRON family are used in the form of aqueous solutions.
The amount of solution prepared for application must correspond to the volume of production for no more than 30 minutes.
To prepare solutions, you must use technical or drinking water.
Solutions are prepared both manually and mechanized, thoroughly mixing until a homogeneous mass is obtained.
If the solution loses its plasticity during operation, resume stirring. Additional addition of water to the solution is not allowed.
Preparing the walls
In order for the plaster to hold tenaciously, meet technical qualities, not be covered with stains of emerging rust or efflorescence, and serve for a long time, it is necessary to prepare concrete surfaces before plastering. That is, the surface at the time of applying the mixture must be clean, dry, and rough. There should also be no cracks, large shells, or excess metal inclusions.
Preparation procedure:
- Remove unusable old coating (whitewash, wallpaper, peeling plaster layers, paint);
- Protrusions and swells of concrete are cut down. The protrusions of cellular concrete are planed. To repair chips, cracks, and sinkholes, DSP with proportions of 1:3 is used. In case of large defects, “patches” are made with reinforcement.
- The smooth concrete surface is “speckled” with notches to increase adhesion.
- Remove excess metal elements, otherwise, once they rust, they will cause rusty streaks to appear on the finishing surface. The remaining metal objects are insulated using oil paint.
- The surface is cleaned of stains of various origins (foci of mold, grease, efflorescence, rust).
- Dust is swept or washed off the walls.
- The clean surface is primed and then dried.
- If the thickness of the plaster layer is ≥7 mm, beacons are installed.
- If the thickness of the leveling coating is large, a reinforcing mesh is attached to the concrete.
If hidden internal wiring is provided, then grooves are made when preparing the walls.
Necessary tool
Depending on the type of surface (concrete, brick, aerated concrete or wood), the master must have a set of tools for the job.
- You will need a portable ladder or platform that is convenient to climb onto to process high sections of the wall.
- The old coating is removed by tapping with a hammer. A chisel, brushes, and a set of spatulas may be useful. With these tools you can remove all layers of the old coating down to the very base.
- In hard-to-reach places, use a hammer drill with attachments. Remains of plaster are removed with a metal brush.
AdviceA good assistant is an electric drill or grinder. When working with these tools, it is advisable to prepare bags for garbage, as there will be a lot of it.
- You will need an extension cord when working with power tools.
- It is good to scrape off the lagging layer of wallpaper or plaster with a spatula. If it is thin, it is easier to pick it up with a paint brush dipped under water.
- Sometimes you may need a sander or a vacuum cleaner to use a hose to collect all the wall dust.
- You need a container for mixing the solution, rollers with different attachments, a trowel, a regular knife, a blade, rags for wiping away stains, masking tape for sealing corners and baseboards.
How to plaster concrete walls
Beginners are especially interested in how to plaster a concrete wall with their own hands. Therefore, below we provide detailed instructions for performing each work operation + videos.
The technology for plastering concrete structures includes:
- Surface preparation in accordance with standards.
- Impregnation (application) of the primer composition.
- Drying.
- Installation of reinforcing mesh (if provided).
- Applying tile adhesive as a future base
- Installation of beacon strips.
- Preparation of the solution.
- Performing spraying.
- Mixing the mixture, making soil.
- Preparing the coating mixture, applying the coating.
- Performing grouting.
Padding
If the plaster mixture is applied to a porous base, the wall will immediately begin to absorb water from the solution through near-surface pores and microcracks. When hardening, a dehydrated composition will not have enough water for the reactions to occur. As a result, a durable, durable coating is not formed.
To prevent the pores of the base from “robbing” the solution, a primer is used - coating the surface of the base with special compounds. The second reason for using a primer is to ensure reliable adhesion of the coating to the base material. An important task of primer compositions is antifungal protection.
Expert advice
It is not difficult to do the cladding yourself. Expert advice:
- If during finishing it is not possible to lay a whole number of tiles in a row, then the excess is cut off at the corners with a tile cutter, diamond glass cutter or grinder. The fragments that remain can later be laid out in the corners or covered with a shelving unit or cabinet.
- Finishing work needs to be carefully planned, because good facing tiles are expensive. You need to buy material with a reserve of at least 10% of the total quantity for trimming.
- Textured requires docking and adjustment. Its quantity needs to be increased by 15–20% of the total volume.
- If you need to make holes when finishing, it is best to use a crown or a ballerina. Just don't press hard on the fragment. This will help prevent the icing from chipping and keep the edges of the hole smooth.
Even the most expensive facing materials will not be able to ensure the durability and strength of the coating if the base was poorly prepared at the initial stage.
It is necessary to perform a complex of simple works - clean the base from dirt and dust, oil stains and other substances that reduce the adhesion of the glue, eliminate all irregularities and add strength. Then the result will please the apartment owner for a long time.
Features and differences of external and internal work
The operating conditions of façade plaster differ from those in which interior finishing is used. The finishing work conditions also differ.
The following conditions are general:
- temperature below +30°C, above +5°C;
- air humidity – up to 60%;
- the electrical wiring of the wall is de-energized;
- They try to protect from inquisitive children and animals.
Plastering of concrete walls on facades is carried out in dry weather. They build protection from rain and scorching sunlight over the fresh covering, and cover it from strong winds.
There are no strong drafts in the premises. Heaters or fans are not used to dry walls.
Base requirements
- Any coating that is to be plastered must be leveled. It must be strong and solid. There should not be any peeling or defects on it. All defects must be plastered over with a base mortar compound.
- There should be no frost. It is advisable to carry out work at a constant temperature with optimal humidity. The recommended temperature for work and for the hardening process of the material is from 5 to 30 degrees Celsius.
- Humidity should be low. While the composition is hardening, there should be no drafts in the room; it is best to dry the air to a certain temperature in advance.
- All surface dust must be removed, and broken elements must be sealed with completely dried construction mixture.
- It is necessary to prime the surface several times before plastering, depending on the degree of initial adhesion.
Attention Rough walls require less primer, since due to small inclusions they accept the plaster solution well and do not require additional processing.
Features of concrete ceiling plaster
Plastering a ceiling is more difficult. Leveling the ceiling surface is done in two layers according to the beacons. Apply the solution with a spatula and level it using the rule. After the first layer has dried, a second one is applied, which is designed to eliminate possible small defects. Applying the second layer is called rubbing. During grinding, a reinforcing fiberglass mesh is built into the layer, which prevents shrinkage cracks from forming. In this way, the ceilings are immediately provided with additional protection from cracking and shedding of the plaster coating.
Plastering concrete walls is a job that not only men can handle. Women also do plastering of concrete walls with their own hands. This activity is especially exciting when it comes time for decorative finishing. You will find a detailed description of decorative finishes in the “Decorative plaster” section.
General rules
Before filling, the walls must be leveled very well so that they are smooth and free of flaws. It does not matter which base material is subjected to the processing process. In any case, it may be necessary to apply a preliminary layer of putty to get a good result.
Evenness is checked with a laser level and other measuring devices. Excess protruding layers are scraped off with sandpaper. Before puttying, you need to determine the quality and composition of the mixture itself. Usually the work is carried out in two stages:
- Working with starting materials. Putties with a layer thickness of 0.5 cm are suitable, or more is possible. These mixtures have a coarse fraction, so these are suitable materials when working with large areas. Coarse-grained mixtures harden quickly without spreading over the base.
- Working with finishing materials. In this case, it is better to use putties with a layer thickness of 0.5–4 mm. In this version of the work, soil may be required, which will serve as a polymer waterproofing agent that penetrates deep into the pores. The soil is also useful for impregnating the base, strengthening it, increasing adhesion and strength.
Important
The soil is applied with a brush. It is not recommended to use a roller.
After applying the primer, it must be given time to dry. You can check the coating for drying strength by hand. If there are no traces of dust on it, then the base is ready for further work.
Maintenance of the restored structure
After performing insulation and restoration work using penetrating protective compounds of the KALMATRON family, it is necessary to ensure careful care of the protective layer.
Be sure to moisten the surface after the composition has set and there is no danger of the composition being washed off the surface. It is necessary to moisten with water for the first 8 hours after application every 2 hours, and for 3 days 2-3 times a day with a water consumption of 1-3 l/m2. When working outdoors in sunny, windy and hot weather, the applied protective layer must be covered from drying out with a damp cloth (burlap, non-woven synthetic material, dornite, etc.) and regularly watered around the clock, preventing it from drying out completely.
In the winter season, protection of internal surfaces is carried out with constantly operating heating and ventilation systems. If it is impossible to use heating systems, air heaters (electric or liquid fuel) should be used.
Plastering technology
High-quality wall finishing can be achieved by following the work production technology and using plaster compositions that are most suitable for the structures being finished.
1.Marking
Inspect the surface of the walls using a long rule and a level.
Applying a long rule to the walls at different angles, find all the bumps and depressions and mark them with a marker.
If the walls are fairly smooth, you can plaster them using the rule, without beacons.
For large differences and unevenness, it is necessary to install beacons.
Figure 7. Marking walls for installation of beacons.
Start marking the beacons from the corner with the door. Stepping back from the corner 20-30 centimeters, draw a vertical line.
Draw the next line in the opposite corner. We draw intermediate lines of beacons in increments of 130-160 centimeters.
At a distance of 15 centimeters from the floor and ceiling, we drill holes in the outer lines and install dowels with self-tapping screws.
From the top screw, using a plumb line or a laser level, we adjust the vertical installation of the bottom screw.
We stretch the cords horizontally between the screws from below and above.
To control the correct installation of the beacons, we pull the diagonal cords. Beacon profiles must pass under them freely.
2. Reinforcement of plaster
If it is necessary to apply a thick layer of plaster, when plastering on facing bricks, monolithic or cellular concrete, the plaster must be reinforced with reinforcing mesh.
A plaster layer up to three centimeters thick can be reinforced with a mesh made of fiberglass or polymers.
If it is necessary to apply a thicker layer, it is necessary to use a metal mesh made from galvanized wire welded together or a chain-link mesh.
Figure 8. Fastening the reinforcing mesh under the plaster.
We fix the polymer mesh onto the first plaster layer. We fix the metal mesh with dowels and mounting tape.
3.Installation of beacons
To apply a perfectly even layer of plaster, it is necessary to install guide beacons.
For these purposes, you can use a metal profile installed on the screw heads and fixed to a gypsum mortar, strips of gypsum mixture or beacons made of high-strength plastic.
We place the beacons in increments of 1 - 1.5 meters, so that the leveling rule follows two adjacent profiles.
After plastering the wall, we remove the beacons, seal the seams with mortar and rub down.
We control the verticality of the profiles using a plumb line and a building level.
Figure 9. Installation of beacons.
A flat wall can be plastered without metal beacons, using plaster guides. To do this, we install dowel screws on the wall level. We place a galvanized steel profile or wooden strip on the screw heads. We place a plaster solution under it and press it with a lath.
We check the evenness of the installed beacon using a long rule and a level. By cutting off the excess plaster, removing the screws from the wall and removing the slats, we get even strips of plaster that will serve as beacons.
We do the rest of the guides in the same way.
4. Preparation of the solution
The construction market offers a large assortment of dry construction mixtures for preparing plaster solutions, with detailed instructions on the packaging. But such a solution will cost much more than one made with your own hands from individual components.
By following the recipes for plaster solutions and observing the exact dosage, it is not difficult to make them yourself.
Table 1. Ratio of solution components
| Solution | Compound | Ratio of components in parts | ||
| spray | priming | cover | ||
| lime | Lime and sand | 1:2,5 – 1:4 | 1:2 – 1:3 | 1:2 |
| Cement | Cement and sand | 1:3 | 1:3 | 1:2 |
| Cement-lime | Cement, lime and sand | 1:1:5 | 0,7:1:3 | 1:1:4 |
| Gypsum-lime | Lime, gypsum, sand | 1: 1:3 | 1:1,5:2 | 1:1,5:1 |
| Clay | Clay and sand | 1:3 | 1:3 | 1:3 |
Lime mortar is used to level brick walls of dry heated buildings.
Cement - for plastering internal and external walls made of brick, concrete and aerated concrete in buildings with varying humidity and any operating conditions.
Cement-lime is suitable for plastering interior walls made of brick, concrete and aerated concrete.
Gypsum mixtures are much more expensive than other analogues and are used for repair work, pulling out cornices, making decorative interior elements and plastering walls on concrete and brick in dry rooms.
Clay mortar is used for plastering stoves, fireplaces, and wooden structures over shingles.
Important!
The thicker the layer of plaster, the thicker the solution should be.
First pour water into the container, and then add the mixture according to the recipe.
Using a drill with a special attachment or a construction mixer, mix the mixture until it is homogeneous and plastic. Leave the solution for a few minutes and then stir again.
Figure 10. Mixing the solution using a mixer.
It is necessary to take into account the setting time of plaster solutions:
- the cement mortar must be used within one hour;
- plaster - in 25-30 minutes.
When choosing a mortar for leveling walls, it is necessary to take into account the advantages and disadvantages of mortar mixtures:
- gypsum and lime mortars are used only in dry rooms, cement mortars - in any;
- the permissible layer of cement mortar is no more than 20 millimeters, gypsum mortar can be applied in a layer of up to 50 millimeters;
- gypsum plaster, unlike cement plaster, can be polished to a gloss and does not require puttying;
- Gypsum plaster is not subject to shrinkage and cracking; it can be used to plaster concrete walls without prior reinforcement.
- cement plaster is stronger and more durable.
Following the rules for preparing the solution and choosing the right mixture will allow you to achieve a durable and strong base for any decorative finish.
5.Applying the solution
Plastering technology involves applying three layers to the wall: spray, primer and cover.
I recommend!
Thoroughly moisten the wall before plastering. If this is not done, the dry surface will draw moisture from the mortar and the plaster may crack before it has time to set.
The first layer, the spray, is made from a solution with a creamy consistency. We throw it on the wall using a trowel in any order. The solution applied in this way fills all cavities and voids.
Figure 11. Spray application.
Lightly level the first layer, removing protruding areas.
The thickness of the spray for concrete and brick walls should be no more than 5 millimeters. For wooden walls - 10 millimeters.
The second layer - apply the primer no earlier than a day after the spray has dried. The soil is the main layer, the thickness of which can reach three centimeters. We apply the solution with a wide spatula or throw it on with a trowel and pull it from bottom to top, using the rule, with zigzag movements along the beacons.
Figure 12. Leveling the soil layer using the rule.
The soil should completely cover the beacons, being on the same level with them. After the soil layer has dried, the beacons can be removed.
Important!
If you plan to cover the walls with ceramic tiles, the installed beacons do not need to be removed. When painting or wallpapering walls, the guides can show through the finish, so it is better to remove them, and fill the resulting voids with mortar and rub over them.
The third layer is a covering , 1.5-2 millimeters thick, applied after the previous layer has hardened. Prepare a solution with a creamy consistency from sifted components. Any large particles or debris can cause problems with the grout.
Figure 13. Leveling the cover.
A thin layer of the solution is applied to the pre-wetted surface and smoothed over the surface with wave-like movements using a trowel or wide spatula.
6. Grouting the plastered surface
Without waiting for the finishing layer to dry, we grout it in a counterclockwise circular motion with a wooden or plastic trowel.
The final sanding is done with a grater with felt or felt attached.
Figure 14. Grouting plaster.
Important!
When leveling walls in a bathroom or toilet under tiles, grouting is not necessary to ensure adhesion of the leveling layer to the adhesive.
After completion of the work, we obtain a surface completely ready for finishing.
