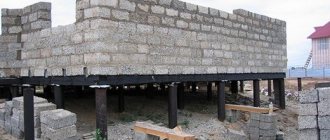
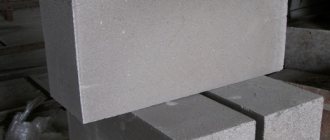
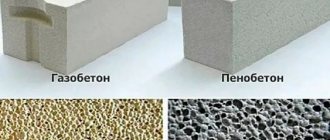
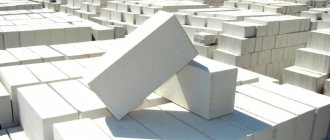
Today, aerated concrete block is considered very popular among building materials for masonry walls. Aerated concrete owes its demand to its unique properties, expressed in ease of installation, good strength, reliability and durability, practicality, and the ability to retain heat indoors. These advantages bring blocks to first place in the construction of residential buildings. But since the material tends to absorb water, it needs finishing to minimize this disadvantage. One of the practical protection options is plasterboard on aerated block.
Materials and tools for work
To install this finishing material on a block wall you will need:
- plasterboard sheets;
- putty material;
- perforated metal corners;
- self-tapping screws;
- metal profile guides;
- set of spatulas;
- screwdriver;
- building level;
- roulette;
- marking pencil;
- self-adhesive tape;
- perforator;
- metal scissors.
You can begin work with everything you need from the specified list at hand. It is recommended to use plasterboard with a thickness of 1.2 cm. For finishing ceilings, use sheets whose thickness is 0.9 cm.
Before finishing, it is recommended to perform calculations on material consumption.
How to avoid mistakes when covering walls
In order to avoid mistakes, it is important to have a good theoretical background - the rest will come with experience. The main mistakes of beginners are:
- Distortion of the plane of the walls by “helicopter” - this happens if during installation the master uses a bubble building level. It is highly recommended that you use a plumb bob or a laser axle builder if you are doing the work professionally. These devices have the smallest error, which allows you to build even frames.
- A hump or depression in the center of the wall occurs if the rack profiles are longer than the height of the ceiling. When profiles are installed in a frame, they may bend. This is also possible if you do not use thread when leveling.
- Self-tapping screws that are not screwed in completely - all fasteners in the drywall must be recessed by 1-2 mm, otherwise the cap will be very difficult to hide under the putty.
- Self-tapping screws can be screwed in even more than required if a bit with a stopper is not used. Such fasteners must be removed and replaced with normal ones, stepping back 5 cm.
If you miss and miss the profile, unscrew the screw and tighten it well. To prevent it from spinning in the drywall during the reverse stroke, press it on the side with the end of the blade of a utility knife.
- Also, be careful that no part of the frame protrudes too much beyond the plane. Only bedbug self-tapping screw caps can do this. This will not greatly affect the evenness of the wall, but will complicate the fastening of the material - when tightening the screws, the edges of the sheets may break.
Preliminary calculations
The material is purchased with a reserve. But here it is recommended not to overdo it, so as not to incur unnecessary financial costs.
First, the room is measured to find out the area of the walls. The result obtained is simply multiplied by the height of the room, and the areas of window and door openings are subtracted.
When determining the ceiling area, everything is much simpler. To do this, the width of the surface is multiplied by its length.
Five percent of the reserve should be added to the resulting amount of drywall.
All that remains is to divide the total area by the value of one standard sheet, and you can go to the store.
Installation
Installation of the frame and fastening of drywall is carried out in the following sequence:
- UD and CD profiles are cut to size in the drawing.
- UD guide profiles are attached to the floor and ceiling. The fastening step is 40-60 cm. To reduce the level of structural noise, an elastic tape is laid between the profile and the surface of the floor/ceiling.
- Direct hangers are attached to the walls.
- Insert the CD profile into the guides, check the position in the plane of the skin, and attach it to direct hangers. Check the vertical level and finally fix it to the walls of the guide profiles.
- To cover the height of the wall, a standard sheet may not be enough. In this case, additional jumpers are installed between the racks. They are secured using a single-level connector. In adjacent areas, the jumpers should be located alternately at the top and bottom, and the joints of the sheets should lie in the middle of the profile.
- A chamfer is made at the ends of the additional pieces along the joint line.
- The frame is sheathed with plasterboard - the fastening step is no more than 20 cm, the head of the screw is slightly “recessed” into the sheet.
To hang something heavy on the sheathing, the frame in this place must be reinforced with an embedded element that is attached to the frame. It redistributes the load onto the supporting structure.
Preparing for wall decoration
The following list of activities must be completed:
- clean the aerated concrete surface from dust and dirt;
- clean uneven areas, seal deep cracks and chips with cement mortar;
- prime the block surface and wait three to four hours until it dries. Here it is necessary to pay attention to the fact that the primer composition should be intended for building materials with a high level of moisture absorption.
Now you can install sheets of drywall over the sheathing or directly onto the blocks.
Installation with glue
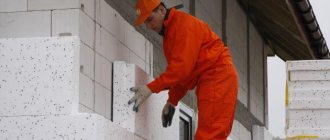
Mounting gypsum boards using an adhesive composition is an easier and more economical option for finishing interior walls. The technique allows you to save money on guide elements and maximizes the amount of free space in small rooms. This method is great for hiding chips, cracks and electrical wiring. So, we glue the drywall onto the gas block.
Execution of work
Let's assume that the preliminary steps have been completed. After that:
- We apply horizontal markings with a pencil. To do this, draw a pair of lines from the ceiling to the floor surface at a distance of ten centimeters from each other. Now we draw two lines in the middle to divide the wall into three even sections. The distance between the vertical lines is sixty centimeters.
- Using self-tapping screws as marks, we apply a mesh that will help fix the drywall sheet evenly. The extreme markings are set plumb, the vertical angles are found by screwing in or turning out self-tapping screws. To further secure the vertical, it is recommended to tighten a thin fishing line.
- On each vertical there is a plane; beacons made of screws are placed in half-meter increments. The constructed plane is checked with a level. If there are deviations, they are corrected with a screwdriver.
- The adhesive composition is applied to the plasterboard surface with small strokes in those places where the marks are approximately located, and the sheet is applied to the block wall.
- It is very important to check the common planes of two or more plasterboard sheets with a level.
As soon as the adhesive composition has completely dried, you can begin sealing the joints between the sheets with putty material. To do this, use putty prepared on the basis of a dry mixture with the addition of water. The consistency of the solution should be creamy; it is applied to the joints and leveled with a spatula.
It is recommended to use long-hardening gypsum mixtures as glue. The thickness of the applied composition is determined by the curvature of the surface.
If the wall turns out to be completely flat and strictly vertical, then further work will be significantly easier. The main difference of the method is the absence of problems when fixing heavy objects on the walls.
The work of finishing with gypsum board does not cause any difficulties; they can be completely carried out on their own. They should only be performed in dry weather with good ventilation of the room.
To reduce the consumption of adhesive composition, the surface of the walls is first leveled with putty, which is applied in several layers.
Let's sum it up
If you need to carry out quick but high-quality repairs, you can use GVL. The material tolerates moisture well and will last for a long period. Using self-tapping screws saves money and time.
Installation can be carried out by following a simple list of works:
- prepare the room, remove all finishing materials;
- prepare tools that may be useful during the work process;
- use screwdrivers or glue to mount drywall;
- Use a level to level the material.
Drywall is laid gradually. It is important not to rush in this process, as the slightest mistakes can lead to joints appearing.
However, if joints do appear, they can be sealed with polyurethane foam. After the foam has dried, the remains are carefully cut off using a stationery knife.
Installing drywall on a profile
For this finishing method, you will have to arrange a sheathing made of wood or metal profiles. The elements should be secured with dowels with a ribbed surface, since the aerated concrete block has a porous structure. Such products will be perfectly held inside, preventing the frame base from being separated from the surface of the walls.
Execution of work
As a rule, aerated concrete walls are smooth. But if there are irregularities, then the finishing material is attached exclusively to metal profiles.
- the pitch between the guides should be sixty centimeters along the axes. If the width of the drywall differs from the standard size (120 cm), then the guides are attached at a distance equal to half the width of the sheet;
- holes are made in the floor and ceiling to fix the upper and lower frame elements. Vertical profiles are attached to them, the length of which corresponds to the height of the wall;
- after this, hanging elements are installed, fixed to the wall surface after half a meter with special fasteners, because simple self-tapping screws into an aerated concrete block are not suitable;
- the correct installation of the profiles is checked by a level, the guides are leveled, fixed with self-tapping screws to the hanging elements and to the main guides at the bottom and top;
- You can attach plasterboard material. This is done with self-tapping screws on the racks in increments of twenty-five centimeters;
- The joining areas are fixed with self-adhesive tape and sealed with putty, which is sanded after drying.
Coloring
When choosing a method for finishing a foam block from the inside, the option of direct painting is rarely considered due to the porous surface of the walls. But this stereotype applies only to ordinary, “smooth paints. And there are also special compositions with a large thickness and a relief surface of the layer. These are textured and textural paints. Additional volume is obtained in them due to special fillers, high viscosity of the composition and application technique.
Additional information on the topic:
- What is needed to cover the walls and ceiling with plasterboard
- How to properly cover pipes with plasterboard in a toilet video
- How to install an inspection hatch under tiles on drywall in a bathroom video
- Stretch ceilings or plasterboard ceilings, which is better for a nursery?
- What is the first step in making a suspended ceiling or covering the walls with plasterboard?
How to treat the surface → Room decoration → How to choose the right paint → Surface treatment technologies → Leveling and finishing the walls → Selecting and applying a primer → Removal from the surface → Stretch ceilings and technologies → Reviews and testimonials
Expert advice
Before finishing the walls with plasterboard begins, the aerated concrete surface should be puttied and leveled. Significant damage and uneven areas are repaired with plaster mortar.
To finish a high ceiling, a frame fastening option is used, because in this case it is considered more reliable. For low ceilings, it is allowed to use glue, but such work requires a lot of labor associated with holding heavy sheets of plasterboard material at the desired height.
For interior wall decoration, only high-quality plasterboard material is used. Experienced craftsmen prefer to work with products from Knauf, which has long been a leader in the global building materials market.
In winter, such work is allowed to be carried out in a room where the temperature ranges from five to twenty-five degrees Celsius.
Interior finishing work in rooms with high humidity levels is carried out using plasterboard that is resistant to water.
To apply the putty composition evenly in the joining areas, it is necessary to use an angled spatula.
In the case when drywall is sewn onto a wooden sheathing, all guide rails are pre-treated with an antiseptic.
Features of fastening gypsum boards without a profile to different bases
To ensure that construction work does not cause difficulties, it is necessary to take into account the following features when working with gypsum fiber board sheets:
- During installation, the room must be warm at least +10 degrees.
- For wooden surfaces it is necessary to use self-tapping screws of various lengths. Wood is a soft material, so you can attach the sheets using a screwdriver or screwdriver. This will allow you to securely fasten the panel to logs and boards in a short time.
- For foam blocks and concrete, you can use special glue or mounting foam. However, the surfaces must be perfectly flat.
- Aerated block surfaces can be glued using gypsum glue.
If joints form between the sheets during work, you can fill them with foam. This strengthens the structure and eliminates visual defects.
Polyurethane foam is a popular means for installing drywall
Types of plasterboard material
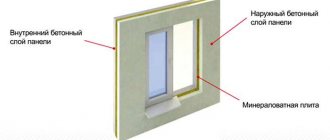
Today it is used quite often for finishing interior walls. This is especially true for houses built from aerated concrete blocks. The following types of plasterboard material are used for finishing work:
- wall – used for finishing the surface of walls;
- ceiling - it is three millimeters thinner than the wall one, the thickness is 9 mm.
In addition, it is recommended to use the following types of sheets:
- standard - they are used most often;
- moisture resistant - recommended for use in rooms with high levels of humidity, for finishing window openings;
- fireproof - they are used when designing an emergency exit;
- combined - have both fire-resistant and moisture-resistant properties.
An internal wall made of aerated concrete block can be finished with any of the listed types of plasterboard.
Preparatory activities
Before you begin fastening the GVL, you should complete the required measures:
- Inspect the surface of the walls and, if necessary, identify irregularities. Defects can be eliminated using putty.
- Identify uneven corners. Concrete walls may seem smooth at first glance, but difficulties may arise during installation. Therefore, each angle is measured with a square.
- Inspect doorways and adjust if necessary using plasterboard blocks.
- Draw out the area and mark the places where the panels are attached.
- Remove old wallpaper and other types of decoration.
The sheets should be attached to clean areas without traces of mold or peeling plaster.
The surface must be dry, so the room must be dried and ventilated before starting work.
A properly prepared room is the key to quality repairs