According to its functional characteristics, the slab foundation belongs to the shallow type of foundation. Its key feature is that an even reinforced base is built along the entire perimeter, capable of resisting the negative effects of soil heaving and ensuring the formation of an ideal surface for further finishing.
Thanks to this feature, a slab foundation can easily transfer various variable loads onto the ground and distribute pressure along the entire perimeter. Today we will look at the features of a slab foundation and the procedure for constructing it with our own hands in the form of step-by-step instructions.
What is a slab foundation
A slab foundation is a monolithic reinforced shallow slab, which is most often used in places where the soil is heaving or prone to shrinkage. Quite often, slab foundations are found in particularly wet areas, where the groundwater level is almost at the surface.
Such a foundation creates a kind of raft, protecting the room from negative atmospheric phenomena and preventing the penetration of moisture into the room. The foundation itself is very similar to USP, with the exception of floor insulation, which is not used in a slab foundation.
This type is used:
- in areas where the soil has a low ability to hold the structure and the weight of the planned building is quite large;
- in places where uneven shrinkage of the structure is possible;
- in areas where pressure groundwater is present.
Correct location of water supply to the house
In the vast majority of cases, water in a private house is supplied from three sources: a well, a well and a central water supply. In this case, the passage unit of the foundation and floor does not change significantly, but what immediately follows it changes: with a central water supply, an automation unit and a hydraulic tank are not required, but one of the frequent requirements is the installation of a meter.
There are two methods for constructing a well: with a caisson and with a well adapter. If there is no bathhouse or garage on the property, and you do not plan to share water with your neighbors, then an adapter is an ideal option. You can read more about the advantages of the adapter in this article. When considering the question of where to install water supply in the house, you need to take into account where the hydraulic tank, pressure and dry running switch will be located, if necessary, and you should also not forget about water filtration and water treatment. When constructing a well with a caisson, automation and filters can be placed in it.
If you want a well, then there are 2 options for how to bring water into the house: if there are space restrictions, then it is better to install pumps with built-in automation. Grundfos SBA or Dab Divertron well pumps are perfect for this. If your house has a separate technical room, then you can consider the option of a pumping station. However, it should be taken into account that the difference between the station and the water level in the well should not exceed 8 m.
Typically the entry is made near the wall. The input unit (conditionally this can include a filter, a pressure switch, a dry-running relay, a half-faucet outlet to the street, a hydraulic accumulator) occupies a width of about 0.5 meters on the wall.
Advice! At the design stage of your residential building, make room for the boiler room. In the technical room you can place equipment, carry out all communications, and also eliminate the noise of the pumping station.
Decide in advance on the location of the well or well on the site in order to minimize the distance from the water supply source to the entrance to the house. This will not only reduce the amount of excavation work, but will also make it possible to understand in which direction to lay the foundation in the foundation.
Pros and cons of a slab foundation, comparison with USP
The slab foundation and USHP are approximately similar in structural design, but there are also significant differences, to a greater extent this concerns the insulation that is laid under the foundation, which is not used in a conventional slab foundation.
To determine the most suitable type of foundation for your home, you need to consider the pros and cons of a slab foundation, and then the differences from USP.
Advantages of a slab foundation:
- reduced construction cost compared to a Swedish stove;
- ease of installation;
- high strength indicators, since contact with the ground occurs over the entire area;
- the platform of the slab is common throughout the house, so deformation is not dangerous for it, since part of the load will simply be transferred to a larger area;
- the ability to use the slab as a rough covering for the basement;
- there is no need to go very deep into the ground, which reduces the cost of equipment and labor;
There are significantly fewer disadvantages, but they also exist:
- the need for additional floor insulation after construction for a comfortable indoor microclimate;
- increased costs for concrete and reinforcement compared to traditional types of foundations;
- the need to use equipment to pour large volumes of concrete;
- financial disadvantage of using a slab foundation on sloped areas due to the significant consumption of concrete.
As you can see, the difference between a slab foundation and a USHP is only in the absence of a layer of insulation under the base, as well as the need for additional insulation of the floor of such a foundation. This type of foundation is well suited for seasonal buildings, as well as bathhouses, but for houses with permanent residence such a foundation has become quite outdated.
Classic communication technology
If the strip foundation is at the construction stage, then the technology for arranging communications is quite simple:
- At the construction site, the locations of all pipes are marked, taking into account the foundation walls.
- Then a trench is dug to a given depth, as when constructing a conventional belt.
- The formwork is being installed.
- Holes for pipes are cut inside the formwork, and large-diameter metal sleeves or pieces of pipes are installed in them.
- The space inside the sleeves is filled with sand to prevent concrete from getting inside.
- On the outside, the sleeves provide a rubber sealing layer and thermal insulation
- The trench can now be filled with concrete.
Sometimes a strip foundation is designed with intermediate concrete floors. This is how basements or technical underground floors are made. In such cases, the pipes are brought out vertically to a given height, and all connections are left inside the future slab. Considering the technical impossibility of repairing pipe connections, communications are welded or soldered, then all connections are checked under high pressure or ultrasound.
Depth of slab foundation
As a rule, the thickness of a monolithic foundation slab is 35-50 cm, it depends on the type of soil and the weight of the building. This parameter can be determined more accurately based on calculations. To find out the optimal depth of the foundation slab, you need to perform the following calculation:
- Determine the type of soil;
- Using the reference book, we find the optimal specific pressure on a given soil;
- Next, the weight of the house is calculated. Here you need to take into account everything: the walls, the weight of the slab itself, the attic floor, the roof and possible pressure on it from snow, the balcony, the attic and everything that creates a load on the ground;
- Determine the load on the surface. For example, let's assume that we have a two-story house with a weight of 100 tons and an area of 54 m2. 100,000/54 = 0.19 kg/cm2. For example, sand has an indicator of 0.25 kg/cm2. Thus the difference is 0.06 kg/cm2. Now you need to multiply by an area of 54 m2, so you get 32 tons - this is the required mass of the foundation;
- Next, taking into account the density, we calculate the volume of concrete 32,000 / 2500 = 12.8 m3;
- It remains to obtain a foundation thickness of 12.8/54 = 0.24 m.
Thus, a slab thickness within 30 centimeters will be optimal for a given house. At the same time, the depth of such a foundation should be such that there are no fertile layers of soil under the slab - all of them are removed at the surface preparation stage, and after pouring the concrete, the foundation is backfilled.
Requirements for laying water supply systems (SP 31.13330)
In this case, the sleeves must be installed directly into the formwork before pouring concrete; breaking structures using the impact method is not recommended due to the possibility of deformation. When designing input nodes, you need to consider:
- the minimum diameter of the sleeve is 50 mm;
- taking into account the height of the pipes, they need to be protected from seasonal soil fluctuations, therefore it is additionally necessary to design special compensators;
- The laying depth of pipes should be up to 50 cm below the soil freezing depth. Then special insulation materials are not used. If the installation is carried out higher, then the pipes must be protected with heating cables or high-strength insulation materials;
- there is a load on the soil from external vibration, it must be included in the design;
- the inlet hole must have a larger diameter than the pipe itself. The space between the pipe and the wall must be sealed with an oil seal or elastic materials. All work should be carried out in warm, dry weather.
Sewerage standards (SP 32.13330):
- The minimum installation depth of the sleeve in a strip foundation is from 0.7 meters from the level of the blind area. This depth will protect the pipes from mechanical damage and vibration;
- it is recommended to provide pipe insulation;
- the tilt angle should be 4−7 degrees to ensure gravity flow;
- the distance from the entrance of water supply pipes must be at least 1.5 meters;
It is recommended to lay pipes at a depth below the freezing zone.
Step-by-step instructions for installing a slab foundation
Surface preparation
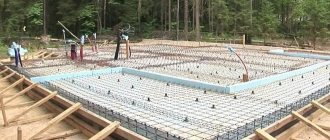
The first step is to mark the perimeter of the area and remove the fertile layer of soil. After excavation work, a geotextile flooring is laid. Next, you should fill the area with crushed stone and sand to form a cushion. The sand is compacted in layers of 10 cm. Then communications are laid. Laying communications in a slab foundation is similar to the same operation in an insulated Swedish slab. It is better to lay pipes in special sleeves, which allow repairs and replacement of communications. Some builders duplicate sewer pipes in the slab so that if one pipe fails, they can use another.
Formation of the base
Next, a screed is made from M100 mortar with a thickness of about 10 cm. Waterproofing is laid on top of it, the seams of which are soldered with a torch. The waterproofing should be slightly larger than the area of the future foundation in order to then turn the flooring up.
Slab foundation reinforcement
After the foundation is formed, the reinforcement is installed. As a rule, for the slab frame you need to knit two-row reinforcement from a rod with a thickness of 12-16 mm and a cell size of about 20-30 cm. The entire frame must be at least 5 cm above the base level; for this, special spacers are placed under the reinforcement. This is done so that after pouring the slab with concrete, the reinforcement is recessed inside.
Pouring a slab foundation
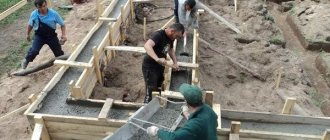
After reinforcement, the formwork of the slab foundation is formed. The formwork of such a foundation is the simplest structure, consisting of wooden panels installed along the perimeter of the foundation. Such formwork will not require large financial investments compared, for example, with strip foundation formwork.
After all preparatory steps are completed, concrete is poured and compacted. The easiest way to do this is to use mixers, since such a foundation requires a significant amount of concrete, which must be poured at once to avoid uneven drying and the formation of cracks.
Installation of sewerage and water supply under the MLF
Here communications are laid deeper than a shallow and shallow foundation. They should be laid as an underlying layer under the foundation base. If the house on the FMZ will stand on heaving soil, then it is necessary to lay a ring drainage.
Approximate scheme of ring drainage Source oboiman.ru
For a sewer line, the set of rules No. 18.13330 states that the distance between the outer surfaces of the pipeline must be more than 20 cm. For water supply systems - 40 cm. In this case, the water pipes must be above the drainage level.
Engineering systems should be introduced before making the underlying layer. It is necessary to bring the structures into the risers of the structures through the floor along the ground. This will make it easier to repair the highway. If you lay metal-plastic water supply in HDPE, you can avoid excavation work.
Features of the slab foundation “pie”
A slab-type foundation does not require deepening - its ability to “float” and resist the forces of frost heaving is fully manifested precisely when laid on the surface.
The basic version of the foundation pie is shown in the illustration:
Foundation layers from bottom to top:
- Compacted soil is the bottom of the prepared pit.
- Pillow - made of sand or a mixture of sand and gravel, crushed stone. It is filled in layers, leveled and compacted. The cushion dampens ground vibrations and reduces the intensity of the impact of loads from below on the foundation.
- Geotextiles. Dornit fabric protects the pillow from silting and reinforces it. Geotextiles can additionally be laid at the bottom of the pit, between layers of sand and crushed stone to increase the strength of the pie.
- Footing. A thin leveling layer of concrete on top of the cushion helps to properly waterproof the foundation and correctly install the reinforcing frame.
- Waterproofing. Waterproof material protects the reinforced concrete foundation slab from the penetration of moisture from the soil. Waterproofing of a monolithic foundation slab is traditionally performed from two or more layers of rolled bitumen material.
- Concrete slab. Actually, the foundation itself, the thickness of which depends on the magnitude of the loads on the foundation.
- Reinforcement frame. Reinforcement increases the strength of a monolithic structure, takes on tensile-compressive loads, preventing cracking of concrete.
At what stage of construction is the laying carried out?
In the case of the construction of a slab foundation, the installation of utility networks in the building area must be carried out before the preparation of the underlying layer. Most builders are of the opinion that it is easier and more convenient to install engineering lines before the stage of laying the reinforcing frame, when the formwork is already ready.
If you lay water supply and sewer pipes before erecting the formwork, it is easy to miscalculate the outlets and risers, which may end up either inside the wall itself or too far beyond it. Therefore, experts recommend laying communication systems as the slab foundation has already acquired its shape due to the installation of the molding structure.
Types of slab foundation
There are several options for making a foundation slab.
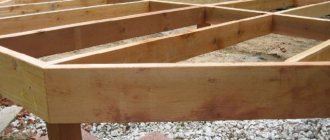
Most often it is a monolithic slab, the thickness of which is the same over the entire area. The advantages of such a base include ease of installation; the disadvantage is that the upper edge is close to the ground surface - in this case, the base of the walls may be exposed to moisture, which is harmful to building structures. To ensure that the edge of the slab is located higher above the ground surface, you should not increase its thickness - this will significantly affect the cost of the foundation. A more practical option would be to install a slab with stiffeners.
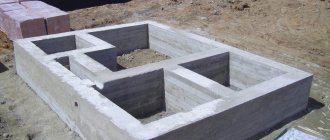
The foundation is a monolithic slab with ribs up
The monolithic structure is a flat base with reinforcing ribs protruding above the surface - it looks like a strip foundation on top of a slab.
The ribs are located around the perimeter and under future load-bearing walls inside, if this is provided for by the project. A foundation slab with upward stiffening ribs allows the construction of a building with a basement or ground floor. In this case, the monolithic structure must be buried in the ground and grillage ribs of a suitable height must be designed. Subsequently, a layer of waterproofing is laid over the ribs and wall structures are mounted.
Slab foundation with ribs down
To increase the load-bearing capacity of the slab foundation without deepening it, a monolithic structure is made with stiffeners directed downwards.
There are two options for making a monolithic slab with downward stiffening ribs:
- Stiffening ribs are formed by trenches dug in the ground below the level of pouring the reinforced concrete slab. A reinforcing frame is installed in the pits for the ribs, made as a single unit with the frame of the slab itself, after which the concrete mixture is poured.
- A pit with a flat bottom is being prepared for the slab. Polymer slab insulation is laid on the waterproofed base - stiffening ribs will form in the spaces between the “islands” of the heat insulator and the walls of the pit. Before pouring the concrete mixture, a reinforcement cage is installed.
Stiffening ribs should be located under load-bearing walls and capital internal partitions. If the project does not include partitions, but it is necessary to increase the rigidity of the slab, the downward-facing ribs should be located parallel to the short side of the building in increments of up to 3 meters.
Laying a heat insulator, including extruded polystyrene foam, under the foundation slab not only allows you to install stiffeners of the required size, but also helps to insulate the foundation base and reduce the cost of heating the house. This type of foundation is called a “Swedish slab”. It is often supplemented with a water heating circuit.
Prefabricated slab base
Instead of a monolithic slab foundation, in some cases a precast concrete foundation is used.
Finished structures are laid close to each other. But this option can only be used on rocky soils that are not prone to heaving. In other cases, the base may deform over time under uneven heaving loads due to the lack of a rigid connection between the slabs. A foundation made of ready-made reinforced concrete slabs is used only in the case of the construction of outbuildings, bathhouses, and small light houses. A screed is made on top of the laid slabs. The technology for installing a prefabricated foundation requires the use of special equipment for transporting and laying slabs.
Briefly about the main thing
When designing a foundation, it is imperative to calculate how water supply pipes, sewerage pipes and other necessary communications will pass through it. All required standards are specified in paragraphs of SNiP - No. 31.13330 and 32.13330.
If in the case of a strip foundation you can limit yourself to laying sleeves through which pipes will subsequently be laid, then when choosing a slab foundation, the work will need to be carried out in parallel.
Pipes that go into a house on a pile foundation must be insulated.
Calculation of the thickness of the slab and reinforcing frame
When installing a slab foundation with your own hands, it is important to correctly calculate the thickness of the slab. A base that is too thin will not withstand the load. Pouring an excessively thick slab will lead to unnecessary financial expenses.
Please note: each centimeter of slab thickness is 1 cubic meter of concrete mixture per 10 square meters. m area.
The calculation should be entrusted to professionals or a special program should be used. The value is calculated based on the type of soil and loads on the foundation. Therefore, it is necessary to have geological exploration data on the site and a ready-made construction project. The standard thickness of a slab foundation is 200-300 mm.
The reinforcing frame for slabs up to 150 mm thick is made of one layer of mesh, located along the central horizontal axis. For slabs of 200-300 mm, two parallel layers of mesh are required, installed with a distance of 30-50 mm from the bottom and top of the future slab. The diameter of the reinforcement is 12-16 mm, the installation pitch of the rods is 200-300 mm.
Under load-bearing walls, the installation spacing of the rods is reduced due to the sparser arrangement of the elements in the central part of the slab.
It is most convenient to calculate the number of reinforcing bars and clamps for their fastening using a specialized calculator.
Diagram of the water supply unit to the house
A similar scheme is used by our company in most cases when supplying water to a private house from a well or from a well with a submersible pump.
Designations:
- Insulation 34 mm
- Insulation 54 mm
- cable tie
- HDPE pipe 32 mm
- Fitting 32/1" HP
- Brass tee 1"
- Brass fitting 1”-½”
- Pump cable
- Self-regulating heating cable kit (supplied with gland)
- 1” fitting with transition to pipe. Inside the house, we switch to polypropylene or metal-plastic pipes.
- Watering tap outlet (installed before the filter)
- Oblique filter (dirt filter)
- Fine filter (retains particles from 5 to 25 microns)
- Dry running relay (if the pressure drops below 0.5 bar, it turns off)
- Five way connector
- Pressure gauge
- Hydraulic accumulator
- Tap leading into the system
We use HDPE pipes 32 mm (4) with seals 54 mm (1) and 34 mm (2). We install the fitting - transition from 32 mm HDPE to 1” external thread (MS) (5). Next, install a 1” brass tee with internal thread. We screw a 1”-½” fitting into the tee from above. And then we screw in the sealed lead-in to insert the heating cable inside (8). We seal all connections (we use only flax with sealing paste).
Next comes a set of self-regulating heating cable (8), which is inserted inside the pipe along with a special seal (gland, included with the cable).
Install the outlet of the watering tap (11). Since it does not require much filtering of water, we install it before the filters. There are 2 taps installed on it: 1 with a fitting outside, the other inside the room. In winter, the tap is turned off inside the house, and the outside one remains open to drain the water (the pipe is laid through the wall at an angle).
Then we install an oblique filter, or mud filter (12). It can be placed before the watering tap - it doesn’t matter.
Fine filter (13) - retains small particles from 5 to 25 microns. Needed for protection against fine sand and is installed optionally. Dry running relay (14), to which the cable from the pump (8) is connected. If the pressure is below 0.5 atmospheres, the relay turns off, after which it can only be turned on manually. This helps protect the pump from running dry if for some reason the water does not have time to fill the well (for example, seasonal changes in the well's flow rate). Dry operation for the pump is dangerous due to overheating, since it is cooled by transient liquid.
We do not use a dry-running relay when supplying water from a well, since well pumps are equipped with built-in automation with appropriate protection (as in Dab Divertron) or a float level sensor (Grundfos SBA and Belamos KF). Five-way connector (16) on which the pressure switch is installed and pressure gauge (15). It also comes with a connection to the hydraulic accumulator (17).
The valve in the system (18) is installed strictly after the automation. What usually happens: Somewhere in the house a faucet turns on. The pressure gauge records the pressure drop in the tank, after which the pump turns on to supply water. If the valve (18), installed incorrectly, is closed, then a water hammer will occur, which will disable the entire system, and the pump will simply burn out.
Also, do not forget that in addition to the water pipe, an electric cable is brought into the house from the pump in the HDPE pipe.
Backfilling the trench
It is advisable to completely fill the pipe itself with sand, but if there is only enough sand for the bottom of the trench, then it’s okay - fill it with mined-out soil, which is also recommended to be compacted in layers. The remaining space around the shaft is poured in the same way.
Since both the trench and the shaft are located at great depths, it is not possible to compact the bedding normally, so it will continue to sag for a long time. Because of this, it is recommended to finish the yard no earlier than a year later, when the soil is naturally compacted due to precipitation.
Thermal insulation of sewer pipes
Even if the pipe is buried 15-20 cm in the ground, it will not need additional insulation, since there is no water standing inside. But open areas need to be thermally insulated, since in severe frosts they can still freeze, especially if there are blockages or the sewerage system is laid in violation of the standard slope.
Special cuffs or mineral wool, which is wound on top, are used as insulation. This measure will not cost much, so we advise you to apply it immediately, without waiting for cold weather. If desired, you can build a warm box around the pipe and place an inspection inside. Such a shell will protect the insulation itself from the effects of wind, sun and moisture.
