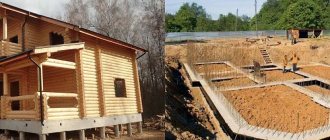
The strip base is a closed strip made from various building materials. Passes under the load-bearing, internal walls of the future building. The choice of the appropriate type depends on the soil, mechanical load, purpose of the structure, and climatic characteristics of the region.
As a rule, the types of strip foundations are classified according to material and depth. Therefore, in order to choose correctly, we will consider each of the types.
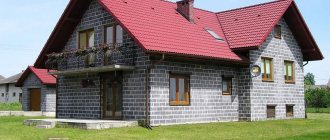
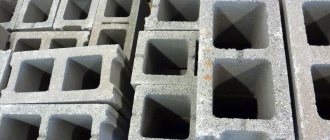
Brick base
It is erected only on dry sandy soils with a constantly low groundwater level. The best option for raw materials is full-bodied clay or red burnt. This material is suitable for the above-ground, underground part of the base, and the base of the structure.
Brick is used in the construction of wooden frame houses, small buildings, closed gazebos, and summer kitchens.
It is important to remember that brick is hygroscopic, so laying waterproofing material is a mandatory step in creating the foundation.
1) waterproofing, 2) blind area, 3) brickwork, 4) monolithic foundation slab
Pros
:
- no need for special equipment;
- the price of materials is low;
- withstands significant mechanical loads.
Minuses
:
- brick absorbs moisture, so if there is no waterproofing, then over time it begins to crumble;
- creating this foundation requires special knowledge or ordering work from craftsmen;
- such a foundation is suitable only for sandy soils;
- high labor intensity of work;
- high consumption of materials.
Construction
To build a foundation of this type, you should use the help of craftsmen or work under their clear guidance.
The whole process consists of the following stages:
- The area is cleared of debris and plant roots.
- Marking is carried out using pegs and rope.
- A trench of the required width and length is dug. The exact numbers depend on the size of the future building.
- The bottom is compacted.
- A cushion of sand and crushed stone 20 cm high is created, moistened with water, and compacted.
- A small layer of concrete screed of 5 cm is poured along the entire length of the trench.
- The bricks are laid on the mortar at the required height.
- If necessary, a metal mesh and reinforcement bars are inserted between the rows. It is better to do this at the bottom and top of the base.
- The finished tape is covered with a layer of waterproofing material.
- At the request of the owners, the foundation is insulated.
Photo: bricklaying - continuation of the foundation
Preparatory work
To install the base yourself, you need to stock up on:
- a massive board to assemble the formwork (it should be 15-20 mm thick);
- waterproofing material and insulation;
- corrugated fittings (its thickness should be 14-20 mm);
- wire to twist parts of the reinforcement;
- sand, concrete grade M200-500, crushed stone.
Valera
The voice of the construction guru
Ask a Question
It is advisable to purchase concrete ready-made, since a large amount will have to be poured. If you mix the material in stages, you will not be able to create a strong, integral structure. The construction site is cleared of vegetation, debris and foreign objects so that they do not interfere with further work.
Depth calculation
First of all, all calculations are performed, the soil is studied, and the dimensions of the structure are determined. It is better to entrust such work to specialists, since the risk of making a mistake and building a foundation that does not meet the given conditions is too high.
Concrete selection
The following grades of concrete are considered most suitable for pouring a strip base:
- M 200 class B15. Used to build foundations for light log, foam block, gas silicate-brick buildings.
- M 250 class B20. It is practiced when constructing the foundation for brick low-rise buildings with reinforced concrete coverings.
- M 300 class B22.5. Used for two- to three-story industrial structures subject to constant loads.
- M 400 class B30. The best option for constructing a frost-resistant, heavy-duty foundation in private homes.
The ideal type of concrete is considered to be grade M 500. It is most often used when constructing a strip-type base.
Excavation
The quality of the future building depends on the correctness of the markings. the top soil layer is removed to a depth of 200-300 mm throughout the entire construction site . Marking is carried out with wooden pegs and fishing line (rope). After tensioning the threads and driving in the pegs, the diagonals are measured.
The soil is sampled manually or using an excavator . Special equipment is used to create trenches. The bottom is leveled, after which they begin to install the drainage system.
Rubble base
Made from rubble stone. Dolomite, basalt, granite and any other rocks are suitable. It can be laid with or without concrete mortar.
Photo: rubble foundation on a slope
Such a foundation can be built on heaving soils with a large freezing depth. It is suitable for country houses made of aerated concrete, brick, timber.
The recommended thickness of the rubble base is from 35 cm. When the trench height is 70 cm, the tape is laid to the full depth.
pros
:
- the possibility of using local cobblestones;
- durability of the tape;
- frost resistance;
- low level of hygroscopicity;
- low price.
Minuses
:
- The rubble base has not gained wide popularity among residents of the private sector due to the complexity of production.
- The strength is an order of magnitude lower than monolithic and prefabricated foundations.
Construction stages
- The area is marked.
- A trench of the required depth is dug.
- A layer of sand and crushed stone up to 30 cm high is poured and compacted.
- The first row of stones is laid without mortar. All subsequent ones are fastened with a cement mixture in a layer of up to 20 cm.
- Roofing felt or other waterproofing material is laid on top.
Reinforcement and insulation of the base is carried out at the discretion of the owners.
Frame reinforcement technology
The strength of the foundation is ensured by the reinforcement structure, without which it is impossible to form a complete foundation. Reinforcement work includes several stages:
- installation of formwork - a plank frame is installed along the perimeter of the future building, the walls of which are lined with parchment on the inside, thanks to which it will be easy to remove later;
- driving vertically located reinforcing bars into the soil - the length of the reinforcement is comparable to the depth of the foundation. It is necessary to bury the rods at a distance of 50 mm from the walls of the formwork, while they are embedded in the ground in increments of up to 600 mm;
- installation of stands on the bottom (height up to 100 mm), on top of which horizontally located reinforcing bars are laid: the function of stands can be performed by halves of bricks installed on the edge;
- horizontal rows connected to vertical rods;
- fixing structural elements at intersections by welding or wire.
Useful
Monolith
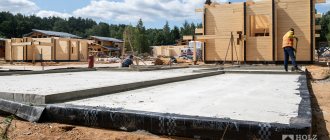
It is a continuous strip of concrete mixture reinforced with reinforcement. One of the most reliable types of foundation. It is recommended to use a concrete mixer to pour it.
Monolithic tape diagram
Suitable for heaving or stable soils. Withstands high loads. This is a strong foundation for a large garage with a cellar, a bathhouse with a summer kitchen, or a frame, brick house with several floors.
Can be buried below the freezing point of the soil. An excellent option for regions with harsh winters.
pros
:
- versatility - suitable for structures of varying complexity;
- strength and durability;
- construction work can be done by one person;
- Possibility of pouring the base at different depths.
Minuses
:
- High consumption of materials, which means high costs.
Step by step construction
All stages, ending with filling the sand-crushed stone cushion, are similar to other types of strip bases.
After this, a formwork is created from wooden boards. Reinforcement bars are laid in the trench. The tape is filled with concrete solution to the required height. The entire surface should look monolithic (solid), without changes. A layer of roofing material is laid on the frozen solution.
Rubble concrete strip foundation
It is created from large stones up to 0.3 m in length, weighing up to 30 kg, which are filled with concrete solution. But broken brick or crushed stone is suitable. It is necessary to erect formwork under it. Recognized as the most reliable type of tape. The construction technology is very similar to monolithic, so it’s easy to fill it yourself.
Done on stable soils. It is not recommended to create on sandy, rocky soil - the foundation will quickly begin to crack.
Due to its reliability, such a foundation is poured under brick houses with a basement, garages, bathhouses, covered gazebos with a stove or fireplace.
In buildings with a basement, the height of the foundation should reach the floor of the first floor. Without it, the tape is made 15 cm higher than the ground level.
pros
:
- inexpensive;
- lasting;
- has a long service life;
- frost-resistant;
- easy to install.
Minuses
:
- None, except that this tape is not suitable for all soils.
DIY installation
To work you need:
- bottle;
- sledgehammer;
- shovel;
- rope and pegs;
- boards for formwork;
- concrete solution.
The procedure is as follows:
- Marking is being done.
- A trench is dug and compacted.
- The first row is laid out from large cobblestones. Each one is rammed with a sledgehammer.
- The cracks are filled with concrete.
- The next row of stones is installed, possibly smaller in size. They should be covered with the solution.
- Layers alternate to the desired height.
According to SNiP, the width of the rubble concrete strip should be at least 15 cm greater than the width of the building walls.
Whether to reinforce the base or not is an individual decision. Most craftsmen believe that there is no such need on stable ground.
Load calculation
To form a reliable strip foundation, it is necessary to perform a calculation based on the actual parameters of the foundation. Let's calculate the foundation for heaving soil using the following approximate data :
- size - 6x3 m;
- upper segment – 0.2m;
- sole – 0.25m.
Building characteristics must be taken into account :
- wall thickness - 400mm - gas blocks;
- the floor covering of the first floor is an embankment of soil and granite crushed stone;
- the height of the house is 2 floors;
- ceilings between floors - reinforced concrete slabs;
- roof – pitched: 45° (wooden logs, tiles);
- the soil base is plastic clay.
Taking these indicators into account, it is necessary to calculate the following types of loads :
- roof - 1.5 x 80 = 1200 N (SNiP coefficient = = 800 N/m2);
- overlap - 1.5 x (300 + 500) = 12000 N;
- external walls (on 1 m of base) - 3 x 0.4 x 600 = 7200 N;
- gas block foundation - 0.450 x 2300.0 = 10350 N;
- sole (per 1 m length) -150.15+120+1200+720+1035 = 42250 N.
The area of the base is 50 x 100 cm = 5000.0 cm2 4225, 15/5000 = 9 N/cm2. Taking this data into account, you can proceed to calculating the volume of concrete that will be needed for construction. This can be done using this formula V=PI x r2 x h.
Soil cement type
It is used only for light structures of one floor, which are not in use all year round. These are sheds, terraces, bathhouses, gazebos.
Suitable soil types are clayey, sandy loam, loam, loess with low groundwater levels.
To make the tape, soil dug from a trench is used, mixed with cement and water to the desired consistency.
Photo: concrete solution
pros
:
- does not require a large purchase of building materials, so it will be cheap;
- Fills quickly and easily.
Minuses
:
- In terms of strength and service life, it is several times inferior to other types.
Construction stages
A trench is prepared in the marked area. Its bottom is leveled and compacted.
The mixture is prepared in a concrete mixer. Ingredients are added in proportions:
- sifted soil – 75%;
- cement grade not lower than M300 – up to 10%;
- water – 15%.
The numbers are approximate, they can be corrected after preparation. The main thing is that the output is the consistency of thick sour cream.
Application of gasoline mixer in construction
The solution is poured into the trench in layers, each 15 cm high, with a time interval of 20 minutes.
Advantages and disadvantages
The monolithic design became widespread thanks to a serious list of positive qualities:
- possible installation on unstable soils;
- high reliability;
- possibility of arranging a basement;
- high load-bearing capacity;
- possibility of independent construction.
The disadvantages include:
- limited scope of application, not suitable for construction on marshy soils;
- high cost compared to columnar foundations or, in some cases, a monolithic slab.
We recommend reading: Pros and cons of strip foundations.
Strip foundation on screw piles
Suitable for houses made of foam blocks and other block structures. It is recommended to install on heaving soil, in areas with a strong slope. In such conditions, this will guarantee the immobility and durability of the base.
Photo: foundation on screw piles
The supports of the pile foundation are deepened into the ground and connected to each other with a grillage - reliable jumpers made of concrete, metal or wood.
pros
:
- Possibility of construction on problematic soils.
Minuses
:
- screw piles are not cheap;
- calculations must be performed with high accuracy.
Main stages of work
- A cushion of sand and crushed stone is poured into prepared holes of the required depth.
- Piles are installed around the perimeter of structures, under load-bearing walls.
- To strengthen the supports and evenly distribute the load on the foundation, the pipes are connected with a grillage.
Installation of formwork on screw piles - If the grillage is made of concrete mortar, then reinforcement is performed.
- The base is waterproofed with roofing felt.
Basic installation mistakes
The main mistakes should be considered:
- Poor compaction of the sand bed, causing significant settlement.
- Use of low-quality or unsuitable materials.
- Lack of accuracy and thoroughness in work.
- Neglect of some stages of work.
CAREFULLY!
All these shortcomings can result in deformation or destruction of the tape during the first few years of service.
Work to eliminate errors is extremely expensive, time-consuming and does not guarantee a successful result, therefore construction should be approached with the utmost responsibility and care..
Bored piles
They are used on slopes, heaving soils, in densely built areas or near water bodies. The foundation has a load-bearing capacity of up to 5 tons. This is an excellent basis for a house, a bathhouse made of brick, wood, or a garage made of blocks.
pros
:
- efficiency;
- ease of installation with your own hands;
- suitable for regions with harsh climatic conditions and problematic soils;
- no need to level the building site;
- quick installation;
- does not harm nearby structures.
Minuses
:
- Significant price of materials.
Work is carried out in this way
- After marking, a trench is dug.
- Places for wells are being drilled.
- It is recommended to make a shirt from roofing felt and fill the gap between the soil and the material with sand.
- A frame is created from reinforcing bars and wire and immersed in the well so that it does not touch the bottom.
- Concrete solution is poured into the well. In this case, the edges of the reinforcement should remain on the surface.
- The trench is filled with a thin layer of sand no more than 2 cm.
- The formwork is made from wooden boards.
- Grillages are installed.
- The trench is filled with concrete.
Necessary materials
Don’t know how to build a strip foundation with your own hands? Let's start with the simplest thing - preparing materials.
You will definitely need:
- roofing material or polyethylene to create a waterproofing layer;
- boards 15 - 2 mm, bars with a section of 2 x 3 cm for installation of the formwork structure;
- wire used to tie the reinforcement;
- reinforcing bars with a diameter of 1 - 1.5 cm. From these you will build a frame for a strip foundation with your own hands;
- nails, screws;
- crushed stone and sand under the strip foundation (if construction is not carried out on sandy soil) to create a “cushion”;
- To prepare the “correct” concrete solution, you will need cement material of at least M 400, sand, crushed stone or gravel. The composition of the components is taken at the rate of 1 x 2 x 4. Knowing the mass of each batch, you can clarify the weight of the future strip foundation.
Sandy foundation option
The simplest type of tape. It is constructed only for lightweight buildings intended for temporary use - small country houses, outbuildings, open gazebos, summer kitchens.
Suitable for dry, stable soils. It is installed in a trench, the walls of which are made slightly wider at the top. The blind area is created in the form of a clay castle.
pros
:
- affordable price;
- speed of installation.
Minuses
:
- It is short-lived, so it is made for seasonal construction when it is not possible to purchase more reliable materials.
DIY construction
A trench with expanding walls is being dug. Its width should be 10 cm greater than the width of the load-bearing walls.
Preparatory work
A layer of sand and crushed stone is poured, which alternate with each other. Each layer is moistened with water and compacted. There should be no more than four. You can lay two rows of bricks on top of the crushed stone or fill everything with a solution of clay and cement.
The sandy foundation should be 15 cm above the ground level.
Useful tips
Recommendations from experienced builders will help you avoid mistakes when laying a strip foundation:
- concrete will set faster in cold weather if the solution is mixed with warm water;
- the strength of concrete decreases when using sand and gravel mixed with earth or clay;
- when using wet sand, the amount of water must be reduced, otherwise the solution will turn out liquid;
- there should be no shoe marks on a well-compacted cushion, otherwise the building will sag due to poor-quality compaction;
- You should not neglect insulation, since thermal insulation of a strip foundation, even for a light frame house only from the outside, reduces heating costs by 15 - 20%.
To drain rain and melt water from the strip foundation and reduce the amount of heaving, it is recommended to install a blind area. To enhance protection and give a presentable appearance, the base part of the tape is trimmed with stone, clinker tiles, and siding.
Deep laying tape
It has found its application on wet, strongly freezing, problem soils. It is being erected as monolithic buildings of several floors, massive houses made of stone and brick, and country cottages.
Regardless of the type of soil, the tape is made 30 cm below its freezing level. It can be prefabricated or monolithic. In areas with complex terrain, the buried foundation is made in the form of steps or expanded downwards.
Formwork for deep tape
pros
:
- justified only in massive structures and in regions with harsh climatic conditions;
- durable;
- reliable;
Minuses
:
- expensive type of base;
- requires a lot of labor and a lot of time to create.
Creating a foundation manually
The construction process is labor-intensive, so one person cannot cope here. In addition, special equipment will have to be used to dig a trench.
Important stages of work:
- Marking. Digging a trench to a depth of at least 1.5 m.
- Leveling walls from unevenness.
- Film flooring made of polyethylene or geotextile.
- Filling a cushion of sand and crushed stone 15 cm high. Tamping.
- Pouring a thin screed of concrete.
- After its partial hardening, construction of formwork from boards or other wood material (plywood, OSB).
- The height of the formwork should be 20–30 cm above the ground level.
- Knitting a reinforcement frame from rods and wire in increments of 30 cm. It is carried out along the entire height of the trench.
- Pouring concrete in layers of 15 cm each. At the same time, it is pierced in several places to remove excess air. They're ramming
- The surface is leveled with a trowel. In the summer, moisten with water so that the foundation does not crack.
It is recommended to remove the formwork 7 days after pouring the solution. After which backfilling is carried out, hydro- and thermal insulation of the top of the base is done.
How to Determine Depth
Depth refers to the distance from the soil surface to the base of the foundation (at least 0.5 m).
The density of the soil matters:
- On homogeneous soils (sand with crushed stone and clay), the recommended foundation depth is 0.5 m.
- The laying level in heaving soils (loam, sandy loam, clay) is 0.7 m.
- Weak and mobile soils (quicksands, pseudoquicksands) force the construction of a foundation at a depth of up to 2.5 m.
At the same time, its level can be slightly increased when there are nearby trees growing nearby. The concrete strip is laid at a level of half the soil freezing depth (GPG, determined according to tables depending on the region).
If groundwater is located below the freezing mark, then the concrete strip can be installed at any level. In the case where the groundwater channel passes above the freezing point, the foundation is laid at the level of the GPG.
Foundation depth is the distance from the soil surface to the foundation.
Shallow strip foundation (MSLF)
It is built on dry, stable sandy soils with low groundwater levels. The best option for wooden houses made of timber, one-story logs, bathhouses, massive gazebos.
Happens:
- monolithic;
- columnar;
Read more in the article: “Shallow strip foundation” - made.
The tape runs along the perimeter of the building under the load-bearing walls. It is buried 60 cm into the ground.
pros
:
- low construction costs;
- reliability of coverage;
- no need to use special equipment;
- a large selection of types of materials to create.
Minuses
:
- It cannot be used for permanent structures of several floors or erected on heaving, frozen soil.
Construction technology
The easiest to create monolithic foundation. It can be done by one or two people, without the use of special equipment.
For pouring, use concrete grades from M200 and higher. The reinforcement frame is knitted from rods D12–D16.
All construction work is similar to the construction of a buried belt, with the exception of the depth of the trench. It is made no more than half a meter.
In addition, there are a few tips to consider:
- Inside the formwork, the maximum concrete pouring level is marked, checking the evenness with a building level.
- If the base height is more than 30 cm, reinforcement is performed in several layers.
- The surface of the tape is leveled and sprinkled with dry cement through a sieve. This measure will prevent cracks from appearing when the foundation dries out.
Foundation hardening process
Non-recessed tape
Shallow strip foundations are used for the construction of sheds, light wooden gazebos, and verandas exclusively on hard, stable soil, even with a high groundwater level.
It can be assembled from bricks or blocks or columnar, less often monolithic. Created on soil without deepening.
pros
:
- easy to build;
- economical;
- prefabricated;
- a large selection of types of materials to create.
Minuses
:
- In terms of strength and service life, it is several times inferior to other types of foundation.
- Used for non-residential utility buildings or buildings for seasonal use.
Construction sequence
The easiest way would be to fill in a monolithic tape. To do this, according to the markings, the fertile layer of soil is removed. The bottom is compacted. The sand cushion is filled in. As with other types of foundations, formwork is erected and a reinforcing frame is knitted. It is recommended to pour concrete mortar from different angles of the trench. When it reaches the marked height, it is seated by tapping it in several places on the formwork. The surface is leveled and waterproofed after hardening.
The choice of foundation directly depends on the purpose of the structure, the soil, the climatic conditions of the region and, of course, the financial resources of the owners. Most foundations can be erected independently, but for massive buildings it is better to involve craftsmen to help.