If you choose this option, the most important thing is to find the right tire. A tire from a tractor or combine is best suited, since the diameter is quite enough for the height of an adult. In addition, you will need a bag of cement and sand. The manufacturing procedure is as follows:
- Using a sharp knife and a hacksaw, cut out one side of the tire, leaving the side. It is more convenient to cut along circles on the tread. You should not use a grinder, as the rubber will begin to crumble and stick.
- We choose a flat area, clear it of turf along the diameter of the pool or a little wider, then fill it with a sand “cushion”.
- Fill a circle about 15 cm thick with cement and install the tire.
- We level the cement and pour in a couple more buckets to be safe.
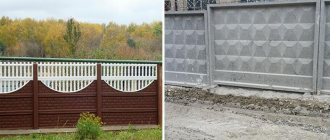
- We decorate the sides of the pool. There are no limits to imagination here - they can be painted, mosaic, stone or brick.
After completing the work, you need to wait about a week for the concrete to completely harden - the DIY wheel pool is ready, you can enjoy water treatments!
Preparing the base
The most important part of the structure is the bottom slab; it bears most of the load. That is
why, when pouring concrete into a pool, special attention must be paid to this element. The waterproofing layer, as well as additional powder, make the structure more durable and reliable and significantly increase its service life.
When creating a concrete blank, you need to proceed according to the following scheme:
- At the very bottom of the pit, they dig a narrow trench and direct it to the pit. A pipe prepared in advance is placed in it, into which water will subsequently be drained. If a large tank is being created, then one pipe will not be enough, so you will need to install several such drains. Moreover, they must be installed in such a way that they are located with a slope towards the pit.
- The next step is to level the bottom and compact it well.
- To prevent cracks from appearing on the bottom slab, it is necessary to cover the surface with a special geotextile material. The canvas is laid with a slight overlap on the walls; it will be enough to leave 15-20 cm.
- A layer of waterproofing is laid on the geofabric; these can be sheets of roofing felt or ordinary polyethylene film. It is advisable to make two layers with an overlap of 10-15 cm.
READ How to lay laminate flooring on a concrete floor with your own hands
At the very end, you need to pour a layer of crushed stone and sand of at least 20 cm onto the prepared surface. Then you should carefully level the drainage pad, compact it and spill it generously with water.
Pouring concrete walls
Wall thicknesses for pools with a capacity of up to 15 cubic meters. m is enough 200 mm. Adhering to these dimensions, begin construction of the formwork and reinforcing frame:
- Make a reinforcing frame similar to that for a 100 mm thick bottom slab. Both planes of it should be similarly filled with concrete 50 mm thick. Tie the vertical rods of the wall frame to the rods sticking up from the bottom slab frame.
- Install all additional elements into the walls: embedded pipes for water nozzles, sockets for lighting fixtures and trays for connecting electrical wiring to them.
- Install formwork on both sides of the reinforcing frame. It can be made from boards or plywood with a thickness of at least 20 mm. Support the outside and inside of the formwork with spacers from a wooden beam so that the walls do not bend under the pressure of the concrete.
- The formwork is filled with concrete in one day. The work involved in pouring concrete walls is the same as when pouring a bottom slab. You will disassemble the formwork when the concrete has completely hardened. This depends on weather conditions and can last from 10 days to 1 month.
Reinforcement
To concrete the pool, you will need to prepare low formwork and reinforcement, the rods of which should never be welded. To avoid corrosion, use only wire to fasten the mesh.
The formwork for the pool should outline the outline of the future building. Two levels of reinforcement are neatly laid inside it:
- The first one should rise 5 cm above the edges of the slab.
- The second level is laid 5 cm below the top edge.
- Since a slab about 20 cm thick is usually poured onto the bottom, the distance between two layers of reinforcement should be 10 cm.
The pool is reinforced with ribbed rods with a diameter of 10-14 mm and cells 20 x 20 cm, which are laid on small stones. The laying step is 20 cm. You need to step back 5 cm from the edge of the slab and bend the rods with the letter “G” (these bends will be required to create the frame of the walls).
Budget ideas for a homemade hot tub
If you need a very inexpensive option for a font for a bath (or near it), there are those. For example, you can use a suitable plastic container. To prevent the walls from leaking, you can make a frame from metal wire mesh.
Budget option for a sauna font
Another option is to use a cubic water container as a font. It is sold immediately with a metal stand. All you need to do is cut off the top and install it at your discretion. If you want, you can concrete it, as in the photo below.
Font from a cube
First, a pit is dug. Its dimensions are 20-30 cm larger than the frame: between the wall of the pit and the pieces of iron there should be a distance of 10-15 cm on each side. The depth is arbitrary, but it is better if there are sides. They can then be tiled. Don't forget about the drain. By the way, it needs to be thought out so that it can be easily dismantled and there is an opportunity to change the plastic container if desired.
The outside frame is covered with a thick film with reinforcement, which is secured with boards or slabs
It is important to hold the concrete solution so that it does not press into the frame. Having installed the structure inside, the gap between the walls of the pit and the nailed boards is filled with concrete (to reduce concrete consumption, you can first fill it with construction waste - broken concrete or brick)
When the concrete has set, you can install plastic and improve the sides.
What is not the basis for a font
In the bathhouse or on the street?
One of the issues that needs to be resolved before installing the font is whether you will install it inside the bathhouse or outside. Both options have positive and negative sides. If you place a font in a bathhouse - in a relaxation room or in a washing room, it will significantly increase the humidity level. Good ventilation is needed to remove excess moisture. It can be done, but with active ventilation, much more time and fuel is needed to heat the premises.
Outdoor fonts have their downsides. If temperature changes and cold water are perceived by many only as a plus, then few people like to sparkle with naked bodies. By the way, we can easily eliminate this drawback: install a fence that will cover the font. A budget option would be several poles with stretched banner film or something similar. For stationary use, polycarbonate canopies are often made.
When there is open water in the room, the humidity rises.
Which pool is better to choose for a summer residence - types and types
Frame pool
Inflatable pool
Fiberglass pool
Fiberglass pool
Sold ready-made.
Fiberglass pool-2
Purchasing such a structure (especially a large one) entails difficulties with delivery and installation, which cannot be done without special equipment (trailer, crane, excavator).
Fiberglass pool-3
Plus, it involves digging a pit, which is also quite problematic.
Plastic pool
Plastic pool
Lightweight and durable. The design principle is similar to the previous version. Causes difficulties during transportation and installation.
Concrete pool
Concrete pool
The best and most justified option of all of the above.
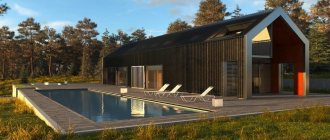
This pool is ideal for a summer house or country house, where you will use it seasonally.
Concrete pool-2
It can be made from concrete blocks, but it is better to pour a monolithic one. Despite the fact that this is the most complex and expensive design, its reliability and durability are beyond doubt.
Concrete ring - why not a swimming pool?
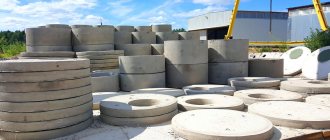
Indeed, why “invent” a container when there are ready-made well and sewer rings? The standard size of such a structure (from 1.2 to 2.5 meters) will be quite sufficient for the construction of a small swimming pond.
A concrete ring pool does not need a waterproof film if you make a concrete base for it and properly insulate the joint between the walls and the bottom. It is better to place the ring on a layer of cement mortar, which will fill all the gaps and reliably connect it to the concrete platform.
We also note that you can do without concreting the bottom. To do this, it is enough to lay a ready-made concrete cover on the sand preparation, which is used for inspection wells. In this case, all you have to do is seal the hatch hole.
Care
Cleaning
The pool becomes dirty and may even bloom. To prevent flowering, you can use special compounds. The pool must be cleaned at least once a week. However, when installing a skimmer system, you can reduce such procedures to once a year.
The skimmer system is designed so that cleaning occurs on its own. In this case, the water in the pool does not even have to be changed. Another device is an overflow system. It is usually not used in private pools because it is very expensive. However, you can try to make it yourself.
Water pumping system
To prevent leaves and debris from getting into the pool, it can be protected with a special dome. Such canopies have become very popular today. In appearance they resemble greenhouses.
Pool cleaning products can be found in specialty stores that stock everything you need for ponds and similar systems.
Measures to preserve heat in the bowl
The sun does not always cope with heating a bowl of water, especially on a cloudy day. To do this you will have to use electric heaters. To reduce heat loss from water and save electricity, the bowl must be insulated. You can use the help of specialists who will apply a heat-protective layer by spraying. You can make thermal insulation yourself from foam boards with a density of 35 kg/cu. m. Seal all seams between the slabs with water-repellent mastic.
Features of waterproofing
Coating and film waterproofing are the main solutions used in this case.
Polymer-cement type mixtures.
Cement mortars of pasty consistency. Special polymers are added to the main composition. They create a waterproof layer on the surface when completely dry. The mixture is applied in two layers to give the structure additional strength. After this comes reinforcement with synthetic mesh.
Liquid rubber, with which you can easily decorate a concrete pool with your own hands.
To create an optimal water barrier. Does not cause any harm to human health and is resistant to any mechanical damage. The coating is capable of self-healing when microcracks appear on the surface. After application, an elastic membrane is formed on the surface. It has high insulating properties.
Liquid glass, which is used to finish a turnkey concrete pool.
A type of water emulsion made from polymer resins. Capable of penetrating into the very thickness of concrete, through the smallest capillaries. The material polymerizes when curing occurs. Then the composition turns into plastic, becoming an excellent base for plaster or special glue.
A variety of films refer to film or membrane type waterproofing. They are designated as TPO, EPDM, PVC. This is not only protection, the materials can be decorative elements.
The main thing is to entrust the installation of such insulation only to specialists, even if you are installing a concrete pool for your dacha.
When the waterproofing is completed, another technological break is needed. The exact duration is determined by the materials used. After this, the bowl is filled with water and checked whether everything is organized correctly.
Option one - monolithic pool
First you need to finally decide on the geometry of the future reservoir. It should be noted right away that the larger the size of the reservoir, the greater the material costs will be. The minimum depth of the pool is 1.5 meters, otherwise it will be uncomfortable for an adult to swim. The walls and bottom will “steal” approximately 50 cm of the thickness of the bowl. This must be immediately provided for by making the pit a little deeper, longer, wider.
STEP 1: design. Before digging a pit, you need to develop a design for water supply and drainage systems so that the reservoir can function normally. It is possible to develop a pit only after the final determination of the location for the location of highways (filling, drainage). To prevent the foundation pit from collapsing, it is recommended to make walls with a slight slope (5° is enough).
STEP 2: filling the bottom, tamping waterproofing. To proceed to arranging the drainage cushion, the bottom is covered with a fifteen-centimeter layer of sand and a fifteen-centimeter layer of crushed stone. After falling asleep, the pillow is compacted and roofing material is spread over it, which serves as excellent waterproofing. To improve waterproofing properties, it is better to lay roofing felt in two layers so that its edges touch the walls (20 cm on each side).
STEP 3: reinforcement. Before pouring the bottom surface, a metal frame must be created. When arranging the latter, class A3 fittings are used. The rods are connected with wire. The use of welding in this case is prohibited, since traces of corrosion will appear in the weld areas over time. The interval between the rods is 10-50 cm (horizontal direction), 20-30 cm (vertical direction). The horizontal frame is best laid on small stones (average diameter 3-5 cm)
It is important that the frame is located as close as possible to the center of the concrete screed. For a more reliable connection of vertical and horizontal rods, the latter need to be bent around the perimeter of the bottom
STEP 4: Filling the bowl. At this stage, the concrete bowl of the pool is poured. It is clear that it is better to fill the walls and bottom in one go. This approach will give the structure maximum tightness and strength. In practice, this is extremely rare, so the bottom is filled first, then the walls. In this case, it is advisable to provide a slight slope (2-3o) for drainage, i.e. There is no need to make the bottom absolutely flat. You can use a pipe located at the bottom of the wall as a drain.
In order not to waste the precious time needed for the concrete mixture to harden, you can begin arranging communication systems. To arrange a drain, a trench is dug into the hole and a pipe is laid. Of course, the pipe is laid at a slight slope to the sewer. In this case, the water moves by gravity and water stagnation is eliminated. When pouring concrete, this pipe must be plugged so that the solution does not accumulate there.
After the bottom hardens, formwork is constructed for the vertical walls. Planed boards or plywood are most often used for formwork. The second option is considered preferable. The minimum distance from the vertical slope to the formwork (future wall thickness) is 40 cm. Next, vertical reinforcement is performed in the formwork, which is connected to the horizontal.
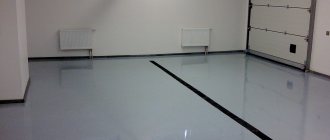
Then the concrete solution is poured and compacted, preferably using vibrating machines. After the concrete walls harden, the formwork is knocked down. You can move on to the final stage: sealing joints, impregnating the bowl with water-repellent compounds, lining and other finishing operations. The lining of the finished pool bowl can be finished with a large number of modern building materials. In this case, the owner can refuse to use decorative finishing in favor of the simplest and most modern method - covering the internal surfaces with PVC film. This material significantly increases the tightness of the bowl, giving it a blue color that is pleasing to the eye.
At the last stage, equipment responsible for supplying, purifying water, and disinfecting the entire pool is installed in the finished concrete pool. Then an easily removable drain valve is installed. A ladder, gangway and other “accessories” can also be installed. At this point, construction is considered completed. You can safely fill the reservoir with water and start enjoying pleasant water treatments.
Drain arrangement
During the design process, it is most reasonable to think through 2 ways of draining water at once - if one breaks, then the second will protect you. The simplest drainage option is to install a bottom connection with the sewer, then water can come out even under its own pressure, especially if the bottom drops on all sides towards the drainage area. The sewer pipe must go down at an angle, otherwise you will not drain the water without installing pumps. For small pools, draining into a cesspool or septic tank may be appropriate.
Please note that using pool water to water garden beds, as well as draining it into natural bodies of water, are not good ideas - there are a lot of disinfectant chemicals there. The problem can be partially solved by installing filtering equipment and creating a sump.
Do-it-yourself pool at the dacha made of concrete.
Consider, as an example, the option of building a concrete pool in an open area.
A concrete pool can be assembled from concrete blocks or filled with a common monolith; this design is durable, but there are also disadvantages:
1. Difficulties in water supply. For everything to work properly, you need to try and do everything correctly.
2. If installation or waterproofing is improper, water leakage may occur.
3. Using bad glue, for example, can cause the pool tiles to peel off.
4. There is a risk of fungus; this problem can be eliminated by treating and disinfecting the pool surface and regular cleaning.
When building a small children's pool or a decorative one, a construction permit is not required, but if you need to build a large pool, you need to obtain a construction permit, fill out the documents accordingly, and it is better to register it immediately, since registering it later will cost a little more.
During construction, it is necessary to take into account many nuances:
- first you need to determine the area for the pool;
- take into account how many people the pool is designed for;
- decide on the form;
- provide for the need for springboards, and it is necessary to take into account the depth - it must be at least 2.5 m.
The area allocated for the construction of the pool is cleared. Excavation work begins with digging a pit; it is better to use special equipment. The pit should be larger in volume than the pool itself. It is necessary to maintain the angle of inclination of the walls so that the edges of the pit do not crumble.
It is imperative to equip drainage systems and drain water; the slope of the drain should be approximately 7 degrees.
For the base of the pool, you need to make a cushion of gravel and sand; it compacts well, its height should be up to 350 mm. For waterproofing, the best option would be roofing felt; it is laid out overlapping. Next comes the pouring of the first layer, since the volume of concrete is large, it is advisable to use a concrete mixer. You can also order ready-made concrete in a mixer.
For 1 cubic meter of concrete you need to take:
- 1250 kilograms of crushed stone;
- 170 liters of water;
- 625 kilograms of sand;
- 325 kilograms of cement.
For the first layer, it is worth taking grade V-25, and filling the bowl itself with concrete of class P-4, Ts-4.6, V-25.
When reinforcing, the bottom is laid out with class A3 reinforcement, from 8 to 14 mm. It is better to lay out the fittings in two tiers. If the pool has the shape of a rectangle, the reinforcement can be laid arbitrarily in increments of 0.2 m. It is better to raise the bundle on bricks so that the reinforcement does not touch the bottom. The reinforcement is poured with concrete, the walls of the pool are reinforced according to the same principle.
Formwork for a simple-shaped pool is made from boards. If the pool has a more complex shape, then when installing the formwork, use moisture-resistant plywood; it bends well and takes the desired shape. The plywood option for formwork is more expensive than wooden boards. To prevent the formwork from deforming under the pressure of the solution, you need to install supports in the form of timber.
When drying, it is better to cover the concrete with a cloth or film and periodically moisten it.
Concrete steps are made using formwork, which is installed after the main pool bowl has dried. After all the concrete elements are ready, the surface of the pool should be sanded using a sander. After sanding, you need to apply a layer of waterproofing, this is done using special solutions; a special mesh is laid between the layers of solutions
When waterproofing, special attention should be paid to seams and places where communications are installed.
The final stage of pool construction is finishing. Before finishing, you need to check the waterproofing, this can be done when filling with water, the water must be left in the pool for a week and a half, and the water level must first be measured. If during this time the water level has changed, then there is a leak; if not, you can begin finishing. The finishing can be done with PVC tiles, film or mosaic.
Choosing the shape, size and location of the pool
If you decide to build such a complex structure as a swimming pool, carefully complete all the preparations so that the fruits of the work done do not disappoint you:
- First of all, decide on the desired size of the pool. The choice of location for the building will depend on this. For example, the optimal depth for an adult is 1.5 m. When calculating the depth, decide whether the upper edge of the pool will be level with the ground or protruding. If you want to swim, then choosing a length less than 5 m will not be advisable. Calculate the width based on the available space for the pool. Please note that one swim lane is 1.5m wide;
- You can give the structure any shape you prefer. The simpler it is, the easier it will be to build. Typically, standard pools are made oval or rectangular. But regardless of the chosen shape, make a small recess at the bottom to remove pipes from the bottom drain and install equipment: a water heater, filter, etc.;
- The location of the pool on the site should be sunny, unshaded, so that the water can warm up with natural heat. It is not advisable to have trees growing nearby. Fallen leaves will complicate water purification;
- For large-scale construction, it is advisable to order geodetic surveys to determine the groundwater level. Based on the data obtained, determine what waterproofing of the bowl will be required. If it is not possible to order research, determine the water level from neighboring wells. Choose a construction site with the lowest groundwater level. But such a choice will be made at your own peril and risk.
How to prepare concrete for a swimming pool
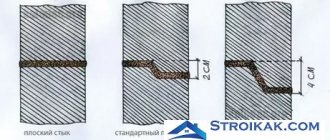
The most difficult problem that will have to be faced when concreting the future bowl of a reservoir is to fill the finished base and wall formwork with concrete in one step. As a last resort, pouring in four approaches is allowed, but provided that the break between pours is no more than 4 hours.
The best solution would be to buy ready-made concrete in two concrete mixers. A small remainder of two cubes can be completely filled in with your own hands by preparing the concrete mixture in a 100-liter mixer.
If the option of purchasing concrete does not work out, then you will have to rent at least two mixers and hire a team of 4 people who would prepare the mixture and deliver it to the pool pouring site. The base of the bowl can be filled in advance, then the sand, cement and fiber are packaged into portions, so that there is no time to waste on preparing the mixture, but only kneading.
Advice! If this option does not work, then you will have to prepare the mixture yourself and pour the concrete in even layers of 20-30 cm. In this case, the joints between the layers of concrete will have to be caulked with a special hydrophobic material.
Preparatory work
Preparation for the manufacture of the pool is carried out depending on the method of installing the bowl.
2 options can be used:
- Surface installation. This option is most often used when installing a bowl indoors. This makes it easier to connect wiring and communications and carry out repair work.
- Burying the bowl into the ground. It is produced in outdoor bowls.
In both cases, it is necessary to prepare a flat horizontal area, make a layer of sand bedding and cover it with geotextiles. Then a layer of roofing material (waterproofing) is laid, on which a concrete bottom is placed.
Each stage requires careful checking of the horizontal position so as not to obtain an unwanted slope of the bowl. It will redistribute the loads, which will reduce the strength and reduce the working life of the structure.
Necessary conditions for obtaining high-quality concrete
The formwork for pouring a concrete pool is made of boards.
In order to obtain a high-quality composition that will be used to fill the pool, it is not enough to simply accurately maintain the proportional amount of its components, since the final properties of the solution directly depend on their initial characteristics.
It should be said that for the construction of a reservoir you will need more than 1 m3 of the binding component. Some builders, for various reasons, buy dozens of bags of cement for future use and try to create conditions for its storage in which interaction of the building material with moisture, etc. is excluded. It must be emphasized that the properties of the binder component only deteriorate over time. It only keeps them for 1st month. It can be noted that after 1.5 months a bag of M 500 cement will “turn” into a bag with the M 400 binder component. Filling a pool with concrete is a responsible undertaking that involves the use of only high-quality materials.
Separately, we need to talk about other dry components of concrete. Today you can buy ready-made sand and gravel mixtures (SGM), which can be used not for such important work as pouring concrete into a swimming pool. It is possible to use PGS to prepare a “lean” solution, but for M 300 you need to adhere to the exact proportions of all its ingredients.
Scheme for determining the plasticity of concrete mortar.
Often, ASG contains additional inclusions (such as clay), which will worsen the characteristics of concrete.
And this also speaks in favor of separate acquisition of components for concrete mortar.
As for crushed stone, the best filler is obtained from crushed stone of fractions from 10 to 20 mm. Of course, it should not contain any impurities.
In addition, crushed stone must be made of durable stone. High demands are also placed on the quality of sand. Impurities in it are also undesirable, and the ideal size of the granules in diameter should be from 1.5 to 2 mm.
To get high-quality concrete, you need to prepare it correctly. First, sand and cement are mixed, then water is poured into a concrete mixer, and the mixture is brought to the consistency of sour cream. Then crushed stone is added.
Before pouring, a hydraulic additive is introduced into the concrete (4 kg per m3 of concrete)
We concrete the bottom ourselves
Concreting the bottom requires preparing a large amount of solution. It is necessary to add water-repellent additives to it. In addition, they will increase the strength of concrete. For such work, it is advisable to order a ready-made solution in a mixer.
If, in order to save money, you decide to prepare the solution yourself, you will need a concrete mixer and at least 2 assistants. You will prepare the solution in a concrete mixer. One assistant carries and spreads concrete along the bottom of the pit. The second assistant will level it. The pouring must be continuous in one day to create a monolithic slab.
As you fill the bottom with the solution, pierce it with a sharpened wooden stick to allow air to escape. It is better to use a vibration machine. It can achieve high concrete density. Fill the bottom with the solution until its thickness above the upper mesh reaches 50 mm. To make it easier to measure the thickness, place beacons from vertical rods or make marks on the formwork. After pouring the entire bottom, cover the slab with film for 10 days to allow the concrete to harden.
It is carried out at the final stages of work after the waterproofing has completely set to the concrete surface and has been tested for strength.
Each material has its own requirements:
- Tiles and tiles should have a rough surface, so a glossy finish will not work.
- The mosaic should also be rough, but not porous, otherwise its moisture resistance is reduced and the risk of destruction of the finish increases.
- PVC film must be sufficiently strong and dense, resistant to mechanical damage.
Mosaics are used to decorate the pool.
All types of material must have good moisture resistance.
In addition, the material must be:
- easy to install and maintain;
- affordable;
- repairable (with the ability to replace individual elements - for tiles).
For laying tiles and mosaics, a special adhesive with increased moisture resistance is used. After laying, the tile joints must be treated with antifungal agents.
Laying waterproofing
The pool construction technology includes waterproofing, which can be carried out using two methods. Some experts believe that the protective layer should cover the entire surface of the bowl, while others recommend waterproofing only the seams.
The work uses roofing felt sheets, bitumen, and liquid rubber. A PVC membrane and hydrophobic dry (or two-component) building mixtures are suitable. Liquid materials are applied in two layers, preferably with a reinforcing mesh.
When choosing a material, it is necessary to calculate the costs, since the surface of the pool has a fairly large area. The quality of waterproofing can be improved by pre-leveling the walls by sanding.
About the concrete pool bowl in the following video:
Construction materials
It is recommended to take concrete grades M 350-M 400, with frost resistance parameters F 100, water resistance parameters W 6. To model your pool, you need a heavy concrete solution with hydrophobic and plasticizing additives. The required density of the solution is obtained using a vibrator and a vacuum pump - this method minimizes the size of the capillaries so that cavities do not appear in the concrete.
Figured bowl project
Composition of the solution for filling the pool bowl - the proportions of the components are indicated for 1 m 3:
- 0.60 t - Portland cement M 400;
- 1.60 t medium-fraction sand;
- 60 kg - silica;
- 0.8 t fiber fiber;
- 1 kg – plasticizing additives;
- W/C ratio - 0.3.
First, water is added to the concrete mixer, then fillers and cement. If the bowl is large, building a pool will require ordering the solution from the manufacturing plant with delivery. To build a concrete pool, it is recommended to follow the following steps in turn:
- Develop a project and construction manual - it could be a pool made of concrete blocks, a monolithic bowl, a prefabricated structure or a pool made of a concrete ring;
- Prepare the foundation for pouring concrete or installing blocks;
- Install embedded structures;
- Assemble the formwork;
- Concrete and reinforce the bottom of the pit;
- Perform layer-by-layer concreting of the bowl;
- Lay waterproofing layers on the walls and bottom of the pool;
- Finish (plaster and paint the pool) and decorate the area around the pool;
- You will also need special paint for concrete pools - it must be waterproof and durable. Hydrostone paint fully corresponds to these characteristics.
Checking the quality of work performed
Before starting finishing, check the tightness of the bowl and at the same time check the engineering systems for filling and draining, as well as the power supply (if heating or, for example, lighting is provided).
Utilities for a concrete poolSource blogremonta.com
The test consists of filling the pool with water for one and a half to two weeks. At the beginning and end of the period, the water level is measured, after which a conclusion is made about the tightness (adjusted for the natural evaporation of water from the surface). The difference in levels should be small, otherwise the container is drained and the waterproofing work is repeated.
Tidying up the walls
After removing the formwork, the bowl walls must be plastered. To do this, secure a plaster mesh over the entire area of the wall. Prepare a solution from 1 part M-500 cement and 2 parts sand. To increase the strength and elasticity of the plaster, add microfiber to the solution, as well as a latex additive according to the rate indicated on the package. Plaster the wall and leave it until the plaster layer has completely hardened.
Next comes the installation of lighting devices, nozzles, and bottom drains. Install all elements on a sealing cord. For reliability, treat the top with sealant and sprinkle with dry cement.
Finishing work and landscaping
The final stage, finishing the pool, is performed in the following order:
- Prepare the surface of the bowl: plaster it with a suitable composition, install embedded elements.
- The edge is decorated with decorative sides, which are laid out of brick or cast from concrete. Additional equipment is installed: hydromassage unit, stairs, slide, counterflow.
- To cover the pool bowl, choose ceramic tiles, mosaics or PVC film; the latter is the most budget option.
Decorative design of the bowlSource pinimg.com
Tiles are most often chosen, but it must be taken into account that there are certain subtleties in its installation. The fact is that under water pressure the surface of the bowl can be slightly deformed. To take into account possible changes, the seam between the tiles is made wide enough.
Also, only elastic adhesives and grouts that can withstand low temperatures are used. If the pool has a complex configuration, mosaic is chosen instead of tiles. After finishing the facing work, allow the glue to dry and fill the bowl again to evaluate the quality of the coating and the operation of the equipment.
The pool is the decoration of the site, so it needs an appropriate frame. You might want to add a roof to it; If there are children in the house, put up a fence. The relaxation area around the pool also needs improvement. To make it comfortable, flower beds are laid out, paths are laid, and space is allocated for umbrellas and sun loungers. A stylish addition would be surface and underwater lighting, a flat, cascading or jet waterfall.
Recreation area with swimming poolSource 8×4.com.ua
About waterproofing a concrete pool in the following video:
Briefly about the main thing
A concrete pool is a rather complex structure for a private plot, so a technical design is developed for it, which is then approved and registered with the BTI. Construction includes several stages, from digging a pit to cladding and arrangement of the surrounding area.
Correct execution of each stage will ensure the durability and integrity of the structure
Particular attention is paid to laying the bottom and pouring the walls of the bowl; it is important to use high-quality, frost-resistant and impenetrable concrete. High-quality waterproofing and finishing will make the operation of the structure trouble-free
Finishing work and landscaping
The final stage, finishing the pool, is performed in the following order:
- Prepare the surface of the bowl: plaster it with a suitable composition, install embedded elements.
- The edge is decorated with decorative sides, which are laid out of brick or cast from concrete. Additional equipment is installed: hydromassage unit, stairs, slide, counterflow.
- To cover the pool bowl, choose ceramic tiles, mosaics or PVC film; the latter is the most budget option.
Decorative design of the bowl Source pinimg.com Tiles are chosen most often, but it must be taken into account that there are certain subtleties in its installation.
The fact is that under water pressure the surface of the bowl can be slightly deformed. To take into account possible changes, the seam between the tiles is made wide enough. Also, only elastic adhesives and grouts that can withstand low temperatures are used. If the pool has a complex configuration, mosaic is chosen instead of tiles. After finishing the facing work, allow the glue to dry and fill the bowl again to evaluate the quality of the coating and the operation of the equipment.
The pool is the decoration of the site, so it needs an appropriate frame. You might want to add a roof to it; If there are children in the house, put up a fence. The relaxation area around the pool also needs improvement. To make it comfortable, flower beds are laid out, paths are laid, and space is allocated for umbrellas and sun loungers. A stylish addition would be surface and underwater lighting, a flat, cascading or jet waterfall.
Recreation area with swimming pool Source 8×4.com.ua
Pros and cons of concrete for site construction
Advantages of a concrete pool platform:
- high strength and reliability;
- durability of service provided that high-quality materials are used and manufacturing technology is followed;
- resistance to high humidity and temperature changes;
- wear resistance;
- grass does not grow on the concrete surface;
- easy to clean - sweep and wash;
- environmental Safety;
- ease of work and the possibility of self-installation;
- affordable cost, no need to use expensive tools.
Flaws:
- concrete becomes dusty if it is not covered with finishing materials;
- risk of coating deformation in severe frosts;
- hardening and hardening of concrete will require at least 20 days;
- not very aesthetically pleasing;
- If cracks appear, it cannot be repaired; the layer will have to be completely replaced.
Types of ponds, their advantages and disadvantages
To create a pond at the dacha near the house, before starting work, you should consider various options for constructing such a hydraulic structure. The characteristics of the main material of the object, delivery methods, and its cost are analyzed. It is also necessary to optimize the placement of the bowl on the site - it should be in harmony with the surrounding landscape design and buildings. You should pay attention to the positive and negative characteristics of the selected material for construction.
| Indicators | Characteristic |
| Price | The cost of the material is low |
| Strength | High |
| Service | Simple and affordable |
| High ductility | Allows you to create ponds of various shapes |
| Hardware Compatibility | Allows the use of various engineering tools |
| Term of use | Long term |
| Indicators | Characteristic |
| Duration of work | Long lasting |
| Nature of the construction process | Painstaking and time-consuming |
| Exposure to sub-zero temperatures | Covering with frost-resistant material is required |
| Waterproofing | To maintain optimal conditions for living organisms of the aquatic world |
| To increase useful life |
1. Film - represented by butyl rubber, polyvinyl chloride and polyethylene film.
Advantages:
- mobility;
- the possibility of forming an arbitrary shape of a reservoir;
- ease of installation;
- the likelihood of being used for urgent repairs to eliminate leaks in cast or rigid waterproofing of a pond;
- ease of repair in case of damage.
Flaws:
- there is a high probability of damage to the integrity of the material from physical impact and ultraviolet rays;
- the need to construct coastal ledges;
- it is impossible to lay out without creating folds in ponds that have right angles;
- limited service life;
- danger of small children falling into the pond;
- the need to mask the edge of the film;
- average cost.
2. Rigid molds in the form of a finished bowl are made of plastic and fiberglass.
Pros:
- have high strength;
- equipped with coastal ledges;
- the ability to move to another place;
- relative ease of installation;
- Possibility of repair for minor damage;
- ease of maintenance.
Minuses:
- limited size;
- strictly defined bowl shape;
- difficulties with transportation;
- the possibility of gradual destruction of the material under the influence of the sun;
- due to the slippery surface, there is a high probability of children falling into it;
- high price.
3. Made of concrete.
Advantages:
- high strength of the structure;
- long service life;
- creating a pond of any size and configuration;
- ease of maintenance;
- concrete structures are compatible with various engineering equipment;
- low cost.
Flaws:
- the need for lining with a frost-resistant agent;
- labor intensity of work;
- the need for waterproofing with liquid glass to extend the service life and maintain the biological balance required for the normal existence of the aquatic world;
- duration of installation work.
Thus, despite the few disadvantages, a concrete pond has undeniable advantages over other materials used to create a pond. In addition, concrete can be used to recreate both a buried and raised pond.
How to choose a building material and determine its composition?
Concrete is the main material that takes all operational loads
It is necessary to approach the choice of composition with maximum attention, since it will be extremely difficult to change anything after filling the bowl
Many years of research and practical exercises in this area have revealed the best option:
- Concrete grade not lower than M350.
- The moisture permeability of the material is W6-W10.
- Frost resistance class F100 (for outdoor bowls, at least F200 is recommended).
- Strength class B25.
- Availability of plasticizing and water-reducing additives.
The composition of such concrete per 1 m3:
- Portland cement M400 (or M500) - 0.6 t;
- quarry or prepared river sand - 1.5 tons;
- silica additive - 0.06 t;
- fiberglass - 0.8 kg;
- plasticizer - 0.001 t;
- water - 30-50% of the total mass of the composition.
It is not easy to make high-quality concrete yourself; you need special tools and equipment, skills and experience in mixing such compositions.
It is recommended to order the required amount of concrete from a specialized enterprise and deliver it to the site in a mixer.
Step-by-step instructions on how to build a tank with your own hands
The process of building a concrete pool involves installing formwork and pouring concrete. Depending on the location and other features of the tank, the technique for performing the work may have its own characteristics.
Recessed
The recessed bowl is the most common design, since the entire load from the weight of the structure and water falls not on the supporting systems of the building, but on the ground.
To carry out the work, first of all, it is necessary to dig a pit of the required depth (taking into account the thickness of the footing and leveling screed). After this, you can begin to directly create the pool.
Required tools and materials:
- concrete M350 or higher grade;
- M100 concrete for leveling screed;
- quarry or river sand for footing;
- fittings (metal or fiberglass);
- boards or ready-made panels for assembling formwork;
- geotextiles, roofing felt;
- tools for cutting, leveling and compacting materials.
Work order:
- Digging a pit, leveling the bottom, creating a layer of sand backfill (concrete).
- Laying geotextiles. Pouring the leveling screed using weak concrete M100. The layer thickness is 5-10 cm, depending on the size of the bowl.
- Laying a layer of roofing felt. The strips are overlapped and the joints are coated with molten bitumen.
- Installation of sides, assembly of the reinforcement frame of the bottom. Pouring concrete. Aging for at least 2 weeks.
- Formwork assembly. Edged boards with a thickness of 25-40 mm or plywood panels are used.
- A reinforcement cage is installed inside the formwork. The grille is assembled from the outside and lowered down. The edges of the gratings of adjacent sides are connected to each other.
- Filling the walls of the bowl. The concrete is compacted by piercing it with a metal pin to remove air bubbles.
- Aging the casting for 28 days with daily watering. The formwork can be removed after 2 weeks. At the end of the curing period, you can begin further work.
Recessed bowls are the most complex and labor-intensive, but they do not change the load on the supporting structures of buildings.
The video will show you how to build a concrete pool:
On a surface
A pool installed on the surface of the site does not require a large amount of excavation work. It is only necessary to prepare the site and remove foreign objects and plants.
Tools and materials:
- concrete M350 and M100 (for the bowl itself and for the preparatory screed);
- sand to create a pillow;
- geotextiles and roofing felt;
- plywood boards or panels for formwork;
- fittings;
- tools for assembling formwork, cutting reinforcement, compacting fill layers and cushions.
Procedure:
- Site preparation, marking. Removing the top layer of turf. Leveling the surface (planning).
- Laying the footing (sand cushion), careful compaction. Laying geotextiles, pouring the leveling screed with M100 concrete, curing.
- Laying roofing felt with gluing joints with hot tar. Assembling reinforcement for the bottom.
- Pouring the bottom of the pool, soaking for at least 2 weeks.
- Installation of formwork for walls, assembly of reinforcement cage and installation of it inside the formwork.
- Filling the sides of the bowl, soaking for at least 28 days. The formwork can be removed after 2 weeks.
If the bowl is small, you can fill the walls and bottom at the same time to save time.
From a concrete ring
A concrete pool from a ready-made well ring is made much faster, since there is no need to soak the casting.
It is only necessary to prepare the site, lay the bottom and ring, and connect them using adhesive. You can immediately begin waterproofing and finishing.
The work is done quickly, the only drawback is the lack of bowl shape options.
The video will show you how to make a pool from a concrete ring:
Let's start construction
We have divided the process of building a concrete pool with your own hands into several steps. The result is a detailed guide that will help you do everything yourself.
Construction layout
Any big undertaking must begin with drawing up a plan. You need to draw a bowl on paper indicating its dimensions. The drawing also needs to reflect the location of the equipment and its connection to the pool and the electrical network.
Decide on the depth of the bowl. If it is intended exclusively for adults, then 2 meters is just right. If for children, then it all depends on their age and height. When installing a diving board, the depth must be at least 2.5 meters.
Planning is a serious and responsible matter. Under no circumstances should you rush. Do not start work until you are sure that your drawing is correct and specific.
Only after creating a detailed plan for this can work begin.
Digging a hole and preparing a pillow
The next step will be choosing a location, digging a pit and preparing a cushion for the foundation.
The place should initially be as level as possible. Electricity and water supply should also not cause problems for the future tank. Pay attention to these two points when choosing a location.
We clear the area of plants and large stones, and then begin digging a hole. You can do this yourself, but this approach will take a lot of time and effort. If possible, contact a team of private workers or even the services of an excavator. This will significantly speed up the process and bring you closer to finishing the job.
Pit requirements:
- The bottom of the pit is 20-30 centimeters lower than the bottom of the future pool;
- The walls of the pit with a margin of 15-20 in each direction from the walls of the concrete bowl;
- The side walls should have a slope of 6-7 degrees to the outside;
Compliance with these requirements simplifies the installation of the pool. If they are violated, you will either not be able to complete the work at all, or you will do it with big problems.
Next, we install all the pipes that will be supplied to the pool. A bottom drain and side nozzles are installed, and from them the pipes go up. It is advisable to cover the holes tightly with a rag or film to prevent dirt from getting in during construction work.
After finally digging the hole, you need to prepare a cushion for the foundation. There is nothing complicated, you just need to pour the compounds in several layers and level them out. The first layer is 15-20 centimeters of sand. Next comes crushed stone 5-10 centimeters high.
It is recommended to make the first layer of cement mortar for the pillow. In small pools you can do without it.
We level each layer using a board with a level attached to it and compact it. If you are pouring cement, let it harden completely and only then proceed to further work.
How to make a pool from scrap materials with your own hands
Most often, a swimming pool is associated with foreign holidays and luxury, but it is not so difficult to make this attribute yourself at your summer cottage and enjoy swimming and cool water throughout the summer season. In this article we will tell you in detail how to make a pool from scrap materials with your own hands.
Tire pool
If you choose this option, the most important thing is to find the right tire. A tire from a tractor or combine is best suited, since the diameter is quite enough for the height of an adult. In addition, you will need a bag of cement and sand. The manufacturing procedure is as follows:
- Using a sharp knife and a hacksaw, cut out one side of the tire, leaving the side. It is more convenient to cut along circles on the tread. You should not use a grinder, as the rubber will begin to crumble and stick.
- We choose a flat area, clear it of turf along the diameter of the pool or a little wider, then fill it with a sand “cushion”.
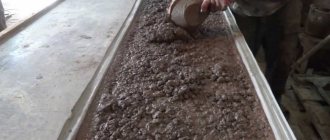
- Fill a circle about 15 cm thick with cement and install the tire.
- We level the cement and pour in a couple more buckets to be safe.
- We decorate the sides of the pool. There are no limits to imagination here - they can be painted, mosaic, stone or brick.
After completing the work, you need to wait about a week for the concrete to completely harden - the DIY wheel pool is ready, you can enjoy water treatments!
Pool from an old bathtub
The best option is a cast iron bathtub, as it is durable, reliable and not susceptible to corrosion. If you cannot find such a bath, you can use a steel one, the main thing is to pre-treat the damaged enamel. You will also need gravel and sand. When choosing a location, it is recommended to give preference to a shady area, protected from the scorching sun - this will avoid rapid heating of the water and the container itself. Let's get started:
- We dig a hole so deep that the bathtub fits 3/4 of the way in.
- We fill the bottom with a sand “pillow” 20 cm high.
- After making sure that the edges of the bath are strictly horizontal, we lower the future pool into the pit.
- We pour sand into the voids and compact it.
- We clear the turf around the perimeter and make a trench.
- We decorate the pool - you can decorate the edges with stones, paint with colored paints, etc.
Concrete ring pool
This option is easy to manufacture, since the container itself is already ready. Typically, the size of a sewer or well ring ranges from 1 to 2.5 m, which is quite enough for a small reservoir. In addition to the ring itself, you will need: geotextiles, concrete mortar, sand.
- On the prepared site, we dig a hole the size of the ring.
- We fill the sand “pillow”.
- We lay geotextiles and concrete the bottom.
- We lower our future pool.
- We fill the voids with sand and compact it.
- We design the pond according to your wishes and imagination.
Gabion pool
The technology for making such a pool is very simple. Gabions are stones placed in steel frames. The mesh frame can be of absolutely any shape, so it is one of the most suitable materials for building a pool. In addition, it is inexpensive, strong and durable. To work, you will need a concrete solution and a durable film. Procedure:
- We fill the bottom with concrete, and the diameter should be made slightly larger than the future pool.
- We install the base mesh on the bottom and lay the stones in layers.
- We attach a film to the inside of the bowl - it will provide waterproofing.
- We firmly fix the edges of the film to the upper edge of the gabion - the original and inexpensive stone pool is ready.
Concrete ring font
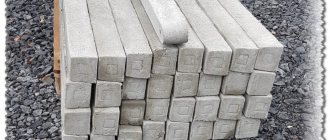
If installing a monolithic concrete font seems too complicated and time-consuming to you, consider installing a font made of reinforced concrete rings as an option. They come in different diameters - from 80 cm to several meters. The most suitable diameter for a hot tub is 1.5 m or more.
In this case, two rings of 2 meters in diameter were purchased. First, a pit was dug, slightly larger in size than the selected rings. Its depth is 1.5 m. The bottom is leveled and compacted, a drainage pipe is laid (discharged into a sewer well). 15 cm of sand was poured and compacted at the bottom in layers (three layers of 5 cm, each of which was spilled and compacted with a hand tamper (a heavy plate with a handle).
There should be locks on the rings
The outside rings are twice impregnated with bitumen mastic. Several bricks are laid at the bottom of the pit, and the first ring is lowered onto them (with a winch). The lock on the upper edge of the ring is cleaned of dirt/dust (with a brush), diluted water-repellent tile adhesive is laid, and a second ring is installed.
A reinforcing mesh is laid at the bottom and filled with concrete so that it is level with the drain. It turned out about 10 cm of concrete under the ring, and about 5 cm more inside the ring.
The outside of the rings was covered with foam plastic 4 cm thick (cut into strips and glued with the same tile adhesive). Then the “native” soil was filled around the rings and compacted.
To make the side thicker, a brick wall is laid around the ring. The gap between the concrete and brick ring is filled with sand, spilled and compacted as much as possible. Everything is filled with solution on top. While it was wet, the surface was ironed - sprinkled with concrete and rubbed smooth with a trowel.
Concrete ring font
The inside of the rings are treated with Supergrunt 100 primer, and uneven surfaces are sealed with mortar. Then everything was rubbed down to relative smoothness with cement diluted with water. Once again everything was primed and painted with SuperDkor pool paint. There is another composition with normal characteristics - REVETON PISCINAS (“Reveton Pisinas”), it can also be used. That’s all, the do-it-yourself bath font is ready.
Font with installed stairs
A stainless steel staircase is installed inside. Based on the results of operation, we can say that the water does not drain. For the winter, the water was not drained; almost empty plastic eggplants were poured into it (a little water was poured into them so that they were half in the water. When the water freezes, they compensate for the pressure of the ice.
Rings with bottom - convenient
By the way, you can make it even simpler: there are rings with a bottom. It's faster and the seal is practically guaranteed.
The area around this font was then concreted and a polycarbonate “shed” was installed.
To avoid flashing your body, a polycarbonate “shed” is made around the font