Making reinforced concrete fence posts with your own hands
Thrifty owners buy only what they cannot do without - if something can be done on their own, they do it: reinforced concrete structures, including steps, floors, slabs and pillars.
In this article we will tell you how to make a reinforced concrete fence post, which will be no different from industrial analogues, except for its cost.
Content:
Decoration options
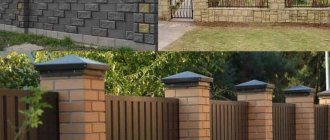
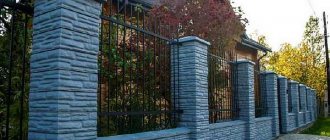
After pouring the pillars and removing the formwork, you can move on to the design of the structure. Various materials are used for finishing. Reinforced concrete pillars can be primed, plastered, and faced with bricks and tiles.
Concrete structures used in the construction of fencing can be made in special formwork. It is possible to pour the concrete mixture while simultaneously laying stone along the walls of the formwork. In this case, in the finished column it will be necessary to design the joints between the masonry elements.
Manufacturing of reinforced concrete pillar
Industrial concrete pillar is good, but a little expensive
The formation of concrete supports for a fence on site is well known to many - the foundation is prepared, formwork is constructed, reinforcement is tied in and everything is poured with concrete. The result is a high-quality product, but it takes too long to do all this - it’s more convenient to use ready-made poles.
Step No. 1 - casting matrix
In order to fill the pillar, you need to make a mold for this - we will use a PVC pipe for external sewerage. The sizes are suitable. For thin poles, a PVC pipe with a diameter of 100 mm is suitable; for more massive ones there are 200, 250 and 300 mm. When choosing, you need to take into account your strength - concrete pillars weigh a lot.
- Having chosen a PVC pipe, cut it lengthwise to make two identical halves.
- We put them on top of each other and drill a through hole for a bolt stud , which will serve as a connecting fastener.
Making reusable formwork for a pole
To ensure the reliability of the formwork (pipe), several through holes can be made.
Step No. 2 - knitting reinforcement
Without reinforcement, a concrete pillar will not last long. For reinforcement we will use welded mesh with a wire thickness of 3-4 mm.
- Cut the mesh into strips. The dimensions must correspond to the dimensions of the pipe: total length and circumference.
- We form cylinders from the cut strips so that the transverse wires are on the outside , fix the resulting shapes with twists or in any other way.
When working with welded mesh, we use a grinder, a sledgehammer and other metalworking tools.
Step No. 3 – installation of formwork (PVC pipes)
We assemble the formwork. To do this, we place an armored belt in one half of the pipe and close the other half of the PVC pipe on top. We fix the formwork to a bolted rod.
The sewer pipe has a connecting connector on one side - a larger diameter coupling. Inside it there is a groove for an o-ring - we will use it to place the damper in it.
- We place a wooden bottom lid of a suitable diameter in this groove (it must be made in advance).
- The end of the pipe is tightened with a clamp.
The clamp can be made from perforated tape and a bolt with a nut.
Clamps must also be placed on the other end of the pipe and its middle.
Installing the bottom in the formwork and fixing it with homemade clamps
On the bottom cover you can form additional elements, as in Fig. 5 - they are needed to form fastening holes for the fence crossbars (so as not to drill the post later).
Step No. 4 - concreting the pillar
Concreting can be done with either ordinary cement mortar or concrete. You can also add some additives to the solutions. Liquid glass will increase the waterproofing property of concrete, and liquid soap will make the solution more plastic, which will make it possible to obtain products with smoother surfaces.
For cement mortar we will use Portland cement M 200 - in the ratio of 1 part cement, 3 parts sand and 3 liters of water. Sand should be used in coarse grain sizes.
When mixing, add liquid glass about 100 ml per 15 liters. bucket of solution. Add 1-2 bottle caps of liquid soap.
Preparation of cement mortar
After mixing the components, the solution is ready.
Step No. 5 – filling the PVC mold
We fix the pipe vertically. Pour the cement mixture inside the plastic formwork. We use a pole to tamp and remove bubble air. Leave the product to dry. After a day, the formwork can be removed.
Installing a Prefabricated Panel Fence
A fence made from prefabricated panels is the fastest way to make a concrete fence for your site. For it, it is necessary to purchase specially shaped pillars, between which concrete sections are placed, like puzzles. Moreover, depending on the chosen method of decoration, one large slab or several smaller slabs of different colors and decor can be placed in one section.
Stages of work for installing sectional fencing
The construction of a fence from prefabricated panels consists of 7 steps:
- We design the structure on paper, plan where the front door and car gate will be located. We calculate the dimensions and amount of material.
- We analyze the soil under the future fence and determine the depth of installation of the support pillars.
- We make markings on the ground. We install wooden pegs and stretch a cord between them. Let's check the calculations again.
- Let's move on to construction. We dig holes for the posts. The depth, depending on the type of soil, can range from 55 cm to 1.2 m. For example, for ordinary black soil 75 cm will be quite enough, but for heaving soil you need at least 120 cm.
- We arrange the pillars and fix them, compacting them well with a backfill of a mixture of gravel and sand. At this stage, you can check the correct placement using plywood blanks, which are cut to the size of the concrete sections.
- We dilute the solution for filling the pillars. You can mix cement, sand and gravel or buy a ready-made dry mixture. We leave the structure for 1-4 days, depending on weather conditions, so that the composition hardens thoroughly.
- Carefully insert the concrete sections into the grooves of the pillars. If you choose a multi-tiered option, assemble it one by one in tiers: first, distribute the lower part around the perimeter, then check its level using a slats, then install subsequent levels in the same way. Solid sections are more difficult to install, since they are quite heavy, but in this case there will be no fuss with levels.
Decorating a finished concrete fence
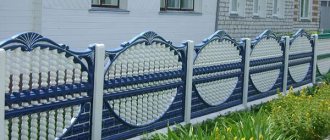
One of the significant advantages of concrete is the ability to give it any shape and decorate it in almost any way. Often in construction they use ready-made sections with a figured tint, but if you have built a fence from solid blocks, it’s time to give free rein to your imagination and decorate it.
To decorate fences, you can use a variety of methods and even combine some of them:
- painting the entire area with one color or artistic painting in any style, be it characters from your child’s favorite cartoon or a fantasy plot “from your head”;
- finishing with forged elements;
- surface decoration with tiles, artificial or natural stone, building panels;
- the use of climbing plants to imitate a hedge.
Any of these options will harmoniously fit into the interior of a concrete fence and make it more aesthetically pleasing and neat.
How to paint a concrete fence
Let's figure out how to paint a finished concrete fence, as this is the fastest and most cost-effective way of decorating. This method not only improves the overall appearance of the site, but also protects the fence from the influence of precipitation and sunlight. Experienced builders say that it is advisable to paint a concrete fence only a year after installation, because the structure must settle and strengthen.
Acrylic paint is ideal for painting fencing. Moreover, you can choose both smooth and textured varieties.
To paint a fence, you need to do 5 steps:
- Thoroughly clean the surface from dust and dirt. Rinse all nooks and crannies with clean water. If the fence has been standing for a long time, sometimes it has to be treated with an antifungal compound.
- Prime the fence to make the surface smooth. When choosing a primer, be sure to consider the type of paint you will be using.
- Allow the primer mixture to dry thoroughly, only after this step can you proceed directly to painting.
- We thoroughly paint each corner with a thick layer of paint. This way it will better cover the surface and protect it more reliably from destructive influences.
- When the first layer has set, you can go over it with a second layer, spraying paint from a special spray bottle. With the help of such a device, a uniform texture and uniform coloring are achieved.
Experienced professionals use paint to create real works of art on their fences. But even just a neatly painted fence looks quite decent.
DIY fence post
Regular readers of the FORUMHOUSE website know well that a fence, in addition to its enclosing functions, is also a decorative element.
A well-made fence or a picturesque hedge becomes the calling card of the house and site.
We have already talked about how to fence with the idea and how to build a reliable fence on soils subject to the forces of frost heaving.
Despite its apparent simplicity, erecting a fence is a troublesome task that requires large expenses. Metal pipes can be used for fence posts for a country house. Despite their widespread use and ease of installation, they are not without drawbacks. This material can rust where the pillar emerges from the ground, and a high-quality thick-walled metal profile is very expensive.
How to make a concrete pillar
One of the alternatives to metal poles can be self-made monolithic concrete ones. Despite the increased complexity of manufacturing such supports, they have advantages over metal ones:
- They are distinguished by increased strength and a long service life, not even one year;
- They can be given any size and cross-sectional shape.
- You can embed embedded elements into a concrete pillar at the required height: anchors, hinges necessary for fastening the fence, wicket and gate;
- Inside it you can conceal the electrical wiring required to connect a sliding gate motor, etc.
How to make pillars from concrete.
DIY formwork for fence posts
There are two main technologies for manufacturing concrete pillars:
- Pouring concrete into the formwork at the site of its installation;
- Manufacture on site and its further installation in place.
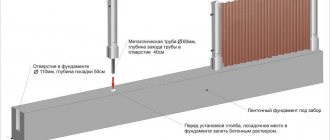
Let's consider the first method. First, a reinforcement frame is knitted (since concrete has low bending strength, and steel strengthens the structure) of three or four steel rods, which is then lowered into a well drilled in advance in the ground.
After this, it is necessary to concrete the part of the pillar that is in the ground. Then, when the concrete gains strength, formwork is installed and the part that is above the ground is topped up.
DIY formwork for pillars.
The formwork can be:
- Round shape (made from a metal pipe). To prevent the concrete from sticking to the walls, they can be coated with a mixture of machine oil and diesel fuel;
- Square shape - made of boards. In this case, the inside of the boards is lined with thick polyethylene film, which is “targeted” onto a stapler.
The main problem with casting a full-height monolithic pole is the difficulty of vibrating the poured concrete. To vibrate it properly, you can use a hammer drill operating in the “jackhammer” mode. Or use the so-called method of “bayoneting” the solution using long reinforcement.
These methods do not provide a 100% guarantee that there will not be many pockets containing air left in the solution, which significantly reduces the strength of the concrete. The solution may be to use sliding formwork.
It’s done like this: take a meter-long piece of pipe and cut it lengthwise into two parts with a grinder. The pipe parts are tightened together with bolted clamps.
After pouring the concrete and gaining strength, the formwork is disassembled and raised higher so that its lower part covers the top of the already cast column by several centimeters.
So, step by step, the entire structure is poured to the desired height.
Despite the labor intensity and increased work time (before pouring the upper part, you must wait until the lower part “sets”), the method allows you to achieve good quality of vibration of the mixture.
Also, one of the options for such filling could be to use an ordinary plastic pipe as formwork.
Trelis:
– To pour concrete posts for the fence, I took a red PVC pipe with a diameter of 160 mm. Reinforcement frame – 3 steel rods with a diameter of 8-10 mm. I drilled wells with a diameter of 190 mm with a hand drill to a depth of 75-80 cm (the freezing depth of the soil is 70 cm). The concrete for the base was poured into a sleeve made of roofing felt, rolled in two layers. At the bottom of the well I made an extension, like the TISE foundation, with a diameter of 22-25 cm. As backfill I used sand with crushed stone of a fraction of 3-15 mm.
Concrete pillars.
The forum member filled the first fence post with sand concrete. Ratio: 3 parts sand to 1 part M500 cement, but then he changed the proportions of the mixture, taking 1 part M500 cement, 2 parts sand and 2 parts crushed stone fraction 3-15 mm. The height from the ground turned out to be 195 cm. According to the calculations of a forum member, the cost of one such pole is 200 rubles. Last winter showed that the method works - nothing stuck out or became warped.
Do-it-yourself concrete posts.
Plastilin, Moscow:
– My friend and I decided to cast concrete pillars for the fence. An OSB sheet 150x150x2100 mm sawn to size was used as formwork. To create a rustication, 20x20 mm blocks were screwed from inside the formwork. The concrete was taken from the factory - M200. A total of 51 concrete pillars were poured. I’ll tell you straight - from an aesthetic point of view, such structures look much better than metal ones!
Pouring without slipform Another option for pouring a post on site is the method without using slipform. In this case, concrete is poured into a finished form - permanent formwork - asbestos-cement pipe. The general scheme of such a fill looks like this:
- A garden drill makes a hole in the ground to the depth of soil freezing. At the bottom of the well, an expansion is made to “anchor” the base.
- A roofing material “shirt” rolled into a cylinder is inserted into the well. The diameter of the “shirt” should be several cm larger than the diameter of the asbestos-cement pipe.
- A reinforcement cage is installed in the well. It is not installed to the very bottom of the well. This is necessary to create a protective layer of concrete between the ground and the reinforcement.
- The roofing felt “shirt” is concreted.
- An asbestos-cement pipe is installed strictly vertically into a “jacket” filled with cement, so that its lower part is in the solution. The pipe is fixed with spacers.
Concrete posts for the fence.
- After the mixture hardens, the asbestos-cement pipe is concreted to the very top.
Forms for concrete fence posts
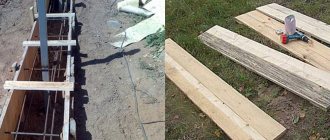
The second option for the production of concrete pillars is casting into a mold and further installation of the finished product into a drilled well. Let's figure out how to make a form for columns. To do this, a wooden box is assembled using self-tapping screws according to the dimensions of the future post. The walls of the formwork are lined with plastic film or covered with plastic. You can also use laminated plywood for such formwork. A reinforcement frame is placed in the box and concrete is poured. After concreting and the mixture has hardened, the formwork is disassembled, and we get a finished pillar, which is then installed in place.
DIY forms for fence posts.
Using this method, it is possible to make shaped pillars, for which concrete is poured into a specially molded formwork.
The main disadvantage of this method is that when making a massive, heavy pole, it may require the use of special equipment to install it.
Krot64:
– I made concrete pillars measuring 100x100x2300 mm under the chain-link. The triangular reinforcement frame was not knitted, but welded from 3 rods of 8th reinforcement. I used a six-meter edged plank for the formwork. I sawed it and assembled the boxes, which I placed on a flat surface, and spread film under them. I screwed a tension bar into the center of the formwork so that it would not burst when pouring concrete, after which I poured the mortar. The technology for installing the finished structure is simple - a hole with a diameter of 14 cm is drilled with a garden drill, a post is placed, the cavity is filled with sand with the obligatory layer-by-layer tamping and pouring with water.
As the experience of a forum member has shown, posts of this cross-section are suitable for installing chain-link, but for a heavier fence it is necessary to increase their size: make them with a cross-section of 120x120x2500 mm, and tie the reinforcement frame from 4 rods of 10th reinforcement, etc.
Regardless of which pole is taken - metal or concrete, its cross-section and, accordingly, load-bearing capacity depend on the expected load. It is necessary to take into account the weight of the fence and wind load.
The metal profile has a low weight, but also a large windage. Chain-link mesh, on the contrary, has low windage.
Therefore, in order to make a concrete pillar with your own hands, you need to take into account all the nuances in advance, then later you will not have to deal with expensive alterations.
At FORUMHOUSE you will learn how to properly install a fence post. Also learn how to cast a concrete pillar yourself.
Join the discussion on whether to concrete or fill a metal pole. Watch our video, which clearly shows how to install a fence from corrugated board.
Factors in favor of choosing stacked supports
The undeniable advantages of type-setting pillars include:
- low cost;
- availability of materials;
- ease of manufacturing elements;
- ease of installation of block poles;
- durability;
- versatility.
The low cost of this type of pole is due to the simplicity of the manufacturing process of both the components themselves and the ease of their final installation. It includes the cost of available consumables (concrete, reinforcing embedded elements), inexpensive equipment (casting molds for blocks and caps), and payment in the case of hired labor.
Concrete is a high-strength material that can withstand external destructive factors. If the manufacturing technology of cement blocks is strictly followed, the service life of both the supports themselves and the fence of which they are part has no time limits.
The strength characteristics of the design of stacked concrete pillars allow them to be used as supports for fences of any type of screening. They are suitable not only for fences with light screens made of welded sections made of metal rods, various types of mesh, Euro picket fences or corrugated sheets, but also Euro fences with embedded reinforced concrete slabs.
Supports for various fences
Having decided to independently fence the territory of your house, cottage, or other area, you have to choose the support material for installing the fence. For this, different building materials are used - metal and asbestos-cement pipes, wood, brick, which, unfortunately, is expensive. The most advantageous material in terms of price and durability is the option with concrete pillars, to create which you will need forms for pillars, made or purchased. Sometimes it is possible to rent formwork.
Mold for casting a column segment
The price of modern concrete mixtures has also increased, because various additives are added to them to improve quality, moisture resistance and appearance. But still, concrete products are much more cost effective than other materials.
Manufacturing of collapsible formwork
You can use a board as the base of the formwork. The sides of the formwork are made of angles and sheet metal.
You need to drill holes in the base using a feather drill.
We insert pieces of plastic pipe into them. Sections of plastic pipe of larger diameter are put on them.
Types of fence supports
Modern concrete is so diverse that it can easily compete with metal and brick in terms of service life. To make supports with your own hands, you should first of all stock up on cement of the appropriate brand with the necessary additives. Determine the place where you will work, tools, a concrete mixer, and make or purchase forms for the pillars. The industry produces various forms for these purposes. The main material from which the molds are made is fiberglass.
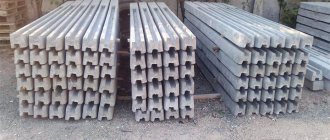
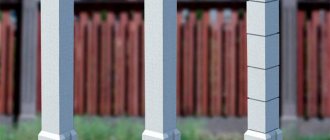
Sections of stacked supports
Forms for creating sections of type-setting pillars consist of 6 side faces. The top and bottom edges have grooves, and the four side faces have a relief; in addition, there is a void former that is inserted inside the mold.
Pillars assembled from sections have one important advantage over supports of other structures - sections can be assembled by arranging the grooves in different ways:
- when the grooves are installed opposite each other;
- when the grooves are located on the faces that make up the angle;
- when the groove is only on one side;
- when there are no grooves on the edges.
- In an hour, you can make up to 10 blocks with one mold.
Composite sections for fences
Cast one-piece supports
For cast solid poles, there are molds made of PVC plastic. The thickness of the plastic walls is from 1 mm. Forms are available with grooves.
PVC plastic molds
Molds are also produced from ABS plastic, with a wall thickness of 2 mm.
ABS molds
There are seven different options for fiberglass pole molds that can be connected with a metal frame. They have from one to seven sections.
Types of concrete blocks
The design of the facing sections of the fence supports can be with or without grooves, a smooth facade or with a texture, angular. The blocks for the pillars also differ in the manufacturing scheme of the stacked racks - there are 2 types of them.
Decorative
Sections consist of two L-shaped parts. During installation, they are stacked in pairs, forming a cavity inside.
Decorative blocks for fence posts are placed over a support pipe or metal core. The operation is performed in stages from bottom to top, followed by filling the internal void with concrete mixture.
Splitter
The first difference between the design and the decorative sections is that the dimensions of the splitter modules are larger. This allows you to quickly assemble block pillars from such elements. The second feature: the typesetting blocks for a fence post of this type are 2 halves of a solid element.
The assembly of racks of elements is carried out in the same way as the decorative sections are assembled. A concrete mixture is poured into the resulting cavity with a bundle of metal reinforcement.
Manufacturing of round concrete supports
An iron pipe is usually used as a mold for a round post; its internal diameter will become the size of the support. Round posts are often formed right at the installation site. They are immediately installed vertically, the part of the support that is immersed in the soil is poured into a hole or well made in the ground, and the upper part into the formwork pipe.
Split sliding formwork
A meter-long iron pipe is sawed in half along the length with a grinder saw. On the resulting halves opposite each other, metal ears with holes are welded. When forming the support, the formwork pipe is tightly bolted through them.
Vertical support casting device
Inserting embeds
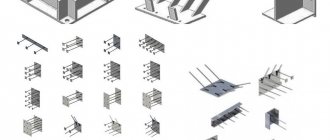
You are hoping to attach the fence sections to the concrete posts. For this purpose, mortgages are provided, which can be iron, to which spans are later welded, or wooden, to which sections of the fence can be easily nailed or screwed with self-tapping screws.
After preparing the formwork, they begin to form the pillar. The well prepared for support is filled with a concrete solution, and it is reinforced so that the iron rods stick out from the concrete by 30-40 cm. After this, the underground part hardens for 3 days, and the above-ground part of the support is created.
Before concreting, the formwork pipe is lubricated with an oily material so that the solution does not stick to the walls and it moves easily along the column.
Installation and molding of the support
install the formwork pipe over the protruding ends of the reinforcement from the base and install the next 4 rods. Fill the pipe with concrete to approximately 90% of the height. At the same time, the solution is thoroughly compacted so that it fills all the voids, and compacted. The concrete is allowed to stand for three days, the bolts on the formwork pipe are loosened and raised up ¾ of the resulting column. The coverage is secured, and all actions are repeated as many times as necessary until the support reaches a sufficient height. The verticality of the support being created must be verified using a plumb line or level.
Horizontal production of supports
The inner surface of homemade formwork, like any other, should be smooth as glass; the task can be simplified if thin plastic, roofing felt or film is placed in the mold.
Molds for casting pillars
If desired, a convex pattern or relief can be applied inside the formwork walls so that it is imprinted on the concrete of the support.
Before laying concrete, the inner surface of the formwork is generously lubricated with machine oil or diesel fuel. The mortar is applied to the level of the mortgage, reinforcement bars are placed and concrete is poured into the form to the edges. After this, a mortgage liner is installed, and excess concrete is removed, carefully leveling the surface.
After 15 minutes, the solution will harden a little; it is pierced from one side to the bottom of the formwork. This technique will make it easier to remove the support from the mold. When the solution has hardened, the structure is turned over onto a flat surface, the bolts are loosened and the formwork is carefully removed, and they begin to lift it from the side of the puncture. The products removed from the molds are allowed to settle for a week.
Concrete curing process
Laboratory studies have shown that an optimal temperature of 20-30 degrees Celsius is optimal for concrete hardening, with 90% indoor air humidity. Concrete hardening actively occurs in the first 7 days after mixing the solution. Concrete at this time reaches 70% of the calculated hardness. Concrete reaches 100% strength only 28 days after molding.
Any pillars can be made in this way; you just need to make formwork of the appropriate shape and arm yourself with patience.
Prices and modern concrete mixtures
The price of your posts will depend on the concrete mix you choose. Currently, there are many additives for various purposes. There are additives that accelerate hardening, others are plasticizers or have water-repellent properties and prevent frost from destroying concrete.
Prices for Russian additives are lower than their imported counterparts. You can make up the mixtures yourself. Granulated calcium chloride and a plasticizer-accelerator of the Fort “UP-2” brand are somewhat cheaper; dry calcium nitrate and kratasol-UT are more expensive.
Technological process for manufacturing fence blocks
The raw materials for the production of decorative sections are crushed natural stones. Mixed in the right proportions and placed in molds, they are subjected to vibration and pressure on machines. The components of the mixture for the manufacture of sections are loose aggregates (expanded clay, sand, crushed stone), binding material - cement, dyes, and other additives that improve the properties of concrete.
Vibrocasting
When making blocks for fence posts, the mixture is molded with the addition of water in an amount sufficient to ensure the plasticity and workability of concrete. The forms with the solution are placed on a vibrating table and are not closed; pressing is not performed.
The compaction of the mass occurs due to vibration for several minutes. The block dries in the mold itself, after which the finished product is removed.
Vibration pressing
This method involves preparing a mixture using semi-dry concrete technology: an insufficient amount of water is added to the bulk components to achieve plasticity. The mass is compacted due to two forces: horizontal vibrations of the machine platform and vertical pressure on the mixture from above.
The optimal ratio of components is selected by trial. Finished products are laid out on pallets for natural or forced drying.
Making reinforced concrete fence posts with your own hands
Thrifty owners buy only what they cannot do without - if something can be done on their own, they do it: reinforced concrete structures, including steps, floors, slabs and pillars.
In this article we will tell you how to make a reinforced concrete fence post, which will be no different from industrial analogues, except for its cost.
Content:
Manufacturing of reinforced concrete pillar
Industrial concrete pillar is good, but a little expensive
The formation of concrete supports for a fence on site is well known to many - the foundation is prepared, formwork is constructed, reinforcement is tied in and everything is poured with concrete. The result is a high-quality product, but it takes too long to do all this - it’s more convenient to use ready-made poles.
Step No. 1 - casting matrix
In order to fill the pillar, you need to make a mold for this - we will use a PVC pipe for external sewerage. The sizes are suitable. For thin poles, a PVC pipe with a diameter of 100 mm is suitable; for more massive ones there are 200, 250 and 300 mm. When choosing, you need to take into account your strength - concrete pillars weigh a lot.
- Having chosen a PVC pipe, cut it lengthwise to make two identical halves.
- We put them on top of each other and drill a through hole for a bolt stud , which will serve as a connecting fastener.
Making reusable formwork for a pole
To ensure the reliability of the formwork (pipe), several through holes can be made.
Step No. 2 - knitting reinforcement
Without reinforcement, a concrete pillar will not last long. For reinforcement we will use welded mesh with a wire thickness of 3-4 mm.
- Cut the mesh into strips. The dimensions must correspond to the dimensions of the pipe: total length and circumference.
- We form cylinders from the cut strips so that the transverse wires are on the outside , fix the resulting shapes with twists or in any other way.
When working with welded mesh, we use a grinder, a sledgehammer and other metalworking tools.
Step No. 3 – installation of formwork (PVC pipes)
We assemble the formwork. To do this, we place an armored belt in one half of the pipe and close the other half of the PVC pipe on top. We fix the formwork to a bolted rod.
The sewer pipe has a connecting connector on one side - a larger diameter coupling. Inside it there is a groove for an o-ring - we will use it to place the damper in it.
- We place a wooden bottom lid of a suitable diameter in this groove (it must be made in advance).
- The end of the pipe is tightened with a clamp.
The clamp can be made from perforated tape and a bolt with a nut.
Clamps must also be placed on the other end of the pipe and its middle.
Installing the bottom in the formwork and fixing it with homemade clamps
On the bottom cover you can form additional elements, as in Fig. 5 - they are needed to form fastening holes for the fence crossbars (so as not to drill the post later).
Step No. 4 - concreting the pillar
Concreting can be done with either ordinary cement mortar or concrete. You can also add some additives to the solutions. Liquid glass will increase the waterproofing property of concrete, and liquid soap will make the solution more plastic, which will make it possible to obtain products with smoother surfaces.
For cement mortar we will use Portland cement M 200 - in the ratio of 1 part cement, 3 parts sand and 3 liters of water. Sand should be used in coarse grain sizes.
When mixing, add liquid glass about 100 ml per 15 liters. bucket of solution. Add 1-2 bottle caps of liquid soap.
Preparation of cement mortar
After mixing the components, the solution is ready.
Step No. 5 – filling the PVC mold
We fix the pipe vertically. Pour the cement mixture inside the plastic formwork. We use a pole to tamp and remove bubble air. Leave the product to dry. After a day, the formwork can be removed.
Made from ABS plastic
This plastic can be described as a chemically resistant and tougher material. The use of this type of tool guarantees high quality of finished products and precise observance of geometric shapes. Along with this, there are a number of undeniable advantages of ABS plastic:
- high strength - withstands up to 200 pouring cycles;
- long service life;
- Lubricating the molds before pouring is not necessary;
- compatible with any technology, making the production of concrete products less labor-intensive;
- When folded, they do not take up much space.
Return to contents
Types of technologies
To make concrete pillars with your own hands, the following production technologies are used:
- Manufacturing in reusable structures in a separate site with subsequent removal of supports after hardening and installation of it in the enclosing structure, according to the developed scheme.
- Filling with concrete mortar individual shapes of the required cross-section (round, square, rectangular, etc.), pre-installed at the installation site of the supports along the perimeter of the fence.
Alternative construction options
The pillars can be round. In order to create such a structure, you need to take a piece of pipe 1 m long. After cutting it in half with a grinder, you need to weld the “ears”. You need to make holes in them to install the bolts, after which both parts of the pipe need to be reconnected.
You can make excellent poles with your own hands if you have a ready-made frame. It is lowered into a pre-dug hole in which the support was previously installed. Then the solution is poured into the molds so that it reaches the surface of the soil. The upper part of the product is made by installing sliding formwork.
To make the structure easier to disassemble, it is lubricated with machine oil. The formwork must be placed strictly vertically, so it is necessary to use a building level in the work.
After pouring the mixture into the structure, leave it for at least 4 days. Then the bolts are unscrewed, the form is moved up 70%, and then the concrete is poured again. This way you can concrete it in the shortest possible time. The procedure must be repeated until a pillar of the required height is made.
Main stages of manufacturing
Regardless of the specifics of the manufacturing technology, the set of measures according to which concrete pillars are made includes the following steps:
- assembly of formwork, the quality of which determines the presentation of the resulting products;
- production of a reinforcement frame that ensures the strength of the elements;
- preparation of a cement mixture, the strength of which after hardening determines the performance characteristics of the supports;
- filling with a solution, after hardening, ready-made fence posts can be removed.
It is worth remembering that the service life directly depends on the quality of the material used in the manufacture of supports
Alternative manufacturing methods allow you to pour a concrete pillar with your own hands directly on the site where it will be used in the enclosing structure. Let us dwell in detail on the features of the stages of work.
Advantages and disadvantages
Each of the technologies used for the manufacture of concrete sections gives the product qualities that distinguish vibration-cast blocks from vibration-pressed ones. The former have a smooth surface, but less strength and frost resistance. The latter can withstand a greater number of freeze-thaw cycles and are stronger, but their surface is rough. Both pillar blocks have common advantages in comparison with natural stone and brick:
- Solidity. It is achieved by reinforcing the void and pouring concrete. This design is more resistant to mechanical stress than a support made of brick or stone.
- Quick installation of the pole. The decorative block is larger than a brick, which speeds up installation, but selecting boulders along their edges is a difficult task and takes time.
- Large selection of compositions due to the variety of textures and colors. Posts can be built for any fencing blocks.
- The costs of erecting a fence on supports made of concrete sections are lower than the costs of constructing the same structures from brick or natural stone.
Stacked sections of posts have good compatibility with any fencing materials, be it corrugated sheets, forged metal or wood. Like natural stone, block products last for decades. The only drawback concerns all heavy supports: a foundation needs to be laid under them.
