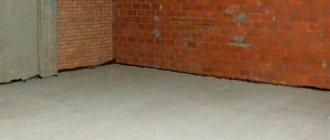
Concrete flooring is the most common option in basements. The main thing here is to prepare the batch correctly, since a low-quality mixture may crack after drying. Let's consider the correct technology for how to pour concrete on a basement floor - what stages the process consists of, what materials and tools are needed, what needs to be taken into account when performing construction work, etc. Let's look at when the need arises for insulation and further external finishing of the coating.
Pouring a concrete floor in the basement is a responsible matter Source ad-cd.net
Requirements for basement floors on the ground
Often the floor in the basement is built on the ground, which means that there are certain requirements for its arrangement related to the need to ensure that there are no voids and to prevent moisture from accumulating in the room.
Waterproof your basement floor
The requirements for floors in basements are quite simple. In particular, it is necessary to ensure:
- strength;
- availability of high-quality building materials;
- installation in accordance with standards and instructions;
- properly equipped waterproofing;
- proper insulation.
Attention! You should not save on the construction of the main floor structure, its hydro- and thermal insulation, and building materials. Savings are possible only on finishing.
All these are basic requirements for organizing construction, without which it is impossible to obtain a high-quality, long-lasting result.
Types of basement floors
There are several types of basement floors. Some of them are used universally, some less frequently. There are construction methods that can only be used at the initial stage of construction. In particular, these include floors made of monolithic concrete slabs. It is considered the most durable, but at the same time quite expensive.
In this video we will look at floors on the ground:
The most popular in private housing construction:
- concrete floors;
- clay floors;
- wooden on joists.
In addition to them, you can also find earthen ones, but for them the type of soil on which the structure is built is very important, and because of this they are not suitable for everyone.
Concrete floor
Today, it is the concrete floor in the basement that is most often installed. This is due to the fact that the base material has a good combination of durability and relatively low price. In addition, an important advantage of concrete floors is the relative simplicity of the work, which allows them to be carried out by the home owners.
It is important to strictly follow the technology, especially when it comes to areas with close groundwater. The first step is to organize a platform from a well-compacted sand mixture. The soil on which it is poured must also be well compacted.
Important! The thickness of the sand cushion should be at least 15 cm.
To strengthen concrete floors, a special reinforcing mesh is used. And for insulation - polystyrene foam or mineral wool.
Wooden floor on joists
A wooden floor in the basement of a private house should be installed if there is virtually no risk of flooding and the groundwater is quite low. It requires both high-quality waterproofing and the use of special wooden joists.
The logs of such a floor are made from well-dried timber measuring at least 15 by 15 cm. The wood species must be strong enough. For rough coating, 50 mm boards are used. In addition to the species and dryness, the treatment of wood with protective compounds plays an important role.
Proper organization of waterproofing in such a field is vitally important. Waterproofing membranes are used for it.
Clay floor
Previously, clay floors were the most common solution when it came to basements and basements. This is due both to the relative cheapness of this construction method (such a floor will definitely be cheaper than concrete) and to the better thermal insulation characteristics of the material. If the customer needs a relatively warm basement without additional heating, then clay is the best solution.
It is also important to carry out the preparatory work correctly, including compacting the soil and backfilling the expanded clay base. Such work will significantly increase the service life of the clay floor to at least 10 years. After preparation, it is necessary to pour out and compact well several layers of clay-crushed stone cushion. The thickness of each layer should be small, but the total thickness should not be less than 20 cm.
Important! The pillow will be stronger if each layer is thin enough.
At the final stage, everything is coated with liquid clay and waiting for it to dry. At the finish, this floor is either covered with something, or impregnated with linseed oil and covered with wax.
Grouting concrete
- Rough grouting of concrete begins from the place where it was poured.
- For work, it is recommended to use special concrete strengthening compounds or topping. Such compositions will improve the strength characteristics of the concrete base and extend its service life.
- If minor loads are placed on the concrete floor, then the topping consumption will be up to 5 kg per 1 sq. m. m.
- If the floor is exposed to medium and high loads, in this case the topping consumption will be large - up to 8 kg of mixture per 1 sq. m.
If you decide to install a concrete floor on the ground in the basement, then before starting such work, watch this useful video:
Average score of ratings is more than 0
Share link
Comments There are no comments yet, but you could be the first...
Required tools and materials
The choice of tools and materials for arranging the floor depends on which construction method is chosen. So, if we are talking about a clay field, then you will need:
- shovel;
- buckets;
- crushed stone;
- sand;
- clay;
Choose the most suitable option for creating a garage floor.
A completely different set is needed for a wooden structure:
- saw;
- hammer;
- screwdriver;
- self-tapping screws;
- nails;
- crushed stone;
- beam;
- board;
- roofing felt;
- membrane.
Well, the set for a concrete floor is quite logical:
- concrete mixer;
- grater and rule;
- beacon strips;
- building levels;
- concrete mixture;
- sand;
- expanded clay
As can be seen from these lists, building a basement floor requires relatively little investment in tools and materials.
How to make a floor in the basement: technology for installing a concrete floor
As noted above, concrete flooring is the most popular. Therefore, a detailed examination of the technology of its device is logical.
First of all, it is worth noting some features of construction work:
- The concrete floor screed in the basement must be reinforced if the groundwater is high.
- Drying of concrete takes from 5 days to 2 weeks, depending on humidity and air temperature.
- Any work should be carried out only after the screed has completely dried.
- It is better to use a concrete mixer, which you can rent.
- Filling should begin from the far corner of the room.
- Leveling should take no more than half an hour - the time during which the concrete will set.
Attention! If the room area is more than 6 square meters. m, an expansion joint is required.
Work on arranging a concrete floor consists of several stages. The first stage involves soil compaction and waterproofing. Next, thermal insulation is produced, after which the reinforcing mesh is laid. At the third stage, the floor is concreted. After the concrete has hardened, finishing is carried out.
Floor waterproofing
As noted above, the first stage involves preparing the soil and waterproofing the floor. To do this, it is first necessary to carry out a series of preparatory work, including organizing a pit, measuring the groundwater level and the height of the room.
After all excess soil has been removed, the earthen base of the floor is thoroughly compacted. To do this, you can use various devices - both special rollers and something homemade. It is important that the tamping device can provide sufficient pressure on the ground.
Upon completion of such work, the waterproofing itself begins. To do this, first pour a base of expanded clay and sand, compact it as thoroughly as possible, and then put waterproofing material on it in the form of a special membrane with an overlap of 20 cm.
The joints must be tightly connected to each other. The membrane should extend a quarter of a meter onto the walls. Instead of a membrane, roofing felt is widely used.
Do-it-yourself concrete - main components
For one reason or another, it is sometimes not possible to order ready-made concrete from production. Either the manufacturer has set the price too high and it is much more profitable for you to make it yourself, or you need very little of it, so there is no need to bring concrete with a mixer. Before you start work, it is important to remember the following - the proportions of the added components, depending on the brand of concrete , may differ. For example, to obtain concrete M200 , the ratio of the proportions of cement (M400), sand and crushed stone is 1: 2.8: 4.8 (respectively). If you need M300 , if the same components are present, the proportion will look like this : 1: 1.9: 3.7 (respectively). Further below in the table you can familiarize yourself in detail with the exact ratio of the components.
The brand of concrete should be chosen based on the purpose for which you need it. The construction of a monolithic, strip, pile-screw foundation, or simply for paving slabs involves the use of various brands.
Cement
This is exactly the binding element without which, regardless of the brand of concrete, it is impossible to make a solution. The strength and speed of its hardening will directly depend on its quality. Necessary marking of cement to obtain concrete of various grades, under natural hardening conditions. Now on the construction markets you can find different types of cements that have different indicators in compressive strength. All of them are divided into groups that determine their maximum load in a frozen state. The percentage of additives and impurities is indicated by the letter “D”. For example, cement M400-D20 , this means it contains 20% additive. This indicator cannot be ignored; the plasticity and strength of the material directly depends on it. Among the products presented on the markets, we can highlight the well-proven Portland cement. Its main advantages include:
- Quite a long service life;
- Has excellent strength indicators;
- Resistant to sudden changes in air temperature;
- Not afraid of moisture.
Important! Whatever brand the cement is, it must be crumbly, without lumps and not expired.
Sand
To prepare concrete mortar according to GOST 8736-93,
you can use sand of various fractions of granules (see Fig. 1).
The final characteristics of concrete will directly depend on its quality. Fig. 1 Size of sand fractions used to prepare concrete Regardless of the type of sand, the absence of clay in its composition is a prerequisite; its presence will significantly reduce the strength of concrete. Usually, quarry sand is used to prepare the mixture, which often contains many foreign particles (dirt, debris, bark and tree roots.). Such sand must be washed and sifted through a sieve before adding. If this is not done, voids may form in the hardened concrete, which will eventually lead to the formation of cracks in it. It is also important to pay attention to the moisture content of the sand, which is present in small quantities even in a dry product. In wet sand, the percentage of moisture can reach 12% of its total weight. This point will need to be taken into account when drawing up the correct proportions of the necessary components, in particular water. Without a special device, you can measure the exact amount of moisture in sand in the following way:
- Prepare a small metal container, an old unnecessary pan will do. Weigh its net weight and record it;
- Next, pour 1 kg of pre-weighed and prepared into it . sand and place the container for 10-15 minutes. on a hot stove, constantly stirring the contents;
- Without allowing the sand to cool, we re-weigh the container along with the hot sand. From the result obtained, we subtract the known weight of the container (pan) and multiply it by the number 100;
- The resulting product will be the percentage of sand moisture content.
When dry, sand should have a crumbly consistency.
Crushed stone
Another important component of concrete mortar is crushed stone. This material is made by crushing rocks (limestone, granite, stone) into smaller ones, resulting in crushed stone having different fractions. Their size determines the initial product into the following types:
- The smallest crushed stone - fraction size less than 5 mm. Used for interior and exterior finishing work;
- Fine crushed stone - fraction size 5-20 mm. The most commonly used size when pouring foundations and screeds;
- Medium crushed stone - fraction size 20-40 mm. It is impossible to do without it during the construction of railways and roads, as well as during the construction of foundations for large industrial buildings that create increased loads;
- Coarse crushed stone - fraction size 40-70 mm. Necessary for the construction of large-scale structures that require huge amounts of mortar;
When calculating the preparation of a concrete mixture, it is necessary to take into account another important indicator, the void space of the material (VSV). It is quite simple to calculate it. To do this, fill a 10-liter bucket with crushed stone to the very top. After this, using a measuring cup, slowly begin to pour water into it until it appears on the surface. The number of liters of water you fill is an indicator of void space. 3 fit into a bucket of crushed stone , then the MRP indicator will be 30% .
Required amount of water
How to make a high-quality mixture? The answer is simple, for its preparation you need to use only clean water. It should not contain foreign impurities of oils, chemical and petroleum products, as well as various household waste. All these substances can significantly reduce the strength characteristics of the finished product. The plasticity of concrete is also an equally important indicator, which directly depends on the quantitative content of water in it in proportion to crushed stone and gravel. No. 1 below . Table No. 1 - required amount of water (l/m³) depending on the filler
| Required level of mixture plasticity | Gravel fractions (mm) | Crushed stone fractions (mm) | ||||||
| 10mm | 20mm | 40mm | 80mm | 10mm | 20mm | 40mm | 80mm | |
| Maximum ductility | 210 | 195 | 180 | 165 | 225 | 210 | 195 | 180 |
| Medium plasticity | 200 | 185 | 170 | 155 | 215 | 200 | 185 | 170 |
| Minimum ductility | 190 | 175 | 160 | 145 | 205 | 190 | 175 | 160 |
| Having no plasticity | 180 | 165 | 150 | 135 | 195 | 180 | 165 | 150 |
It is important to adhere to this table, since a lack of moisture in concrete, just like its excess, will negatively affect its quality.
Calculation of concrete composition
In order to know how to correctly calculate concrete, you must have the following information:
- Required grade of concrete;
- Required level of solution plasticity;
- Marking of the cement used;
- Size of sand and crushed stone fractions.
As an example, we will calculate a solution of maximum plasticity, the strength of which corresponds to the M 300 Calculation of concrete by weight - from the first table we take the recommended grade of cement M400 filled with crushed stone with medium-sized granules. Using table No. 2 , we determine the required proportions of the mass of water and cement (W/C - water-cement ratio). Table. No. 2 - W/C indicator used for different markings of concrete
| CEMENT MARKING | BRAND OF CONCRETE | ||||||
| M100 | M150 | M200 | M250 | M300 | M400 | ||
| M 300 | 0,74 | 0,63 | 0,56 | 0,49 | 0,41 | — | |
| 0,81 | 0.69 | 0.61 | 0.53 | 0.46 | — | ||
| M 400 | 0,87 | 0,72 | 0,65 | 0,57 | 0,51 | 0,39 | |
| 0,92 | 0,79 | 0,69 | 0,62 | 0,56 | 0,44 | ||
| M 500 | — | 0,86 | 0,70 | 0,63 | 0,62 | 0,48 | |
| — | 0,89 | 0,75 | 0,70 | 0,64 | 0,53 | ||
| M 600 | — | 0,92 | 0,76 | 0,70 | 0,64 | 0,49 | |
| — | 1.02 | 0,78 | 0,72 | 0,70 | 0,54 | ||
| - use of gravel. - use of crushed stone. | |||||||
Knowing all the data (concrete - M300, cement - M400, filler - crushed stone), using table No. 2 we can easily find the water-cement ratio, which is equal to - 0.56 . It remains to find the required volume of water to obtain the finished product of maximum plasticity, taking into account the use of crushed stone fractions 20 mm . To do this, we return to table No. 1 where we see that the result obtained is 210 l/m³ . After all the basic data has become known to us, we calculate the required amount of cement to prepare 1 m³ of concrete mixture. Divide 210 l/m³ by 0.56 , we get 375 kg. cement. Using table No. 3 we display the final proportions of all necessary components. Table No. 3. Proportions of the ratio of components (cement, sand, crushed stone)
| Concrete grades | Cement brand | |
| M 400 | M 500 | |
| Proportional ratio by weight - (cement: sand: crushed stone) | ||
| M100 | 1 : 4,6 : 7,0 | 1 : 5,8 : 8,1 |
| M150 | 1 : 3,5 : 5,7 | 1 : 4,5 : 6,6 |
| M200 | 1 : 2,8 : 4,8 | 1 : 3,5 : 5,6 |
| M250 | 1 : 2,1 : 3,9 | 1 : 2,6 : 4,5 |
| M300 | 1 : 1,9 : 3,7 | 1 : 2,4 : 4,3 |
| M400 | 1 : 1,2 : 2,7 | 1 : 1,6 : 3,2 |
| M450 | 1 : 1,1 : 2,5 | 1 : 1,4 : 2,9 |
So, if to prepare 1 m³ of concrete (M300) we need 375 kg. cement (M400), then, following the calculated indicators in table No. 3, we obtain sand - 375 × 1.9 = 713 kg, crushed stone - 375 × 3.7 = 1,388 kg.
- lay out strips of roofing felt so that their side and end edges extend 25 cm onto the walls;
- fill the joints between the strips with tar or glue them with mastic; to be sure, it is advisable to fix them with tape;
- cut off the excess roofing felt on the walls one level at a time and glue it to the surface.
Floor insulation
Thermal insulation begins after waterproofing work is completed. It is important to choose the right insulation - based both on your climatic conditions and on your budget.
Many home owners decide to use fairly inexpensive mineral-based materials (mineral wool). They are really affordable, retain heat well and are easy to use. But their main problem is their fragility. Within ten years you may experience significant heat loss.
For concrete floors, it is recommended to use modern materials, such as polyurethane foam and high-density foam. They are even more convenient due to their simple shape and lightness. And, most importantly, they are distinguished by exceptional durability.
The insulator is laid in a layer directly on the waterproofing membrane. Usually 5 cm of insulation is enough. In some cases, its thickness is increased to 10 cm. Much depends on the groundwater level.
Important! Thermal insulation boards are placed so that they do not come into contact with the walls.
Insulate your garage floor
Getting ready to build a ceiling for the cellar - preparatory work
Storage for grown crops is often arranged in a garage. When planning to build a basement in the garage with your own hands, it is important to take into account all the nuances:
- make sure that there are no utilities below the soil level at the work site. This requirement is especially relevant in urban areas, where various highways may be located. If it is possible to go deeper into the soil up to three meters, you can proceed to the next task;
- carry out survey activities aimed at determining the depth of aquifers and assessing soil quality. Professional surveyors will carry out research and provide an official conclusion. In case of increased moisture saturation, drainage and reliable protection of walls and floors should be provided;
- develop the optimal layout of the basement, taking into account all the features. You should pay attention to the shape and size of the basement, which should correspond in size to the contour of the garage space. It is important to choose the right material, as well as the technology for building the foundation.
A traditional cellar is designed so that its entire room is located below ground level. To ensure a comfortable microclimate, it is important to pay attention to the following points:
- ensuring reliable moisture insulation. Under normal humidity conditions, dampness will not develop;
- implementation of effective thermal insulation. One of the main tasks in this case is the correct insulation of the ceiling in the cellar;
- construction of a ventilation system. Thanks to air circulation, comfortable conditions will be maintained.
Having comprehensively solved the listed problems, you can arrange the ceiling of the cellar in the garage.
Nowadays in the construction markets you can find different types of cements with different compressive strength values. All of them are divided into groups that determine their maximum load in a frozen state.
How to pour a basement floor: concreting stage
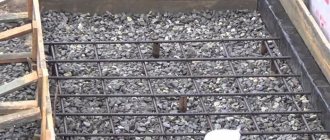
Before pouring the concrete, a reinforcing mesh is laid. It must be placed on pieces of brick so that, due to its elevation, it ends up inside the concrete screed and not below. The cells are laid with a slight overlap.
The concrete mixture used for the floor must be at least grade M400. If the mixture is prepared independently, then the proportions must be 2:3:1 for sand, crushed stone and cement, respectively. It is better to supply the mixture directly from the concrete mixer.
Attention! If concrete is carried in buckets, and the room is large, then pouring can be done in parts, dividing it into squares using wooden fences.
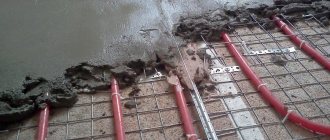
After pouring the concrete, workers have about half an hour to level it. For this, both ordinary shovels (at the initial stage) and rules with long handles are used.
If the room temperature is high enough (21 ° C) and the humidity is not high, then it may take only 5 days for the concrete to harden. Otherwise you will have to wait up to a month. At the initial stage of hardening of the material, it is necessary to sprinkle it with a little water so that it does not crack.
Work on pouring concrete mortar
In order for a concrete floor to be of high quality and last for many years, you need to properly prepare the solution. Sand and cement are used for preparation; its grade must be at least M400. The sand is pre-sifted. Next, take three parts of sand and one part of cement and mix thoroughly with each other. Then gradually pour water into the dry mixture and stir until the required viscosity is formed. After this, the solution is placed on the laid reinforcing mesh and leveled. To ensure that the thickness of the layer is the same over the entire floor area, beacons are installed.
Once the concrete has matured, it is polished. However, expansion joints will need to be made first. To do this, the floor is cut with a grinder so that the seams are four to six meters apart. The seams will prevent cracks from forming on the concrete surface.
Expansion seams
Floor sanding
