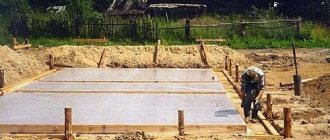
Home |Construction |Do-it-yourself fence formwork
Date: January 19, 2019
Comments: 0
The owner of a country house or country house is interested in a reliable fence that makes it difficult for uninvited visitors and animals to enter the territory. Any site fencing needs a reliable and solid foundation. After all, clean soil cannot be the basis of a building, including a fence. The main material for making the foundation of the fence is concrete, for pouring which you need formwork for the fence.
If you are interested in installing the fence of your site yourself, without hiring hired workers, be sure to learn how to make formwork for a fence. This is the initial stage of work, which determines the service life, quality and stability of the future fence.
In this article we will look step by step at how to make fence formwork with your own hands and decide on the necessary tools and materials. Doing the work yourself will save money, and following the technological sequence of operations will ensure the stability of the fence structure. You can also solve the issue with formwork at https://arendaopalubki.spb.ru
The first thing to start with is making a foundation
What it is?
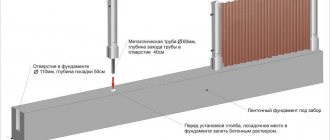
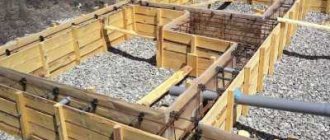
The frame for pouring the foundation for the fence is a reliable structure on the basis of which the foundation of the future fence will be formed. The frame structure ensures the flatness of the concrete surface and is able to withstand significant loads.
The frame was traditionally made of plank panels, the main disadvantage of which was the deformation of the boards that occurs under the pressure of the concrete solution. New materials are now being used that have successfully replaced shields.
Installation of formwork for the foundation under a fence with your own hands
You can make the formwork for a strip foundation for a fence yourself, without involving experienced craftsmen. Installation of the formwork structure is carried out in several stages:
Stage 1. Investigation of the construction site and marking of the territory
Before starting construction, it is necessary to inspect the area where the fencing system will be built. It is possible that there will be various obstacles along the fence path. These could be stumps of old trees, depressions or ditches, as well as all kinds of utility lines. It is recommended to mark the entire perimeter of the fence, avoiding problem areas. Also, when marking, you must pay attention to the fact that the area along the fence may have significant differences in height.
Stage 2. Excavation
It is necessary to dig a trench under the base of the fence along the entire length of the future fence. In this case, the following conditions must be observed:
- The groove width must have a significant margin in width. This is necessary for installing the bars on which the formwork system panels will be attached.
- The depth of the trench is determined taking into account the arrangement of the gravel and sand cushion at the bottom. The presence of the latter is necessary not only for waterproofing, but also for greater stability of the formwork structure.
Stage 3. Installation of bars for fastening panels
To arrange the formwork, it is better to use bars with a cross-section of 50*50 mm. To install them, holes are dug along the edges of the trench. The bars are driven into the ground strictly vertically. It is recommended to use a building level for accuracy. The distance between the bars is determined in accordance with the width of the future foundation: with a width of 30 cm, the bars are placed every 100 cm, with a width of 20 cm - after 120-130 cm. The length of the bar must be greater than the height of the foundation being poured. This is necessary for further actions to impart rigidity and strength to the formwork.
Stage 4. Assembly and installation of panels
Formwork panels are assembled from the selected material. The number and length of elements depends on the method of pouring the foundation. When pouring simultaneously, a single canvas is assembled along the entire length. For filling in individual sections, elements 3-9 m long can be used. Wooden products must be treated with a waterproofing compound. This procedure will reduce the removal of moisture from the concrete solution and prevent it from drying out and cracking. This problem is especially relevant during construction in hot and dry weather. Waterproofing the formwork can be done using ordinary polyethylene.
Assembling panels for formwork
The assembled panels are attached to installed vertical bars using nails or self-tapping screws. In this case, it is better to leave the caps of the fastening elements on the outside in order to more accurately dismantle the structure at the end of the work. The installed panels are additionally fastened together with reinforcement rods or wire. This will increase the strength of the structure. On the outside of the formwork it is necessary to have side jibs. They are made from wooden blocks, beveled at one end. At the bevel point, the block rests against the installed shield, and at the other end, against the ground. To create additional strength, bars are also stuffed along the upper edge of the formwork. They do not allow the structure to diverge under the pressure of the concrete mass.
Purpose
Regardless of what the foundation formwork is made of, its main task is to form a reliable concrete base for the fence, which will limit access to private property by outsiders.
It is advisable to place the upper plane of the fence foundation at a distance of about 25 cm from the ground surface. The protruding plinth is intended for the following purposes:
- ensuring aesthetic perception of the structure;
- preventing the destruction of the fence from corrosion;
- compensation for changes in landscape level.
Using high-quality raw materials and following the work technology, it is possible to ensure the functions assigned to the fencing plinth.
A reliable base can withstand the weight of a high fence, ensuring its resistance not only to the effects of natural factors, but also to attempts by people and animals to enter the protected area.
The fence is an important part of every home
Advantages and possible disadvantages
The advantages of such a foundation:
- High strength at low installation depth.
- Resistance to mechanical loads and environmental influences.
- A high-quality poured solid concrete strip extends the life of the fence for decades.
- If necessary, the base can be reinforced with pipes and metal corners.
- The tape protruding above the ground level is lined with stone, which makes the structure more beautiful.
Photo: 3D model of tape laying
Among the disadvantages is the large waste of materials, and therefore the high cost of construction. If the construction area is large, you will need to use special equipment and 2-3 assistants.
Varieties
The formwork for the foundation of the fence, depending on the possibility of dismantling and further use, is divided into the following types:
- Stationary frame structure. After pouring concrete, permanent formwork remains in the soil and is an element of the foundation, reliably protecting it from moisture.
- Removable design that can be used repeatedly. Dismantled formwork is more expensive, but pays for itself in several cycles of foundation pouring.
Various materials are used to make the frame, which we will discuss in detail.
When is it necessary to cover the foundation?
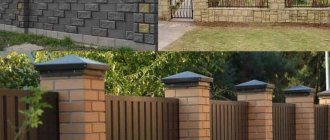
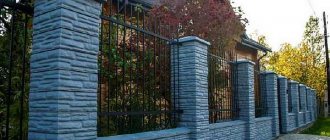
When erecting a stone, brick, or wrought-iron fence, the strip protruding above ground level becomes part of the structure, therefore, in order for the fence to have a complete look, its lower part is finished. The following materials are suitable:
- natural or artificial stone (granite, sandstone, flagstone);
- facing bricks, tiles;
Photo: corrugated fence with brick pillars - pieces of colored glass (to create a mosaic).
In order to save money, you should not use such a technique as painting on a concrete surface. This will cause the solution to crack.
Monolithic tape is a reliable basis for the fence, which will give it neatness and extend its service life by years.
Materials used
Do-it-yourself fence formwork can be formed using various materials, the surface of which can withstand significant forces of the concrete mass. The formwork for the fence is formed from the following materials:
- wooden boards, 20x50 mm in size, knocked down into panels. Wood waste can be used;
- sheets of metal up to 2 millimeters thick, which are easily bent and take the required configuration. They allow you to create a durable frame with high insulating characteristics. Disadvantage – high level of costs;
As a rule, wood is the most common material used in the manufacture of formwork
- polystyrene foam blocks, easily assembled into a solid structure and with increased waterproofing. The elements are easy to attach and allow you to give the frame the required shape;
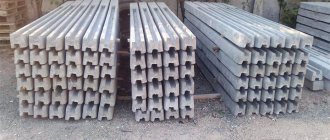
- reinforced concrete elements, allowing to reduce the need for concrete mortar for the foundation of the fence. As the size of the slabs increases, the consumption of concrete decreases while maintaining the strength characteristics of the entire structure;
- thick coniferous or laminated plywood, more than 15 mm thick, allowing you to form a reliable frame. Plywood is offered in standard sheets measuring 2.44 x 1.22 m;
- 16 mm thick particle boards, which have a high load-bearing capacity and are easy to install.
The elements of the fence frame are fixed on the outside with pegs, ensuring the immobility of the structure. Reinforcement elements in the form of 5x5 cm bars or steel threaded rods are attached inside.
In what cases is it used?
Since one of the functions of the foundation is to correctly distribute the weight of the structure on it, here the type of foundation is also selected according to the weight of the fence.
The strip base is considered one of the strongest even in the construction of houses, so a fence with increased mass is usually assumed here. This means that it will be brick, concrete, forged, but its sections can be made of corrugated sheets, wood and other lightweight materials.
Moreover, such a foundation can always be strengthened by making reinforcement or additional parts to create a columnar strip foundation.
When constructing heavy fences, strip foundations are used. The weight of the entire fence structure is correctly distributed on it.
Necessary materials, tools and equipment
For the fence foundation frame you will need:
- Gravel, fine sand and water.
- Steel reinforcement bars used for reinforcement.
- Sheet plywood or any available material.
- Transverse elements 30 cm long, intended for fixing the formwork walls (5x5 cm bars or threaded rods with M10 threads complete with nuts).
- Wire for knitting, nails, screws, staples, fixing corners.
Height. The depth of the foundation depends on this parameter
To complete the work, also prepare:
- construction tools and accessories (shovels, buckets, level, plumb line);
- carpentry equipment (screwdriver, electric jigsaw, hammer, axe, hacksaw).
Take care about the protective equipment used when performing work. Prepare:
- Protective glasses.
- Mittens.
For further concreting activities, you will need a concrete mixer, with which you prepare a concrete solution made on the basis of M400 Portland cement.
Components for preparing concrete
The concrete mixture consists of aggregates, binder and water. Sometimes various additives are added to provide additional properties. They can increase the frost resistance of concrete or increase the setting time of the solution.
Fillers
This is mainly crushed stone and sand, less often gravel and screenings. These are materials of natural origin, obtained by natural or artificial destruction of rocks. Concrete aggregates are divided into large and small.
Coarse aggregate
It has grain sizes from 5 to 20 mm. For crushed stone these are fractions 5-10, 10-15, 10-20, 15-20. But most often they use 5-20. This fraction is always in demand in construction, therefore it is produced in most quarries. As for the rock, it is better to choose granite, serpentinite or amphibolite varieties for concrete. Limestone, marble, gabbro and others are not suitable.
Gravel in its pure form is rarely used for concrete. This is due to its low strength indicators. This material has been subjected to weathering processes for hundreds and thousands of years, and its grains have too low structural connections. Crushed gravel is suitable for concrete: crushed river or sea pebbles. In terms of strength, it is somewhere between natural gravel and crushed stone produced in a quarry.
It happens that when making concrete pillars they do without coarse aggregate at all. This reduces the strength of the structure, but not critically. In addition, the absence of large grains contributes to better compaction of the mixture.
Fine aggregate
Sand with a particle diameter of 2 to 3 mm works best. You should not use very fine sand - during the preparation of the solution it will precipitate and be unevenly distributed over the concrete. The fine aggregate should not contain clay, silt, dirt or other foreign components. Washed quarry sand meets these requirements. You can also take river or sea.
As an alternative to sand, screening of crushed stone from granite or serpentinite is used. Fraction – 0-5 or 0-10 mm. This material never contains foreign impurities, and its rough grains provide good adhesion to other components of the mixture.
You can read more about coarse and fine aggregates in the following articles:
- Crushed stone for concrete
- Sand for concrete
- Screening for concrete
Astringent
In order for the concrete solution to set, a substance is needed that will bind the grains of crushed stone and sand. This substance is cement. Fence posts are graded M400, in some cases - M500. Cement, like other components, must not be contaminated. Please note that it has a shelf life, and it is very short - only 2 months. After this time, the material begins to lose its original properties.
Water
Clean running water, without sediment or impurities, not contaminated with oils and without a strong odor. You can use water from a well or well. By the way, to prepare concrete in factories they use only water that meets the requirements of GOST 23732-2011. It undergoes special laboratory tests, during which the chemical composition and other indicators are examined. In the case of private construction, such tests will not be possible. Therefore, it is enough just to use ordinary water.
Stages of work
Do-it-yourself fence formwork is installed in compliance with the sequence of the operation. The general package of work on installing formwork includes the following stages:
- the calculation part performed at the initial stage, which allows us to determine the need for the necessary materials and the depth of the foundation;
- preparatory stage, including measures for marking and preparing the site;
- excavation;
- production of frame elements;
- installation activities related to the installation of panel structures, their fixation, waterproofing and installation of reinforcement.
If the fence is stone or brick, then the formwork should be high
After the erection of the frame-panel structure, the following is carried out:
- Concreting.
- Dismantling the frame (for removable formwork).
Let us dwell in detail on the activities related to the formation of the frame.
Formwork for a fence on a sloped area
Formwork for a fence on a site with a slope of more than 10° or on uneven terrain requires a more complex approach to manufacturing and installation. In such cases, stepped foundations are erected.
The formwork will also have the shape of a ladder. Its step is the distance between the supports. For each section of the future fence you will have to make a separate formwork.
Photo No. 5: formwork for a fence on uneven terrain
Important! The protruding ends of the steps must be tightly closed. The bottom of the trench should also have a stepped structure and run parallel to the line of the future base. This will increase the resistance of the base to sliding and minimize the likelihood of premature failure of the structure.
Calculation part
At the preliminary stage, the following work related to calculations should be performed:
- calculate the length of the perimeter of the fence, which will help determine the need for building materials;
- determine the required height of the fence, which affects the depth of the foundation for its installation;
- identify and purchase materials required for construction;
- prepare the tools and equipment necessary to carry out construction activities.
Preparatory activities
The preparatory stage includes the following activities:
- Marking the site, allowing you to mark the perimeter of the contour and identify possible obstacles on the line of the future fence.
- Preparation of the surface of the site, during which the site is cleared of green spaces and debris.
Please note that it does not always make sense to dig a deep foundation, especially where the load on the fence will be minimal
Having completed the preparation, you can begin excavation work.
Excavation
According to the previously completed markings, excavation work is carried out, which is carried out independently using a shovel or using a small excavator. Pits can be made as follows:
- locally, 0.8 m deep, in the area where the support posts for the fence are located. In areas that do not bear a load, it is allowed to deepen the base below the zero mark by 50 cm;
- along the entire perimeter of the fence, if it is built of heavy stone or brick.
Having gone below the zero mark, perform the following operations:
- Fill with sand and gravel mixture, pouring water over the resulting depressions or trench, ensuring a layer thickness of up to 10 cm.
- Compact the massif using a special tool or a hand tamper.
How to mix concrete for fence posts
To prepare the solution you will need the already mentioned buckets. It is advisable to have at least two of them. You will pour dry materials into one, and pour water into the other. A container for mixing components is also useful. A construction basin or trough is quite suitable for this. The main thing is that their volume is sufficient to prepare one portion of the solution: this is approximately 80-85 liters. Accordingly, the capacity should be at least 90-100 liters.
It is most convenient to mix the components with a bayonet shovel or hoe. To make the process go faster, it is better to work together: one will pour the materials and add water, and the other will mix. If you have a manual or automatic concrete mixer, then everything will be much simpler.
It is advisable to reinforce concrete pillars with reinforcement. To do this, buy steel rods with a diameter of 8-10 mm. You will need at least 2-3 of them for each pillar. Instead of rods, you can use a mesh.
It is advisable to choose a place for mixing closer to the future fence. This way you won't have to carry heavy concrete poles over long distances. A wheelbarrow may be useful for transporting aggregates.
The order of adding components
To ensure that the concrete turns out to be of high quality and the mixing process is not difficult, use the following instructions:
- Pour cement and fine aggregate into the container. Stir until smooth. This will take no more than 3 minutes.
- Pour some water into the mixture. There is no need to fill in all the water at once. It is better to add it in small portions as you stir.
- Add the coarse aggregate and mix the ingredients thoroughly again for at least 5 minutes. If you decide to prepare concrete without crushed stone or gravel, you can skip this step.
Why this particular sequence? It's simple. Firstly, when making concrete mortar manually, you need to follow the main rule: all components are added one by one; Moreover, you first need to mix the previous materials well, and then add new ones. Secondly, it is better to add coarse aggregate at the very end. This way you will spend less effort. However, if you prepare the solution in a concrete mixer, you can fill in the crushed stone right away.
Production and installation of formwork
When making panels for the frame, it is convenient to use particle boards, boards or plywood, by sawing which you can obtain blanks of the required size. The need for shields depends on the length of the perimeter or the size of the pits intended for installing the pillars.
Stages of work:
- waterproof the wood surface using waste oil or tar;
- drive vertically located stakes, maintaining an interval of 0.5-1 m;
- attach the shields to the support posts using self-tapping screws or nails;
- fasten the panel structure with threaded fittings or binding wire using pre-made holes;
- install fittings;
- fix the upper part of the frame with bars;
- install fixing brackets in the corners;
- seal the cracks.
Now you can start pouring the base.
