Purpose of vibrating plates
A vibrating plate is a mechanism designed to compact loose soils and bulk building materials. In addition, such a mechanism is widely used for vibration processing of semi-dry concrete mixtures and asphalt when constructing floors and paving surfaces.
The use of such a tool is very effective when working on a small plot of land and in cramped spaces.
The construction of sidewalks, garden paths, driveways and parking lots near a private house using a vibrating plate is carried out much faster, while ensuring high quality of work. Compacting the bottom of the trenches when laying utilities eliminates their possible damage in the event of subsidence of loose soil.
These and other advantages encourage many home craftsmen to make such equipment themselves and use it in construction work.
The nuances of compacting various materials
When starting compaction of crushed stone or other bulk material, it is necessary to first remove any debris on the surface of the work area, for example, pieces of boards, large cobblestones, bricks.
Sand
Vibration compaction of sand is performed as follows:
- cover the construction site with sand with a layer no more than 0.6 meters thick, depending on the mass of the vibration equipment being used;
- moisten the entire area of the compacted area evenly with water;
- pass the entire area with a vibrating plate four times;
- if the required degree of compaction is achieved, then pour the next layer if necessary;
- repeat the entire process of compacting the poured mass.
As a result, the sand compaction coefficient when compacting with a vibrating plate should be at least 0.95.
To work near columns or walls, additional (more compact) equipment may be required.
If sand is compacted without first being moistened, a lot of dust will be generated. This will quickly lead to clogging of the air purifying filter when operating gasoline units. At the same time, you should not pour too much water onto the sand backfill so that it does not remain in the existing voids, thereby preventing the normal bonding of material particles (grains of sand). Only a moderate amount of liquid creates a cementing effect.
Sheben
Compaction of crushed stone is complicated by the fact that this material is represented by fractions of different sizes. It is necessary to determine the maximum thickness of the poured layer for compaction immediately before work. After 4 passes of the vibrating plate over the surface being treated, the crushed stone mass (or gravel) should be compacted by approximately 95%. If it remains quite loose, then subsequent compaction makes virtually no sense: it is necessary to pour the material into less scrap.
It is recommended to start tamping with a minimum thickness, gradually increasing this parameter until the desired balance between productivity and quality of work is achieved. This will allow you to determine the optimal height of the poured layer.
When using limestone crushed stone, the clinking effect is often encountered - the adhesion of the stones of the upper layer to each other when exposed to vibrations emanating from the slab. As a result, the underlying mass of material is not compacted. This effect can be overcome with the help of heavy (weighing more than 150 kg), powerful vibrating units. If the weight of the slab in use is 100 kg, only crushed stone fraction with stone sizes from 10 to 20 mm is suitable.
Paving slabs
When laying paving slabs, special polyurethane or rubber mats are attached to the working plate of the vibrating equipment so as not to damage the created coating. Due to their performance properties, polyurethane plates are preferable because they do not leave black marks on the surface of the tiles and are more wear-resistant.
Advantages of a homemade tamping machine
The main advantage of a home-made vibrating plate is its low cost and the ability to perform high-quality and efficient work. The simple design ensures the reliability and durability of the mechanism.
In addition, a homemade vibrating plate allows you to:
- Safely tamp any surfaces;
- reduce the amount of manual labor when performing work;
- improve the quality of footpaths and platforms;
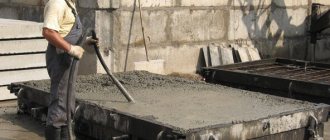
- It is good to compact dry cement and semi-dry concrete mixtures when laying them.
Having a mechanism for compacting loose soils and bulk materials will allow you to carry out any amount of landscaping and exterior design work.
Mechanism design
The main working element is a heavy metal platform, which can be made of gray ductile iron or steel. The vibration effect on it is transmitted from a mechanical vibrator driven by a gasoline, diesel or electric engine.
A durable handle is provided to control the vibrating plate as it moves across the work area. Additionally, the design may include a fuel tank or starting electrical equipment. The engine and vibration device are installed on a frame, which is mounted directly on the tamping platform.
How to make a hand tamper?
The point of tamping is that each layer is compacted using a hand-made tool. Such a product is most often constructed from ordinary materials that can be found in the garage. Select a block with square sides of 10-15 cm. There is no need to specifically purchase a new item - any whole block will do.
To make the structure you will also need:
- steel plate 2 mm wide;
- a stick without sharp corners up to 0.5 meters long;
- screws;
- glue.
Next, you need to prepare the block, adjusting its lower part to a square shape. In the meantime, the chamfers are removed and the sides of the wood are leveled with a plane. The next stage is the construction of a metal shoe. A drawing of the future shoe is depicted on a sheet of steel, and excess parts are removed with special scissors. Holes for screws are then cut into the metal tile.
The finished shoe is attached with wings to the bottom of the beam and secured with screws. A hole is drilled in the beam itself for a handle, which is attached to wood glue.
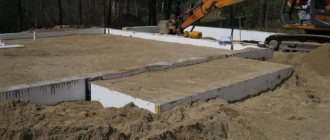
As a rule, during construction, the foundation is covered with loosened soil. This material has a low density compared to compacted material. If compaction is not carried out in a timely manner, the soil will settle and cracks will appear on its surface. Gaps between the surface and the wall can cause the concrete slab to break.
Now let's look at the methods that are often used to compact soil.
- Watering with water. A long-term method that requires constant access to water. To work you need a hose with good pressure. Next, fill the entire area of soil, and for the best effect, use a large volume of liquid. Watering is a natural and long-lasting method, close to nature. As a result, the soil is dried for a couple of days, and then the next layer is laid.
- Compacting soil using homemade tools.
- Mixed method. This is a combination of hand tamping and water pouring.
The sand compaction technique has its drawbacks. Initially, it is important to choose the type of sand suitable for such work. Often it becomes gravel, since small grains of sand are generally not recommended to be filled in. So, the larger the particles, the stronger the base, which will prevent the building from shrinking.
To install a monolithic structure, medium-fraction sand particles are used. But even in this option, groundwater will affect the strength of the lower layer. The washout of the base is prevented by laying geotextile trenches, after which sand is poured.
To begin with, the sand is sieved, since it contains many impurities, including clay, which affects its properties. Also, an optimal level of humidity is created for the sand. If you can roll a small ball, then the material is sufficiently wet.
The moisture level should be about 15%.
The quality of installation depends on both the equipment and the material. Everyone chooses the type of equipment according to their financial capabilities.
How to make your own hand tamper
When building foundations for houses, garages, country paths and much more, great attention is paid to the substrate, consisting of gravel and sand.
To ensure that the concrete monolith is laid evenly and does not begin to move over time, it is important to carefully level the underlying layer.
For these purposes, you can use specialized vibratory tamping machines or rolling equipment, but manual tamping will be much cheaper.
The principle of do-it-yourself processing is that with the help of a homemade tool, blows are applied to the surface, due to which the sand and crushed stone are compacted. In this case, compaction is performed after laying each of these layers.
In custody
Hand tools can be used to compact sand, gravel or soil. However, it is worth considering that in this case, human muscle strength is used, so using such a tool to compact large areas will be expensive. Such rammers are recommended for use when constructing foundations for small buildings or when arranging garden areas.
HOW TO MAKE A VIBRATING PLATE ON WHEELS FOR TRAMPING WITH YOUR OWN HANDS
To compact soil, sand or crushed stone during construction work (for example, when constructing a blind area for a house or laying paving slabs), manual tamping is usually used, since this is the cheapest method.
But it is much more convenient and faster to do this work using a vibrating plate. In this review we will tell you how to make it yourself from scrap materials.
- The base of the vibrating plate can be cut from sheet metal 9 mm thick.
- To bend the edges, the author made two parallel cuts 4.5 mm deep with a grinder. Then the edges must be bent to the desired angle, and the slots must be welded.
- The top plate can be made from two pieces of channel material, welding them together and cutting the edges to the shape of the sole. Additional bolts must be welded into the top plate to secure the vibration motor.
- To reduce the vibration of the handle, the top plate must be installed not on the sole itself, but on vibration isolators, for which the author decided to use silent blocks.
- The author placed about 10 kg of various scraps of metal (to increase weight) into the resulting cavity between the sole and the top plate and secured them by welding.
- At the next stage, a blank is cut out from a piece of channel to support the control handle. It is welded to the top plate. We clean the welds and paint the assembled structure.
- Next, we install the vibration motor, securing it with screws so that the nuts do not unscrew due to vibration.
- To make the handle, the author used a piece of corrugated pipe 40x40 mm. A piece of round pipe with a diameter of 32 mm is welded into the lower part of the handle, and a piece of round pipe with a diameter of 20 mm is welded into the upper part. Additionally, you need to cut a hole in the profile pipe to install the switch.
To move the vibrating plate conveniently, the author used a pair of large wheels, making them quick-release.
Tamping for laying paving stones manually
tamping for laying paving stones manually.
3. Underlayment for the floor.
When installing houses on the ground, a non-rigid underlying layer must be installed. It includes two layers. They are poured on top of gravel or crushed stone, each layer is moistened and compacted. For backfilling, as well as for the foundation, river sand or washed quarry sand is used. To achieve uniform thickness, pegs are installed and then removed.
4. Laying paving slabs .
When paving pedestrian roads, alleys and areas with paving slabs, sand bedding must also be used. The first and final layers of the paving stone cushion are made from it. Crushed stone is used as a layer between them. All layers of the cake under the tile are compacted tightly according to technology requirements, and periodically moistened to achieve the best result.
For backfilling, sifted river material is used. The thickness of its layers is determined depending on the depth of the trench and the height of the road surface element. It is often necessary to remove soil to great depths due to heaving and other problems that do not allow the soil to become a reliable basis for the installation of paving slabs . In these cases, it is necessary to add a lot of sand and compact it thoroughly. The finishing layer is made at about 7 cm, dry cement is often added to it.
Making a vibrating plate
Coping with soil compaction is very difficult, so you can’t do it without tools. For some, a homemade design is a good choice, while others purchase a gasoline vibratory rammer. The most popular types include vibrating rammers and vibrating plates. Their operating principle is quite similar, and rental of such a machine is always in demand among construction companies.
A vibratory rammer is most suitable for compacting the soil layer. Its work is based on centrifugal force in a certain direction. The amplitude of the oscillations depends on the device model.
If we compare the device with a vibrating plate, it is worth noting that it is smaller in size. And the compaction of the layer occurs due to the small volumes of the sole itself, which provides the best effect.
For compacting sand, the optimal choice is a vibrating plate, since thanks to it the sand will be compacted and will not be squeezed out over the edges. But for laying paving stones, crushed stone or a base under a concrete slab, this method is more suitable than tamping. The large compaction area is the main advantage of the method.
Making your own vibrating plate using an electric motor will help you save on equipment. Drawings for structures are not difficult to make.
To make it you will need:
- power section;
- two channels;
- iron plate more than 7 mm thick;
- fasteners;
- two wheels;
- a pipe that is used as a handle for convenient movement of the structure.
Since vibration increases during operation, some inventors also attach soft pads for the hands. But this is optional.
The concrete vibrator consists of an electric motor, a vibrating device and a flexible shaft. A replacement for the first element is constructed from a jackhammer, hammer drill, drill and other devices that transmit vibrations. There is no need to neglect the design of a flexible shaft for the vibrator, because thanks to it the tip is safely lowered into the solution and transmits the desired vibration.
This product can operate from a 220 V home electrical network.
The vibratory ramming machine, constructed from a hammer drill, operates on the basis of impact force. A metal peak is created for the nozzle. This design helps to penetrate the thickness of the concrete, which is extremely necessary after pouring the pile base. It is important to determine the required length of the nozzle. To process a large area, choose a large sheet to which the puncher itself is attached.
It is necessary to firmly strengthen the structure, because the vibration force can be destructive for the product. In cases where the equipment elements are horizontal, the nozzle should be positioned at a slight angle. And this can be achieved by attaching the washer as a support. Then a vibration unit of the hammer drill is installed in it.
DIY vibrating plate and vibrating table
After building a house, it is invariably the turn to improve the dacha: make garden paths, organize a patio area, etc. And every time you come across the high cost of the necessary materials and equipment, you think about whether to try making them yourself. Participants in the Home and Dacha forum share their experiences of creative experiments.
Vibrating table
Many householders think that buying special equipment “once” and, even more so, making it yourself is a troublesome and unnecessary task: it’s easier to ask friends or rent it. As soon as realsystem decided that he needed a vibrating table to build a pair of winding paths across the entire six-acre plot and a parking lot for a 30-square-meter car, he began to study information on how to make paving slabs and building blocks himself.
The main reason for such a bold decision was the high price of materials. He planned the tiles to be 40x40 or 50x50 cm in size and 60-70 mm thick, with reinforcement. I made the table without drawings, in just a couple of weeks. We used scraps of a 40x20 pipe, a 2.5 mm sheet, a pair of 10 mm plates and an old vibrator, purchased for 500 rubles, with dimensions of 1050x550 cm.
realsystem placed the moving part of the table on six weight valve springs with pieces of rubber hose inside them. The springs are in glasses. Additionally, he secured tension springs around the perimeter. After a trial switch-on, the first defect appeared: the sand collected closer to the center, shifted to the far right part and fell onto the floor, because... the table was not set out and stood on an uneven floor. The owner concluded that it was necessary to make a side.
The table legs were made from 40x40 pipe. The first one was lumpy, so they turned out crooked due to overheating. realsystem tiles are made from screening concrete using masonry mesh.
To get white tiles, you can mix white cement (more expensive than usual) with marble chips.
Another forum participant, tarasiki, did it a little simpler: he made a table without springs (their functions are performed by wood) and a vibrator, replacing the latter with a motor from a washing machine with an “eccentric”. Among the shortcomings of his product, the forum member notes the small area of the table; the frame also needs to be secured to the floor. As a composition for making tiles, he takes one part of 400-grade Kramatorsk cement, one part of river sand and three parts of crushed stone.
Budget tamper made from scrap trash
Peter_1 regretted spending money on renting a vibrating plate for filling the foundation. After rummaging around in the garage, a ferrous metal collection point and a nearby car service center, he found everything he needed: a drum from a tabletop woodworking machine, a motor from a washing machine, a piece of metal 5 mm thick, pieces of 30 mm angle iron, a bunch of various rubber supports from automotive equipment, scraps of metal 2-3 -4 mm, a piece of 12 mm stud and a couple of freon cylinders. There I also got hold of a piece of wire, a switch and a starting capacitor for the motor. I only bought a belt and two pillows from a VAZ gearbox for 600 rubles.
A pack of electrodes, five hours of work with a welding machine, a grinder and a drill, several modifications to the vibrating unit, and this is the result - a vibrating plate that compacts small layers of sand quite acceptably. Using homemade equipment, a cushion was compacted under the foundation of the garage and work began on the foundation for the house.
The design of the vibrating plate is quite simple: the horizontal cylinder for weight is filled with concrete, the vertical one is made for water. On the front tube there are 12 holes Ф 1.3 mm. A drum from a planing machine was used as a vibrator. Peter_1 cut off half of it with a grinder, and installed two lead weights on the second half.
Results: vibration does not reach the hands due to triple vibration isolation. In addition, the handles are equipped with a heat insulator from refrigeration units. The tamper, while working, moves forward on its own, 60-80 cm per minute; it only needs to be directed. Because the owner considered it unjustified to use a double reverse stroke and two vibration mechanisms; the plate has to be turned around so that it moves in the opposite direction.
One interesting and useful feature of the equipment was also discovered: during operation, the vibrating plate sways slightly left and right, especially when the tamper reaches the required density. This is a signal that the car needs to be moved to a new location.
After using the rammer, Petr_1 discovered several shortcomings, which he plans to correct in the future. The first was a weak ballast fastening. The forum member plans to strengthen the clamps and make them with a collapsible clamp connection rather than a welded one - the slab can be moved disassembled. To do this, the upper platform, along with the ballast and water tank, was made removable, but practice has shown that it was necessary to make the ballast itself removable.
The owner concluded that the ballast should be moved closer to the middle of the slab, and not placed in front - so that the slab does not bury itself when turning. For the same purpose, you need to raise the front “ski” of the rammer. It is also necessary to better protect the vibrating drum with a casing, because crushed stone of small fractions gets into the mechanism and flies out at high speed.
Another improvement should be improved engine cooling: at temperatures above +35 °C you have to stop after every 40-50 minutes of operation to cool the engine. As one of the options, you can attach an axial fan or cooler from the server.
Forum participant Tim1313 used the following materials to make the vibrating plate: an IV-98E platform vibrator, an RCD for it, a cast iron frame from a Soviet drilling machine, jet rods with silent blocks from Soviet cars and a 6 mm stainless steel sheet, 45x70 cm.
Sequence of work: secured the vibrator to the frame (drilled holes, cut threads, screwed in d12 bolts), made a handle and attached it to the frame through silent blocks. Using a self-created press, the base of the vibrating plate was attached. Then two plates were welded perpendicularly to secure the frame with the drive to the base: four holes were made and secured with d10 bolts. The finished rammer was painted.
To irrigate sand, you can provide a canister mount.
Result: speed – 6-7 m/min. During the day, 10 cubic meters of sand were compacted, in layers of 10 cm. Quality of compaction: traces when walking are barely visible.
Cons: Strong vibration that comes and goes, causing finger joints, wrists and elbows to ache at the end of the day. In addition, four hours after the start of tamping, the purchased RCD stopped turning on. The problem was solved with the help of an ordinary socket, fortunately the handle was attached to rubber silent blocks.
Based on materials from participants of the “House and Dacha” forum
Do-it-yourself manual rammer for soil compaction
Materials used
A suitable material for homemade manual tamping is a square beam with a side of 100 or 150 mm. It will be difficult to work with a round log in the corners and will have to be compacted with a significant overlap of the previous impact point.
It is not at all necessary to take new lumber; a used lumber will do. The main thing is that the wood is free from rot and splits. Choose a piece of timber that you can lift. The height of the manual tamper can be waist-high or chest-high, depending on ease of use.
If you have no experience working with this tool, take a longer block, try it out and shorten it if necessary.
You will also need:
- A piece of 2mm steel plate.
- A round birch stick 450 mm long (an old shovel handle will do).
- Wood screws.
- Carpenter's glue.
Prepare the timber
Saw off the ends of the workpiece according to the dimensions exactly at right angles. Using a plane, adjust the plane of the lower end of the beam to a square. Remove 5 mm wide chamfers from sharp edges.
Make a shoe
Transfer the dimensions of the workpiece from the drawing to the steel sheet.
- You can simply align the timber vertically installed on the metal and trace the outline with a pencil.
- Depending on the thickness of the plate, cut the workpiece with metal scissors or cut out the excess with a grinder. Remove burrs with a file, holding the part in a vice.
- Mark and drill holes for the screws, make recesses for the caps with a countersink or a drill of a larger diameter.
- Sand the surfaces with sandpaper.
Bend the wings of the workpiece in a vice, which will be easy to do with the first two opposite sides. When bending the two remaining sides, the vise jaws may turn out to be wider than the shoe, then use a timber prepared for tamping.
Secure the shoe
- Check the fit of the steel plate on the beam, if necessary, tap the metal or sharpen the wood. The shoe should fit snugly against the end on all planes.
- Drill holes for screws in one wing, pointing the drill at a slight angle into the wood, and tighten the screws.
- Turn the beam over to the opposite side and fasten the other wing in the same way. Make sure that the shoe does not move away from the end.
- When drilling subsequent holes, guide them past the already screwed in screws.
Set the handle
Mark the drilling center at a distance of 100 mm from the top end. Select a drill bit with a diameter 2 mm smaller than the cross-section of the handle. Make a through hole perpendicular to the surface of the beam.
- Even with careful drilling, the outer parts of the hole will be slightly larger than the inner diameter. Sharpen the wood with a file, periodically trying to insert the handle into place.
- At the same time, correct any possible misalignment of the hole relative to the plane of the beam. Achieve a tight (but without significant force) fit of the handle, and if necessary, lightly trim the stick. Do not try to hammer into the handle - the wood may split. Place the stick in the beam and make marks.
- Apply glue to the sides of the hole.
- Place a pen on the marks and wipe off any excess glue. Drill a pilot hole and secure the handle with a long screw.
- After the glue has hardened (according to the manufacturer’s recommendations), the manual tamper is ready for use.
After use, clean the device from dust and store it in a place protected from rain and snow. Over time, the bottom of the tamper wears out; monitor the condition of the metal lining and change it in a timely manner.
Materials used
A suitable material for homemade manual tamping is a square beam with a side of 100 or 150 mm. It will be difficult to work with a round log in the corners and will have to be compacted with a significant overlap of the previous impact point.
It is not at all necessary to take new lumber; a used lumber will do. The main thing is that the wood is free from rot and splits. Choose a piece of timber that you can lift. The height of the manual tamper can be waist-high or chest-high, depending on ease of use. If you have no experience working with this tool, take a longer block, try it out and shorten it if necessary.
Drawing of a manual tamper for soil compaction.
Materials for the manufacture of manual soil compaction.
Recommendations
Before starting tamping, you need to familiarize yourself with the weight of the vibrating plate, as this affects the type of work and its volume. To compact the soil, you should opt for a vibrating rammer. And for sand, crushed stone or a sub-concrete base, a slab is used. Large fields for football, golf and other sports are compacted with professional machines weighing from 50 to 100 kg.
Weighting agents are added to homemade structures. The weight material can be water, cement or sand.
Before starting work, all gasoline engine structures are constantly tested for reliability. It is important to regularly remove carbon deposits from candles, which will increase their service life. The first time the oil is changed after a day of work, then the period is extended to 3-4 days. For cases where work is being done at a depth of a meter or more, it is worth using the help of another person.
How to assemble a vibrating plate yourself
Materials
- Sheet of steel measuring 50x80cm and thickness 8 mm;
- An area vibrator and an electric motor for it, for example IV-98E. Some craftsmen build vibrating plates with a washing machine motor
- Two pieces of channel up to 45cm long;
- M10 and M12 bolts with nuts and washers;
- Metal pipes 1.5 m long and 20-25 mm in diameter;
- Shock absorbers.
Tool
- Welding machine,
- hammer,
- grinder with cutting wheels,
- drill and a set of metal drills for it,
- set of wrenches,
- tape measure and marker.
Step-by-step instructions for assembling a vibrating plate
- On the steel sheet, cuts are made on both sides approximately 5 mm deep, this is enough to bend the sheet. Moreover, the incision should be 10 cm from the front, and 5 cm from the back.
- Bend the edges of the sheet at an angle of 20-30 degrees, and weld the bend points.
- The prepared channels are welded parallel to the bent edges. The distance from the center line of the sheet to the channels is about 5-10 cm.
- A vibrator is mounted in the center of the channels, securing its legs using an electric drill and bolts with nuts and washers;
- Shock-absorbing cushions are attached to the slab;
- A U-shaped handle is formed from the pipe, at the edges of which holes for bolts are drilled;
- Using metal corners, the handle is secured to the sole through shock absorbers;
- Connect the power cable and provide start-up protection.
A vibrating plate made in this way will have a mass of about 60 kg. For ease of transportation, you can add an axle with wheels to it.
Advice! If you want to increase the weight of the vibrating plate, you can weld several metal sheets or reinforcing rods to it.
Before starting the structure for the first time, check all its components for secure fastening or absence. damage and chips. Keep it clean and your homemade vibrating plate will last a very long time.
If you have chosen a gasoline engine for the mechanism, you will have to clean the spark plugs more often, check the oil level, and change filters.
The first time the oil should be changed after 25 hours of operation, after which it can be done after 80-100 hours. It is better to fill the oil with the engine warm but turned off.
By making a vibrating plate with your own hands, you can save up to 10,000 rubles.
Homemade vibrating plate from scrap metal
I found a 10mm slab meter by meter in the bins of the garage. I decided to make a vibrating plate, anyone who has built it knows how necessary it is.
The 1.5kW 380 motor was just in stock.
Of all the costs:
- — 2 bearings for the Niva transfer case (460r),
- — 2 pillows ICE 2101 (500r),
- - pump pulley (180r),
- — Niva generator pulley (200r)
- and starting capacitors for switching the motor to 220v (1200r).
Calculation of capacitors 7 microfarads for every 100W of motor, total 105-110mF.
The rest was all at hand:
- It's a 50 pipe and a bunch of old garage sheds. An eccentric vibrator was made from these canopies and pipes. The bearing housing was made from the same pipe.
- A gearbox support from some jeep was also useful for the third engine mount.
- The photos show the making of the eccentric, I’ll post the whole thing and the video later. I already started the rammer as I wanted.
Control handle and vibration damping system
During operation, thanks to the front location of the eccentric and the resulting vibrations, the platform with the engine installed on it begins to move along the surface independently. But to set the correct direction of movement, a control handle is needed.
According to its design, it can have one or two inclined posts with a transverse handle-crossbar.
It is recommended to install a vibration damping device in the upper part of the handle so that vibrations are not transmitted to the hands during operation. You can use springs as protection; the stand itself can be made of two pipes, one of which will go inside the other. The springs are fixed by steel rings installed on the pipes.
If you have the financial opportunity, then instead of a homemade spring structure, you can install silent blocks from a passenger car. This will provide sufficient vibration damping, and the structure itself will be less noisy.
Engine selection and installation
When making a vibrating plate with your own hands, diesel engines are usually not used. Yes, they are reliable and durable, diesel fuel is cheaper than gasoline, but these engines are too expensive and bulky for a small home machine. The most popular mechanisms are those with a gasoline internal combustion engine and with an electric drive.
The gasoline engine makes it possible to perform work regardless of the presence of a nearby energy source. This vibrating plate is in demand among small construction teams performing contract work on private development sites.
To carry out work within the personal territory, it is better to use a tamping machine with a 220V electric motor. It operates much quieter, does not require refueling, and the power supply can be easily provided through an extension cord that can be extended to any location on the site.
The electric motor is fixed to a welded channel using bolts and connected to the vibration mechanism using a belt drive. If the vibrator eccentric is connected to the motor with a rigid connection or mounted on a shaft, then the motor bearings will constantly fail due to vibration effects.
The structure of the model with a gasoline engine.
The center of gravity of the engine must be on the central axis of the vibration platform. If this is not done, then during operation the vibrating plate made by yourself will constantly move to the side and you will have to make additional efforts to keep it in the desired direction. Vibration-damping pads made of thick rubber must be placed under the motor feet.
Possibility of reverse movement
Movements of a homemade vibrating plate made as described above are only possible in one direction. Therefore, after walking a certain distance, you have to turn it around and only then move in the opposite direction. This reduces the speed of work and requires additional physical effort on the part of the operator.
In order to provide the vibration machine with the ability to reverse movement, it is necessary to install a device that changes the direction of rotation of the motor. After its installation and connection, the vibrating plate will be able to move in two directions.
When the edge of the treated area is reached, the operator turns off the engine and starts rotating it in the opposite direction. The vibrator eccentric will also become reversible and provide the machine with a return movement.
Providing water irrigation
If the soil or bulk materials are moistened with water during compaction, the compaction will be better, and the platform itself will not stick to the surface. This can be especially effective when rolling asphalt concrete pavements.
In order to ensure such wetting, a container with water is installed on the platform, and on the front curved part there is a perforated tube connected to the container through a hose.
Safety precautions at work
Compaction of soil with a vibrating plate must be carried out in compliance with safety precautions. Among the many recommendations, the following basic rules can be highlighted.
- During work, it is necessary to use personal protective equipment: appropriate clothing and shoes, glasses, headphones, and a hat.
- Before starting operation, you need to check the equipment you are using for external damage: if any, they should be eliminated first.
- It is prohibited to leave operating equipment unsupervised; the operator must be positioned behind it and promptly move behind the unit.
- Every 40 minutes you need to organize a break of about 10 minutes to prevent operator fatigue.
- You cannot further speed up the mechanism by applying additional force.
- If you need to work on an inclined surface (when the angle does not exceed the norm), then the operating personnel must stand above the unit, moving from top to bottom.
- It is prohibited to operate the technical device near sources of explosive or flammable materials.
- When the vibrating plate overturns, it should first be turned off and only then put into working position.
- The unit can be deployed with one hand.
- To prevent injury, you should keep your feet and hands away from the working base of the stove.
- If you collide with any obstacle, you need to stop the unit, and then eliminate the obstacle and possible damage caused by it.
- It is required to be no closer to the edges of trenches, pits, ravines and other excavations than the minimum permissible distance, or better yet, further away.
- It is strictly prohibited to allow people under the influence of drugs, alcohol, or psychotropic drugs to work.
It should be taken into account that the higher the center of gravity of the vibration equipment (and the smaller the support area), the easier it can tip over. This is very dangerous for the operator. You should also be very careful when turning on equipment that is not equipped with a soft start function.
To increase the degree of safety of work, especially in confined spaces, it is recommended to give preference to models with the possibility of remote (remote) control, despite their high cost.
The use of a vibrating plate is required when carrying out all construction activities that involve compacting loose soils. It is necessary to take into account the characteristics of the materials being rammed in order to achieve a high-quality result. It is necessary that the maximum depth of the poured layer corresponds to the thickness that the operating unit is capable of compacting. In any case, safety must come first. Failure to follow these simple rules along with inattention can result in serious injury.
Vibrating plate configuration options
Nutrition classification
- electrical,
- diesel and
- gasoline vibrating plate.
Electric. Electric is considered the most economical. This is exactly what they recommend collecting with your own hands for your own household.
Moreover, in terms of technical characteristics, vibrating plates with an electric motor are in no way inferior to their competitors. The only downside is the condition of having an accessible electrical network.
Gasoline. It will cost more than electric ones, but cheaper than diesel ones.
However, it will be more profitable to buy fuel for diesel engines, although the engine itself will be the most expensive of the three described.
Also, its disadvantage will be high noise, which reduces comfort at work.
The power of the installed motor must be sufficient to operate a heavy slab. Otherwise, the latter will load in bulk material.
Classification of vibrating plates by weight
The mass of the vibrating plate will be the primary determinant for the selection of component parts if you make the mechanism yourself.
Highlight:
- Lightweight slabs. Weighing 75 kg. For processing layers up to 15 cm thick. Such slabs are used for landscaping work, laying paving slabs, and damping polyurethane mats.
- Universal plates. Their weight ranges from 75 to 90 kg. The maximum layer to be treated is 25 cm. They are used for landscape work, repair of road surfaces, including patching on asphalt.
- Medium-heavy. Weight 90-140 kg. The thickness of the treated layer is up to 60 cm. Application - laying road surfaces in layers, backfilling trenches along the perimeter of the foundation.
Classification by direction of movement
According to the direction of movement during the compaction process, vibrating plates can be straight or reverse.
Straight lines can only move forward, and if a second pass over the compacted layer is necessary, such a machine will have to be turned around. And this, albeit small, is still a waste of time.
Reversible vibrating plates can move both forward and backward. They give higher performance. Typically, devices with slabs weighing more than 100 kg are equipped with reverse.
Manufacturing options for basic elements
The design of the vibrating plate is quite simple. It consists of four main nodes:
- engine;
- slabs;
- frames;
- vibrator.
Engine
The following can be used as a drive for a homemade vibrating tool:
- electric motor;
- gasoline or diesel internal combustion engine (ICE).
It is recommended to choose an electric motor for the vibrating plate that you plan to assemble with a power of 1.5 to 2 kW. In this case, the rotation speed should be from 4000 to 5000 rpm. If the power of the electric motor is less than the specified value, then this will affect the performance of the created unit in the direction of its reduction.
The electric motor is the most expensive part of a homemade installation. For home use, it is better to buy single-phase modifications of electric motors, for example, as part of IV-99E or IV-98E vibrators, operating at a voltage of 220 V. The electric motor can also be removed from old unused equipment, for example, from a drilling machine. It is only necessary that it matches the power and speed.
If you equip homemade equipment with an electric motor, then to increase the safety of the work, it is recommended to install separate protection, for example, a differential circuit breaker or a residual current device (RCD).
The automatic device, in addition to preventing electric shock to the operator, also turns off the equipment in case of overload or short circuit in the circuit.
A homemade vibrating plate can also be equipped with an internal combustion engine. If you buy it, it is recommended to give preference to single-cylinder three-stroke engines from Honda. An internal combustion engine from a chainsaw or walk-behind tractor is also suitable.
Plate and frame
From the engine, movement is transmitted to the vibrator by a belt - it is mounted on pulleys. By changing the dimensions of the latter (diameter), you can set the required speed of the vibrator. A car belt is suitable for a belt drive. The plate is made of steel or cast iron sheet with a thickness of 8-10 mm. The rest of the structure is located above it. To make the frame, use metal corners 5 by 5 cm or larger.
Vibrator
A vibrator for a vibrating plate can be purchased factory-made or made independently in various ways. One of the options for a homemade vibration unit will be discussed in the next paragraph.
Additional structural elements
Light (up to 75 kg), universal (75-90 kg) and medium-heavy (from 90 to 140 kg in weight) models of equipment without remote control are equipped with handles made of metal pipes. With their help, the operator sets the direction of movement.
For ease of transportation, the units are also equipped with wheels. They can be removed if necessary. To move a homemade stove, you can take wheels, for example, from an old wheelbarrow.
Advantages of a homemade tamping machine
The main advantage of a home-made vibrating plate is its low cost and the ability to perform high-quality and efficient work. The simple design ensures the reliability and durability of the mechanism.
In addition, a homemade vibrating plate allows you to:
- Safely tamp any surfaces;
- reduce the amount of manual labor when performing work;
- improve the quality of footpaths and platforms;
- It is good to compact dry cement and semi-dry concrete mixtures when laying them.
Having a mechanism for compacting loose soils and bulk materials will allow you to carry out any amount of landscaping and exterior design work.
Torque transmission
It is recommended to use a soft V-belt drive as a transmission to transmit torque from the engine to the vibration mechanism. It will ensure reliable rotation of the eccentric and protect the motor bearings from the effects of vibration.
It is recommended to use double-belt pulleys. This will give greater grip to the belts and ensure trouble-free operation in the event of a break in one of the belts.
To protect against possible injuries, the belt drive must be covered with a protective cover, and if this cannot be done, then a bumper guard must be installed.
The gear ratio and the required pulley diameters depend on the engine speed and should ensure that the eccentric rotates at a frequency of about 180 rpm. In this case, 3 impacts on the ground will be made every second. If you do not have experience in such calculations, then you will need to contact specialists.
Possibility of reverse movement
Movements of a homemade vibrating plate made as described above are only possible in one direction. Therefore, after walking a certain distance, you have to turn it around and only then move in the opposite direction. This reduces the speed of work and requires additional physical effort on the part of the operator.
In order to provide the vibration machine with the ability to reverse movement, it is necessary to install a device that changes the direction of rotation of the motor. After its installation and connection, the vibrating plate will be able to move in two directions.
When the edge of the treated area is reached, the operator turns off the engine and starts rotating it in the opposite direction. The vibrator eccentric will also become reversible and provide the machine with a return movement.
Final work
After assembling the slab, all metal parts must be primed and painted to protect against corrosion. Securely fasten the supply cable to the control handle to prevent the possibility of running over it. The engine switch must be located on the structure itself to provide an emergency stop during operation.
After this, the vibrating plate made by yourself must be tested. Freshly dug soil is best suited for this. Testing on bulk material will not allow you to test operation at full load.
As you can see, it is quite possible to make a vibration machine yourself. But for this you need to have basic knowledge and experience in plumbing and welding.