The issue of floor leveling is acute during any renovation. And it’s good if previously a cement screed was made under the base and it was immediately of high quality. Then you can avoid the need for additional floor leveling. But if there is no such screed, or there is some other reason that requires leveling the floors, you still have to solve this issue somehow. And floor leveling slabs, which come in several types, sometimes become the ideal solution to the problem. Let's see what they are and how they are installed.
Floor leveling slabs
Preparing old coating
Before laying pressed particle boards on the floor, it is necessary to prepare the old surface. Special equipment will help remove paint from wooden boards or even remove them if possible. The following is a process consisting of step-by-step steps:
- the old coating is removed;
- the floor is treated with a primer;
- OSB sheets are installed;
- strengthened with nails or self-tapping screws.
When there is a need to install a raised floor for communications, for example, in an office, then a good option is to lay OSB on a wooden floor with a pre-designed frame. Sheet flooring material is placed on top of it.
Another problem home owners face is squeaks from old floors. Here, no matter how you level it, the sounds when walking will not go away. In order not to have to redo the repair in the future and to prevent the boards from creaking, they are nailed to the joists, each separately. The screws are twisted at an angle towards the joists.
Floor installation
Application area
When laying OSB on the floor is used, you should understand for what purpose this is all being done. There are main areas where this material is used:
- Use as a floor finish. In addition, you can make a rough version of the floor on joists.
- Leveling the surface. After laying such material on a concrete or wood base, you can easily begin laying any type of flooring.
- Noise insulation. OSB board can absorb almost any type of noise.
- Thermal insulation. The material is based on 90% wood chips, that is, a natural component. This indicates high thermal insulation properties. The heat does not leave the room, and besides, it is perfectly maintained at the required level.
OSB floor installation
At the same time, it is worth paying attention to the fact that there are enough technologies that make it possible to fully carry out installation on various substrates.
In what cases are OSB sheets laid on the floor?
OSB is installed on the floor under any finishing material. A backing made of wood sheets allows you to level the base and extend the life of the floor covering, protecting it from wear due to interaction with the floor. Often this is how the floor is prepared for linoleum, laminate, parquet, and carpeting. It is not always cost-effective and relevant to perform a leveling screed, so leveling with OSB boards becomes the only correct solution.
When to cover the floor with OSB slabs:
If there is good insulation of the base in the room and it is impossible to fill the floor with concrete. If the housing is located in a region with a large minus in winter, which requires additional insulation of the cement screed using a layer of OSB or an artificial void using sheathing and a layer of insulation. If there are noticeable irregularities (holes, chips) and other defects that can be noticeable under the decorative coating and will contribute to its rapid deterioration. When it is important to make the floor resistant to mold, rodents, and other negative influences. When leveling the floor using OSB boards is more financially profitable than other options for preparing the base for laying the finishing coating.
OSB can be laid on both concrete and wooden floors, on a metal frame, and other types of durable foundations.
Application and material selection
DSP boards are very often used in the repair and finishing of floors, but they do not act as a finishing coating, but serve only as a basis for other materials. They are ideal for laying ceramics, carpet, linoleum and other materials that require a flat base. Moreover, if we compare the cost and labor costs of installing a conventional screed and laying CBPB, then the latter win. With their help, you can do an excellent job of leveling the rough foundation with a minimum of effort.
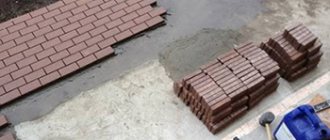
Laying CBPB boards on the floor
DSP slabs can be laid on top of a concrete base, and on logs or wood flooring. In all cases, the material will serve well for many years. You can also make dry floor screed from DSP. They are also quite compatible with the base heating system, unlike the same OSB, which can be used only with certain restrictions.
On a note! DSPs are also suitable for creating partitions in rooms along with plasterboard sheets.
As for the choice of sheets, for the floor it is better to take those that have a thickness of 10-40 mm, no less and no more. The initial curvature of the floor can play a big role here. Good CBPBs should have the following physical characteristics:
- density – 1300 kg/m2;
- humidity – 6-12%;
- roughness – no more than 80 microns;
- tensile strength – 0.4 MPa;
- liquid absorption – 16%;
- swelling in water during the day – no more than 2%.
Options for installing DSP floors
Why OSB boards?
For high-quality leveling of a wooden floor, you can use various materials, but OSB boards are preferred by people who decide to carry out high-quality repairs in their home.
The main advantages of this type of coating:
- Perfectly flat surface.
- Moisture resistance, due to which the method is also applicable for rooms with high humidity.
- The strength of the slabs allows them to withstand long-term loads, not deform under the influence of irregularities from below, and reliably hold fasteners.
- Large surface area and easy to use.
- Affordable cost of materials.
To ensure a durable and high-quality rough floor finish, it is better to give preference to OSB-3 or OSB-4 boards with additional E1 markings. This material consists of 96% natural components, is environmentally friendly and can be used in residential areas.
Creating a subfloor from OSB on joists
Laying OSB on wooden joists is the easiest way to get a durable and reliable subfloor. This technology is especially appropriate for existing columnar, pile, or pile-screw foundations. Work order:
- Logs are installed on the foundation. The lag pitch must correspond to the thickness of the OSB boards used (the larger the pitch, the greater the thickness).
- Perform rough rolling of the floor. To do this, retaining bars are nailed along the joists, and OSB boards are laid and secured on them. The surface facing the ground is covered with waterproofing preparations, for example, bitumen mastic.
- A layer of vapor barrier is laid on top of the OSB.
- Thermal insulation material is laid, for example, polystyrene foam, mineral wool slabs, ecowool, etc.
- Cover the insulation with another layer of OSB. Fastening is carried out in the same way as when laying OSB on logs on an existing concrete base (the technology is described in the previous paragraph).
At this point the work process is considered completed.
Selecting the required OSB board thickness
For the floor, you can use sheets with a thickness of 9 mm or more In order for the base of a floor made with OSB slabs on logs with your own hands to be in no way inferior in strength to the screed, you should select the correct thickness of the sheets and correlate them with the pitch of the logs. The material made from pressed chips is stronger than solid wood, so the ratio in this case is slightly different.
How to make floors on joists in an apartment?
For flooring, sheets with a thickness of 9 mm or more can be used. With this size of the slab, the pitch between the load-bearing bars should not exceed 25 cm. A thickness of 16 mm corresponds to a log pitch of 35-40 cm. A sheet 22 mm thick will not bend at a distance between the bars of up to 60 cm. With a beam pitch of 80-90 cm, OSB with a thickness of 80-90 cm will be appropriate 25 mm.
Types of slabs
OSB boards are presented in the form of layers of glued wood chips, which are also very strongly compressed. Usually everything is done in three layers. The chips are placed perpendicularly inside, and along the outer layers along the entire slab. The following main types of OSB boards are distinguished:
- OSB-2. They are characterized by a reduced level of moisture resistance, which indicates their use exclusively inside the building in rooms with low humidity levels.
- OSB-3. You can call it a universal material. It looks great and performs its functions both indoors and outdoors, regardless of the humidity level. Strength and other characteristics allow it to be used in any direction of construction. They withstand external loads from the location of furniture, constant flow of people, etc.
- OSB-4. In addition to excellent moisture resistance, the board is also distinguished by a high degree of strength. With their help, load-bearing structures are constructed, including in rooms where moisture is constantly present.
As for the thickness of the slab itself, much depends on the purpose of use. If you need to get rid of minor defects in the floor surface, then 10 mm will be enough, but for significant potholes - 10-15 mm. An even greater thickness will be required to install a floor on joists. In this case, you need to choose a layer of 20-25 mm.
Preparing the base
A correctly completed preparatory stage is more than half the success of floor leveling work. First, a thorough examination of the wooden surface is carried out. This is done using a bubble or laser level. All protruding and loose parts are marked, this will make it easier to strengthen them.
The next step is to securely fix the boards. Some experts recommend doing this using dowels, but a more reliable option would be to pull loose elements with self-tapping screws to the joists. The old coating must be secured as securely as possible. To do this, you can use several fasteners in one area. The ideal result is when the “walking” floor fragments are recessed or are level with the rest.
Some people recommend removing the old paint layer with a sander. You need to know that this is only necessary in areas where there are obvious blisters in the paintwork. In fact, the presence of old paint is not critical; you can lay slabs on it. In this case, it is necessary to remove all large contaminants.
Recommendations for laying OSB
Two types of installation are used: on logs and using point support. The steps are not complicated, you can do it yourself. Logs are wooden beams laid from one wall of the room to another, in one direction. Point fastening is the installation of small blocks, in the form of a grid across the entire floor, with a cell size of up to 35 centimeters. With a sheet thickness of 20 millimeters and above, you can increase the distance of the slabs to 40 centimeters. The frequency of the supports will provide resistance to dynamic stresses on the surface.
Installation of OSB to joists
Holes are made in the floor sheets in the corners of the room to allow air to pass under the floor and prevent mold from occurring. All joints with walls and between panels, as well as air duct openings, must be sealed with gauze and PVC glue so that insects living under the floor do not pass upward.
How to lay OSB sheets on the floor
The technology for installing OSB panels on a horizontal surface is quite simple to implement and even a non-professional can handle it. The basic principle when laying floors from any material is to create a durable, even surface. When repairing floors using OSB boards, three options for laying them are most often used:
- direct fastening to cement-concrete screed;
- on the floor made of old wooden boards;
- installation using lathing made of wooden logs.
All three possible methods have some nuances that should be taken into account during the work.
Laying OSB on a floor with a concrete surface
The method is widely used in apartments of multi-storey buildings - where the base will not absorb dampness and excess moisture. This will keep the wood-shaving structure in its original form for a long time. The purpose of this method is to create a perfectly flat surface for decorative cladding and insulation of stone slabs.
The cement-concrete screed must be perfectly leveled before work begins. Residual roughness, cracks and local potholes are acceptable.
You can learn more about the technology for leveling a concrete floor in the article: leveling a concrete floor.
The process of laying OSB sheets on a concrete floor is performed in the following sequence:
- The first step is to clean the work area well. You can use a regular vacuum cleaner for this. The sheets will sit on the glue and the dust-free surface will give a high degree of adhesion.
- Afterwards, the cleaned base should be coated with a primer composition. This will help the glue adhere better. In addition, the priming process creates a fairly dense film that will prevent the screed from becoming dusty during use.
- Then, they begin to lay OSB on the floor. If necessary, the slabs are cut. It is more convenient to do this using a cutting or circular saw.
- The back side of the board is impregnated with a moisture-repellent primer with antiseptic properties and dried.
- An adhesive composition is applied to the treated surface. It should be chosen only based on rubber. To distribute the mixture evenly, it is convenient to use a notched trowel.
- Additionally, the panels must be secured with concrete dowels. This is done to ensure guaranteed and safe operation. It is best to drive the dowels along the entire contour of the slab. The distance from the edge should be kept at 5 cm, and the interval at 20-30 cm. With a perfectly leveled and strong screed, it is enough to fasten only in the corners, but this takes into account the fact that a good adhesive is used.
- Compensator gaps are left between adjacent sheets. Their width should be about 3 mm. There is also a 12 mm gap around the entire perimeter of the room. Subsequently, they will prevent deformation of the floor surface.
- Finally, thoroughly clean the new surface. The joints are filled with polyurethane foam or putty if paint or varnish is subsequently going to be applied. After this, the floor should rest and dry. The foam is cut off, the putty is sanded and cladding can begin.
Laying on a concrete base
If it is necessary to level the floor with an OSB slab, you should carefully prepare the base for work. Fill all possible cracks and potholes, get rid of defects as much as possible. There should be no garbage. After all, the mounting adhesive must have excellent adhesion to the base. It would be a good idea to cover the concrete floor with a primer to create a dense film on the surface. During operation, this will relieve the screed from dust.
The next steps are to lay out the sheets over the entire surface of the room. Along walls and other structures, slabs should be cut to size. The reverse side of the slabs is covered with parquet glue, which is based on rubber. To ensure that the glue is applied evenly across the entire width of the material, a notched trowel is used. After this, the sheets are glued to the concrete floor.
To ensure the reliability of the entire structure, the OSB board is fixed with driven dowels. To ensure that everything here is strong, the fasteners are located at a distance of 20-30 cm from each other. The exception here is a flat floor and a dry room, when dowels only in the corners of each of the slabs will be sufficient.
There should be an expansion joint between the plates, about 3 mm wide. There is also a seam between the wall, but slightly larger - 12 mm. These gaps will help compensate for the expansion of the slabs under the influence of temperature changes and changes in humidity. No swelling of the entire structure will occur during use.
The final stage is to clean the surface from dust and debris. Any seams along the walls in the room are sealed with polyurethane foam. The entire “cake” will dry in about 3-4 hours. More accurate data is shown in the instructions from the manufacturer. If there is excess foam, it should be cut off with a sharp knife. In the future, you can carry out finishing and flooring work.
Preparing the base
A correctly completed preparatory stage is more than half the success of floor leveling work. First, a thorough examination of the wooden surface is carried out. This is done using a bubble or laser level. All protruding and loose parts are marked, this will make it easier to strengthen them.
The next step is to securely fix the boards. Some experts recommend doing this using dowels, but a more reliable option would be to pull loose elements with self-tapping screws to the joists. The old coating must be secured as securely as possible. To do this, you can use several fasteners in one area. The ideal result is when the “walking” floor fragments are recessed or are level with the rest.
Some people recommend removing the old paint layer with a sander. You need to know that this is only necessary in areas where there are obvious blisters in the paintwork. In fact, the presence of old paint is not critical; you can lay slabs on it. In this case, it is necessary to remove all large contaminants.
Attention! The main part of the preparatory process is fixing the old wooden covering. It is this stage that should be given special attention
Advantages compared to other materials
Despite their simplicity, OSB boards are multifunctional. They are used in various areas of the construction industry, in rough and fine finishing, construction of structures and floors. This material has a lot of benefits useful to the consumer:
- Simplicity. There is no need to purchase special equipment or tools for installation. Anyone can do this kind of work.
- Convenience. Thanks to its dimensions, one OSB board can level a large area of the room. The length is designed for installing logs in increments of 56 centimeters, which allows you to insulate the space under the floor.
- Cheapness. The cost of OSB is optimal, and the price-quality ratio will please consumers.
- Durability. The slabs are well fixed with popular fixing elements, do not deform, do not become loose and can withstand the load perfectly.
OSB is one of the newest and most practical flooring materials, which is gaining popularity every year. Now you don’t need to think long about how to level the floor using OSB. Compared to other similar products, they are resistant to humidity, wear and mechanical stress. An excellent example for its price category, meeting the requirements for building materials, and, importantly, multifunctional.
Purpose
OSB floor boards are used as a basis for decorative coatings:
ceramics;
OSB boards use binders based on polyurethane resins without the presence of formaldehyde
- laminate;
- linoleum;
- carpet;
- parquet
Main tasks:
- Formation of a flat base surface, including a rough base mounted on support beams.
- Elimination of differences in a wooden or concrete base for the subsequent installation of finishing coatings.
- Providing thermal insulation of the floor, contributing to the creation of a comfortable microclimate in the room.
- Reliable protection from external noise, the penetration of which is hampered by the three-layer structure of the base.
- Effective insulation against moisture contained in concrete foundations.
What is OSB?
The meaning of OSB is Oriented Strand Material.
Today, it is a fairly common option for floor coverings.
The board consists of numerous thin pressed layers of wood particles, layer-by-layer glued with specialized adhesive mixtures based on pine resins. The strength of OSB comes from the right technology.
The gluing of the slab occurs in stages, i.e. outside, wood raw materials are placed along the length, and inside – vertically at a right angle. It is this technological process of manufacturing the slabs that adds confidence in choosing a new floor for your home, as well as resistance to use and humid environments, as it can withstand short-term exposure to water.
Laying features
To properly sheathe various surfaces with oriented strand board, you must follow a number of recommendations. The list of general rules according to which panels should be laid includes several important points.
At the initial stage, careful processing and leveling of the base surface, as well as its marking, are carried out.
Their thickness depends on where exactly the slabs will be installed (floor, walls, ceilings, roof).
Particular attention is paid to the choice of material for the sheathing and (or) frame. Taking into account the thickness of the sheets and the condition of the surface, fasteners for timber and metal profiles are selected
Taking into account the thickness of the sheets and the condition of the surface, fasteners for timber and metal profiles are selected.
The interval between screws (nails) in the middle part of the panel should not exceed 30 cm.
Sheets of small thickness should be fixed starting from the middle. This avoids sagging.
The length of the self-tapping screws should be 2.5 times the thickness of the slabs being laid.
It is also worth considering the design features of the OSB ceiling space. After surface treatment, the algorithm will include several stages.
Calculation of room height and ceiling level, if insulation or soundproofing layer is provided. The recommended gap in this case is 10 mm.
Marking.
Installation of fasteners that will later support the entire ceiling structure. The optimal solution would be to use hangers - special devices that are fixed to the base surface using dowels or self-tapping screws. They are made from durable materials and are as reliable as possible.
Choice of material for the frame.
Installation of sheathing. The easiest way to do this is using a laser level.
And also at this stage it is necessary to pay attention to the wiring and installation locations of lighting fixtures
When all of the above operations are completed, proceed directly to the installation of the panels themselves. They are attached starting from one of the corners of the room. It is better to do this with an assistant.
On the floor
The easiest way is to lay the panels on a concrete base. In such situations, at the preparatory stage you will need:
- thoroughly clean the surface - the best solution is to use a vacuum cleaner;
- make a leveling screed if necessary;
- coat the resulting surface with a primer.
After this, the sheets are laid out on the floor of the room and the outermost elements of the future covering are trimmed. The panels are then glued to the concrete. At the final stage, foam the cracks around the entire perimeter.
If it is necessary to cover a plank floor with OSB boards, it will first need to be leveled as much as possible. The fastening elements in such cases will, of course, be self-tapping screws. By the way, sometimes the fastening points are puttied, and the coating itself is simply thoroughly cleaned and varnished.
The described sheet material can also be laid on joists
It is important to compare the thickness of the panels and the distance between the bars. To create a durable floor covering, you can take a slab with a thickness of 9 mm. Therefore, the lag pitch will be 250 mm
Therefore, the lag pitch will be 250 mm.
On the walls
Taking into account the laws of physics, many sheet materials, including oriented strand boards, are capable of withstanding greater loads in a vertical position than in a horizontal plane. This is primarily due to the direction of the fibers and gravity. It is for this reason that it is better to fix panels on wooden sheathing with nails. In this case, options with both ring and spiral cutting will be equally effective. However, when installing partitions that may subsequently experience increased loads, self-tapping screws should be used.
On the roof
Any roof is a multi-layer structure, requiring the presence of a sheathing or frame as the basis for the outer covering. When using modern soft materials, OSB panels act as the base. Often a solid surface is installed with gaps between the elements. The technology also provides for sparse lathing, calculated individually in each specific case, taking into account the characteristics of the roof.
The roof slabs are attached along the supporting beams starting from the bottom row
It is important that each sheet rests on at least two bars. In this case, the joints are located on supports. It is necessary to leave gaps of at least 2 mm between the sheets
Gaps of at least 2 mm must be left between the sheets.
Types and features of use
The scope of application of the sheets largely depends on what type they were purchased. But almost all of them are suitable for flooring.
GVL sheets can be laid on top of a heated floor system
Table. Types of GVL.
| Slab type | Characteristic |
| Standard | This is a fairly durable and high-quality material that is not afraid of fire. Often used for finishing absolutely any purpose premises. The material has the following dimensions - 2.5 x 1.2 m or 1.2 x 1.2 m and a thickness in the range of 10-12.5 mm. |
| Moisture resistant | This option is characterized by increased resistance to water, as it is treated with special substances. It is correct to call it by the abbreviation GVLV. It is usually recommended for use in places where the humidity level is higher than normal - kitchens, bathrooms, etc. You can also use it to equip an attic or basement. The dimensions are the same as a standard regular sheet. |
| Floor element | This option is produced by the well-known. In another way, gypsum fiber sheets are called superfloor. One such sheet consists of two ordinary gypsum fiber board sheets with dimensions of 1200x600x10 mm firmly glued together with a shift relative to each other. The sheets also have a rebated edge 5 cm wide. The thickness of one sheet of superfloor is 2 cm. Such sheets make it possible to easily make a rough prefabricated Knauf floor base. |
Leveling the floor with GVL sheets
Most often, such slabs are used for the production of dry screeds in houses. This allows you to avoid fiddling with a wet screed and not doing a lot of dirty work, and also provide a very light and even base without wasting extra time - you won’t have to wait for the screed to dry. Immediately after installing the dry GVL screed, you can begin finishing the floor.
As for installation, GVL can be laid on any surface. It is enough to follow the general rules of work. So, for example, if insulation was installed, then the GVL needs to be reinforced with an additional layer of expanded polystyrene or other material. It is also possible to lay GVL when planning a heated floor. Just don’t use thick sheets - they won’t let the required amount of heat into the room. The optimal thickness is 10 mm.
Adapted dry screed Knauf
There should be no gaps of more than 2 mm between the sheets during installation. And if linoleum or carpet is laid over the gypsum fiber board, then all cracks must be sealed with sealant. The edges of the sheets, if any, must be cut off from those sides that will adhere to the walls or ceilings.
Installation of GVL floor - dry screed
Step 1. First you need to clean the surface of the ceilings or subfloor from debris and remove all unnecessary things from the room.
Cleaning the floor from debris
Step 2. Next, you need to provide a waterproofing layer by laying plastic film on the floor. It needs to be laid with a slight approach to the walls. The individual canvases are connected to each other with tape.
The film must extend onto the walls
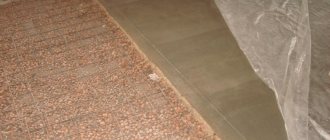
Step 3. Then you need to pour a layer of expanded clay onto the film, which is leveled.
Expanded clay backfill
Leveling the expanded clay layer
Step 4. Next, you must install the beacons according to the level. They can be made from aluminum profile. Using them, using the rule, you need to finally level the expanded clay layer.
Aluminum profile cutting
Expanded clay is leveled along the beacons
Step 5. Now you can start laying the floor elements. The edges of the sheets that will be located against the wall need to be cut off with a jigsaw. The first sheet should be laid on expanded clay in the far corner of the room.
Laying GVL
The edge of the sheet is cut off
Step 6. If necessary, GVL sheets can be trimmed with a jigsaw to achieve the desired size. It is also worth making cutouts for heating pipes and other communications.
Cutting sheets with a jigsaw
Pipe cutout
Step 7. Now you can place the next sheet. The edge of the previously laid sheet is first lubricated with special glue. Next, you need to lay the second sheet so that the edges of it and the adjacent sheet meet each other. It is worth pressing the joint a little with your hand.
Application of special glue
Joining sheets
Step 8. Additionally, the joints of adjacent sheets need to be twisted using wood screws.
Using wood screws
Step 9. Thus, you need to cover all the expanded clay with gypsum fiber sheets. The gaps between adjacent sheets will be minimal.
Expanded clay is covered with GVL sheets
Step 10. The gap between the wall and the outer sheets of gypsum fiber board can be sealed with polyurethane foam. The work is completed.
The gap is filled with polyurethane foam
Do-it-yourself self-leveling floor technology on a wooden base
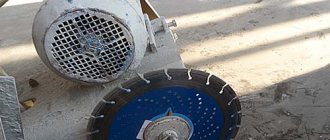
To fill the mixture you will need the following set of tools and materials:
- Belt, planetary (surface grinding) and/or angle grinding machine. It is better to rent professional series devices for 1-2 days. They are more powerful and operate in several modes;
- Fine-grained sandpaper for finishing sanding (from 180 to 600 units), as well as a belt or attachments for a sander (grain size - from 80 units);
- Plastic or wooden grater for sanding paper, hand scraper for small jobs;
- Construction vacuum cleaner;
- Hammer and nail puller;
- Sealant or repair putty for filling cracks and gaps;
- Waterproofing compounds or polyethylene film with a thickness of 150 microns;
- Damper tape;
- Roller or coating for applying coating waterproofing;
- Wide spatula or squeegee;
- Plastic bucket or container for mixing the solution;
- Construction mixer or drill with an attachment;
- Point beacons, laser level or water level;
- Needle roller for rolling the mixture;
- Paint shoes, gloves.
Dry screed made of cement bonded particle boards
This type of installation is used when there are noticeable differences in the height of the base. In this case, you cannot do without a leveling sheathing made of bars or metal profiles. The space between the base and the slabs is filled with bulk material, for example, fine expanded clay or sand. Work order:
- Using a building level, height differences are verified and the mark at which the layer of slabs will be located is calculated.
- A drawing of the sheathing is made taking into account the difference in the thickness of the bars, which will hide the unevenness.
- Waterproofing is laid on the surface of the base - most often a construction polyethylene film is used, which must be laid in at least two layers.
- A sheathing of guides according to the drawing is mounted on the floor. The bars are fastened together with self-tapping screws; the distance between the beams should not exceed half a meter.
- The layer of sand or expanded clay granules is filled, compacted and thoroughly leveled.
- According to a pre-calculated scheme, cement-bonded particle boards are laid out, which are fixed to the sheathing using self-tapping screws.
There are often cases when there are no large differences in height, but it is necessary to perform a rough leveling of the floor. In this case, dry screed is also often done, but without using guides. The slabs are laid on a layer of expanded clay or sand, in two layers, so that there is displacement of the joints. The plates are fastened together with self-tapping screws or adhesive.
Important
Dry screed ensures the leveling of difficult floors, while the lack of sealing prevents the formation of condensation. Due to the light weight of this coating, this is an ideal option for old houses where the condition of the floors does not allow the installation of a full-fledged cement screed.
Application of OSB boards in residential premises and construction
As mentioned earlier, this material has very wide applications. It is suitable for construction, repair, finishing and furniture work. Possible applications depend on the properties of each class.
Osb board - technical characteristics
- OSB 2 – suitable for the production of furniture and finishing elements. This OSB board is used for interior decoration. This is a typical joinery panel that will perform well in residential interiors. Thin versions with a thickness of 8 and 12 mm can be used as the main material for wall coverings. Slightly thicker panels (eg 15mm thick) are well suited for furniture production such as cabinets and also furniture shelves.
- OSB 3 – the most popular is OSB 3, which is characterized by numerous possibilities of use. In this case, it is possible to use OSB boards for the floor, internal walls and ceilings. The 22mm thick panel is also suitable for rigid roof cladding. Large sizes, combined with the stability of the material, make it possible to appreciate it at its true worth.
- OSB 4 is the most durable and versatile board, suitable for use indoors and outdoors. It is highly resistant to adverse factors and has very high strength, so it can be used in particularly difficult conditions. However, it is not as widely used as its Group 3 counterparts due to its higher price. In some cases, the price is worth it. OSB 4 is advisable to use for the construction of houses in a frame system, in the construction of formwork, as a backing and for rigid roofing coverings.
Which slab is suitable for the floor and roof?
Tongue-and-groove OSB is well suited for floors and roofs of houses. The tongue and groove connection is very convenient to use during installation work and ensures tightness. The flooring slab should have a thickness of 18 to 25 mm. The panels are laid perpendicular to the beams. You should also remember to leave a gap. Before installation, it is worth analyzing all the dimensions of the panels and cutting them to the desired format. The panel laid on the joists is fixed with special screws or ring nails.
The principles of installing panels on the roof are very similar. The thickness of the board depends on the pitch of the rafters. As a rule, panels with a thickness of 22 mm are used. It is also worth remembering that OSB roofing boards must be protected from the destructive effects of moisture. The maximum humidity of the slab during installation is 15%. To get this result, you need to store the material in a dry, protected area.
This is quite important because installing OSB elements that are too wet can lead to later cracks in the roof sheathing
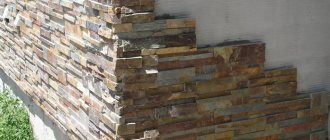
Wall finishing with OSB boards
The panels can be used for mounting the walls of frame houses. The preferred thickness is usually 12 mm. OSB can be mounted both horizontally and vertically. However, during installation work, you must always remember that gaps of at least 3 mm must be left around the arches of window and door openings. External frame walls require an additional layer of insulation. Mineral wool is usually used for this. OSB wallboard is usually secured using long ring nails or self-tapping screws.
Processing of slabs for finishing
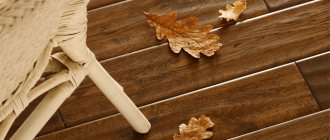
The floor is leveled, wood sheets are laid. Now we process them for finishing. Of course, if you are satisfied with the natural pattern of the OSB, the floor can be left as is, varnished, a plinth installed, and that’s all. Or you can put any other type of finish on top. The surface of the slabs and their processing characteristics are determined by the type of finish used that will cover them.
- Clean finish. Chip sheets are used in their original condition, but the surface must be protected from destruction and wear. Several layers of varnish or a special substance are applied on top to prevent the appearance of bark beetles and other insects.
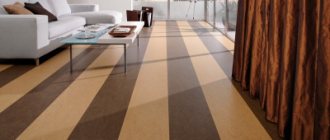
- Linoleum or carpet. Roll materials require a perfectly flat floor. Any differences at the joints and gaps negatively affect the operation of the linoleum, and it will not look very nice in appearance. Under the elastic carpet, cracks and other bulges from changes or screws will be felt. It is best to cycle the floor to achieve one level.
- Ceramic floor tiles. The base must be stationary, especially if the sheets are laid on joists. The surface is sanded with sandpaper or a metal brush, and the tiles are placed on a special glue that connects ceramics and wood.
- Laminate. This is a fairly rigid and durable material, equipped with a special fastening, so there are no special requirements for the floor. The main thing is that everything is smooth. These recommendations will help make the interior beautiful and practical, functional and durable.
Advantages
Any room can be brought to perfect condition if you use an OSB board. In some cases, you don’t even have to do any subsequent finishing of the subfloor. There are other compelling arguments in favor of choosing this material:
- Convenience. The size of one slab is such that it can cover a large area in the room. In this case, the logs can be located from each other at a distance of about 56 cm. This, in turn, allows you to place the selected insulation option between the logs.
- Simplicity. The work can be done on your own, even without the use of expensive equipment and tools. Only a minimum of knowledge in the construction industry is required.
- Reasonable price. If we compare it with other similar materials, OSB for a concrete floor will cost slightly less.
- Reliability. After fixing with fasteners, the plate remains in this place firmly and reliably. In addition, the fasteners fit perfectly into the structure and do not become loose during operation. Even over time, the shape and thickness remain the same, which allows them to withstand significant loads.
Installation on joists
You will not need to use leveling screeds to create a flat surface in the room if you purchase OSB boards. Time is saved due to the fact that you do not need to prepare a solution for leveling the floor yourself. This reduces the overall repair costs to some extent.
In this case, you will have to install the logs. In addition, materials can be placed into the created structure to improve the protective functions against moisture, excess sound and noise, as well as improve the thermal insulation qualities. In addition, the floor is leveled quickly and in the shortest possible time.
Attaching the logs to the concrete base is done using anchors or dowels. Depending on the thickness of the purchased OSB board, the distance between the logs will be determined. The thicker, the wider the distance. With a step of 40 cm, there should be a slab with a thickness of about 15-18 mm. If the distance between the logs is more than 60 cm, then the material itself must have a thickness of at least 22 mm. This is provided by the OSB floor leveling technology.
After installing such a structure, there will be a space inside that can be filled with various materials. It's mostly isolation. For the first cold floors, a thermal insulator in the form of mineral wool or polystyrene foam is ideal, and if there is a damp basement, vapor barrier films or membranes are ideal.
The placement of the slabs should be across the joists. We must not forget about expansion joints, which should be determined in the middle of the joists. Gaps are set not only between different slabs, but also along the wall in the room. The sheets used can be attached to the joists using nails or self-tapping screws. True, it is best to choose spiral or ring nails. Along the perimeter of the sheets, a fastening pitch of 15 mm should be maintained, and on intermediate supports - 30 mm. When using nails, measure the distance from the edge of the slab to approximately 10 mm. As for the size of the fastener, the length should be approximately 2.5 times greater than the thickness of the OSB sheet used. In this case, leveling the concrete floor with your own hands will be at the highest level.
Some rules for greater safety
The first time (about six to seven months) after installation, the most intense release of harmful fumes occurs. If you regularly ventilate the room, the negative impact on the body will soon begin to subside. But for greater safety, additional processing of the slabs is carried out.
If the work takes place in a children's room, then compositions with detoxifying properties are chosen as a primer. For common areas, simple water-dispersed paints, varnishes, wax, and penetrating primer are suitable.
Particular attention is paid to the ends. It is through them that the main amount of harmful substances is released
It is enough to saturate them with varnish or primer.
Priming is one of the safety measures that allows you to reduce the amount of harmful substances released
It should be taken into account that the rate of release of toxic elements is affected by temperature. The higher the indicator, the more formaldehyde in the air. The norm is considered to be 30 °C.
In general, there are two main ways that allow, without making excessive efforts, to rid the room of chemical components and saturate it with oxygen. Namely, frequent ventilation and the presence of indoor flowers.
OSB is not recommended for use in rooms where temperatures exceed 30 °C
Any modern building or finishing material that is made using chemical components can emit harmful substances. But manufacturers are constantly trying to keep these figures to a minimum.