Decorating a new house and renovating an old one begins with solving the main question: how to level the walls for wallpaper or painting. If this is not done, the fresh decorative coating will not look much better than the old one, and may soon peel off from the surface. Alignment makes the walls not only visually attractive, but also more durable, warm, and better at absorbing sounds. It can be done in different ways, the choice of which depends on the original condition of the walls: their integrity, strength, smoothness, deviation from the level, the presence of old finishing.
This condition of the old wallpaper indicates that there are problems with the walls. Source dekoriko.ru
Preparing walls for wallpapering
The main arguments for preparing concrete walls before wallpapering are the following:
- A porous surface will not be able to hold the wallpaper for a long time. This can be noticed when dismantling old wallpaper, which is easily removed in places where it is glued to the porous concrete surface. The prepared surface is smooth and has much better and stronger adhesion to the wallpaper.
- The prepared surface is free of irregularities, small depressions and bumps, so the appearance of the wallpaper looks very neat in any lighting.
- Good adhesion is created, thanks to which the wallpaper can remain on the surface for a long time, sometimes its service life reaches ten years.
- The appearance of dampness and fungus on external walls occurs due to neglect of the quality preparation of their surface. In the corners of the wall, under the plaster, which has cracks, cold air can enter, gradually destroying the finish and spreading mold, mildew and other troubles that can be avoided thanks to preliminary preparation.
Briefly about the main thing
When choosing the best way to level the walls for wallpaper, you must first determine their curvature and the general condition of the surface. If it is strong, stable and with slight deviations from the level, it is best to use putty. Curved walls with serious defects, as well as those in need of insulation and sound insulation, are leveled with plaster or plasterboard sheets. The plaster is applied not in one thick layer, but in several, gradually bringing the surface to the desired plane. Drywall can be glued to walls or attached to a pre-assembled frame.
First stage of preparation
The preparation of concrete walls depends on whether there is an old coating on them, or whether the walls have never been decorated.
Preparation for old wall coverings
The very first stage in carrying out preparatory work for wallpapering is dismantling the old covering. If you do not dismantle the old wallpaper, further measures to prepare the surface will not make sense.
The old wallpaper needs to be softened. If the previous wallpaper was paper, it should be wetted with a soap solution and wallpaper glue added. On vinyl or non-woven wallpaper, you need to make cuts in order to get to the paper base, which should soften the soap solution. After the wallpaper has softened, it should be removed with a metal spatula. If they are difficult to remove, you should moisten them again with soapy water.
If the wall was painted with enamel or oil paint, it should be cleaned with coarse sandpaper. Water-based paint is removed in the same way as paper wallpaper using a spatula.
If the previous wall finishing was plaster, you need to ensure its integrity by tapping for the presence of voids. Empty spaces are removed and plastered; if there are many such spaces, it is better to remove the entire layer and plaster the surface again.
Preparing walls in a new building
Before preparing the walls for wallpapering in a new building, a rough finish should be carried out, which, in turn, consists of several stages:
- Spray with plaster in a layer of 3 to 9 mm. It should have a consistency that can easily fill all the cracks and small holes. Preparation for plastering begins with wetting the wall with water.
- Applying primer in several layers.
- Finish coating with plaster with a layer of 2-4 mm.
- Leveling the surface with sandpaper.
Elimination of uneven walls can be done using a plaster mesh. To achieve maximum adhesion of the plaster to the surface, notches are made on a smooth concrete wall with a hammer drill.
Selecting an alignment method
You can level the walls with plaster, putty and drywall. The choice of method is not so much a matter of the personal wishes of the home owners as the need to give these structures all the required characteristics. Namely, heat and sound insulation properties, being in a vertical plane, strength and smoothness of the surface. If there is a need for hidden wiring and other communications, this must also be taken into account.
- First of all, the strength and integrity of the walls, especially the external ones bordering the street, are assessed.
The presence of through seams, cracks and other serious defects will require their elimination before leveling the walls for wallpaper. Moreover, such walls need to be repaired not only inside, but also outside, in order to protect them from atmospheric moisture, blowing and other negative influences. Without this, dampness and fungus will settle in the house, it will be cold, and no finishing will stick to the walls.
Such defects require serious repairs Source vop.ru
- The second factor influencing the choice of leveling method is the curvature of the walls: the deviation of their plane from the vertical, the presence of noticeable depressions and bumps, and peeling areas.
The degree of curvature is determined using a plumb line and any building level. If the deviation from the level and the depth of the unevenness is no more than 10-15 mm, you can get by with leveling putty on the walls. If they are larger, you must use plaster or drywall.
Checking the vertical level using a plumb line and tape measure Source legkovmeste.ru
Advice! It is better to assess the condition and curvature of the walls after removing the old coating, under which cracks, peeling plaster, wet areas and areas affected by fungus may be found.
- Also, the need to insulate them and lay communications influences how to line the walls with wallpaper.
You can insulate the walls by installing a heat-insulating layer and plastering it or covering it with sheets of plasterboard. It is easiest to lay pipes or electrical wires under them. But if the walls are fairly even, communications can be laid in grooves or specially made decorative boxes, so as not to reduce the area of the room with thick-layer finishing.
Even heating pipes can be hidden under a layer of plaster Source oboiman.ru
Stage two: primer
After completing the first stage, the preparation of the walls continues with their primer. It is needed to fasten the surface layer of the wall, penetrating deeply into the plaster or concrete. The wall surface begins to absorb moisture worse, which improves the quality of its coating. In addition, the primer removes dust, cleaning the surface. It must be remembered that the preparation of concrete at each stage must be accompanied by priming.
The primer is applied using a roller or brush until a white foam forms. If it absorbs quickly, additional layers are applied. After the primer has dried, the wall is rough leveled.
Removing old coating
Before you start gluing wallpaper, you need to completely clean the walls of the old coating. And whatever it is (wallpaper, decorative plaster or paint), certain rules must be followed.
- When removing old finishes, work with caution so as not to repair the main wall later.
- Get rid of absolutely all, even the smallest, particles of material, because they can spoil the final appearance of your new wallpaper.
- If there are driven dowels, screws or old nails in the wall, you must remove them.
The simplest task is to remove outdated wallpaper. A solution of warm water and dishwashing detergent will help you with this.
You can clean even a large room in a few hours. You will cope much faster if the coating was glued many years ago and began to come away from the walls on its own.
As a last resort, special liquids that can be purchased at hardware stores can help dismantle the wallpaper.
To remove other types of decorative coatings, you will have to put in more effort!
Final preparation
The final preparation of the walls includes sanding the putty surface with a metal mesh or sandpaper to remove small irregularities after the putty has completely dried, and final priming until it dries completely with the required number of layers.
This preparation of concrete walls is carried out by gluing paper, vinyl, non-woven wallpaper.
Tools
You will need to prepare the tools in advance so as not to waste time and simplify the process. The availability of tools depends on the nature of the old finishing layer and the quality of the coating.
Note!
Glass wallpaper - what is it? Pros and cons, types, features, characteristics, photos of design and combinations in the interior
Plain wallpaper - 150 photos of modern design. Rules for choosing and combining wallpaper in the interior: kitchen, bedroom, living room, hallway
Wallpaper framed on the wall in the interior: photos of original design and beautiful decor
Need to purchase:
- floor protection film;
- knife, it is better to choose a stationery knife, sharp;
- tape to avoid dirt;
- container for diluting mixtures;
- a brush for priming in difficult places;
- roller for applying the mixture to the wall;
- spatulas for leveling and applying the mixture;
- construction drill mixer for kneading.
Preparation for liquid wallpaper
When preparing for liquid wallpaper, a perfectly flat surface is required, while when gluing non-woven wallpaper, some wall irregularities may become invisible. Preparing concrete walls for decorative plaster and liquid wallpaper is similar, but liquid wallpaper requires less time. It is no different from preparing for gluing regular wallpaper, except that liquid wallpaper tends to pull out stains and stains from concrete surfaces, so the walls must be coated with special products and several primer layers.
For concrete walls, such a product is gypsum. It protects the adhesive contained in liquid wallpaper, allowing it to reliably stick to the concrete surface. Gypsum clogs all small irregularities and pores; it can also be sanded. After it dries, the surface is primed and covered with white water-based paint so that the liquid wallpaper does not lose its color. Painting on concrete and plaster is ineffective - only on gypsum putty. Finally, a strengthening primer is applied to bond the liquid wallpaper and the wall surface. Liquid wallpaper is applied with a spatula in the same way as decorative plaster.
Leveling with plasterboard
There are two technologies for how to independently level walls for wallpaper using plasterboard sheets.
- Gluing.
It is used on relatively flat walls with slight curvature. It is possible to pre-fill large depressions with plaster. Glue is poured onto the back side of the sheet in small piles, then pressed against the wall and leveled. The glue squeezed out at the joints is removed with a spatula. For additional fixation, use dowels in several places.
Gluing drywall to the wall Source lifehacker.ru
Preparation for painting
When preparing a concrete wall for painting, it must be cleaned of any coating that has been applied and anything that may prevent an even layer of putty from laying down. All chips and cracks are repaired, then the concrete for painting is sanded with sandpaper. To prime a concrete surface for painting, special deep penetration primer mixtures are needed to prevent swelling and peeling of the paint. You can get a high-quality surface painting only after applying several layers of primer. Painting of concrete should be done after complete removal of dust using a roller. Proper painting is carried out starting from the top of the wall.
Materials and tools
To carry out high-quality repairs, you first need to acquire important tools and various mixtures:
- putty, gypsum mortar to level the wall plane and apply the base layer;
- primer for initial surface treatment;
- finishing putty to complete the preparatory work.
For information! It is better to choose a universal primer that can penetrate deeper into the wall.
A product purchased in a store contains instructions that must be followed unconditionally in order to carry out the repair efficiently.
Weapons against fungus
So, you have discovered mold under the old covering, and now you don’t know what to do before wallpapering. How to treat the walls so that this attack does not occur again under a new decorative coating? Go to a building materials store and buy a special antibacterial deep penetration primer. The composition “Ceresit” is considered the most effective. And carefully treat contaminated surfaces with it, after washing off the black coating with a wet cloth. If for some reason it was not possible to buy soil, you will have to use folk recipes. Dilute a glass of bleach in a liter of water. And carefully coat the fungus-infected areas. You can do something even more cunning. Buy a cheap, but so beloved by many housewives, bleaching solution called “Whiteness”. Which contains so much of the chlorine mentioned above that no homemade mold remedy can compare with its composition.
Operating procedure
You should start by preparing the base for primer. Namely, it is necessary to remove the old finish, repair deep unevenness, putty and dry and remove dust from the surface.
The next step is the preparation of the primer composition. If the soil is a concentrate, then it must be diluted in the proportion indicated on the package. You need to prepare a solution from a dry primer using a construction mixer. The finished composition does not require additional preparation.
It is most convenient to prime the ceiling with a roller, and in corners and narrow areas use a paint brush. The composition should be applied from bottom to top to avoid splashing. Do not leave untreated areas or smudges on the surface. It is recommended to prime in two layers (except for concrete contact). The second layer is applied only after the first has completely dried.
Solution consumption rates
To calculate the required amount of primer, you need to know the area of the surface to be treated. Each package indicates the approximate consumption in grams or milliliters per square meter (on canisters you can see the following numbers: 100-200 ml/m2, 1 canister per 25 m2, and so on). However, the indicated consumption figure is, as a rule, underestimated, and the value of the cultivated area, on the contrary, is overestimated. This happens because the substrates being treated can have different degrees of porosity, the number of layers applied can vary, and simply force majeure in the form of an accidentally spilled canister can disrupt all calculations. Thus, when purchasing primer, be guided by the consumption value indicated on the packaging, taking into account the surface area, the number of layers of application, as well as a margin of 10%.
The consumption rate also varies depending on the type of soil.
| Type of primer | Consumption rate, g |
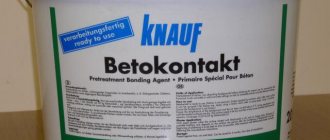
| Concrete contact | up to 500 |
| Deep penetration | up to 400 |
| Acrylic | up to 200 |
| Mineral | up to 300 |
| Alkyd | up to 150 |
| Glyphthalic | from 50 to 120 |

