The nuances of arranging a concrete base
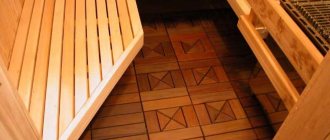
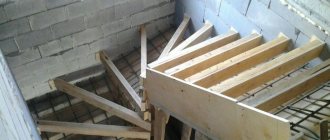
Figure 1. Concrete floor in a bathhouse
Arranging a concrete floor in a bathhouse allows you to achieve a solid foundation whose service life exceeds 10 years. This material is resistant to repeated exposure to moisture. It is environmentally friendly as it is made from natural ingredients. The solution contains sand, natural filler, cement and water. To improve the properties of the material, plasticizers and other polymer components are added to it. Mold and mildew do not grow on concrete, which is typical for wet rooms without a constant temperature regime. This flooring is not susceptible to damage by insects and rodents.
after using the sauna . This material is heavy and therefore requires a strong foundation. In order for the floor screed to dry completely, you need to wait 30-45 days. Over time, the material shrinks, the duration of which is determined by the amount of liquid in the solution.
When pouring a concrete floor in a bathhouse, it is important to choose the right components from which the solution is prepared. You should also strictly follow the technology for pouring the mixture. It involves preparing the base, laying out the composition, finishing and sealing the joints.
Briefly about the main thing
A concrete floor in a bathhouse is the right and economical solution. Such a foundation is not afraid of negative external influences. If the work is performed correctly, the foundation can last for many years. This base is fireproof, has sufficient strength and is easy to install. Not hygroscopic. Withstands significant temperature fluctuations. Doesn't rot.
The last factor makes a concrete base more preferable than its natural wood counterpart. This is explained by the fact that the stone base is not so favorable to the development of fungus. In addition, it does not impose any special requirements for care.
Ratings 0
Preparatory activities
Before pouring concrete onto the floor, it must be carefully prepared. If this procedure is skipped, the characteristics of the finished layer will be poor.
Alignment
Figure 2. Leveling the floor in the bathhouse
The specified procedure involves the following actions:
- Removal of the top layer of soil with organic residues to a depth of 40-45 cm.
- Leveling the base surface. At the same time, do not forget about arranging a pit in the center of the room. Water will collect in it.
- Installation of a drainage pipe with a diameter of 10-20 cm. It must be laid on a slope so that the liquid drains by gravity.
The quality of floor leveling can be checked with a laser or a regular building level.
Seal
Before pouring concrete floors in a bathhouse, the base must be thoroughly compacted. For this, a manual rammer or vibrating plate is used. At this stage, a cushion of sand (layer 5-10 cm) and gravel (layer 10 cm) must be installed. It needs to be compacted as much as possible. The cushion protects the concrete pie from heaving of the soil and rising moisture from it.
Final stage
Once pouring is complete, the floor is left for about a week. At the same time, it is regularly moistened and covered with a thick layer of polyethylene on top so that cracks do not appear in the coating. After a week, the beacons are removed from the screed.
Bottom line
The article describes in detail the procedure for installing a concrete screed for the further installation of any floor covering. There is also an option to process the screed using a grinding machine, which allows you to use it as a finishing coating that looks no worse in photos and visual inspection than conventional facing materials.
If difficulties arise, you can always turn to specialists who will take responsibility for all stages - from purchasing the necessary materials to pouring the screed and putting the floor into operation.
Concrete floor in a bathhouse - installation methods
Before making concrete floors in a bathhouse , you need to determine how the material will be poured: on the ground or on joists. The choice of method depends on the personal preferences of the master and the financial capabilities of the owner.
Installation of the solution directly on the ground
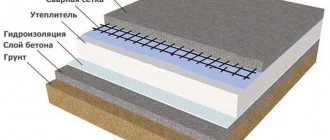
Before pouring a concrete floor over the ground in a bathhouse, it is necessary to remove the top layer of soil. Its height is 40-50 cm. A sand and gravel cushion is placed on the base. Its total height can reach 60 cm. Before using concrete, sand and gravel are carefully compacted. After completing the floor preparation, you can pour the solution. Don't forget about the slope of the base. The screed is poured in one or two layers. At the same stage, waterproofing and insulation of concrete is arranged, since it has high thermal conductivity.
Pouring concrete on joists
Figure 3. Pouring concrete onto joists
When constructing a concrete floor in a bathhouse using this method, the pouring technology is somewhat different. The advantage of this method is the arrangement of a ventilated underground. In this case, installation of additional ventilation systems in the screed itself is not carried out. Arrangement on wooden logs involves preliminary antiseptic treatment of the elements.
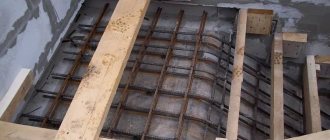
The cross-section of the beam is 10-20 cm. After the product is completely absorbed and the material is dry, it is laid on a base in the form of a mesh. A subfloor made of boards is mounted on wooden The optimal thickness of the elements is 2-4 cm. A layer of thermal and waterproofing is laid on the surface. The concrete floor in the bathhouse is poured with your own hands, taking into account the reinforcement of the layer with metal mesh.
Stages of work
We prepare the surface, lay waterproofing and install beacons. Before you start filling the expanded clay, you should carefully plan the base (if the floor is poured on the ground) and carefully cover it with polyethylene film with an overlap of 100 mm.
Installing beacons is a very important stage that requires accuracy and scrupulousness. Let’s immediately answer a popular question from non-professional builders: how to evenly fill a floor with concrete without beacons?
It's possible. There is a private video on the Internet showing how to evenly fill a floor with concrete without beacons. True, to implement such a technology, you will need to purchase and manufacture an expensive special tool and get your hands on it. Therefore, it is faster, easier and cheaper to install simple and inexpensive beacons.
Installation steps:
- Using a ruler, measure the boundary of the expanded clay backfill 100 mm from the surface of the base, and place a point on the wall. We apply the lath or rule with one end to the point and press the lath (rule) with its side surface against the wall along the surface of the base. Using a level placed on top of the slats or rules, we set the horizontal position and draw the boundary line of the backfill. We sequentially rearrange the slats, setting the horizontal and drawing the border, we go around the entire perimeter of the room. This operation is performed in tandem with an assistant.
- From the boundary of the expanded clay filling, use a ruler to measure the boundary of the concrete pouring 40 mm and draw a line along the perimeter of the room.
- Next, mix a thick cement-sand mortar of grade M150. They retreat from the wall 1 m and in increments of 1 m, in the form of pyramids with a base of 150-200 mm, pour (piles) of mortar - a series of beacons. They retreat from the row of beacons to a depth of 1 m in the room and repeat the operation. As a result, the room is divided into 1x1 meter squares by beacons. While the solution has not hardened, using a lath (rule) and a level, level the tops of the pyramids along the line of the concrete pouring boundary. Excess mortar is cut off with a spatula, and the missing solution is added with a trowel. After leveling, work is stopped for 4-5 days until the solution hardens.
There are other technologies for installing beacons, which involve the purchase of steel profiles, anchor bolts, adjusting screws and other material parts. The technology described above is the simplest and cheapest, all other things being equal. The final stages of constructing a concrete floor:
- Carefully, so as not to damage the beacons, pour out expanded clay and level it along the border on the wall using a slats and a level.
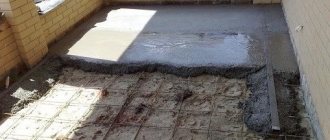
- A reinforcing mesh is carefully laid on top of the expanded clay. If the mesh is placed on top of the lighthouse, the interfering piece of wire is bitten out.
- In accordance with the above proportions, a solution is prepared using a concrete mixer. The structure is poured along the beacons and the boundary outlined on the wall. Immediately after pouring the next batch of mortar, first level the surface with a rule or a lath, after which the ironing operation is immediately carried out. To avoid delamination along the boundaries of mortar batches, the floor should be poured continuously until complete completion.
- Maintenance of the structure consists of spraying with water for 72 hours. You can walk on the floor 4-5 days after pouring, and laying the final coating or installing household items is allowed only after the solution has completely dried. Control of complete drying - there is no moisture condensation on the back surface of the polyethylene film laid on the floor surface.
Concrete floor installation diagram
In order to properly fill the floors in a bathhouse with concrete , you need to observe the nuances of the technology for working with this material and take into account the design features of the structure.
Step 1: construction of a drainage system
The bathhouse is operated in conditions of periodic high humidity, so the water drainage system must be well-established. It must be planned during the creation of the construction project. Drainage should not interfere with bathing procedures. It is better to place it under the shelves.
Do not forget about the pit into which the waste liquid will be collected. From it, water is then discharged into the main reservoir. After organizing the system, the floor is waterproofed and poured.
Step 2: laying a heat-insulating layer
Concrete has a high level of thermal conductivity, so it heats up quite slowly. To eliminate this problem, thermal insulation of the floor screed is carried out. Mineral wool or expanded clay is used to form the layer. There are also newer materials, but the choice here depends on the financial capabilities of the bathhouse owner.
Insulation methods
The floor in a concrete bathhouse must be insulated, otherwise visitors will feel uncomfortable, and it will also be more difficult to achieve the necessary atmosphere inside the room. There are the following isolation methods:
- Pouring two layers of concrete mortar, between which thermal insulation material is laid. This procedure requires more time and material costs, but it provides the necessary technical properties of the floor in the bathhouse.
- Laying the insulator on a dry screed. In this case, additional finishing of the concrete is required.
To finish the floor, a flooring made of wooden boards is used. Over time, wood deteriorates due to constant exposure to moisture and high temperature, so this layer will have to be replaced.
Step 3: pouring the first layer of mortar
To fill, you need to choose a suitable brand of concrete for the foundation of the bathhouse . Since the load will not be very large, a solution of M150-200 is sufficient. The thickness of the first layer of screed is 12-15 cm. You can spread the solution all at once or in portions, dividing the room into parts. The mixture must be leveled with a rule and left until completely dry.
It is important not to forget to make a slope towards drainage. For concrete to completely harden and shrinkage occurs, a certain amount of time is required: at least 5 days. Only after this can the next layer be laid.
Filling must begin from the corner opposite the front door. The process should be carried out without stopping. To prevent the screed from cracking, it must be periodically moistened until it dries completely.
Step 4: laying waterproofing and insulation
So, what brand of concrete is needed is already clear. Now we need to consider the features of laying hydro- and thermal insulation. To protect against the negative effects of moisture, a double layer of insulation is required. At the same time, the concrete should not have any depressions, cracks or chips, oil stains, dirt, or dust.
To reliably protect concrete, you need to coat it with liquid mastic. Moreover, it is applied in several layers. After the product has completely hardened, a roll of material is laid on its surface. It should go onto the walls. There should be no cracks or gaps between the insulation sheets.
Lastly, a thermal insulation layer is laid, the height of which is 2-10 cm. Expanded clay, expanded polystyrene, foam concrete, and mineral wool are used as insulation.
Step 5: pouring the second layer of concrete
What kind of concrete is needed for the foundation of a bathhouse is already clear: M150-200. Since the second layer must be poured correctly, fine gravel or crushed stone should be used in the solution. If the base has a small area, then additional reinforcement with mesh is not required. The surface must first be cleaned of debris and dust.
The optimal thickness of the second layer of concrete floors in a bathhouse is 10 cm. After installing , you need to wait a few days until the solution hardens. If you follow the step-by-step guide , then after a week or two the room can be used for its intended purpose.
Do-it-yourself insulation and finishing screed
An example of insulating a rough screed with foam sheets
To create a heat-insulating barrier under a concrete floor base, it is better to use polymer moisture-resistant insulation. In our case, you can use sheet foam with a density of 35 kg/m3, but extruded polystyrene foam is better, which is stronger and absolutely impervious to moisture. In addition, the slabs of this material are equipped with joining protrusions, which makes its installation more convenient without the formation of gaps.
If the rough base is fairly level, the insulation boards can be laid directly on the surface. When existing unevenness does not allow for a high-quality installation of polystyrene foam, you can use polymer-cement glue, which will help smooth out the unevenness and “beautifully” lay the insulation sheets. The slabs should be placed offset to avoid the formation of long longitudinal joints. A gap of about a centimeter should be left between the polystyrene foam and the wall to allow for deformation expansion. It is advisable to fill all seams and gaps with polyurethane foam to prevent the formation of cold bridges.
Using plaster profiles as beacons for finishing screed
If glue was used to lay the insulation, you should wait a day, after which you can install the beacons. A long building level is used for control. As guides, you can use plaster beacons with a T-shaped end, or guide profiles, which are used to assemble frames for sheathing. Beacons are installed on thick cement-sand or gypsum mortar laid out in slides. When adjusting their position, they are pressed into the applied mixture.
Taking into account possible temperature changes, even with a small area of finishing pouring, a damper tape should be attached to the perimeter of the wall, which would protrude 2-3 cm above the surface level. The excess can then be cut off or covered with a plinth.
Laying reinforced cement screed
If the choice for finishing pouring is concrete, the proportions of the solution are as follows: 4:2:1, where, respectively, are the volume fractions of sand, fine crushed stone and M-400 cement. The cement-sand mixture is prepared in a ratio of 4:1. The prepared solution is poured between the beacons and leveled using the rule. When the solution has set, the surface should be rubbed using a plaster trowel. The beacons do not need to be removed during subsequent laying of tiles. If this is done, the seams should be filled with freshly prepared mortar and smoothed.
Waste water drainage system in the bathhouse
Pouring the floor in a bathhouse is a responsible process, so it is important to provide a drainage system. There are several installation schemes.
Directly under the bathhouse, when installing screeds on the joists
Since properly designed drainage system ensures comfort in the room and longevity of its operation, with such a bathhouse design, a drainage hole is dug under the building itself. Its depth is 1 m, and its dimensions are 1 * 1 m. A cushion of crushed stone and sand is placed at the bottom of the catchment.
To prevent an unpleasant odor from wastewater from appearing inside the premises or around the building, ventilation pipes are laid in the drainage pit. This option is acceptable if the screed is located above the ground surface.
Requirements for the soil, what it should be
The quality of a monolithic concrete pavement largely depends on the constituent soil surfaces and on the proximity of groundwater, the height of which should not exceed 500-600 centimeters.
On porous, loose soil it will not be possible to pour a high-quality screed made of sand and cement. The lower the soil indicators, the higher the cement strength required for the solution should be. In extreme cases, concrete is laid on a reinforcing mesh.
With a groundwater depth of up to 2 meters, the floor layout consists of:
- soil compaction;
- layers of sand and crushed stone;
- water-repellent pad;
- a simple intermediate layer or reinforced screed.
If there is deep water in the soil, the intermediate layer is laid on a backfill of crushed stone and sand.
Pouring concrete
The process of pouring a concrete base for a bathhouse.
Laying the cement-sand mortar begins from the far wall from the entrance to the room. The solution is applied to the prepared base, leveled with a trowel and pulled together with a horizontal board or rule towards you. The process of laying the mortar must be continuous; after serving the first portion, the second portion should be served immediately.
The screed begins to harden on the first or second day, but the base cannot yet be used. Loads are allowed at least seven days after concreting, but the optimal time will be a month when the concrete reaches its maximum strength
During the hardening process of the screed, it is important to provide it with proper care, which will help avoid drying out and cracking of the concrete surface. To do this, it is irrigated with water throughout the day or wiped with a wet cloth.
If it is necessary to fill the base within a deadline, you can use special additives that speed up the hardening process of the solution. Plasticizers prevent the formation of cracks and increase the strength characteristics of concrete. After the concrete solution has hardened, you should check it for strength; to do this, hit the coating with a hammer and if the marks are insignificant, then the strength characteristics are high.

