During the construction of a country house, its owner is faced with the question of choosing a floor. Both concrete and wooden structures have advantages. Both of them have features that need to be taken into account. Therefore, do not worry when choosing a base. First you need to consider the type of room, how often and for what purposes it is used. Even the area of the rooms is important. But the last thing you should look at is the price, because the cheapness of building materials often leads to problems in the future.
Comparing all these parameters, let's consider the features of wooden and concrete floors.
Types of flooring for apartments, country houses, cottages, offices
Floors in residential buildings, of course, do not bear as high a load as in commercial premises, but a long service life is an extremely pleasant characteristic for any floor covering.
Durability is not directly related to price. For example, those types of floors that we talked about in the article “4 budget ways to decorate a floor” also last quite a long time. Linoleum is in the lead - the commercial, most durable version will retain its performance properties for up to 30-50 years, but the outer layer with a pattern can wear out in places and look ugly. The highest quality tiles do not lag behind - also up to 50 years, if you update the grout and replace areas with chips. But laminate and carpet last a little over 10 years with proper care.
Let's talk about other types of flooring and their service life.
Benefits of the oil
They won’t describe the advantages here—you can find them online. Very briefly:
- the damaged area can be washed, sanded and re-oiled without redoing the entire floor
- the wood remains to the touch and looks like wood
- “Zhivitsa” is 100% natural. You can work without gloves and respiratory protection. Unless you are prone to allergies to anything and everything. The base is linseed oil. There are no strong odors during work. The oil is washed off in the usual way with soap.
Epoxy floors
An excellent option for those who are puzzled by the question of which self-leveling self-leveling floor to choose for their apartment. Epoxy coating is considered absolutely safe, since it is based on an inert substance that does not enter into any reactions.
These floors are easy to keep clean. They are not afraid of dust or dirt, mold never appears on them, and they do not rot. Even a very thin coating can last at least 40 years, not to mention thicker epoxy coatings.
Many people are interested in which self-leveling floor to choose for an apartment, in terms of the fact that each room has its own purpose. Indeed, it makes no sense to fill the entire apartment with one composition, and for living rooms or children's rooms a cheaper option is suitable - this is a polyurethane coating.
This approach will save a lot of money. There is another option and it’s not expensive - it’s a cement self-leveling floor, which is better, this is up to the apartment owner directly (read: “How to make a cement-based self-leveling floor with your own hands”).
Before deciding which finishing self-leveling floor is better, you need to pay attention to:
- the purpose of the future coating;
- number of preparatory stages;
- load on future coverage;
- individual coating requirements.
Having received answers to such questions, you can safely move on to another question – which company’s self-leveling floor is better.
Is it worth laying carpet?
Advantages of the material as a finishing coating for floors in a private home:
- Tactile pleasantness. It is good to walk on carpet barefoot.
- High thermal insulation ability. Even material lying on a cold screed creates a feeling of warmth.
- Huge selection. There are a lot of carpets available in different colors, patterns, textures, and base compositions.
The coating also has disadvantages:
- Carpet easily collects dust and dirt. They get clogged between the fibers and are difficult to remove with a vacuum cleaner. But the material does not like moisture, which makes wet cleaning difficult.
- The carpet is fading. In direct sunlight it loses its color and becomes dull.
- Wine and coffee stains are difficult to remove from the coating. Traces of coffee or wine will most likely remain. Or there will be traces of their removal.
When purchasing carpet, pay attention to the fact that the label mentions treatment with sanitary and fire-fighting compounds. This material will not harbor ticks and will not blaze like a match in a fire.
Carpet is appropriate in dust-free, little-trafficked rooms. For example, in bedrooms. Maybe in children's rooms. You should not use carpet to cover floors in corridors where people wear dirty shoes, and in kitchens where there is a high risk of contamination from spilled liquids, including greasy ones. Excellent in terms of price-quality ratio, easy to install, carpet is deservedly popular in budget projects of private houses.
No. 1 - Laminate
Among all floor coverings, this option is the most commonly used. Why is laminate so popular? It's simple: it's inexpensive, easy to install, practical, beautiful type of covering that's easy to install yourself.
Laminate is a material consisting of lamella boards with special locking joints that allow the floor to be assembled without the use of glue. However, types of laminate that are glued on also exist, but now such options are rarely seen on sale. When assembling the floor, the locks of two adjacent lamellas are connected to each other until they click, and thus two adjacent elements are securely fastened to each other. This is how the entire coating is assembled.
Laminate installation process
The laminate itself consists of several layers. In the middle there is material from wood processing waste, at the bottom of the lamella there is a protective layer, and above the wood material there is a layer with a pattern, usually imitating wood. On top of it is a laminated layer, which can be smooth or have a wood structure. The top and bottom layers are not afraid of moisture and protect the material from it and a number of other influences - for example, abrasion. But still, laminate itself is afraid of water. And, similar to most of the options described above, it cannot be installed in a bathroom or toilet. But for the kitchen, laminate flooring is quite suitable.
The material as a whole is not capricious, but requires special attention. Thus, installation of the laminate should be carried out on a flat surface free of debris using a special substrate. Otherwise, the coating will begin to creak over time and quickly become unusable.
It is also important to understand that moisture is dangerous for laminate flooring, and you should not spill anything on it, and if this happens, it is important to quickly wipe the floor to remove the moisture.
- looks good
- inexpensive
- There are several strength classes
- ideal for decorating floors in almost all types of rooms
- easy installation
- It is not necessary to use glue during installation
- tactilely pleasant
- can be bought at any hardware store
doesn't like moisture
Preparation of tools and materials
Before laying laminate flooring on a concrete floor, you should prepare:
- pencil;
- construction square;
- roulette;
- mallet;
- sealant;
- jigsaw;
- wedges;
- steel bracket.
A mallet will be needed to adjust the panels, and the cracks will need to be filled with sealant. A jigsaw is needed to cut the panels, while wedges will be used to ensure the distance from the wall to the laminate.
Concrete screed
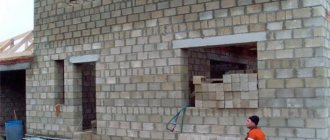
Before choosing the type of flooring, let's talk about how to make a floor in a summer house as such. The simplest and most reliable option is a concrete screed. It is inexpensive, durable and strong, and can also to some extent prevent the appearance of rodents in the house, which is very important for a summer residence.
You can leave the screed in its original form in non-residential premises - for example, in the hallway and garage. In other rooms, its appearance and the fact that the floor will remain cold at any time of the year will interfere. Of course, you can combine the technology with a heated floor system, but for a summer house this is not the cheapest option.
It is also worth remembering that concrete screed is very difficult to lay evenly. Therefore, most likely you will have to put sheets of plywood under the flooring. This will also help insulate the floor.
Choosing a floor base and a method for constructing a good floor
Arranging a floor in a country cottage, in a country house or in your own home is a serious and responsible task that many try to solve on their own. However, without studying the features of the technology, it is problematic to give a clear answer on how to make a floor in a private house. It is important to think through not only design issues, but also decide on the method of installing the floor base and the materials used.
A serious and responsible task: arranging the floor in a country house
The most common in the private sector are the following self-installed flooring options:
- wood. The main advantages of wood flooring are environmental friendliness and increased thermal insulation characteristics. At the same time, wooden boards are characterized by increased hygroscopicity and require effective waterproofing protection. The wooden floor is laid on support beams located above the ground surface, on wooden beams resting on brick pedestals, as well as on planks laid on a concrete or cement screed. Building a wooden floor is not difficult. The plank base is durable, maintainable and attracts attention with its original texture. The correct selection of material for a plank base determines the performance characteristics. It is important to use dried wood, the moisture concentration of which does not exceed 12-14%. The use of boards with defects in the form of cracks, falling knots and chips is not allowed. The materials used are coniferous trees and hardwood. Impregnation of boards with antiseptic compounds ensures the durability of the structure;
Environmental friendliness and increased thermal insulation characteristics are the main advantages of wood flooring
- concrete. It surpasses all types of floor bases in terms of strength characteristics and service life. When making a concrete screed of increased height, the concrete mass is additionally reinforced with a reinforcement grid. It prevents cracking of the monolith. However, the concrete base has a serious drawback - increased thermal conductivity. To ensure a comfortable temperature of the concrete floor and reduce heat loss, be sure to lay insulation in the form of granulated expanded clay, polystyrene foam or extruded polystyrene foam. A waterproofing material is placed on top of the insulating layer, and then the concrete mixture is poured. It is important to use a fresh concrete solution made from Portland cement grade M400 and higher. To improve the appearance and increase thermal insulation, a concrete base is combined with a wooden one;
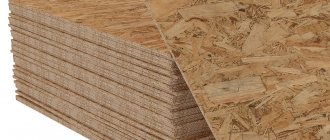
- floor base in the form of a dry screed. This type of floor has gained popularity relatively recently and is a progressive solution in the construction industry. A dry screed is also called a loose floor or a floating floor structure. This type of base attracts with its ease of formation and accelerated pace of work. Dry screed is performed on a planned base, which is waterproofed and then logs are laid. Fine expanded clay, slag or sifted sand are poured into the space between the joists. Then you need to pull off the bulk composition and distribute it evenly over the entire area. At the final stage of dry screed construction, OSB floor boards are laid or sheet plywood is installed. Floor screed with expanded clay is durable and prevents heat loss.
When choosing installation methods and material for the future floor, you should study the design features of the floor base, as well as analyze its advantages and weaknesses.
All types of flooring are superior to concrete flooring.
Types of coatings for kitchen floors
A well-chosen floor for the kitchen can give the room not only coziness, but also real chic, if the choice of all kitchen building materials was preceded by a discussion of what goes with what, what combination of colors in the kitchen will be the most advantageous, whether a particular floor covering will look good with the kitchen set, walls, curtains.
Professional builders and interior designers advise choosing a coating from the following materials:
- linoleum;
- tiles (tile, ceramic);
- self-leveling floor;
- parquet;
- laminate;
- traffic jams.
The following list is a rating of kitchen floors based on practicality, durability, and cost. The best option is at the beginning of the list and in descending order.
How to coat with oil and what consumption?
From one site we managed to get as many as 4 combinations of applying Zhivitsa oil to a wooden floor.
In any case, it would be a good idea to contact the manufacturer. And discuss the scheme and nuances of the coating. They actively respond to email and Instagram. And they definitely have the latest information.
The first combination is oils from the “Standard” line
- 1st layer - Primer oil. Antiseptic (consumption 10-15 m2 per 1 liter of oil);
- 2nd layer – Solid oil with wax (consumption 15-20 m2 per 1 liter of oil);
- 3rd layer – Solid oil with wax (consumption 22-25 m2 per 1 liter of oil*);
- 4th layer – Carnauba wax (consumption 15-20 m2 per 1 piece).
The second combination is professional oils from the “Pro” line:
- 1st layer - Bio Soil (consumption 10-15 m2 per 1 liter of oil);
- 2nd layer – Parquet (consumption 15-20 m2 per 1 liter of oil);
- 3rd layer – Parquet (consumption 20-25 m2 per 1 liter of oil*).
The third combination is oils from the “Standard” “Pro” line:
- 1st layer - Primer oil. Antiseptic (consumption 10-15 m2 per 1 liter of oil);
- 2nd layer – Parquet (consumption 15-20 m2 per 1 liter of oil);
- 3rd layer – Parquet (consumption 20-25 m2 per 1 liter of oil*).
The fourth combination is also “Standard” and “Pro” oils
- 1st layer - Bio Soil (consumption 10-15 m2 per 1 liter of oil)
- 2nd layer – Solid oil with wax (consumption 15-20 m2 per 1 liter of oil)
- 3rd layer – Parquet (consumption 20-25 m2 per 1 liter of oil*)
* Oil consumption for hard wood will be less.
No. 4 - Cork covering
This is an expensive and not the most practical floor covering option. But the material is environmentally friendly, it is pleasant to walk on it even with bare feet, it is elastic and, in general, even by itself creates coziness and comfort in the room.
Cork is a material that not only makes the floors warmer to some extent, it also insulates sound, and the neighbors below will not hear all noise from the apartment, except the loudest. This type of coating is considered elite and is quite expensive.
Forms of production of cork flooring
Installation of cork flooring can be done in any room, except those where the level of humidity is high, since the material will simply begin to absorb moisture and deteriorate. Also, installation must be done on a flat and solid base. You can't put a cork on bare concrete either - you must use a backing. Overall installation is very simple.
Cork is especially popular in children's rooms
Cork is available in the form of slabs or rolls. It must be installed using special glue. Some options have a layer of immediately applied adhesive component in production, which allows you to fix the material on the floor. The upper part of the material is coated with a special compound that protects the cork from moisture.
- heat and sound insulation properties
- environmental friendliness
- easy installation
- high strength
- elite material
- it's nice to walk on it barefoot
- suitable for any room except the bathroom
- does not bend and can withstand heavy loads
- not afraid of rising or falling temperatures
- it costs expensive
- cannot be placed in the bathroom
Conclusion
Should I install a concrete or wooden floor? It is, of course, up to you to decide. We have covered the main points of installation and given practical advice, but everyone has their own situation and if this information is not enough for you, then the video in this article clearly shows the process of installing the coating. Look, decide!
Installation of wooden covering on a concrete base.
As you can see, there are quite a lot of materials on our website about concrete and wooden subfloors, but having installed any of them, you have another pressing question. And this, as you might guess, is a matter of care! There is a current article on our website - “How to clean carpet?” It is very interesting and definitely worth your attention.
We, in turn, wish you successful renovations - so that the space around you pleases and creates a great mood for you. Make both cool luxury renovations and modest and cozy ones, based on our materials. And, have no doubt, your floor will serve you for a long time, it will be perfectly smooth, beautiful and without defects!
If you need to buy tile leveling systems on excellent terms, feel free to contact us, we can do it most profitably. We are a direct partner of an online store selling hovercraft with the best prices in the capital. We sell 100 percent originals.
Natural = environmentally friendly?
Let's just define the concepts right away. “Environmentally friendly” is not at all the same thing as “naturalness,” although often natural houses with natural finishing materials are among the most environmentally friendly. The concept of sustainability has become a gold mine for entrepreneurs today. After years of negative information about the dangers lurking in our homes in the form of new furniture, flooring or windows, most people would give anything to replace the silent killers with eco-friendly walls, furniture and flooring. Moreover, clay floors in a cottage, walls made of firewood in a country house and pebbles underfoot in the shower no longer cause laughter.
So, what is eco-friendly flooring? In official terms, this is the property of all structural elements not to emit harmful substances, especially during operation. This provision is even spelled out in the MDS 31-12.2007. But keep in mind that sometimes even the most natural coating has to be laid only with glue - and this is no longer environmentally friendly. That’s why we’ll now look into everything in detail - both the coatings and the methods for laying them.
How to pull together boards
The easiest way is to cut a piece with a groove from the same board.
And use a hammer to adjust the boards to each other. But this method is not for perfectionists. If you have the opportunity and desire, then you can make one of the magical devices.
Device for pulling together boards
In this video, the author demonstrates the operation of this thing: https://www.youtube.com/watch?v=PMEzEffA2-U
Unfortunately, the author did not give the dimensions.
Second device
Andrey Shaiter is famous for his extremely useful videos. And then he turned up the heat. I assembled a device from plywood, tested it and already made a tool from a 25x25mm square aluminum pipe. All sizes are in the video.
A self-builder doesn’t need such thoroughness; it can be made from plywood. It won't be difficult to assemble a couple of these pieces.
In fairness, it is worth mentioning the device from Kreg. This dream of a perfectionist costs 6000 rubles. Ideal angles, drilling and tightening with stops will eliminate pinching and cracking. Suitable for cladding walls, terraces and of course floors.
Floor laying sequence
1. It is necessary to prepare a full set of materials and tools: flooring, insulation, waterproofing, beams for joists, a saw or jigsaw for sawing wood, self-tapping screws, a screwdriver, a building level to control the slope of the floor surface.
2. Logs are laid on the base, cleared of debris and dust, maintaining a distance of 40-50 cm between the bars. The lags are laid starting from the highest point of the floor, so that its surface can then be accurately leveled.
3. The logs are secured to the base using metal fasteners.
4. The floor surface is covered with a layer of waterproofing.
5. Sections of insulation are laid between the joists.
6. Floor boards are laid on the prepared base, starting from the wall farthest from the exit. A small compensation gap is left between the wall and the first board, which is then covered with a plinth.
7. Floor boards are screwed to the joists with self-tapping screws. The fasteners are positioned at an angle of 45 degrees. If a tongue and groove board is laid, it is mounted by connecting the locks all the way so that there is no distance between the boards.
How to properly coat a spruce or pine board with oil
The floorboard is usually made of softwood. This means that it contains a lot of resin. The resin will prevent oil from penetrating into the pores. On his Instagram, the manufacturer gave a way to properly coat spruce and pine with oil.
Question: I heard that oil is of little use on spruce and pine . There, they say, the resin is in the pores and the oil does not penetrate. Are they lying? ) Tell me how to do it correctly. Are there any nuances or differences from hardwood? Manufacturer's response: Resinous rocks can be treated with gum turpentine before impregnation with oil and all resin pockets can be cleaned. After this, soak in oil. There will be no sense if you do NOT process it, especially such porous wood species)
True, they gave this feature in the context of wooden furniture. But the mechanics and process are the same.
Something else worth paying attention to is the polymerization time of the oil. The surface can be used after 1-2 days. But the final formation of the oil layer will occur after 21 days. Until then, it must be handled with care.
How to cover a wooden floor to avoid problems
In my opinion, varnish is not an option. If it peels off, as in the photo above, then you need to remove it from the entire surface and reapply it. This process is called scraping.
The second reason is that the varnish makes the surface “plastic”. Yes, she looks like a tree. But to the touch and in essence it is acrylic. Then it’s better to buy laminate. He is more resistant to damage.
The only alternative to varnish may be oil. I like Russian. This is not an advertisement.
By the way, the guys from Doubledom also do not use varnish, but coat it in 2 layers with German Biofa borma or Osmo oil. Here is a comment from their leader:
When should you pour a concrete floor?
A similar base is suitable for industrial premises, garages and rooms where supplies are stored. Concrete is used if the building is expected to experience strong mechanical loads. But this does not mean that it is not used for houses, just as it is used.
For example, a concrete floor is rational on the first floor of a two- or three-story house with a massive structure. It is also the only correct solution when it comes to the basement. No matter how you treat the wood, if it is in constant contact with wet soil, it will still begin to rot.
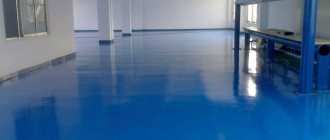
No. 6 – Self-leveling floor
This type of coating was previously used only in various production workshops, but is now also used for home improvement. Now many people are choosing self-leveling floors, and there are many reasons for this. For example, self-leveling floors look beautiful, they turn out perfectly smooth, can have absolutely any color and even an original design, even printing photographs.
What is self-leveling floor
This is an inert material that is not afraid of either water or heat, and if desired, you can make heated floors underneath it. By the way, if a self-leveling floor is installed in a bedroom or living room, then, as in the case of tiles, heating is almost mandatory, otherwise it will be uncomfortable to walk on the base barefoot. Also, this coating option is not afraid of almost any impact and is easy to clean to an almost sterile state.
Mixtures for self-leveling floors
Comparative analysis
Of course, a wooden floor is more environmentally friendly, its price is often lower than concrete, it is warm and reliable, but short-lived. And there is a possibility that your descendants, having decided to change their gender, will remember you “with a not evil, quiet word.”
In our opinion, it is more reasonable to make a combined version of the covering, in other words, the base is poured from reliable, durable concrete, and then you make a slab flooring on the joists. If necessary, you can tear it down and install an economical heated water floor or other covering to suit your taste in its place.
Installation of slab flooring.
Marmoleum or natural linoleum
This modern flooring option is environmentally friendly because it contains jute fiber, linseed oil, natural dyes, wood resins and other components of natural origin. Thanks to its antibacterial properties, it is ideal for use in hospitals and kindergartens. This material does not accumulate dust and dirt, and its wear resistance only increases over the years.
Marmoleum - natural linoleum
It is produced like regular linoleum - in rolls, but there are also marmoleum tiles with a click joint, which are laid similarly to laminate - Marmoleum click. Unlike ordinary linoleum, marmoleum tiles have a very wide variety of colors.
Marmoleum in the children's room
However, during transportation, natural linoleum should not be bent, otherwise it may break. It is recommended to lay marmoleum on a perfectly flat surface, and in the first week after installation, point loads on the floor should be avoided (for example, you should not place heavy furniture or walk in heels).
Saving on the rough field
Often the cost of a solution must be considered in its entirety. You need to compare several lines in the estimate at once, and not just one. This way you can cover the floor with an inexpensive laminate. But the cost of m2 must include a subfloor (a strong and level base) and a substrate.
With wooden floors, there are other cost items: in addition to the boards, there is also oil or varnish, sealant or cork backing to protect against squeaks, and fasteners.
But the absence of a subfloor, the pie of which can cost a pretty penny, warms the soul.
Tips and solutions
And in the end, we will try to summarize and provide general recommendations for choosing a coating for the base and advice given by experienced users. The basic requirements for any coating are as follows:
- easy care;
- safety for human health;
- beauty;
- pleasant tactile sensation;
- durability.
Choosing flooring for an apartment
These indicators may vary in priority and other parameters depending on the requirements of the homeowner, budgetary capabilities and personal wishes. For some, the main indicator when choosing a material will be its price, while for others - strength and environmental safety. And all people will have different approaches to the choice of material for the foundation, each from their own “bell tower”. Thus, you need to start choosing coverage with a thorough analysis of your own life, your habits and the behavior of your family members.
There are a number of factors to consider when choosing flooring
If children and animals live in the house, then one of the main requirements for the base coating will be compliance with the required environmental friendliness indicators. That is, the material must be safe for health. These are ceramic tiles, wood, parquet. Also, the chosen option must be non-slippery, non-traumatic and resistant to various influences. It is desirable that it is easy to clean - just imagine that a child painted the newly laid carpet with his paints. Or your favorite Labrador ran all over it after playing in the dirt outside. It is immediately clear why this covering option is completely unsuitable for a house where such residents live.
Light-colored carpeting is not the best option if there is a child in the house.
If you have a habit of walking barefoot, then in most of the apartment the floors should be tactilely pleasant, not cold in sensation. Otherwise they will be uncomfortable to use. Alternatively, there may be wood, fleecy coverings, or materials that imitate wood covering. But you can also lay tiles if you worry about heating them
It is important to understand that constantly running heated floors waste a lot of electricity, which will definitely affect utility bills
Beautiful self-leveling floor in the apartment
You will also have to take into account what building the apartment is located in or what kind of floors it previously had. For example, not all houses can be filled with screed. It is usually installed in new buildings or houses that structurally allow this to be done. In most old panel houses, this option for a rough foundation is unacceptable. This means that coatings that require screeding will have to be completely eliminated.
It is important to think about what color of the floor you would like to see, how harmoniously the texture and shade of the floor covering will be combined with the rest of the interior. Dark looks solid and contrasts well with a restrained and light interior
But a room with such a base needs good lighting. For dark rooms, it is better to choose a light floor - it will be fresher and will not absorb light.
Combination of colors in the interior
Also, you should not make one covering option for the entire apartment. This will be a mistake, especially for small rooms. The coating should be chosen depending on the purpose of the room. By the way, floors with a pronounced relief coating are also not the best option. Keeping them clean will not be easy - dirt will get into all these reliefs and grooves if they are very deep. At the same time, in the bathroom, for example, it is worth putting a relief covering in order to reduce the risk of injury to the floor. It's easy to slip on glossy surfaces if you spill water on it.
Video - How to choose a floor covering
Repair is a costly business, so many owners of apartments and houses try to choose the cheapest coatings. This also applies to gender. Some people believe that only expensive materials will last a long time and will not require replacement after a few years. But in fact, if you choose the right coating, it will in any case please its owners for a long time
When determining which floors are the cheapest, buyers most often pay attention to linoleum, laminate or carpet. You can also consider a bulk option
Each material has its own pros and cons.
Requirements for floors in different types of rooms
When choosing the material and type of coating, it is necessary to take into account the purpose of the rooms. Requirements for floors in different rooms:
- Hallway. A large amount of dirt accumulates here. Floors are subject to high mechanical stress. You need to choose durable, moisture-resistant coatings that are easy to care for.
- Kitchen. The room is exposed to hot fumes, and dirt often gets on the kitchen floor. Coatings must be moisture resistant and easy to clean.
- Living rooms. For them, it is necessary to select environmentally friendly coatings that retain heat.
- Bath and toilet. These rooms have high humidity. Floors in bathrooms and toilets must be moisture-resistant and not deteriorate from exposure to household chemicals.
Classification of linoleum
Linoleum is divided into types and depending on its wear resistance. Guided by manufacturing technology, manufacturers cover the image, which is first applied to a PVC base, with a protective layer on top. The wear resistance of the material depends on the thickness of this layer. The thicker the “shield”, the more expensive the coating. Household linoleum, which has a low level of wear resistance, is usually laid in residential premises; The material is of a semi-commercial type, which is considered to have an average level of wear resistance, which is why it is laid in rooms with average traffic: hallways, kitchens, offices. One is quite rigid, which is why there are no marks left on the surface from heavy pieces of furniture and other objects. Commercial linoleum is endowed with increased wear resistance. For this reason, it is laid in industrial premises, as well as in areas with high traffic. However, please note that these are just general guidelines. In your apartment or house, you may prefer linoleum of any kind. Still, when choosing a flooring, do not forget about its purpose and the load it can withstand. Linoleum classes
Floors in a private house - the best options for installing floors in the house (100 photo ideas)
It's no secret that the comfort of living in a home largely depends on high-quality floors. Installation of the basement floor is carried out using various materials: wood, concrete, special mixtures using the “self-leveling floor” technology. Floors in a private home must be smooth, durable, retain heat and have aesthetic qualities.
Types of floors
The question of what to make the floor of a house from often arises when building your own home. Therefore, there is a need for a detailed study of the types of floors, taking into account their advantages and disadvantages.
Wooden covering
Wood floors look impressive, they meet environmental requirements, combine practicality and long service life, and allow for repairs as necessary.
Installation of a wooden floor requires the presence of the following materials: timber with a thickness of at least 15 cm, edged boards with a thickness of at least 2.5 cm, waterproofing and vapor barrier elements, insulation. Timber and boards must be taken dry, their humidity should not exceed 12%.
Polyethylene film or roofing felt is suitable as waterproofing. There are a huge variety of vapor barrier membranes on the market. The insulation can be mineral wool slabs, sheets of extruded polystyrene foam, or expanded clay. You will also need nails and screws, metal angles, a hammer and a screwdriver.
Installation of a wooden covering goes through several stages. The first thing to do is to carefully level the ground, on which a sand cushion is then created. It is necessary to lay waterproofing on it. If roofing felt is used, the overlap between the strips is at least 15 cm.
Next, a strapping beam is installed around the perimeter of the house, to which logs are attached using metal corners. All bars are pre-treated with protective compounds. The distance between the joists should be equal to the width of the insulation. If mineral wool slabs are used, they are installed by surprise. This must be taken into account when installing logs.
Then a vapor barrier membrane is stretched over the joists and insulation overlapping, the joints of which are glued with special tape. The final stage involves installing the boards. They are also recommended to be treated with protective compounds. The boards themselves should be nailed as tightly as possible to each other.
When the wooden floor is ready, it can be varnished or linoleum laid on it.
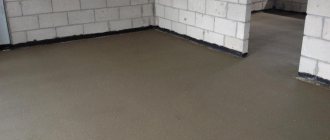
Concrete floors
Most often, concrete floors in a private house are installed in utility rooms, but this option is also possible in residential areas. The floor is poured according to the following scheme.
If there is a need, a small pit 10 cm deep is first dug in the area of future filling. Then a sand cushion at least 5 cm thick is made, which is carefully compacted. A reinforcing mesh is laid out, beacons are placed, which will help you monitor the evenness of the surface.
It is recommended to lay the concrete solution from the corner of the side opposite the door, and it is advisable to avoid joints and do the pouring in one go.
The concrete will reach its nominal strength in 28 days, after which it will be possible to begin finishing. Options for such finishing are tiles or linoleum on a thick base.
Linoleum is used in living rooms, tiles are laid in the hallway, bathroom and toilet, and in the kitchen. Linoleum is glued to concrete with special mastics, or it simply lies freely, secured along the walls with plinths. A special adhesive is used to lay the tiles.
Self-leveling coating
To install such a floor in a private home, special mixtures are used, which self-level after application. This is one of the most popular methods of installing floors in country houses. The cost of a self-leveling floor directly depends on the manufacturer and brand of the mixture.
In addition, there are flooring options with a pattern or color, which is also reflected in the price. The base of self-leveling floors is a concrete screed, the surface of which is treated with special primers to improve adhesion. Using a drill with a special attachment, dilute the bulk mixture with water. The solution is applied to the primed base in small portions and rolled out with a needle roller to remove air bubbles.
For better strength gains, the finished floor is covered with plastic film, if this is specified in the instructions for the mixture. After the solution has completely hardened, it can be coated with polyurethane varnish to add shine.
The coating will be ready for full use in a week, and you can move on it within 12 hours after pouring. The peculiarity of this floor is that it is often used as the main one. But you can also lay carpet on top, lay parquet or laminate.
If you have the financial opportunity and the floors are being made in a residential area, then it is best to use three-dimensional or decorative self-leveling floors. To do this, you need to think about what kind of pattern will be placed on the floor, and then contact a company that specializes in these issues. She will take a photo of the floor in the house, printing it on a banner of the required size. Subsequently, using a special technology, this banner will be installed on the floor, making the room stylistically very attractive.
Warm floor technology
The most convenient and practical option is to install heated floors in a private home. There are floors with water and electric systems. Electric floors are popular in small rooms of apartments or country houses. The main condition for installing electric floors is the presence of a power supply line capable of operating under heavy loads.
The only drawback of an electric floor heating system is that it consumes more electricity.
In the case of floor heating in large rooms, which also do not have central heating, it makes sense to use water floors, since they can significantly save energy.
The water floor as a heat source has water heated by a boiler, circulating through pipes built into the floor. The role of heating elements is played by metal-plastic pipes (there are options for using plastic pipes). They are laid on the subfloor and connected through a distribution mechanism to the supply and return manifolds. The water circulating in the pipes has a temperature of +35-45°C. Higher temperatures would make the floor uncomfortable and subsequently lead to its destruction.
A water heating system has a number of advantages:
- heating costs are reduced due to the low temperature of the coolant;
- as an independent unit, it makes it possible to effectively use living space (in the absence of radiators);
- Cost-effective compared to electric underfloor heating despite high installation costs
Flooring for a bedroom or children's room
It is better to use high-quality environmentally friendly materials in the recreation area in the house. Coverings such as, for example, wooden parquet or floorboards are an ideal choice, since they do not emit any harmful or toxic substances into the atmosphere and provide natural ventilation. Modern methods of treating with effective antiseptics make such floors durable and protect them from fungi and rot. To make the room as warm as possible, which is very important for a nursery, you can also use carpets, not forgetting that they require constant care.
What modern materials make sense to use in recreation areas? We lean towards laminated parquet (laminate), which is highly durable and can last for many years. When installing such floors in a private home, be sure to use sound insulation to eliminate loud noise when any objects fall on the flooring.
Double wooden floor
If you are wondering how to make a wooden floor, then you are in luck, because we will look at this option in detail, since it is used most often.
If you want to do everything as efficiently and correctly as possible, then try to follow all the points of the instructions below as accurately as possible. So let's get started:
The first step is to lay the beams. They are placed on top of the installed pillars on the support beams. The beginning of any flooring construction begins with this.
Already on these installed parts you need to lay a subfloor made of boards, which should be fitted as tightly as possible to each other.
Absolutely any boards are suitable for this, as long as they have a thickness of two to four centimeters. It doesn’t matter what quality they are, but it is advisable to use coniferous wood material.
Pre-prepared boards are fastened with nails; they should be driven in at an angle of forty-five degrees. The distance from the edge should be at least twenty centimeters.
After the final installation of the subfloor, you need to begin laying the thermal insulation layer. To do this, use foam sheets or mineral wool mats.
On top of the laid layer you need to lay out a six-centimeter layer of expanded clay, and on top of it you need to apply a polymer film. She will be involved in vapor isolation.
Once you have completed all these processes, you can begin laying the finished floor. For this it is better to use high quality boards; they will be attached with nails.
Selecting a screed based on the finish coating
Rice. 3. Scheme of screed installation for laminate flooring
A private house is not necessarily an unsightly wooden hut in the country for storing shovels. This could be a cottage with an area of 200-300 square meters. meters with designer renovation. Traditionally, tiles (in wet rooms) and laminate (in others) are used for flooring in both apartments and houses. Special requirements are imposed on the screed for these types of coatings. The joints of laminate slabs, if the height difference per square meter exceeds 2-3 mm, will collapse. After 2-3 years, the floor covering will become unusable. The situation is no better with tiles. If the base is uneven, it will look unsightly.
When choosing the type of screed, it is important to consider the following:
- Differences in floor slabs of 2-3 cm or more in height are eliminated using a standard sand-cement mixture.
- If the subfloor is made of wooden logs, it is better to avoid using concrete mortar. For leveling you will need plywood or moisture-resistant drywall. The disadvantage of this method is that if there is a significant distance between the joists, the floor will sag underfoot and creak during operation. In the case of a wooden base, tiles are placed on a special glue, which increases the cost of the entire structure.
- If the rough concrete floor has minor differences (up to 1 cm), they are leveled with self-leveling mixtures.
- Dry screed is not applicable when using laminate or tiles. The reason is problems with the organization of waterproofing.
Which floor is best for an apartment: screeds in all their glory
Yes, yes - you heard right. Screeds in the plural – today we can count at least three different technologies for their manufacture. Moreover, all these technologies are by no means similar to each other and do not necessarily involve the use of cement-sand or any other mortar - these are both classic options and, so to speak, adapted specifically for apartments in high-rise buildings.
Standard floor screed. Its main disadvantage is the larger amount of water contained in the solution - it is this that makes this flooring option unsuitable for apartments. The fact is that all this water does not evaporate into the air during the hardening of the screed - in every possible way it looks for loopholes that allow it to penetrate the ceiling of the neighbors below. Believe me, in almost 100% of cases these loopholes are found. A screed of this type in apartments is acceptable only if you are eager to definitely ruin relations with your neighbors, and at the same time make repairs for them. It is this drawback, from which even a waterproofing film cannot save, that negates the advantages of this option, such as low cost and comparative ease of self-production. In general, these are not the best floors for an apartment. Which floor is cheaper to install in an apartment photo
Semi-dry floor screed
An excellent alternative to the previous option - if you are looking for a cheap and, as they say, angry flooring option for an apartment, then you should pay attention to a semi-dry screed. Unlike the previous option, a minimal amount of water is added to the solution used to create it - in fact, it’s not even a solution
In the language of builders, such a mass is called prancing - dry mixed sand and cement, to which, if exaggerated, one drop of water is added. Even without a waterproofing film, there is nothing visible on the ceiling of the neighbors below - to a large extent, such waterproofing is done as a safety precaution. Although no - at some points it helps. The fact is that it is very problematic to level dry grout, and in order to achieve a perfectly flat surface, it has to be moistened with water, which, in general, creates waterproofing protection. It is physically more difficult to pull such a tie, and it costs a little more than a standard one - in principle, not much, especially considering that the technology will deprive your neighbors of all chances for free repairs. Dry floor screed. We can say that this is the ideal answer to the question, which floors are best for an apartment? This technology does not involve the use of water at all, and it is classified as screeds only formally. In fact, it is something between a screed and a wooden flooring, which, in fact, it is to a greater extent. To make it clearer what it is, I will say a few words about the installation of such a floor - first, using beacons, ideally at the horizon level, filling is done with fine granular heat-insulating material. Then gypsum fiber boards are laid on top of all this - they are laid in at least two layers, resulting in a coating similar in its technical characteristics to a cement-sand floor screed. Such a floor can withstand all the necessary loads for a long time - you can cover a dry floor screed with anything, including fashionable laminate and tiles. There are no restrictions here. What kind of floors can be made in an apartment photo
This concerns the floor screed, one of the disadvantages of which is the cold - such a base gives off the cold. There is no way you can walk on it barefoot without heating, even if you insulate it in every possible way. The only base made from sand and cement that can really be called a screed is a mortar screed with foam introduced into it - the so-called warm screed, which will cost you no less than a dry screed, although their insulation effect is approximately the same . In general, if you want to get a truly insulated floor base, then it is better to look for the answer to the question of what kind of floor to make in the apartment among the boardwalks, which we will talk about later. Here you should look for the answer to the question, which floor is cheaper to install in an apartment?
Boiler installation
The boiler can be installed even before the heating system is developed. Before you decide to connect the installation to it, you need to make sure that this boiler has sufficient power to cope with heating the room.
If a boiler is installed specifically for heating, you can choose between several types:
- Gas,
- Electric,
- Diesel,
- Solid fuel.
It is possible to install on the floor or attach to the wall.
Installing a boiler requires several important steps:
- Coordination of connection with special services;
- Arranging the installation site, leveling the wall or floor, creating thermal insulation;
- Calculation of required power.
To create comfort, sometimes you need to spend a lot of effort and money. The feeling of comfort is directly related to the ambient temperature. For humans it is 20-22 degrees. Maintaining a comfortable temperature in living rooms is carried out in various ways, among which heated floors occupy one of the first positions.
average rating
more than 0 ratings
Share link
Which is better - concrete or wood?
At the design stage of a private house, you must immediately decide what the floor will be - wooden or concrete. To choose the most suitable option, you need to know what the difference is between these floors.
Price
To fill a screed 5 cm thick, you will need 0.5 bags of cement (300 rubles/bag) and 1.5 (50 rubles/bag) bags of sand. Thus, 1 m2 of screed will cost an average of 225 rubles. If the work will be performed by a hired person, then the cost of the work must be added to this amount - 250 rubles / m2.
Average cost of concrete screed
If we take as a basis dry timber 10 x 10 cm, in increments of 40 cm (400 rubles/m2) and OSB boards (600 rubles/m2) 18 mm thick. With the work of a carpenter, the cost will be 1250 rubles/m2.
Average cost of plank flooring
Communications
In modern houses, the heating, water supply and sewerage systems are laid inside the floor structure. In the event of a pipe break, wooden ones can be quickly sawed and access to communications can be gained. With concrete floors it is more difficult - to remove the screed you will have to use a professional tool, and the process itself will take a lot of time and effort.
Deadlines
The screed gains full strength within 28 days from the date of pouring. Moreover, it gains 70% of its strength in the first week. All this time, the solution gives off moisture and nothing can be laid on it.
Wooden floors can be used immediately after installation.
Filling the screed
Durability
If the installation of a wooden floor is not carried out by a professional craftsman, then after a couple of weeks you can hear a characteristic creaking sound when walking on the floor. Concrete screed does not have this drawback. Moreover, when work is performed by hired workers, the result and quality of their work can be assessed immediately.
Rich texture of natural wood
Comparison of characteristics
A comparative analysis makes it possible to understand in more depth the issues: which is better, a semi-dry screed or a classic screed and a dry screed or a cement screed. For comparison, let's take the following criteria:
- strength;
- cost of materials per m2 of screed;
- cost of work;
- durability;
- resistance to sudden changes in temperature and humidity;
- thermal conductivity;
- floor load;
- complexity of technology;
- surface quality level;
- screed thickness;
- compatibility with heated floors;
- application area.
Strength
One of the main criteria for evaluating a screed is its ability to withstand static and dynamic loads. After all, you can’t place a fireplace or heavy furniture made of solid wood on a floor that might fall through. In this regard, classical technology is the leader - it can withstand up to 20 MPa. The semi-dry screed is slightly inferior to it. But the data here is contradictory. Some sources consider its strength to be high, others - worse than dry. Long searches in various reference books (is it really a military secret) made it possible to find some numbers: from 1.0 to 18.0 MPa. But this cannot be.
A specific figure can be found if desired, but in a “crooked” way. It is known that the strength value is directly related to the density indicator. And these indicators are in the technical conclusion of one interesting work devoted to the study of the thermal conductivity of semi-dry unbound cement-sand mortar.
It indicates the average density of such a screed - 1450 kg/m3. The density of the leveling layer poured using “wet” technology is 1800 kg/m3. Then everything is simple: divide 1450 kg/m3 by 1800 kg/m3 and multiply by 20 MPa (strength of cement screed). As a result, we obtain a semi-dry screed strength of 16.1 MPa. A figure close to real strength. Reinforcing mesh and fiberglass slightly increase the performance. But their input is also possible in the “wet” CPR.
It was also not possible to find exact strength figures for dry screed - no one knows, no one needs it. But here everything is much simpler: just as the speed of the squadron depends on the speed of the slowest ship, so the strength of the screed is determined by the strength of one pellet: 2.0 MPa - average, 4.5 MPa - maximum.
Conclusion: in terms of strength, “wet” technology is the undoubted leader. Dry screed under a fireplace, stove, frame furniture made of solid precious wood will simply crumble. It won’t even support the weight of a car in the garage.
Cost of materials per 1 m2 of screed
When carrying out repairs, one of the main criteria is the cost of materials per 1 m2 of screed. And here we observe an interesting situation: the cheapest type of material is expanded clay. For 1 m3 you will have to pay about 2000 rubles, if you take it in bulk, without packaging. And many consumers buy into this.
In fact, 1 m2 of cement screed costs from 320 rubles. up to 397 rub. (calculations can be viewed here). A dry screed will be more expensive. Expanded clay itself will cost about 90 rubles/m2 plus flooring 280-300 rubles/m2 for one layer, but you need two.
Conclusion: despite the apparent cheapness of expanded clay, a screed made from it will cost more, and significantly. Cement screeds, despite the difference in the thickness of the mortar being laid, are completely equal, because the consumption of materials is the same, and the extra 1 cm in the thickness of the bond appears due to the lower density of the semi-dry technology.
Cost of work
You can order a professional team to install the screed:
- for dry - for 200 rub./m2;
- semi-dry - 250 rub./m2;
- “wet” - from 400 rub./m2.
These are reasonable prices for proven teams. There are also smaller ones. For example, they are ready to work using wet technology for 140-160 rubles/m2. But here the question immediately arises: why does the master not value his work? Most likely, such prices are offered by guests from Central Asia. There are also mind-blowing prices - 500-600 rubles / m2, designed for people who do not understand construction at all.
Conclusion: dry screed is the cheapest option. The most expensive is the classical method.
Durability
In the absence of extreme operating conditions, all compared types of ties have approximately the same service life.
Conclusion: no one has an advantage in terms of operational life.
Resistance to temperature and humidity changes
Expanded clay actively absorbs moisture from the air and then dries for months - this is its peculiarity. Wet screed is the enemy of laminate flooring. In addition, due to the dampness of the leveling layer, there is a high probability of fungus and mold appearing on the walls. Therefore, expanded clay is not used in wet rooms.
Cement-based screeds do not absorb water, so the technology has no restrictions on humidity. Temperature changes do not affect the ceramic pellets in any way, and the screed changes its size. A damper tape around the perimeter of the walls solves the problem.
Conclusion: it is better to avoid using dry screed in wet rooms.
Thermal conductivity
When analyzing the thermal conductivity of screeds, several important points must be taken into account.
- In what quality do the owners of the home want to see the screed? If in the form of an additional insulating layer, then the advantage is given to the technology in which the screed conducts heat poorly (the thermal conductivity coefficient is lower). If in combination with a “warm floor”, then the opposite is true, good thermal conductivity is needed.
- Expanded clay is not friendly, in general, to heated floor coverings from below.
- Through a layer of expanded clay backfill up to 5 cm thick (some experts say up to 6 cm), heat escapes like sand through your fingers. This must be taken into account, especially when installing floors on the first floors of apartments and in private housing construction.
If we talk about specific numbers, the thermal conductivity coefficient is equal to:
- for a “wet” screed - 0.6-0.9 W/m*K;
- semi-dry - 0.45-0.46 W/m*K (when used in a dry state or in laboratory conditions - 0.4 W/m*K);
- dry - 0.16-0.18 W/m*K (depending on bulk density).
conclusions based on the above figures :
- for “warm floors” it is better to use “wet” technology - denser material will better transfer heat from the heating system to the floor covering. But you can’t refuse semi-dry pouring. With good thermal insulation from below, the heat will not go anywhere - it will remain in the room. The only trouble is that it takes longer to warm up the room when starting the heating system;
- Only expanded clay can really insulate a floor, but provided that the thickness of the screed is at least 5 (6) cm. Some visitors may argue that there is a contradiction: the materials on insulation say that the effect of heat preservation with expanded clay occurs only with a backfill layer of at least 20 cm. That's right. But in the case of a screed, there is another factor that insulation does not have - flooring, which prevents the circulation of cold air between the expanded clay granules.
Floor load
The weight of the leveling layer is important for weak floors: subfloors made of boards and floor slabs with a long period of operation. According to this criterion, at first glance, expanded clay is the undoubted leader with its specific gravity of 560-780 kg/m3. In second place is semi-dry screed - 1450 kg/m3. The heaviest weight of concrete is 1800 kg/m3.
But this is only at first glance. In reality, it's not that simple. So, a 1 cm thicker layer of semi-dry screed puts pressure on the ceiling in the same way as concrete. There is complete equality here. Expanded clay is lighter, even when the thickness of the screed is doubled.
Conclusion: on weak floors there is no alternative to expanded clay.
Complexity of technology
The easiest way is to fill expanded clay. Can be done well by a novice builder. A “wet” screed is more technologically complex and labor intensive.
It is believed that semi-dry screed should be done by professionals - you cannot fill it without a little mechanization. But it is not so. The work can also be done by a home handyman. How? Read here.
Conclusion: the most complex technology for screeding is the semi-dry unbound CPR method, the simplest is the dry method.
Surface quality level
According to the criterion of surface quality, there are two leaders: semi-dry technology, which, after grouting the laid mortar, has a smooth surface and a dry one, thanks to plywood or OSB flooring.
With the “wet” method, the difference in height can reach 5-7 mm due to uneven shrinkage. Therefore, an additional finishing operation is required: grinding or pouring a self-leveling mixture.
Conclusion: you can immediately get a smooth surface using dry and semi-dry screeding methods. “Wet” technology requires refinement, which means additional costs.
Screed thickness
In Khrushchev buildings, the thickness of the screed is one of the important indicators - you can take a couple of extra centimeters from a ceiling with a height of 2.3 to 2.7 m. But reducing the height of the ceiling, firstly, negatively affects the human psyche, and secondly, all interior doors will have to be cut.
The thinnest screed for the “wet” technology is 3 cm, 1 cm more for a semi-dry screed. For some reason, it is believed that dry screed is 4 cm. But this is not so. 4 cm is only the minimum thickness of poured expanded clay or vermiculite. You also need to lay flooring on top of the backfill. This is plus more than 3.5 cm. The result is 7-8 cm.
Conclusion: the thinnest screed is with the “wet” technology, the thickest with the dry one.
Compatibility with heated floors
In private construction, when choosing a technology for leveling the base of the floor, its compatibility with “warm floors” plays an increasingly important role. Here the expanded clay immediately disappears - inside the backfill, the water heating pipes or IR film will simply be crushed. Cement mortars do not have this problem. Another plus in favor of a “warm floor” inside concrete is the approximately equal expansion coefficient of most pipes and concrete screed when heated.
Conclusion: wet and semi-dry screeds are completely, without restrictions, compatible with heated floors. Dry - no.
Application area
A dry screed has a weak point - moisture. Therefore, restrictions are imposed for use in the bathroom, open balcony or loggia, basement, garage. The fragility of the concrete slab does not allow it to be laid on unstable foundations (soil), and its weight does not allow it to be laid on weak floors. Semi-dry technology has practically no limitations. An exception is a weak reason. May not be able to withstand the load.
Conclusion: semi-dry technology has a wider range of applications, while backfill has the smallest range of applications.
Selection according to the purpose of the room
When choosing a material for a specific room, take into account the features of its operation.
Hallway
The floor covering for the hallway must be wear-resistant
This room is characterized by high foot traffic and is located first at the entrance to the apartment, so strict requirements are imposed on the coating:
- easy care;
- presentable;
- strength and resistance to mechanical damage.
The best options: solid boards, commercial and semi-commercial linoleum and laminate, tiles. Moreover, it is recommended to lay a particularly easy-to-maintain coating directly at the entrance, namely linoleum or tiles.
Corridor
Porcelain stoneware is often chosen as a covering for a corridor.
For corridors that are not in close proximity to the front door, you can use laminate flooring. Natural or artificial linoleum with a reinforced top layer, durable and beautiful porcelain stoneware are also suitable here.
Kitchen
Kitchen floors get dirty quickly and need to be washed frequently.
The peculiarity of this room is that dirty household processes are carried out here, high traffic flow, which means the coating must be wear-resistant, non-slip, and easy to clean. Options:
- porcelain stoneware;
- semi-commercial or commercial laminate;
- linoleum;
- rough ceramic tiles.
Bathroom and toilet
The bathroom floor must be moisture resistant
Relief tiles are best suited for bathrooms and toilets. Then, by preference, follow linoleum, cork, moisture-resistant carpeting, and solid boards made of moisture-resistant, rot-resistant wood.
Living room
Parquet is suitable for the living room
In the room that is the face of the house, you should put a beautiful and durable covering, for example, piece parquet, factory-varnished, or a solid board. Laminate looks like natural wood and cork.
Bedroom
Natural and soft coverings are appropriate in the bedroom
It is recommended to put environmentally friendly material in this room, which will give a pleasant tactile sensation. And the best option is natural carpeting. Practical options for the bedroom also include: linoleum, laminate, parquet, solid boards.
Children's
The flooring in the nursery should not harm the child’s health
The coating must be environmentally friendly and durable. If it is a wooden floor, it is recommended to treat it with oil. You can also install laminate or short-pile carpeting.
When choosing flooring for a private home, pay attention not only to the aesthetic qualities of the material. Do not forget about the features of care, service life, be sure to evaluate the functionality of the coating in a particular room
Our editors would like to thank the experts from the Remontnick.ru store for their assistance in preparing the material.
Selecting a covering for the kitchen
Floors in the kitchen - both in a private house and in an apartment - are subject to increased loads. Therefore, they must be made as resistant to moisture and hot steam as possible, to abrasion and various mechanical damage. What coating do we recommend? There are several options, each of which has its own advantages and disadvantages:
- cork floors, which came into fashion just a few years ago. Among the advantages are resistance to almost any aggressive influences and durability. The main disadvantage is rapid contamination in the food preparation area and difficulty in cleaning;
- tile. Regular tiles, which were used a couple of decades ago, are most likely not suitable for the kitchen, as they are too susceptible to mechanical stress. But you can easily replace it with stone tiles, which have incredible strength and resistance to moisture. The only drawback is the high cost. However, stone floors will pay for themselves over many years of use;
- Another option for a kitchen in a private home is porcelain stoneware. This material is much cheaper than natural stone, but in terms of its performance properties it is practically in no way inferior to it;
- linoleum. The best choice if you want to install inexpensive kitchen floors in a private home. It can withstand heavy loads, but is unlikely to withstand exposure to hot steam or dripping hot fat. However, you can replace the damaged area at any time - the low price allows you to do this quite often;
- The laminate mentioned above is also suitable for the kitchen. But it is best to choose a special moisture-resistant material that repels water and does not collapse under prolonged exposure.
What should floors be made of in technical rooms? The main requirement for them in a private home is the same water resistance, abrasion resistance and strength. If we consider the numerous tips published on the Internet, we can recommend using special collections of ceramic tiles or porcelain tiles for the bathroom and bathroom. Such materials can withstand almost any impact and are ready to serve you for many years.