Every owner of a country property wants his house to be not only durable, warm and cozy, but also to look attractive from the outside. There are many beautiful and durable materials for finishing the external walls of a house. These are facade tiles, vinyl, plastic, metal, polymer and insulating facade panels, fiber cement and porcelain tiles of various sizes, colors and textures. They can be attached to walls either with self-tapping screws or with special glue. Facade panels, although their price is low, require certain skills and the involvement of specialists for their installation. The optimal solution for finishing the walls of a house would be facade tiles. Its installation on the wall does not require the involvement of specialists or specific construction equipment.
Today, construction stores sell various types of facade tiles, which are distinguished by a wide variety of colors and unexpected design solutions. In these stores you can purchase, among other things, plastic molds for them. The Forteza panel has the most interesting execution and design. These products are clinker facade tiles made in the form of blocks. Despite the affordable prices, in order to cover the entire house with facade tiles, you will need a considerable amount of money, which not everyone has.
Modern technologies can significantly reduce the cost of cladding a private house.
It is quite possible to make tiles with your own hands at home, and you do not need special production equipment for this.
Preparing the filling solution
After the glue has dried, begin preparing the polyurethane mass for pouring.
The required quantities of polymer and hardener are poured into two separate dry and clean containers in the required proportions. Then pour them into a third dry and clean container and mix thoroughly with your hands, touching the walls of the container.
When working with the components of the compound, you should use protective clothing, gloves and goggles, avoiding direct contact of the polymer with the body. If the solution gets on your skin, wash it off immediately with running water and detergent!
Before filling the formwork with the compound, you need to dry brush the matrix with a thin layer of polyurethane to reduce the number of air bubbles that form on the surface of the sample when adding the bulk of the mixture.
One of the corners of the base is raised, and the filling of the formwork with polymer begins from the lower corner, while simultaneously introducing the composition and lowering the raised corner. When the base is in a horizontal position, the thickness of the polyurethane layer above the top point of the matrix should be 2-3 cm.
House façade cladding technology
The technology for laying facing tiles for facades has two options:
"Wet" method.
Installation of tiles using glue. The method is suitable for lightweight products that externally cover walls whose surface is fairly flat: foam blocks, bricks. It is preferable to carry out external work in warm weather to ensure the best adhesion of the adhesive composition to the material.
"Dry" method.
The façade is tiled, mounted on a sheathing attached to the wall. This allows you to fix heavier elements. The method is used mainly for frame or wooden buildings. A facade lined in this way can be additionally insulated or made ventilated.
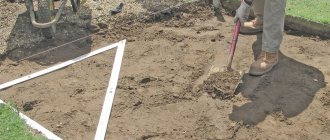
Preparing the base
Facing the facade with tiles using the “dry” method as a base implies the presence of a frame, starting, as a rule, from the base itself.
If the facade is not insulated and the facing material is not heavy, it is possible to install it without a frame.
To prepare the base for cladding, you usually need:
- clean the surface of the facade from all contaminants;
- apply adhesive primer;
- mount the starting profile around the perimeter.
Laying tiles on the frame
Do-it-yourself installation of a frame for laying facade tiles is made easier by the fact that there are already ready-made structures for specific finishing materials, including guides and brackets. Places for installing the bracket are marked on the wall. Installation is carried out using the points obtained using anchors. After this, the facade is insulated, thermal insulation is placed and secured with fasteners. Then the guides are mounted, and the frame is ready.
When laying façade tiles on the frame with your own hands, it is convenient to use clamps secured with self-tapping screws to the sheathing - fixing devices into the grooves of which the tiles are inserted.
To lay tiles on the frame you need:
- install the bottom row of fasteners horizontally on the guides at the same level, secure with metal screws;
- insert the tiles into them, attaching 2 clamps on top, and also fasten them to the guide.
This method of fixation is no less reliable than cement, and allows, if necessary, careful dismantling of the tiles.
"Dry" installation method
Finishing the facade with tiles using the “dry” method is carried out on a metal frame, which must first be assembled on the facade.
OSB cladding products are well suited for finishing in this way.
Frame technology is used to create ventilated facades, because Air circulates freely between the finish and the wall, providing ventilation. This space can be filled with thermal insulation: mineral wool or PPS boards, and topped with facade tiles.
"Wet" cladding method
Exterior finishing of the facade, in which the tiles are laid on an aqueous adhesive composition based on resins, polymers or cement, is considered to be produced by the “wet” method. With this installation method, frost-resistant special adhesives are used. To do a “wet” installation, the surface must first be prepared, and then the tiles must be laid with gaps formed by crosses, starting from the bottom. The cladding is done using an adhesive mixture, which then takes about a day to set. After drying, removing the crosses, rub the seams.
Wall decoration
Installing facade tiles on the wall is not difficult. Vertical and horizontal frame elements are attached to the wall using self-tapping screws. The tiles are secured to the frame using clamps and self-tapping screws. Between the frame elements you can lay slabs of mineral basalt wool. This will significantly insulate the house. After this, sequentially screwing the clamps to the frame with self-tapping screws, the cladding of the house is mounted from home-made facade tiles.
If one or more tiles break, such a facade will be easy to repair. To do this, you should have several dozen facade tiles in stock. They need to be stored indoors or under a canopy.
Installation instructions
To install tiles, a prepared surface is required. The installation procedure for “dry” and “wet” methods differs from each other.
To install tiles on self-tapping screws you will need:
- Creating a sheathing with horizontal placement of planks. The pitch is equal to the distance between the upper and lower axes of the tile fastenings.
- The bottom row of tiles is installed with position control (flat, straight, horizontal) along a stretched cord. It is recommended to check the condition of the masonry in a similar way every few rows.
- When installing corners, specialized elements or trimmed regular ones are used. In some cases, elements from other types of tiles are used to decorate the corners, creating an attractive decorative effect.
- Window and door openings are finished in the same way as corners.
Installation of tiles with adhesive is carried out in a manner almost identical to the usual laying of tiles for interior decoration. You will need to purchase glue that is most suitable for the type of material available.
- The bottom row is installed with support on a temporarily installed bar. It is mounted at the required height, the position is controlled by the building level.
- The glue is diluted according to the instructions on the package. Apply with a notched trowel of a certain size, the tile is applied to the wall and pressed slightly.
- The same distance between the tiles vertically and horizontally is ensured using plastic crosses.
- The joints are grouted using the same glue or a special compound. For a greater decorative effect, it is recommended to use a composition of a different color; this will decorate the masonry and create a neat appearance of the facade.
Clinker tile manufacturing technology
Clinker facing tiles are plates made from natural clay that have undergone a special processing technology. Such material is fired at more than a thousand degrees, after which it is shaped under pressure into tiles or building blocks of given dimensions.
An important difference between clinker and other types of decor is its extremely low ability to absorb moisture.
Thanks to this property, which is important for the durability of interior cladding, clinker tiles are characterized by:
- Increased resistance to destruction;
- Long service life;
- Ability to withstand severe frosts.
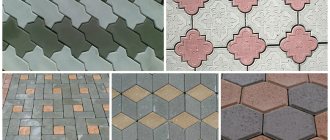
Forms for facade tiles
One of the main points in the process of creating tiles or artificial stone for facade cladding is the shape. This device is made from ABS plastic.
This material is the most widely used among others, but silicone, polyvinyl chloride or polyurethane can be used for such purposes. These materials are capable of providing a high-quality result that will have the desired degree of matte or will be glossy on the surface.
As for molds made from PVC or plastic, they are convenient to use because they do not require lubrication and steaming, since the concrete mixture that is poured into them is not capable of sticking.
A good option regarding the material from which molds can be made is polyurethane. It is characterized by good strength and durability. If the mold is made of polyurethane, then it can be used for quite a long time, using it to produce 1000 or more tiles. In addition, this shape gives the tile an ideal glossy surface:
There is a wide variety of types of shapes that are used to create facade tiles.
The main ones include:
- limestone ore;
- marble;
- cut limestone;
- cliff;
- dolomite.
IMPORTANT! By creating tiles yourself, you can make a shape that is not similar to any of the ones listed. Thus, the tiled facade of the building will be one and only of its kind.
Selecting molds for casting tiles
In an enterprise environment, façade tiles are produced using methods of which only one is suitable for home use – vibration casting. It should be taken into account that the prices for high-quality molds are quite high, the turnover of molds for casting facade tiles is up to 1500 cycles, so it makes no sense to buy them for the production of 5-10 square meters of finishing. But, if the amount of cladding work is significant, the cost of purchasing molds or making them yourself from polymer materials will provide significant savings.
The use of primitive homemade molds from scrap materials when casting, although it is a less expensive option for performing the work, does not guarantee the aesthetics of the finish.
Silicone molds can withstand a huge number of castings
Molds for casting tiles are divided into 3 types based on the material used:
- silicone;
- plastic;
- polyurethane.
Of the listed types, polyurethane molds are suitable for making facade tiles at home, since silicone molds are fragile, and products made from plastic molds do not resemble natural stone due to their glossy surface.
The process of manufacturing facade tiles using the vibration casting method consists of the following stages:
- Making molds.
- Preparation of the solution.
- Pouring the solution into molds.
- Removing products.
Let's take a closer look at these stages.
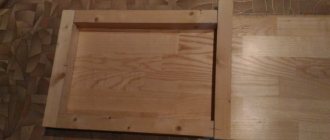
Making a mold for tiles from wood is the easiest way
Laying clinker facade tiles
Clinker tiles are a highly durable material. But in order for it to last for a long time, it is necessary to follow the technology of working with it. Installation of finishing material takes place in stages.
Preparatory activities
As a base for finishing, you can use plaster or reinforced concrete with increased frost resistance. There are special requirements for the foundation:
- perfect smoothness;
- good load-bearing capacity;
- absence of cracks, voids and poorly secured parts;
- absolute cleanliness - no dirt, grease stains, bitumen mastic.
There must be a layer of waterproofing to prevent moisture penetration and destruction of the facade. If there are weak places on the base that crumble, they are removed. All unevenness is leveled using plaster no later than 3 days before installation.
Mechanized façade plastering
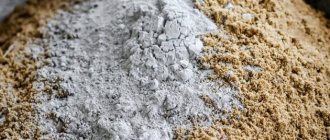
Mixing glue
For this purpose, it is most convenient to use a mechanical mixer. Prepare a solution from cement M-500 and sand in a ratio of 1:3. Add water to this mixture in small portions and mix until the mass becomes plastic and homogeneous.
You can also use a ready-made solution, but the scope of its application must correspond to the planned construction work. This adhesive is most often applied to the tile itself, so you should not leave important notes or calculations on its inside.
Application of adhesive composition
Laying features
Before starting the installation process, the materials must be removed from the packaging and mixed so that there are no sharp deviations in color. Only slight differences in shades are acceptable.
You can start laying only in good weather - at a temperature within +5-30 degrees and no rain. If it is too hot outside or the precipitation continues, and work needs to be continued urgently, you can install a shelter in the form of an awning and a background.
Facade made of thermal panels with clinker coating
The process of laying clinker tiles occurs in a certain order:
- The surface of the walls is moistened with water from a sprayer.
- A 3-4 cm thick construction mixture is applied to it. The mortar is leveled using a lath.
- An approximate marking of the location of the tiles is outlined.
- Finishing material is laid on top. The width of the seam should be no more than 12 mm.
- Installation of tiles begins with the design of areas around windows and doors. After this, they proceed to the corners of the building. To facilitate the installation process, you can use a special tile - corner, which emphasizes the lines of the walls and looks natural.
- The surface is sprayed with water and covered with polyethylene to ensure uniform drying of the mixture.
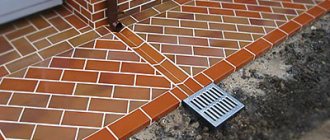
Cladding the house with tiles with a stone texture
To make the façade finish look harmonious and durable, it is recommended to adhere to the following tips:
- tiles of rich and dark shades are laid in the lower part of the facade - at a height of up to 6 m from the foundation;
- dark colors increase the overheating of the building, so it should be no more than 20% of the total tile area;
- to grout joints, you can use a ready-made color mixture that matches the tone of the finishing material;
- Before applying the solution, it is better to cover the surface of the walls with a primer and wait for it to dry completely;
- It is advisable to lay clinker in rows, starting from the bottom of the facade;
- if insulation is attached to the walls, it is covered on top with a reinforcing mixture or fiberglass;
- if after sealing the seams there is a lot of dirt left, it is removed with a jet of water under high pressure, and for especially advanced cases, special substances are used.
Facade tiles are becoming more and more popular, and the installation process is not very labor-intensive. Even a beginner can cope with this if he takes into account the installation technology. In order for the finish to look impressive, perform a protective function and retain heat inside the building longer, you need to be careful about its installation.
How to sew seams - step by step instructions
They are filled with a solution to bind all the elements into a single whole. This also promotes enhanced sealing of seams. After this procedure, the facade looks noble, and the finishing is less exposed to the aggressive influence of the external environment. Grouting is performed in several stages. Each of them has its own characteristics.
Step 1. Moisturize the seams. Before starting work, you need to wait until the solution dries completely - from 10 to 15 days . If you start unstitching the seams ahead of schedule, this will negatively affect the strength of the finish.
Attention! The water that is part of the adhesive mixture will not find a way out and will destroy the facade from the inside. This is especially dangerous for regions with extremely low air temperatures in winter.
Working with seams begins with moistening them. A sprayer is used for this. Wetting with water improves adhesion between surfaces. It is necessary to moisten the seams in all directions - both horizontally and vertically.
Moisturizing with a brush
Step 2. Mixing the solution. A mixture based on lime and cement has good plasticity. It is easy to level and distribute over the work surface. Cement in its pure form is not suitable for this. It can only be used with the addition of plasticizers to ensure normal hardening of the mixture.
Mixture manufacturing process
Construction mixer price
Construction mixer
To prepare the solution you will need the following components:
- cement - 1 bucket;
- slaked lime - 1 bucket;
- sand - 5 buckets.
Instead of lime, you can use a liquid plasticizer. The solution is mixed in a certain order:
- Add water in small portions. Regular tap water will do.
- Stir the mixture continuously until it becomes homogeneous and has a consistency similar to wet sand, which sticks together well if crushed.
- The finished mixture is used for 2 hours . Then the solution hardens and becomes unsuitable for work. Even if you dilute it with water, it will not help improve adhesion between surfaces.
If you don’t want to prepare the mixture yourself, you can buy a ready-made one. Then it is used in accordance with the instructions that come with it.
Ready mixture for joints
Note! The strength of the solution depends not only on compliance with the technology of mixing it. This is also affected by the base on which the mixture is applied. It should be clean and smooth.
Step 3. Filling the seams. The moistened surface is filled with the prepared solution. This is done as follows:
- The composition is drawn onto a spatula.
- Using a trowel, the mixture is pushed into the open seam.
- Compact the seam. To do this, iron it with a trowel with slight pressure.
The consumption of the composition for tiles with a thickness of 8 to 12 mm will be in the range of 4-5 kg per 1 sq.m. During operation, part of the grout mixture crumbles. To save money, it is better to lay clean plastic film on the floor. The crumbled solution can be carefully collected and used for its intended purpose.
Filling seams with a gun
Prices for a sealant gun
Caulking gun
Step 4. Clean and moisten the seams. After compacting, you need to remove any remaining mortar from the tiles. To do this, carefully sweep the finish with a soft bristle brush or soft brush.
Advice! Movements are performed diagonally. Then you can easily remove the excess mixture without damaging the seams.
After this, the seams are sprayed with water from a spray bottle. This helps prevent the mortar from drying out prematurely and cracking.
Finished seams on the facade of a building
Video - How to grout seams on hand-molded clinker tiles
Types of cladding: pros and cons
The most common types of tiles used for cladding facades include the following varieties:
- ceramic,
- concrete,
- terracotta,
- clinker
In order for you to choose the most suitable option for yourself, you should familiarize yourself with the advantages and disadvantages of each type of tile.
Ceramic granite tiles
From ceramic granite
Facade tiles from ceramic granite are made by mixing different types of clay with the addition of sand, feldspar, dyes, and special mineral enzymes. The mixture thus obtained is first shaped and then placed in a kiln, where at a temperature of about 1300 ° C the tile takes its final form. The main advantages of this type include high frost resistance, water resistance and wear resistance of the resulting coating. The disadvantages of granite material include the difficulty of laying tiles due to their significant weight.
Concrete tiles
Concrete
Concrete tiles are made from classic Portland cement and well-sifted sand with the addition of fillers and additives, which give the product special strength and frost resistance. Vibration-pressed molds are first fired in a kiln and, after cooling, covered with colored sealants. The advantage of this type of coating is a wide selection of different textures and colors, as well as relative lightness and low cost. There are practically no significant shortcomings in tiles of this class.
Terracotta tiles
Terracotta
The starting material for the production of terracotta tiles is a special kaolin clay with a porous structure, fired in a kiln at a temperature of 1000° C. The advantages of these coatings are their ease of installation, resistance to temperature changes and solar radiation. A relative disadvantage of terracotta products is their insufficient mechanical strength.
Clinker tiles
Clinker
To produce clinker tiles, special slate clays are used, fired in a kiln at a temperature of 1300° C.
Its advantages include low moisture absorption, high frost resistance, as well as a wide selection of colors and textures, as well as resistance to mold and mildew. Its only drawback is its high price.
Choice of material - what affects it
When choosing a material for making tiles with your own hands, you need to understand that it serves a role not only for decoration. The finishing must reliably protect the facade from the negative effects of the environment.
In order to minimize the cost of producing facade tiles, the following factors are taken into account:
- Cost of material for manufacturing.
- Availability of cooking technology.
- Shape and dimensions of the product.
- Availability of decor and color shade.
Pouring stone
Preparation of the workplace
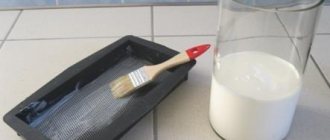
Before pouring the stone, the molds need to be wetted so that the stone is easier to remove. It is best to moisten with water diluted with laundry soap. Take the soap, grind it a little and pour it into warm water. Wait a little, shake and pour the solution into a spray bottle.
The table on which you will be pouring must be level, otherwise the tiles may turn out uneven. Place the mold on the table, spray it with a spray bottle so that it is well wetted, but not too much water.
Wetting the mold with soapy water
How to calculate the amount of plaster per mold?
If you have purchased molds, you can ask the seller how much plaster and water you need. But it also happens that, following the advice of the seller, you end up with a lot of mixture or the solution turns out to be too liquid or thick. A lot depends on what kind of water you have and the gypsum itself.
Ask a stone maker!
For example, I work, as I said above, with Magma G6, diluting it with water 1 to 1, i.e. I add 1 liter of water to 1 kilogram of gypsum, the mixture is perfect. A very good friend of mine also works with this gypsum, but he lives not in Russia, but in Kazakhstan and adds 0.8 liters of water to this amount of gypsum. Everyone's water is different and that's a fact.
Now I’ll tell you how I empirically determine the amount of ingredients for new forms. I take dry plaster, fill the mold with it, cutting off the rest with a spatula on top. Then I pour it into a bucket and weigh it. I remove about 30% from this amount. I dilute it with water 1 to 1 and fill it. If there is a lot of solution, then approximately “by eye” I remove the plaster and water in equal proportions and fill it again. If there is not enough mixture to completely fill the mold, then I add more, etc. In this way you can find out the required amount, the main thing is not to forget everything and write it down in a notebook.
By the way, I noticed this pattern: if for 1 mold, for example, you need 1 kg of gypsum and 1 liter of water, then it is not a fact that for 2 molds you will need 2 kg of gypsum and 2 liters of water. As practice shows, 2 forms require a little less of each ingredient.
Join our group vk.com/kamnedelofff - you can always get an answer there. Or just exchange experiences.
Mixing and pouring process
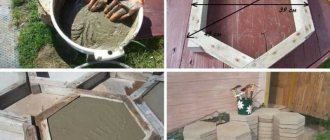
Once you have determined the amount of plaster and water needed, take a flat bottom bucket and fill it with water.
Weighing gypsum
Then take a screwdriver with an attachment, lower it into the water and turn it on so that the speed is not too high. Then start pouring plaster from the second container. You should not immediately pour out the entire mass of plaster, as it will be impossible to stir it without lumps. Pour in the plaster slowly while stirring. The solution should be fluid and without lumps.
After this, take a bucket and pour the mixture into molds, first filling the bottom of all the tiles while the solution is thin. Add the rest on top and level it with a wide spatula. Do not press too hard on the trowel as the back of the tiles will be oval when dry.
After 1-2 minutes, go through the spatula again, because... the plaster begins to swell and the back side may turn out uneven.
Pouring decorative stone
Stripping
After 15-20 minutes you can do the unmolding. To do this, pull the form onto the edge of the table so that part of it hangs in the air. Pull it down until it separates from the stone and remove the tiles. Some specialists turn the mold over on the table and remove, as it were, not the stone from the mold, but the mold from the stone.
Finished stone after casting
Mold making
Today it is quite possible to purchase ready-made forms. They come in all types of tiles; if you look hard enough, you’ll be lucky enough to buy exactly what you need. The most important thing is not to purchase cheap plastic matrices. Usually they are enough for no more than one application of the solution, after which the plastic becomes unusable. As already noted, a suitable form may not be on sale, then you will inevitably have to make it yourself. Whatever material you choose for the matrix, you can take an artificial analogue, tile or natural stone as a basis. If you choose the second option, then buy several different samples, remember that nothing is the same in nature. The base can be a wooden beam or log. The main thing is to choose a beautiful wood texture. Let's understand the technology of the form.
Let us immediately note that the base can be made for one tile or directly for a group of stones. It is more profitable to do the second one, since the output is several finished products at once, and the speed of work, accordingly, increases. Whatever material you use, you will need formwork. Buy ready-made or make it yourself.
Silicone sealant is cheaper to choose in large packaging
Silicone
Silicone is sold in different packaging. It’s better for you to look in buckets, since in tubes you will overpay for packaging, but you need a lot of it.
Now we lubricate the bottom and walls of the formwork with a special lubricant, and lay tiles or stones on the bottom. The sources also need to be lubricated, since they will have to be freed from silicone.
Important! If gypsum stone or tiles are used as the starting material, then they must be covered with several layers of varnish, only then coated.
The form is filled to the brim.
Prepare a soap solution for brushes and spatula. Apply silicone and smooth it with a brush, constantly pressing. This way you will avoid bubbles. Now it is advisable to compact the silicone and level it with a soap spatula. Now the mold must be left until the silicone hardens.
The polymerization process takes a long time. The standard rate is 2mm per day. The thicker the future workpiece, the more time it will take. Don’t rush to pull out the matrix; the stronger it is, the longer it can be used. A poorly polymerized form can be used once or twice. Standard properties of silicone sealant that should be taken into account when working:
- tensile strength - 01 MPa;
- density - 1200 kg/m3;
- viability - 8 hours;
- durability - 20 years.
Base for stone-look tiles
After complete hardening, the material is removed, the matrix is washed with soap and can be used.
Compound molding dies
There are special compositions for casting molds. They can be purchased at construction stores or craft departments. There is no need to chase imported compounds; our compounds are of good quality and reasonable cost.
The example shown in the photo has two components. Silagerm -5035 has a tensile strength of about 4 MPa, shrinkage of no more than 1%, and a complete hardening time of 24 hours.
The quality of the composition is better, and accordingly the forms made from it are used longer.
Important! Before pouring plaster or cement, lubricate the mold with a special compound - Tiprom, then it will last even longer.
Domestic polyurethane compound
Molding of facade tiles
The forms are placed on a working vibrating table and filled with the finished solution using a trowel - a narrow mason's trowel. If the solution does not include natural crumb fillers and dye, then pigment is first added to the molds with a layer of 1-1.5 cm, after which they are gradually filled flush with the edges with the main composition. This allows you to get a tile with a front surface uniformly painted to a depth of 1.5-2 cm.
Considering the high cost of a vibrating table and the laboriousness of making it yourself, when molding tiles you can do without it. If you install a sheet of steel or chipboard (chipboard) on two supports, and place polyurethane forms on it, then the mixture can be compacted in the forms by tapping the sheet from below with a hammer.
After compacting the mold, being careful not to deform it, transfer it to a horizontal surface for two days. During this time, the products are not moved or touched.
How to choose adhesive for clinker tiles
The clinker specifications described above make it necessary to be very careful when choosing an adhesive for it.
The better each individual tile is fixed on a vertical surface, the longer the entire facing decor will last.
At the same time, using the first glue you come across can easily lead to peeling or chipping of some cladding parts. This will inevitably deteriorate the aesthetics
- Facade surface;
- Balcony walls;
- Clinker-lined steps.
Two simple manufacturing methods
- Making from concrete is considered the easiest way. The raw materials used are Portland cement, fine crushed stone, sand, lime and plasticizer. In order for the cladding to have water-repellent and frost-resistant properties, modifiers must be added to the mixture. The production process is very simple. All components are mixed, poured into the mold and laid out on the vibrating table platform. This is a mandatory procedure to completely remove air. After drying, the product is painted in the preferred color.
- If you want to make clinker tiles, the technology is slightly different. A clay mass is used as a base, which is mixed with modifiers. The prepared mass is poured into a vibratory pressing machine, through which the tiles are formed. This process includes mandatory firing. The workpiece is also pressed under high pressure. The firing temperature reaches up to 1300 degrees Celsius. The result is a high quality finish.
Step-by-step instruction
Now let's look at the step-by-step process of how to make facade tiles with your own hands. All work must be carried out at temperatures from +15 to +30 degrees Celsius. This temperature range will provide ideal conditions for the product to harden.
Please note: For protection purposes, gloves and goggles must be used. The room should be well ventilated.
First, prepare the molds for casting
A vibrating table is also installed. Can use a regular table
First, molds for casting are prepared. A vibrating table is also installed. You can use a regular table.
Further work has the following sequence:
- The molds are treated from the inside with soap or oil. This will make removing the tiles from the mold simple and easy.
- Next, the solution for casting is prepared. Let's consider a simple cement-based option. For mixing, it is best to use a concrete mixer, so all components will be evenly mixed together. For one bucket of sand there is half a bucket of water. These components are mixed for one minute, and then two buckets of cement and another bucket of water are added.
- After this, half a bucket of water and four buckets of sand are added. These components are mixed.
- The resulting composition should not be rare. Its structure should be plastic and dense.
- When the required consistency is reached, dye is added to the composition and everything is mixed.
- Next, the solution is poured into molds. This must be done on a working vibrating table.
- The solution is evenly distributed throughout all forms.
- Throughout this time, the vibrating table continues to operate.
- During vibration, air bubbles will come out of the solution. At the same time, using a wide spatula, all forms are leveled to the same level.
- The solution protruding beyond the mold is immediately eliminated.
- After this, the workpiece is sent to a drying cabinet or a special drying chamber.
It is necessary to remove it carefully so as not to damage the workpiece. You can use a rubber mallet or light hand movements. Facade tiles will be completely ready for further cladding after 10 days
The facade tiles will be completely ready for further cladding after 10 days.
Conclusion As you can see, DIY tiles are a doable task. By making it yourself, you will save your family budget, but you will also need to spend time and effort on the production process itself.
But the end result will not leave you and those around you indifferent. To consolidate all the material presented, we recommend that you watch the prepared video.
Professional production of tile material at home
Do-it-yourself tiles are made using gypsum or cement. Gypsum cladding is usually used indoors, but if its surface is impregnated with hydrophobic substances, it can be used on building facades in dry climates. Nevertheless, many are interested in gypsum products, since they are easier to give the required color, they have better adhesion and are much lighter than cement elements.
Production of gypsum-based facing elements
To work you will need the following tools and materials:
- Plaster, preferably white.
- River purified sand.
- Lemon powder.
- Necessary dyes.
- PVA glue.
- Drill with mixing attachment.
- Matrices for shaping.
- Plastic bucket for solution.
- Brushes and spatula.
Gypsum also comes in different forms.
Before work, prepare a place to dry the material. It must be perfectly even so that the products are of the same thickness. Let's look at the whole process step by step.
- Add 1.5 kg of gypsum to one liter of water and mix with a mixer attachment. Please note that it is in this sequence, and not vice versa: first water, then plaster.
- Sand gives strength to the finished finish and should have a particle size of up to 1 mm. You can use smaller fractions, it all depends on the type of finished product. Sand is added in the proportion of 100 grams of sand per 1 kg of gypsum powder. Everything gets mixed up again.
- If you do not want your gypsum mass to harden after 5 minutes, and it has just such a setting period, then add citric acid to the solution.
- PVA glue will serve as a plasticizer for the mass; it, like lemon, delays the hardening of the mass. After adding PVA and powder dye, the mass is mixed again. It should reach the consistency and thickness of sour cream.
- Before mixing, you need to prepare the mold. Silicone is coated with any lubricant, for example a mixture of turpentine and wax. The polyurethane matrix must be lubricated with a special release fluid.
- If you are making tiles to look like stone, then it is worth touching up the bottom of the mold in some places. This will make the stone tiles look more natural.
- The mass is poured into molds in parts. The first portion is shaking, the second portion is shaking. The presence of a vibrating table would be desirable and working with it would be much easier, but you can do it this way. Shaking is necessary to distribute the mixture evenly. When you apply the top layer, it will already have thickened, and therefore you need to do all the work quickly.
The solution is poured in parts - Use a spatula to level the surface, removing excess mass. When distributing the solution into the form, you must shake it.
Distributing the solution with a spatula - A sheet of plywood is placed over the top layer and the entire mold is turned over. Now, what was below turned out to be above.
- The form is carefully removed from the corner, the products remain lying on the plywood for further drying. The form is removed carefully from the corners
- If necessary, the stones can be coated with a glossy varnish or painted over again.
Finished elements can be painted white
Video instructions for making tile elements from gypsum mortar
We invite you to watch a detailed video tutorial. After watching it, you will learn how to cast beautiful finishes for your home without difficulty.
Cement paste tiles
Cement or concrete tiles and artificial stones are much more in demand, as they can be used on any facades, garden paths and other types of landscape design. Nothing will happen to them in any weather. This tile is resistant to weathering, chemical and biological influences. It is durable and wear-resistant. Such products can be formed from Portland cement, river sand and water. PVA glue is added as a plasticizer. The following is all familiar:
- Cement and sand are mixed in powder at a ratio of 3 to 1. Then water and glue are added to them. The mass is mixed well with a concrete mixer or drill with an attachment.
Type of finished mixture - The solution is applied in parts to the prepared forms. Just like when forming gypsum veneer units, the molding container is constantly shaken.
- Before applying the last layer, reinforcing mesh or thin rods are laid on the surface. All this is covered with the final layer and leveled with a spatula.
Reinforcement
- After the solution has set a little, a mesh is drawn on it to improve adhesive properties.
- The tile must dry. Then it is carefully removed from the molds and left to dry completely for several weeks. It is then stacked on pallets and stored in a dry, dark place.
Storage of finished products
Painting gypsum tiles
To give the manufactured products the appearance of a natural material, you will need to give them color. To do this, you can use a universal tinting paste. It is diluted with water to obtain a more durable surface, instead of pure water, use a mixture of water and acrylic primer (1:1).
You can apply the paint with a brush or use a spray bottle.
After applying the first layer of paint, it is recommended to wait a few minutes, moisten the surface with a spray bottle, wait 10 minutes, and apply the next layer of paint. Set the tiles aside for a day or two until completely dry.
There is another option for obtaining a uniformly colored surface. In this case, a coloring pigment is used intended for tinting cement and is added when mixing the solution.
To get an artificial stone with an interesting pattern, similar to natural, you will need to apply a little imagination and effort, paint the surface several times, creating areas of darker and lighter shades; you can give the stone a special attractiveness by drawing dark veins on it.
Gypsum tiles can be made with or without molds. The process itself is quite simple, but in order to get good results, you should still study the instructions and recommendations or consult with friends who have experience in performing such work.
Noticed a mistake? Select it and press Ctrl+Enter to let us know.
Required tools and equipment
A huge advantage of making cladding yourself is the ability to develop unique designs. Experiment with the composition of raw materials, but do not violate the basic proportions and requirements for the product.
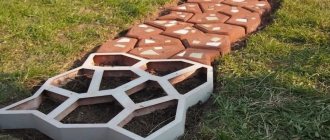
The easiest way to make tiles is from concrete. To make it using the vibration casting method, you only need a set of molds and a vibrating table. Matrices are made of wood, plastic, plywood, but the best option is polyurethane. Such templates allow you to convey the texture of the tile in the smallest detail and imitate natural stone. You can make a vibration table yourself from a metal frame, a sheet for the tabletop, springs and a motor from a washing machine.
The easiest way to create concrete tiles is vibration casting; you only need raw materials, a vibrating table and molds for pouring
The second method is vibrocompression. This installation is necessary for all tile options, as it allows you to maximize the density of the raw material without using a large amount of water.
In order for porcelain stoneware, terracotta and clinker to reach the finished state, you need a kiln. Each material requires compliance with a certain temperature regime from 1000 to 1300 degrees.
We make a matrix for decorative stone with our own hands
The whole procedure comes down to holding the liquid material in the desired shape until it hardens. In other words, we will create a form for the matrix. Polyurethane and silicone use the same operating principle.
What you will need:
- A flat, flat table measuring at least 1 x 1 m, standing indoors at room temperature.
- Smooth varnished (ideally laminated) plywood or chipboard the size of the future form plus its own thickness (of plywood) on each edge. The 50 mm sides are attached to the bottom and to each other with confirmations. In other words, you need a box for pouring into which the master model will stand.
- Elements of the master model (stones, even and smooth on one side).
- Universal PVA glue or superglue.
- Construction hairdryer.
What is a master model and how to make it
This is the original relief from which the impression will be taken. And there are two options here.
Operating procedure:
- We try on the stones on the form board. We lay them out so that there is at least 15–20 mm between them and between the stone and the wall.
- We outline the stones with a marker.
- We install the elements according to the markings, applying universal glue to the flat side.
- We fill the gaps between the board and uneven edges with acrylic sealant.
Attention! This must be done very carefully and remove any remaining glue and sealant from the mold. Master model with large elements is ready
The master model with large elements is ready.
Option two. Small elements grouped in unsystematic masonry. In terms of terms, this is called a “pile”. To get a cast in this form, we first need to create this form. This is painstaking work. Here you will need to make a small box according to the dimensions of the model with sides of 20 mm.
Operating procedure:
- We select the elements of the pile - real strips of sandstone with natural edges.
- We cut along the length on one side so that the width of the strip from the cut to the natural edge is from 20 to 30 mm.
- We assemble the pile by gluing the strips together. The gaps between them should not exceed 5 mm.
- When the box is filled, we place technical paraffin on the resulting relief and melt it with a construction hairdryer.
- Heated paraffin flows through the cracks and fills the lower part of the master model. This is necessary so that liquid polyurethane does not fill this place. Then it will simply be impossible to get the model out of it.
- After the paraffin has hardened, we disassemble the small box.
- Carefully remove the model, transfer it to a large box (with 50 mm sides) and place it on glue.
- We seal the gaps between the stones and the plane.
From this point on, the procedure is identical for both options.
- We install the 50 mm sides on the confirmats using sealant.
- Key moment. Lubricate the formwork and stone with a release agent - clean machine oil.
Attention! Lubrication with a release agent is carried out several times until the pores of the stone are filled. Otherwise, liquid polyurethane will take up space in the pores and this can lead to rapid wear of the mold and complications during operation.
- We set the form according to the level in the planes.
- We prepare the polyurethane mixture in strict accordance with the instructions.
- Fill the formwork with the composition. It is allowed to lay an alkali-resistant mesh to strengthen the bottom of the flexible matrix.
- After the time specified in the instructions, we disassemble the box and carefully separate the frozen silicone from the master model. We remove the sagging.
Despite the obvious simplicity of the technology, it also requires skill. To begin with, we recommend practicing on simple small forms - sawn brick, tiles, ready-made decorative stone.
Vitaly Dolbinov, rmnt.ru
TOP best manufacturers of adhesive for clinker tiles
In the domestic construction market, adhesives and adhesive compositions produced under the following brands are especially popular:
- "Extrabond". This glue is produced in the Russian Federation. Its composition is universal and quite suitable both for cladding rooms and for finishing facades, columns, galleries, and canopies over entrances. This glue can easily withstand severe frosts.
- RKS. This composition is used mainly for internal cladding. It easily tolerates high humidity. In latitudes with temperate climates it can also be used for external cladding.
- Ceresit CM. Very elastic and moisture-resistant adhesive. It is often used for cladding bathrooms, swimming pools, saunas, baths.
"Quick mix Baumacol". This composition is characterized by increased elasticity. It easily tolerates strong temperature fluctuations and other destructive atmospheric and weather influences.
This composition has proven itself to be effective in clinker cladding of complex engineering structures, including stoves, fireplaces, and staircases.
Installation methods
There are two options for laying facing tiles - dry and wet.
Dry installation
Its second name is ventilated facade. With this mounting option, additional thermal insulation of the building is created. This method is considered the most expensive and reliable. The dry version is more suitable for laying porcelain tiles, but it can also be used for installing other types of materials.
Porcelain tiles for facade
Its design includes the following elements:
- aluminum profile;
- brackets;
- membrane;
- insulation;
- facade tiles.
It is better to use non-flammable material – mineral wool – as insulation. Installation is carried out in a certain order:
- Using a level, the wall is marked. You need to draw two vertical lines and one horizontal.
- Using a drill, holes are drilled for the anchor bolts. Brackets are installed under the profile.
- Insulation is fixed to the wall. A special membrane made of non-woven materials is placed on top of it.
- A metal profile frame is installed. It is fixed with rivets. The distance between the profiles should be equal to the length of the tile.
- Holes are made in the profile for clamps for tiles. They are attached to the frame using rivets.
- The facing tiles are being installed. First the bottom row, and then the top rows.
Installation of porcelain tiles
Wet installation of tiles
A special mixture is used to fix the tiles. The adhesive solution is made on a cement-sand base. It is better to take it from the same manufacturer as the tiles. This method is more suitable for ceramic tiles.
Facade made of ceramic tiles
Required tools:
- notched spatula;
- mallet;
- adhesive solution;
- Master OK;
- level;
- plumb line;
- mooring cord.
The installation process consists of several stages:
- Leveling the surface, eliminating defects.
- Coating walls with primer.
- Mixing the adhesive solution.
- Applying the mixture to the wall. To prevent the solution from drying out, the surface should be covered with 2-3 tiles, no more.
- Distributing the adhesive on the back of the tile.
- Laying tiles in corners. Cladding the main part of the wall. The rows must be horizontal. They are aligned using a mooring cord.
- Maintain the width of the seams within 6-12 mm. Leveling the tiles by tapping them with a mallet.
Excess glue is wiped off with a piece of dry cloth. If all work is done in accordance with the instructions, the tiles will last a long time.
Pros and cons of laying facade tiles
Design options
Facades lined with tiles made of unpolished natural stone or imitating natural material look rustic. Natural irregularities and roughness, protrusions and depressions, and color tints add depth and volume to the building. This finish is well suited for castle-style estates, Alpine chalets, and English-style mansions.
Often natural stone is a material that adds accents to the exterior of a suburban area, because it harmonizes perfectly with other finishing methods. The best companion to sandstone and shell rock is plaster. In this combination, the nobility of the finish is not lost, and there is an opportunity to save a lot.
Porcelain tiles are often used for finishing government buildings, commercial buildings, offices and shops. However, cottages in the Scandinavian style, as well as high-tech or minimalism, look best when faced with porcelain stoneware slabs. To create an original exterior design for your home, it is better to choose several types of models, for example, with a glossy and rough texture, as well as models that differ in color.
Regular brick finishing is not capable of giving the exterior such a variety of color transitions and combinations. Clinker harmonizes perfectly with natural and artificial stone, porcelain stoneware, dolomite and plaster. The color palette helps greatly diversify the design options for the exterior design. From cool gray Scandinavian facades to light, warm Mediterranean styles.
Disadvantages of clinker tiles
The increased strength of such tiles also has a downside. It manifests itself in the fact that, under the influence of high temperature and other weather factors, such material is not able to stretch or bend along with the surface of a concrete wall or brickwork.
As a result, quite often after severe frosts and prolonged thaws, the clinker simply separates from the facade and warps or falls out.
Another significant drawback of clinker is its significant mass. Clay that is heavily compressed at a building materials factory and has undergone heat treatment weighs much more than ceramics of similar sizes that have not gone through such harsh pressing.