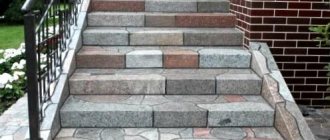
Let's talk about how to prepare the base for laying paving slabs on concrete. Such a base itself is durable and stable, it is indifferent to blizzards and slush, and will not sag under maximum weight loads. The stages of work, nuances and pitfalls are discussed below.
Paving slabs can be laid in three ways:
- cheap
- Fine
- and cool
Today I will tell you: how to make sure that the tiles last for decades, so that they don’t fail and the area doesn’t get wrinkled, cars don’t create ruts, and when leaving the house you don’t step in a puddle. Because, you see, the tiles sank and the work was done poorly.
RECOMMENDED ON THE TOPIC
- Laying linoleum with your own hands:...
- Preparing walls and floors for...
What is the main problem with paving:
- The fact is that the soil tends to sag.
- The earth also tends to swell. It is saturated with moisture and when winter comes and sub-zero temperatures arrive, it begins to swell and it is precisely this procedure that is the biggest evil for paving slabs.
It is winter frost heaving that tears up garden paths. The soil under the tiles begins to play and the area becomes covered with waves and subsidence. I would like to tell you how to make sure that you never touch laying tiles again. They did it once and forgot about it, I think maybe thirty years or more.
Options for laying paving slabs
Let's assume that there is a small plot and a parking space on it. Which, without fail, if you have money or don’t have money, you need to fill it with concrete. There are three technologies:
The first is an economical option. You simply take and equalize the entire area. It is advisable to go through the base with a tamper. You pour sand on top, a certain layer, it doesn’t really matter what it is. Place the paving stones on top in the order you like. After this, you fill the gaps with the same sand and... voila, the path or parking space is ready.
Disadvantages of this technology: the water that will appear on top of the tile, and this is precipitation, will pass down. The ground below will be saturated with moisture. At the first frost, this thing begins to swell very quickly. It starts to tear your tiles, well, don’t tear them and push them apart, bumps, holes and the like appear. This method is acceptable, of course, but you must understand that in a year, most likely, there will be no more species. You will have to add something somewhere and level the surface.
The second option, which has the right to life, but which is also subject to soil changes. The technology is this: you take out the soil, replace it with crushed stone and sand (at least 30 centimeters). After this, pour sand mixed with cement on top. This is the basis for installing the tiles. You are already laying tiles on it.
When it rains or you hose down the area, the base under the tiles will turn to concrete. This technology is quite common and is used, but again, the tiles will last three or at best five years, and then a new laying of paving stones will follow.
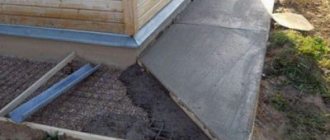
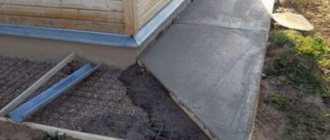
The coolest, correct technology for paving areas is to pour a concrete slab under the entire area of your paths, parking spaces, blind areas and recreation areas. I assure you, your paths and parking spaces will last at least 30, or even 50 years.
Construction of a concrete base
Work begins with marking the pedestrian path, site or roadway. The easiest way to do this is to stretch the cord on pegs along the contour of the future paving. You need to pull the cord slightly beyond the coverage, which will allow you to later install the formwork, and then the sidewalk curb stone.
The soil is removed along the dimensional contour to a depth of 25-28 cm.
It is recommended to move the removed fertile soil to flower beds or lawns. If the top layer is not fertile and it is planned to import black soil, then there is no need to dig, but simply add a thin layer of crushed stone. If the top layer is clay, then you don’t need to add it - just smooth the surface a little and that’s it.
Crushed stone of medium fraction and a layer thickness of 10-12 cm is poured onto the bottom of the dug trench or hole, after which it is compacted. This crushed stone will ensure water drainage from the concrete layer. On top of the crushed stone it is necessary to pour a layer of sand 3-5 cm thick and compact it too. This is necessary in order to level the surface of the crushed stone and prevent its sharp edges from tearing the waterproofing that will lie above.
Is it possible to lay paving slabs on concrete?
Well, of course you can, it’s just more expensive and therefore they prefer to make do with sand and crushed stone backfill. And if you approach the matter generally on a budget, then lay the paving stones directly on the compacted sand. As practice shows, in a couple of years, at best, it will have to be redone. Therefore, it is better to lay paving slabs correctly right away.
The concrete base is very reliable and will not allow soil heaving or the pressure of heavy equipment wheels to damage the parking space or path. In general, it is reliable and will last for centuries. Particular attention should be paid to the absence of voids between the tiles and the concrete base. Because water gets in and freezes there, it will tear off the tiles. It is necessary to provide for a slope and storm drainage elements.
Consumables and tools
If you need to independently paving paving stones on a concrete base, you need to acquire the following materials and working tools:
- Cement.
- Sand.
- Crushed stone.
- Concrete mixer.
- Construction level (50 and 100 cm).
- Angle grinder (Bulgarian).
- Pusher (manual or automatic).
- Pegs for marking.
- Cord or twine.
- Hose.
- Mallet.
- Master OK.
- Rake.
With all these materials and accessories, the process of laying paving stones will become much easier.
In what cases are paving slabs laid on concrete?
Paving is done for different purposes, mainly for parking a car or for a recreation area. But no one limits your imagination; you can even pave the entire area.
Usually they say that paving is necessary:
- if the soil shrinks easily;
- there are large differences in elevation;
- there is clay in the area, then swelling is more likely;
- if you want to enter the site by car;
- and of course, if you already have a concrete platform (using old concrete), then why not decorate it with tiles? I have dedicated a section to this below.
So, have you decided whether you need to pour concrete under the paving slabs? If not, then below I will reveal the pros and cons of this technology.
Advantages and disadvantages of laying on concrete
The advantages of this technology include:
- maximum strength;
- you can park your car and even drive construction equipment;
- It’s relatively easy to build with your own hands, certainly easier than laying asphalt.
Of course, there are also disadvantages:
- a concrete slab must be made, as opposed to laying it on sand;
- concrete must be made according to technology and observing the correct proportions (otherwise it will begin to crumble);
- the paving slabs are held firmly and if you need to get one out, let’s say it’s damaged, then there is a risk of breaking the adjacent one.
Where to buy tiles in the Stavropol Territory
You can buy paving slabs in Stavropol and Mikhailovsk at the “Roman Master” TVK. The trade and exhibition complex offers products that are not inferior in quality to foreign analogues. A variety of colors, shades and modifications will please even the most demanding customers. The paving stones are made using European equipment from first-class raw materials, which makes them especially strong, durable, resistant to abrasion, fading and destruction. Local production, quality assurance, huge selection, fast delivery – these are the main advantages of the building material offered by TVK.
Which paving slabs to choose
Before you make a tile covering, you need to decide for what purposes it will serve:
- If you want to lay street tiles on the roadway, then a thickness of 8-10 centimeters is required.
- If this is a tile in the courtyard of a private house, with the possibility of a passenger car driving in, then a thickness of 6 centimeters will be sufficient.
- For a pedestrian area, 3-4 centimeters.
When choosing a tile, I would like to draw your attention to such parameters as: the absence of chips or any foreign inclusions in the front surface. But the most reliable way is to compare the tiles with each other by color and thickness.
I also note that tiles made by vibration-dry pressing are the best tiles made by conventional casting.
Design of paving stones
From traditional design solutions, three main layout options can be distinguished:
Paving slab production technology
- Geometric is the use of simple shapes in design, such as line, square, circle and monotonous repeating elements. Similar solutions are presented in layout diagrams.
- Chaotic layout - elements are laid out in discord, so that it is impossible to trace any patterns. But sometimes they adhere to one rule so that adjacent elements are not repeated, or there are no more than two repetitions.
- Artistic laying of paving slabs is perhaps the most interesting and expensive option in classic solutions. As a rule, such decisions are of an author’s nature, take into account the peculiarities of the location of objects on the site, emphasize them or, on the contrary, shift attention. In this segment there are both standard solutions and exclusive design solutions. The latter option may require custom-made paving slabs in individual sizes and colors.
And there is another option for modern design, this is imitation of the 3D effect, creating the illusion of volume or violating the laws of geometry. This optical illusion effect is achieved by using the features of our vision and as a result we observe a stereoscopic, three-dimensional image.
And the latest fashion is luminous paving slabs
Read more about the technology for making luminous paving slabs with your own hands.
Calculation of the number of tiles
Check the distance, that is, the size of your site. So that when you do paving, the stones are solid. Without any segments there, so that it wouldn’t turn out like this:


