Recently, concrete countertops have become increasingly popular, which can give your home exclusivity and individuality. Of course, you can invite a designer and builders who will make your dreams and desires come true. But, having demonstrated “miracles of craftsmanship,” you can make a similar product on your own, which in the end will not be inferior to its marble counterpart.
Preparatory stage
A countertop is a work surface that is an integral part of any kitchen. At the first stage, you need to decide on the dimensions of the future product, since it must be harmoniously combined with the existing interior. Also, when creating a kitchen countertop with your own “golden” hands, you need to make sure that it fits as tightly as possible to the wall. To achieve this, you need to carefully measure everything and make an accurate drawing.
Advice! If you want to avoid problems in the manufacture and installation of the countertop, it makes sense to divide the entire product into several elements and take this into account in the drawing, that is, the formwork will be single, but divided into sections.
Also, when designing a kitchen concrete countertop, a very important point must be taken into account: the joints of parts of the finished product must clearly align with the transverse elements of the table frame (otherwise there is a possibility of cracks).
Where can the furniture be used?
Concrete furniture is suitable for both home use and installation in public spaces. Usually it is placed in the kitchen, dining room, office, on the balcony, less often in the corridor, hall.
Since moisture-resistant concrete is not afraid of dampness and temperature changes, it can be safely used to create furniture for terraces, open verandas, street cafes, various areas, as well as for gardens and summer cottages. Concrete cabinets and vases are used to decorate the exterior of houses and cottages.
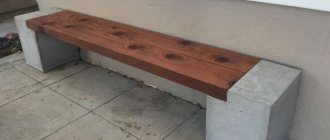
Concrete garden furniture
Required materials and tools
To make a concrete countertop you will need the following materials:
- cement;
- sand (fine, sifted);
- gravel (or expanded clay);
- wooden blocks (size 40 x 40 or 50 x 50 mm);
- boards;
- moisture-resistant plywood laminated with chipboard 18 mm thick;
- metal mesh (for reinforcement);
- silicone sealant;
- decorative elements;
- glue;
- drying oil, vegetable oil or special liquid for lubricating the mold;
- pigments – dyes (if you want to have a colored surface).
You will also need the following tools:
- screwdriver and screws;
- Bulgarian;
- hacksaw;
- grinding machine with abrasive discs;
- construction mixer or electric drill with a special attachment;
- building level;
- rule;
- roulette;
- container for preparing the solution;
- respirator, safety glasses and rubber gloves;
- putty knife;
- vacuum cleaner.
Concrete countertop with bathroom sink and coffee table in black
There is also a ready-made example on the forum of a concrete countertop with a bathroom sink.
Anrushka1FORUMHOUSE Member
The sink is made of concrete, sand, screenings and cement, decorative elements and pebbles are visible on top, I regret that I didn’t add more of them. I made the formwork, reinforced it, poured it, when it dried - sanding with a rough wheel, then with flexible “turtles”. As a finish, it was coated with varnish for exterior use, which I also regretted; ordinary varnish, after prolonged exposure to water, begins to glow with blue highlights. It needed to be coated with polyurethane.
The craftsman first sanded the main surface with a grinder with a hard wheel; for the next stage of work, a grinding machine was required; hard-to-reach parts were sanded manually. For the future, Anrushka1 advises everyone to treat such areas with their hands until the concrete for the countertop has completely set, and only when it has hardened with a grinder. You will have to purchase several “turtles” for fine grinding.
Anrushka1
You need to take from the smaller grains and in order, you need to use everything, jump over only after 800 and then not much, you will kill the turtle quickly. They also come in sizes less than 1500, 2000, 3000, but since I varnished, the last 1000 was enough for me.
After washing, I cast a coffee table with the addition of black pigment, assembled the formwork from 25 mm thick boards, a plywood bottom and everything was wrapped in film. Subsequently, grinding and polishing, in the middle - impact-resistant glass and lighting.
Work order
The procedure for making a house countertop from concrete with your own hands is as follows:
- we make formwork for casting the future tabletop based on a previously completed drawing;
- we install it on a workbench, sawhorse or work table (we check the correctness with a level);
- coat the mold with drying oil or vegetable oil (this will make it easier to remove the finished product);
- We place decorative elements on the bottom (there is room for your imagination) and secure them with glue (these details will later become the front side of your tabletop).
Further, the order of work will depend on the method of pouring the solution into the mold. If the formwork is completely filled with the mixture at once, the order of work will look like this:
- we place a metal mesh in the mold, which we attach to the edges of the formwork with thin wire so that it is raised to a height of 25-30 mm from the bottom of the mold, and during the pouring process the solution appears under and above it;
- we prepare a concrete mixture using the basic recipe (that is, which includes sand);
- pour into the mold.
If the form will be filled with solution layer by layer, then we adhere to the following order:
- prepare a solution for the layer that will be the front surface of your countertop (the components correspond to the main recipe);
- pour the prepared solution into the mold;
- we lay a metal mesh (there is no need to lift it);
- we prepare a solution for the base layer, to which we add gravel or expanded clay instead of sand (it takes no more than two hours to prepare it, since the liquid stage of concrete does not last that long);
- pour it into the mold.
Further, the order of work is the same regardless of the filling method:
- we place blocks or corners in liquid concrete so that the tabletop can later be attached to the legs or walls of the table;
- tamp with a trowel and remove excess with a rule;
- cover the formwork with a sheet of laminated chipboard, having previously lubricated it with drying oil;
- We cover the entire structure on top with a polyethylene film;
- leave everything alone for 7-9 days;
- free from polyethylene;
- remove the formwork;
- leave the product for additional drying (5-7 days);
- if you need to trim the tabletop, we do it using a grinder;
- grind;
- polish;
- if the countertop consists of separate elements, then after assembling them we seal the joints with special silicone or moisture-resistant grout.
If you still have any questions about the process of making a kitchen countertop from polished concrete, then the video will help you.
What kind of furniture is made from concrete?
Nowadays you can buy or make to order absolutely any furniture. Most often, the main materials for its creation are wood and lumber, as well as various composites. But there is another type of universal raw material that is also suitable for the manufacture of furnishings - concrete.
Concrete patio furniture
Important! Finished concrete furniture will be strong, wear-resistant, durable and will withstand the highest loads.
Initially, only outdoor furniture was made from this material. But now, due to the increased popularity of the loft style, it has become increasingly used in interior design.
The most common are monolithic concrete kitchens and islands, in which both countertops and partitions are self-leveling. Work desks are also made from concrete - they are ideal for modern offices and are perfectly combined with wood, glass and stone.
Loft style kitchen
You can also build from concrete:
- sinks for kitchen, bath;
- fonts, shower trays;
- window sills;
- shelves;
- consoles;
- coffee and computer tables;
- chairs;
- bedside tables;
- benches, benches;
- garden figures;
- fountains;
- flowerpots and flower pots, etc.
We create a form (formwork) for making a tabletop
In order for a hand-made tabletop to ultimately bring you satisfaction and not disappoint you with its quality characteristics, it is necessary to strictly observe all the dimensions indicated in the drawing when creating its shape. The work algorithm is as follows:
- cut out a sheet of moisture-resistant plywood (or laminated chipboard, fiberboard or MDF) with dimensions exceeding the dimensions of the future tabletop by 10-15 cm on each side;
- along the entire perimeter of the form we make sides 50-60 mm high (this thickness is optimal for the future tabletop), using long boards (50X30 or 60X30 mm), which we place on the edge and fasten with self-tapping screws; to strengthen the structure from the outside, we install two or three bars or metal corners in the corners and in the middle;
- as a result, we obtain a container whose dimensions clearly correspond to the dimensions of the tabletop;
- carefully seal all joints, seams, gaps and cracks in the mold using silicone sealant;
- if you want to give the finished product rounded shapes, we recommend using plastic or silicone inserts, which are installed in the corners of the mold and removed after the concrete solution has dried;
- if you plan to install a sink in the working surface, then you should provide free space for it (to do this, draw a rectangle at the bottom of the mold corresponding to the size of the sink; secure bars 50 x 50 or 50 x 60 mm; the drawing lines must remain on the outside of the bars) , and also make a hole for the mixer (for this you will need a piece of pipe with a diameter of 35 mm and a length of 50-60 mm).
Advice! For the countertop, it is better to choose a countertop sink, so as not to suffer in the future with the seating chamfer, which is available in built-in models (but do not forget to take into account the presence of a horizontal side of countertop sinks around the entire perimeter at the stage of preparing the drawing).
The creation of formwork must be approached carefully, without missing anything, since the concrete countertop will completely repeat the shape into which the solution will be poured: all irregularities, bends and recesses will spoil the appearance of the finished product.
Decorative design
Before pouring the face layer, you can beautifully arrange decorative elements at the bottom of the formwork. Here, various beads, pieces of glass, horseshoes and even memorable souvenirs can be used as decorative elements. Try laying out a wire ornament as decoration. After pouring the concrete, wire fragments, glass or metal texture will appear on the surface of the countertop.
If no decor was used, then the front side is sanded.
When you place the decor on the surface of the plywood sheet, make sure that it does not move. To do this, glue each piece to the chosen place. This will ensure that you end up with the pattern you planned.
Preparing the concrete mixture
It includes:
- 2 parts cement (M 500);
- 3 parts sand (sifted);
- plasticizers;
- water (to give the mixture a creamy appearance).
If the volume of the solution is not large, then it can be prepared in a small container (for example, in a bucket) and mixed with a construction mixer using a special attachment. If the dimensions of the finished product are large, then it makes sense to use a concrete mixer.
Important! The mixture must be stirred very thoroughly.
If you want to make a concrete countertop with your own hands of a certain color, then you need to add pigments - dyes - to the solution. But remember: to give the concrete a uniform color, pigments must be added to the dry mixture; and to obtain stains, like on marble, it is recommended to dissolve the dyes in water, and then mix them with the finished concrete mixture.
Advice! If you doubt that the mixture will not have the consistency required, it is better to go to the store and buy a ready-made one, the packaging of which will indicate all the proportions.
Facing solution
For the face layer solution, mix cement with water. Then crushed stone, sand or marble chips are added, depending on the recipe. Stir thoroughly to avoid lumps. The peculiarity of the composition is that they use finer grinding of sand or gravel, without large fragments or sharp edges. Add a little less water than indicated in the recipe. This will help you avoid small holes on the surface of the finished product. For the front layer, the solution is poured to a level of no more than half of the formwork.
When laying the cement mortar, compact and shape it using a spatula. Do not allow air voids to form.
Grinding and polishing
To make a concrete countertop attractive and similar to granite or marble, we carefully polish it with a special machine using diamond discs. The process looks like this:
- Place the tabletop flat with the front side up;
- remove the main irregularities using a rough disc;
- We process the front surface of the product with special care;
- grind with a disc, abrasiveness – 50 units;
- We perform final grinding with a disc - 100 units;
- we carry out polishing (it is better to polish with discs - 400 units);
- At the final stage we use a felt circle.
Advice! We recommend wearing a paint mask (respirator), safety glasses and using a vacuum cleaner while sanding.