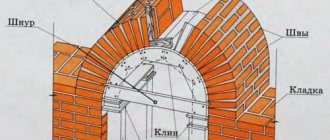
- Types of brick partitions;
- The process of constructing partitions;
- Rules for the construction of partitions.
Brickwork of partition walls is done most often. This durable material has excellent sound and body insulation. There is also a specification for brickwork of walls and partitions, which provides for the standards of a given building. Today we will tell you how partitions are made and you will learn the technology of doing the work. Also in the video and photo you will be able to see the individual, most critical areas of the work and you will be able to do everything yourself.
Which bricks to choose for a partition
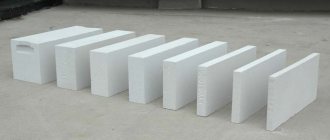
The composition of bricks is: silicate, ceramic and facing. The former are made from sand and lime in addition to special additives.
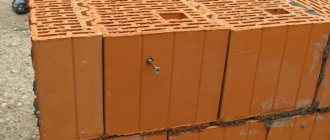
Ceramic bricks are made of 100% clay, fired in a kiln and have more efficient characteristics.
Facing bricks are usually not used for the construction of high-quality partitions and are used mainly for decorative purposes when finishing facades and interior spaces.
What are the advantages of brick:
- Fire resistance;
- Easy installation;
- Noise insulation;
- High load capacity;
- High level of strength;
- Thermal insulation;
- Environmentally friendly.
We suggest understanding the features of all types of bricks in order to determine the most optimal option.
Floor preparation
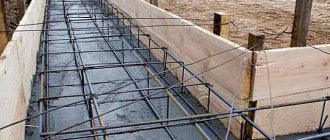
Here you will need a mini-foundation to prevent the ceiling from cracking. Ideally, you need to build the foundation for the interior walls at the same time. But, if the decision to redevelop came after the construction of the building frame, it is possible to pour the foundation under the future wall at this stage.
Photo: Instagram goyradesign
By this time the floor should at least be covered with sand and compacted.
For details on the process of creating a strip foundation, see the video instructions.
Ceramic bricks for partitions
Clay bricks are used in most buildings due to their affordable price and proven quality.
Such a brick can be ordinary or facing. The difference lies in the presence of a special additive in the facing bricks. The additive prevents plaque from forming. Ordinary brick can be used if additional facing layers are planned for the material used.
Advantages when using “standard brick”:
- Moisture and frost resistance. The letter "F" is on the marking. The highest level of cold resistance is F 300;.
- Fire resistance;
- Durability;
- Thermal conductivity;
- High load capacity. The letter “M” on the marking, the higher the M number, the better the performance.
This product is universal and can be used in the construction of load-bearing walls or partitions, at the stage of laying the foundation, in the construction of a stove or fireplace and other buildings for household purposes.
Sand-lime brick
Consisting of lime and sand, sand-lime brick is produced by dry pressing and treated with high pressure steam.
Advantages and disadvantages:
- Eco-friendly;
- High level of sound insulation;
- Cold resistant;
- Lasting;
- Wide range on the market.
There are also disadvantages, such as a low level of resistance to high temperatures and moisture.
Sand-lime brick can be used for the construction of partitions, buildings and cladding. But such a product is not recommended for the construction of foundations and walls in rooms with high humidity.
Common data:
- It is important to remember that the greater the thickness of the partition, the higher the level of fire resistance.
- Fire resistance is determined by the time during which a brick can prevent the spread of fire.
- For example, based on SNiP, you can find out that a partition 12 centimeters thick will be fire resistant for two and a half hours.
Brick structure
Fire resistance indicators are higher for solid bricks, which also perform well in rooms with high humidity. Such products will not crack, melt and retain their original shape. Hollow bricks can become cracked and peel off when exposed to high temperatures.
The use of hollow options is acceptable for the manufacture of interior partitions. Due to them, the overall weight of the structure will be reduced, but the sound insulation, unfortunately, will leave much to be desired.
Design
After the plaster mortar has completely dried, the interior partition can be decorated in any style, taking into account the overall design concept of the room.
Today, natural bricks or painted, but not plastered, are considered fashionable. When installing an unlined partition made of brick material, it is recommended to choose high-quality material that has the correct shape and provides narrow, uniform seams.
Decoration is also ensured by applying a varnish composition to the surface built from ceramic bricks.
Requirements for brick partitions
Brick interior partitions are used to create isolated rooms within certain spaces. Such products are not load-bearing structures, therefore there is no need for a foundation.
Work must be carried out in accordance with standards and SNiP (in our case, 03/12/2001 and 03/03/01 - 97).
During the work, it is important to use bricks with non-combustible properties, and the base of the partition must be mounted in the floor covering.
General requirements for partitions:
- If there is no foundation, then it is important to prepare a reliable foundation (ceiling on the floor or between floors). Laying bricks on floor coverings is strictly prohibited;
- According to standards, the thickness of the partition should not be less than 6 centimeters, otherwise the partition will not be strong;
- Partitions longer than 3 meters must be mounted in conjunction with a concrete floor covering;
- In order to make the structure more dense, you need to resort to reinforcement;
- Having determined the dimensions of the structure, it is important to choose a material with the appropriate level of load capacity.
Preparatory work
Before starting masonry, it is necessary to clear the area and remove the flooring down to the concrete. Then markings are carried out on the floor according to the developed scheme.
Using a square, the first block is placed against the wall. A second brick is placed on the other side and the cord is pulled. Then you can draw a straight line that will correspond to the location of the partition. Markings are also carried out on the walls.
When erecting a structure in a private house or on the first floor of a multi-story building, it is imperative to lay a waterproofing layer. For these purposes, roofing felt is often used. In case of strong evaporation, a vapor barrier is installed in the room.
Materials and tools for a brick partition
Let's find out what materials need to be purchased for laying a brick partition:
- Bricks;
- Cement, clay or lime mixture;
- A container in which the solution will be mixed. Recommended volume – 50 liters;
- Shovel;
- Buckets of arbitrary sizes for “transporting” the finished solution;
- A trapezoidal stainless steel trowel, with which you can apply mortar to bricks;
- A hammer with a sharp end. The tool will help split blocks into separate parts;
- Jointing for finishing seams in the partition.
Tools for monitoring the correctness of actions:
- The thickness of the seams is checked by any of the available measuring instruments; even a simple tape measure or ruler will do;
- The level is checked with a straight rod made of metal or wood. If you find deviations, adjust them by the thickness of the layers on subsequent rows;
- Using a simple metal square, check all corners on the partition;
- It is important to monitor verticality using a plumb line weighing from 200 to 600 grams.
Thickness of brick partitions
The partition is placed in the following ways:
- Rib. With small partition sizes, since with large sizes the product will have low stability;
- Half or quarter brick. These are the standard and most common types of laying out partitions for zoning spaces;
- One and a half, two or two and a half bricks. For load-bearing walls and structures with high requirements for heat and sound insulation, as well as fire resistance.
Consider this information when choosing the type of masonry in your room.
Ways to reduce the thickness of load-bearing walls while improving thermal insulation
Additional thermal insulation laid between the layers of the structure will help reduce the thickness of load-bearing walls. In this way, material consumption is reduced, the design is lighter, although it retains the usual width or becomes only slightly narrower.
Important! To implement the technology, you need to lay well-shaped masonry: bricks are installed in two rows with a space of 25 cm between them.
One of the best insulation materials is placed in the empty space: expanded clay, slag, concrete mixture, organic material or polystyrene foam. Inside the house, double partitions with heat insulation are not made, only according to individual projects of private houses. In high-rise buildings, such structures take up too much space.
Step-by-step process of installing a partition
Let's consider a detailed plan for installing a partition using the example of the most common half-brick scheme, which complies with the stated standards and SNiP:
- We take measurements for the partition, apply markings to the walls and floor;
- The level of the masonry allows small deviations from the horizontal: no more than 1.5 centimeters per ten meters. You need to check the correctness of the distances on each row of masonry;
- We prepare the solution by thoroughly mixing it in a container so that heavy particles settle to the bottom and the composition becomes more watery in structure;
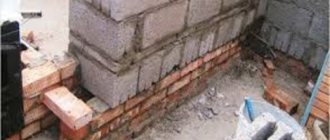
- Apply the solution to the marking line. We make sure that the bricks are laid evenly, especially the first row. This may affect the level of the following rows;
- Apply the solution to the top of each laid row. This method is called "bed". Distribute the solution evenly, with a distance of 2.5 - 3 centimeters from the edge;
- The daily recommended limit for laying bricks is no more than 160 centimeters. The solution should settle and dry;
- It is important to leave a space of 2 cm between the product and the ceiling. Subsequently, this seam will need to be “filled” with felt or polymer material. At the final stage, plaster. If the gap is more than 2 centimeters, then it will be necessary to lay an additional layer of bricks;
- Make openings in the partition using jumpers, adjust the height with crushed stone;
- After completing all the previously described stages, you can begin facing and finishing work, if such a task exists.
Basic terms
Let's start with general concepts. Everyone knows exactly what a brick looks like, and that it is ceramic and silicate, too. But not many people know how the edges of this material are correctly called. And in the description of masonry technology they appear very often.
Name of brick faces: pastel, spoon, poke
The largest edge is called “ pastel ”, the middle - side - “ spoon ”, and the smallest - “ poke ”.
The dimensions of the brick are, in principle, standardized (250 * 125 * 66 mm - single and 250 * 125 * 88 mm - one and a half), but the technology of its production is such that they can differ significantly from different manufacturers: by 2-3 mm in each edges, and this is quite a significant difference, considering the number of pieces in one row. Therefore, before ordering a batch, it is advisable to measure samples from several firings in order to determine how accurately the technology is maintained.
It is also important to pay attention to the geometry: the edges must be positioned strictly at 90°. Otherwise, bursting loads will occur and the wall may crumble.
Types of reinforcement
Reinforcement is a mandatory step in strengthening and increasing the strength of the partition through the use of metal rods, which are laid every 3-5 rows of masonry.
- The partition can be reinforced vertically, longitudinally or horizontally. In the case of horizontal reinforcement, a mesh is used. Metal rods are connected by welding or attached to each other with wire. The mesh should not be larger than 120 millimeters, otherwise the strength of the structure will decrease.
- Before installing the reinforcement, it is recommended to place it in cement mortar in order to increase the thickness of the rod and seam.
- For seismic zones, vertical or longitudinal reinforcement is used. The partition can be strengthened both inside and outside the structure.
Important! Use lintels made of reinforced concrete or metal materials.
Options for securing the structure
If the house is still under construction, and you have already designed a partition in a specific place, you need to release reinforcing strips and halves of ordinary bricks from the adjacent wall along the entire height. The gap between them is small - about one brick.
If you decided to build the partition after the house was built, you can “tie” the new wall to the load-bearing wall in a different way. For example, use a perforated metal strip. The shape is a corner, one side of which is fastened with dowels to the load-bearing wall, and the other is driven between the rows of new masonry.
The latter, by the way, needs to be reinforced every five to six rows - lay horizontally a metal mesh approximately 4 mm thick or long metal rods with a diameter of 6–8 mm.
Photo: Instagram composit_group
You can add stability to the partition if such reinforcing elements are also inserted vertically so that they intersect with a horizontally laid mesh or rods. The approximate size of the “cells” is 50 cm.
Photo: Instagram ramilzinnatulli
Useful tips
In any case, the brick partition will be massive and heavy. Consider the load-bearing capacity of the supporting structures, evaluate how strong the foundation is and follow the recommendations below:
- When preparing the solution, try to achieve the desired consistency, viscous enough to “adhere” the materials. Use the classic, time-tested option - cement-based or lime-based mortar.
- Maintain proportions. The seam between bricks should be in the range from 9.5 to 11 millimeters.
- For reinforcement, use a rod with a thickness of 4 to 6 millimeters.
- Dress your seams correctly. If your scheme is half a brick, use vertical bandaging.
- If it is necessary to insulate a brick partition, use the well masonry method, supplementing the brick layers with insulation. As insulation, you can use a mixture of concrete, expanded clay or expanded polystyrene.
- If you are building a partition from a load-bearing wall, prepare a small ditch in the form of a groove with a depth of 35 to 45 millimeters.
- When planning the subsequent plastering of the partition, lay the brick in the waste area, namely, lay the cement mortar along the bed line; there is no need to go through the outer parts with mortar.
- For better adhesion, it is recommended to slightly wet the bricks.
Making a brick partition yourself is a completely feasible task. To do this, you need to gradually master skills and study masonry methods. Let this process become not only an exciting pastime, but also an opportunity to reduce the budget for repair work.
Interior design ideas
After finishing the wall with plaster, the partition is designed in the chosen style. The construction of a brick partition and its design should be thought out in advance. Today in interiors it is fashionable to leave the wall unfinished. It can be painted in the desired color.
If the room has an unlined partition, then the blocks are selected in the correct shape and neat seams are made. Ceramic bricks can be varnished. White silicate blocks look stylish in modern interiors.
