In this article you will learn about how to install windows in a house made of aerated concrete with your own hands. The article will contain instructions for self-installation + video. You will also learn about important rules for installing windows: the depth of installation of windows in the opening, insulation of slopes and when to install windows.
Installing windows on plates
This method is quite simple and suitable for people without much experience in construction. Suitable for small and medium windows. The window is secured using stainless steel anchor plates 40x160x2 mm. It is secured in aerated concrete with dowels and self-tapping screws (6×60 mm).
Before installing the window, you need to make insulated external slopes 20 mm thick from EPS. This will reduce the freezing depth of the slope, which will shift the dew point outward, eliminating excess condensation and mold.
If you want to get acquainted with the assortment of various plastic windows from the best manufacturers, we recommend visiting this website at the link - https://www.svetokna.ru/ where you will find both budget and high-class windows.
Installation of window openings in aerated concrete
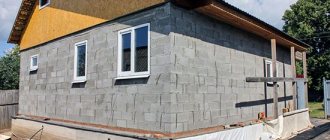
A house made of aerated concrete blocks is characterized by high strength, ease of use, reliability, and ease of installation. The walls perfectly retain heat even in severe frosts, without requiring additional insulation, and in summer they protect from scorching heat, creating an oasis of pleasant coolness inside. Aerated concrete blocks also reduce construction time, so any craftsman can independently build the box of a large house in just a few months. One of the important aspects of the construction of any structure is the installation of windows. Installing them yourself will not be difficult if you strictly follow the instructions.
To install plastic windows with your own hands you will need:
- Drill/screwdriver.
- Self-tapping screws.
- Fine-pored polyurethane foam.
- Silicone sealant.
- Roulette.
- Polyethylene.
- Ready-made packages according to the size of window openings.
- Sheet of steel.
- Wedges.
- Windowsill.
- Anchors.
- Low tide.
- Building level.
Installing plastic windows in a house made of aerated concrete is slightly different from the general technology for installing such structures. In most cases, double-glazed windows are fixed into the opening using dowels, but with a gas block everything is different. The porous structure of aerated concrete has excellent thermal insulation properties, but is not capable of holding driven fasteners, since when it is installed, the diameter of the prepared hole expands. For this reason, many craftsmen use self-tapping screws when working with gas blocks.
Before installing metal-plastic windows in aerated concrete, it is recommended to remove all furniture from the room and cover the floor with polyethylene.
The surface must be thoroughly dedusted by sweeping the window opening with a stiff brush, but it is best to use a powerful vacuum cleaner. Cleaning is very important, as is further priming, although many craftsmen do not consider this necessary. It must be remembered that dust significantly impairs the quality of adhesion between the base and the polyurethane foam, and this will greatly reduce the strength of the structure and may compromise the tightness of the connection. After applying the primer, wait for it to dry completely (at least 5 - 6 hours) and only then begin the main work, so it is better to do this procedure at night.
Related article: Attaching ebb tide to a plastic window
Instructions for installing a large window on plates:
- A hole for the dowel is drilled in the plates.
- The plates are secured to the window frame with two short self-tapping screws.
- The number of plates used is usually from 4 to 6 pieces or more.
- The window is installed and leveled using stands.
- The plates are pressed and a hole for the dowel is drilled through their holes using a hammerless drill.
- All dowels and screws in them are screwed in.
- The space between the frame and the wall is filled with high-quality polyurethane foam. It is desirable that the gap is about a centimeter, for convenient filling with foam and its economical consumption.
- Excess foam is cut off.
- Next, the window sill and internal slopes are installed.
If the window is small, the plates can be secured with ordinary self-tapping screws, without using dowels, since the main load will be supported by the mounting foam.
And in this video you will learn from an experienced self-builder how to quickly and easily install small plastic windows in an aerated concrete house. The presented method has some tricks that greatly simplify the installation process.
Quality control
We will omit the process of measuring and ordering window units; we will assume that you measured everything correctly and there were no problems with delivery. The installation cost is approximately $50-60, so you decided to save that money. So, the window blocks have been delivered to you and you can begin installing them.
Before you start installation, you can be a little boring and check the geometry of the window blocks, you never know, what if they gave you illicit goods. There is a separate standard (GOST 30674 - 99) which contains the basic requirements.
You can select:
- tolerances depending on dimensions. So, for sizes over 2000 mm, the tolerance for the internal dimensions of the frame is +2.0 mm -1.0 mm, and for the external dimensions -2.0 mm +1.0 mm. Up to 1000 mm, the tolerances will be equal to ±1.0 mm (internal dimensions) and -1.0 for external dimensions. For the range 1000 – 2000 mm, the error can be +2.0 mm and -1.0 mm for internal dimensions and ±1.0 mm for internal ones;
- Be sure to measure the diagonals of the window block. For longer sides over 1400 mm, the maximum difference in lengths should not exceed 3.0 mm; for lengths up to 1400 mm, the tolerance is reduced to 2.0 mm;
- the maximum sagging of an open sash/window should not exceed 1.5 mm/1.0 m in length when fully open.
Installing windows on dowels (unpacking)
This method of fastening windows is complicated in that before installation the frame must be completely disassembled, that is, all sashes must be removed. Next, alignment and fixation is carried out across the entire profile with long stainless self-tapping screws (metal dowels). The distance between the dowels should be about 40 cm.
The unpacking method is most often used for installing large windows with an area of more than 4 meters.
After installing the profile, the entire window system is assembled and adjusted again.
Window installation depth in an aerated concrete house
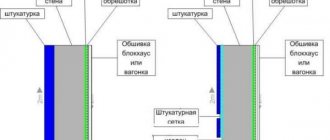
If an aerated concrete wall does not require external insulation, then usually the window installation depth is 1/3 from the outer plane of the wall. That is, from 8 to 12 cm from the edge of the opening to the frame and depends on the thickness.
- Wall 20 cm thick – depth 8 cm.
- Wall 30 cm thick – depth – 10 cm.
- Wall 40 cm thick – depth – 12 cm.
If the aerated concrete wall is to be insulated, then the windows are installed closer to the outer edge of the opening, leaving only 3-5 cm for subsequent fastening of the slopes and external cladding.
These indentations were not invented from the point of view of the visual perception of windows, but to protect the frames from condensation and freezing, because the dew point must be shifted outside the frame.
Preparatory work
Before you begin to describe this stage, you need to at least superficially familiarize yourself with the material that you have to work with.
Aerated concrete is an environmentally friendly material that is popular due to its strength and ease of construction processing. Therefore, to cut aerated concrete blocks, use the most common hacksaw with fine teeth. And in order to drill holes in this building material, it will be enough to use a well-sharpened drill for wood or metal. Advice!
To make the process of preparing for window installation as fast and comfortable as possible, use the following tools and materials: tape measure, hammer drill, nail puller, steel sheet and plastic film.
First, the room where installation work will be carried out is cleaned. That is, it is necessary to completely free the space from furniture, carpets and other objects. Since installing a window is a very dusty job. If possible, cover the floor with plastic film - this will simplify the process of cleaning the room in the future. If at the time of starting installation of a new window there is an outdated structure in the opening, then it can be dismantled using a hammer and chisel. This will be much more difficult and longer than using a rotary hammer with a fixed bit, which will take no more than 10 minutes.
If the window installation will be carried out on a floor above the first, then it is worth adhering to certain safety measures. After all, there may be an external air conditioner unit under the window or, worse, people passing by. If these situations are not excluded, then at the edge of the future slope it will be necessary to secure a steel sheet along the entire width. No equipment or fasteners are required to install it. It will be enough to squeeze the sheet between the walls until it is absolutely immobile.
In parallel with the window, it is necessary to dismantle the ebb. This can be done using a regular nail puller or pliers. The most difficult and time-consuming stage can be called dismantling the old window sill. Of course, if it is made of wood, then there should be no problems. But sometimes the window sill can be concrete. To remove the window sill you need to use a hammer drill. First we make the basic groove and start swinging. We rock the wooden structure and carefully pull it out, but with the concrete one you need to be extremely careful. After all, such a window sill weighs quite a lot and during the finishing dash it is better to hold it on the opposite side and keep your feet at a safe distance. After dismantling, all dirt and dust from the window opening must be swept out with a broom or brush.
When to install windows in an aerated concrete house
With the correct design of an aerated concrete house and high-quality work, the installation of windows can be done within two months after the completion of the construction of the house frame.
There is a version that it is advisable to install windows in the fall, before heavy rains and snow. This is due to the fact that the absence of windows creates maximum ventilation in the house, and aerated concrete dries faster, and for the winter it is better to completely close the box of the house from precipitation.
For more information about preserving an aerated concrete house for the winter, see our article at the link.
Selecting suitable tools and materials for installing PVC windows
Most often, installation of windows is carried out by the organization that manufactured them. But during the construction process, when the installation deadlines are not precisely defined, but the windows are already ready, this can be done by the main contractor, or the owner himself.
Here is the set of tools and consumables you will need for this:
- screwdriver;
- hammer drill with drills;
- polyurethane foam;
- two mounting guns - for foam and glue;
- flushing for the mounting gun;
- glue Installation “liquid nails”;
- marker;
- roulette;
- universal hacksaw;
- hammer and mallet;
- bubble and laser level;
- metal scissors (for cutting out fragments in casts);
- stationery knife;
- square;
- spiral dowels for porous bases.
Rules for installing plastic windows in a private house
- If the installation is carried out on plates, then a minimum of five plates are needed for a standard window. There is one plate at the top and bottom, and two at the sides.
- The side plates should be located at a distance of 20 cm from the corners of the frame.
- If installation is carried out on dowels, then the distance between them should be 40 cm.
- External slopes must be insulated.
- The best insulation for slopes is extruded polystyrene foam (EPS) 20 mm thick.
- Be sure to install the sills at an angle.
- When installing flashings, be sure to take into account the thickness of the future layer of insulation and plaster, if any are planned.
- The maximum number of windows is recommended on the south side of the house.
What is the construction of foam block walls?
The term “masonry of walls made of foam blocks” means the laying of load-bearing, internal walls and partitions in a room using foam concrete blocks. This material is distinguished by the ideal dimensions of the stone, its surface is smooth, so the construction process is accelerated several times.
Foam concrete blocks are laid on a special adhesive composition, polymer foam or cement-sand mortar. On the first row after the foundation, cement-sand mortar is necessarily used to strengthen the structure
The first two rows must be well insulated, and it is also important to maintain horizontality
The masonry of foam blocks turns out to be neat and beautiful and requires minimal costs for finishing work, since craftsmen do not need to level the walls inside and out. Foam concrete has increased fire resistance, which increases the demand for them in the construction industry.
When arranging masonry from foam blocks, it is important to make a very strong foundation, since the material itself is made of cement and foam - its strength is low. If reinforcement is not done, then the construction of more than 2-3 floors is unacceptable
