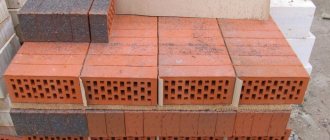
In this article we will tell you how to make a clay brick with your own hands. This building material can be easily and inexpensively made independently.
Many of you know that red brick is a high-quality building material, but it is not at all cheap. I’ll tell you a secret: you can quite simply make it yourself, without incurring any special costs.
What kind of clay can you use for red brick?
The main raw material is brick clay, mined in a quarry . It is better to choose a deposit located close to the site. Take sand and clay in a dry place. Clay is transported in wheelbarrows and stored on wooden flooring in cones up to 1 m high.
You cannot take clay with pebbles, small pebbles, or white inclusions - carbonates. Therefore, the raw materials are first crushed and sifted through a sieve.
- The clay is placed in troughs and soaked in water. The liquid is added gradually, in 2-3 stages. The clay is not mixed, but rather soaked.
- The clay chaff is soaked for at least 3 days. At this time, the trough is covered with film so that the water does not evaporate.
- After aging, the raw materials are checked for suitability. For bricks, use low-fat clay - the amount of sand added is no more than 3-5%. Adding peat, sawdust, and husks to the mixture reduces fat content.
Determination of clay fat content
500 ml of clay is poured with water until it absorbs all the water and does not stick. The mixture is used to make a ball 4–5 cm in diameter and a cake 10 cm in size. The samples are dried for 3 days and then tested for strength. The ball is dropped from a height of 1 m: if it does not crack or crumble, the clay has optimal fat content. If it cracks, it’s too fat; if it bursts and crumbles, it’s skinny.
A cake made from too oily clay becomes covered with cracks after drying, a cake made from normal clay remains unharmed, and a cake made from thin clay crumbles.
They also resort to a more complex method . Mix the original clay in different ratios with water: 500 ml of clay and 250 ml of water, clay in half with water, and so on. A total of 5–10 samples are made. After drying, some of the balls are inspected, and some are dropped from a meter height. This method of evaluation requires more time, but is convenient because in the end the master immediately establishes the best ratio of water and clay.
Composition of blanks
Before making a fragment manually, you need to know what elements to include in the composition in order to improve the performance properties of the material. The main ingredient is clay, but depending on the purpose, the components of the building mixture include additional components. Based on their contents, the following types of bricks from scrap materials are distinguished:
- Silicate - consists of quartz sand and lime in a ratio of 90% to 10%.
- Red refractory brick - made from clay and plasticizer.
- Ceramic material can be prepared from a constantly used composition and clay admixtures of small fractions.
Before making bricks from cement or other material, you must consult with a specialist, because there are different subtleties in mixing, storing or calculating raw materials. Therefore, in order for the masonry to be durable and look professional, you need to know exactly how to use manual force. Homemade clay brick will be warmer if sawdust or plasticizer is added to it, and if the fragments are reinforced with cement, the installation will last longer.
Brick production technology
Making bricks requires space. For this purpose, a flooring is built. It is not recommended to dry the stone in the open sun: the material dries unevenly, and the risk of getting caught in the rain remains.
Mold making and molding
wooden or steel boxes with their own hands as a form . For the first, you will need boards 20–25 mm thick and plywood. Metal ones are riveted from iron sheets.
Clay shrinks when dried, so the dimensions of the template should be larger than the expected dimensions of the brick. For a block with dimensions of 250*120*65 mm, you need a mold with dimensions of 260*130*75 mm.
Templates can be collapsible or non-collapsible . The former are more convenient, as they allow you to remove the product without the risk of damaging it.
Manufacturing technology:
- To keep the inner surface of the mold smooth, it is lubricated with oil, whitewash or water. A layer of sawdust and sand is poured onto the bottom.
- The clay is placed inside the mold and compacted with a shovel. As the raw material shrinks, clay is added repeatedly until it fills the box to the brim.
- Excess mass is cut off with an iron or wooden strip.
- The surface is smoothed and the mold is removed. Raw clay bricks are “cured” in air for 1–2 hours. The process is considered complete if, when pressed, no traces remain on the surface of the raw material.
You can speed up molding if you use a simple screw press.
Another option is also allowed . They make templates for several bricks - in the form of a thick plate. In this case, after drying, the layer will need to be cut into blocks with a string.
Drying
Drying is deliberately carried out very slowly , since the main problem is uneven drying of the material. To avoid cracking and warping, drying is “stretched” for 15–20 days .
The bricks are left to dry in special sheds or under a canopy . Place the products in bags of 6–8 rows in height. Each row is sprinkled with sawdust or sand. The bottom row is placed on a stick to ensure uniform drying of the entire package.
The bricks are dried in a closed, dry room for 3 days, then the pallets are transferred to a ventilated area, protected from the sun.
Drying is carried out at an outside air temperature of at least +10 C.
Burning
Mud bricks are fired in kilns . It is better to use an analogue of a tandoor for this, but you can get by with a barrel stove. You cannot burn bricks on a fire.
Firing begins with the masonry to ensure uniform flow of flue gases across each brick. The stone is laid out according to a special pattern. The sequence is determined by the size of the furnace. The requirements are as follows:
- The density of the charge - laying during firing - is 220–240 pcs. not 1 cubic m;
- upward the density can be increased to 300 pieces per 1 cubic meter. m;
- the first 4 rows are laid according to the “legs of the garden” pattern - staggered in a herringbone pattern;
- the next 4 rows, if the height of the oven allows it, are laid in the same order, but at a smaller distance from each other and with a rotation at a certain angle;
- the raw material is stacked in columns with a distance of 8–10 cm between them.
A cage for a barrel or a small oven is much simpler. Here the raw material is laid in offset rows.
Firing is performed in several stages.
- The first is drying, removing internal moisture. Performed at the lowest temperature – +150ºС. It ends when condensation stops appearing on the upper surface of the masonry. Drying takes about 9 hours.
- At the second stage, the stove is heated so that a flame appears on top of the stove. In this case, the lower stones become yellow, and the upper ones acquire a faint red tint.
- At stage 3, the flame is extinguished, the firebox is filled with bricks and covered with clay. The oven cools down for 6 hours. After this, the front wall is disassembled and the brick is removed from the baked clay.
The uniformity of firing depends on the density of the charge. It is rarely possible to determine the correct design the first time, so it is better to make trial batches small.
Question to the expert
How to check the quality of finished bricks?
They split one brick, apparently intact and without cracks, and examine the chips on the fault. In well-fired clay, all chips have the same structure and shade. Then the fragments are filled with water. If after a couple of hours they still have the same color, the brick is of high quality.
Drying and preparation for firing
Molded brick on a drying tray
Many who wonder whether it is possible to make a brick very often neglect the issue of drying before firing, and completely in vain, since the clay mass must dry completely and evenly. Otherwise, the product will simply break during the firing stage, and this can harm not just the brick that was dried incorrectly, but also those standing near it in the kiln.
Interesting! The production of ancient bricks took place using a similar technology, and drying was carried out in special pits covered with tree branches on top, which prevented direct sunlight from entering.
The final drying of the bricks takes place in a shaded place for several days, and on the first day the bricks simply lie on pallets, and on the second they are laid out on top of each other, placed on an edge. This arrangement during drying is necessary, since there is less contact between the products and each other.
At this stage it is very important not to let the clay dry out too much, as this will cause the bricks to crack, but too cold a temperature is also not suitable for them. Therefore, it is very important to catch not only the right time of year for production, but also to properly prepare the place for drying.
Possible drying problems
| Problem | Reason for appearance | Remedy |
| Uneven drying of bricks | The pyramid is too high | Thin out a pyramid of bricks |
| Some bricks are very deformed | Insufficient drying time on the pallet | Increase wilting time |
| Cracks on the surface | Not enough sand in the solution | Rework the recipe, add absorbents |
| The brick is falling apart | Ambient humidity is too high | Move drying area |
Interesting! The drying stage is important for all materials, without exception, and even wood, since making wooden bricks according to all the rules also requires full compliance with the drying technology.
Production safety rules
The stove should be placed at a distance from the house and access to it should be limited.
Making clay bricks involves the use of open fire sources. Safety measures must be strictly observed:
- the stove is installed in an area where maximum visibility is provided;
- place the structure at the required distance from wooden buildings and objects, green spaces and fences;
- control the cooling rate and temperature in the furnace throughout operation;
- restrict access to the site for children and pets;
- do not open the oven ahead of time;
- do not touch its surface during operation.
To prevent injury, keep a first aid kit on hand.
Terrablocks
It is even easier to use ordinary earth as a material for bricks and blocks.
For earthen bricks, you should not take the top layer of soil, in which plant roots are found in large quantities, but those located deeper. Silted soils are not suitable for work.
Ingredients for Terrablocks:
- 1 part clay;
- 9 parts of earth;
- 5% fluff;
- 2% cement;
- filler (slag, garbage, crushed stone, expanded clay, crushed insulation).
You can mix the ingredients for the composition with your feet by placing it in a hole, a large container like a bathtub. There is an option to perform this work using special devices - soil mixers, which resemble miniature concrete mixers.
Manufacturing of KKK as a type of business
Features of this case
To start your own production of ceramic bricks, it is worth remembering that this business, although very profitable, will not immediately pay for itself. You'll have to wait: a year, or even two.
And:
- It is very important to find qualified workers in order to establish production without defects or failures.
- It is better to buy new equipment, otherwise completely unplanned costs for constant repairs may appear. When purchasing a stove, it is better to take a metal tunnel-type model.
- The room for the workshop is spacious, with an area of at least 400 square meters. And its ceilings should be no lower than five meters.
- When choosing a technology, we remember that the plate method is profitable only for large volumes (from 30 million bricks per year).
- It’s good if you have to transport raw materials nearby (there is a deposit nearby).
- Don’t forget to set up a warehouse for finished products. It should be easy to get to.
Next, we see the point of talking about the cost of producing ceramic bricks.
Cost price
One piece of solid ceramic brick will cost from 3 to 5 rubles. We subtract it from the market value - we get a profit. Naturally, these numbers change somewhat every year.
The capacity of the future brick production workshop can range from three to forty million pieces per year. If you take a factory that produces five and a half million products a year, then you will need to buy equipment for about ten million rubles. Equipping a large plant for the production of ceramic bricks with plastic pressing technology can cost up to a billion rubles.
You can have a business plan for the production of ceramic bricks here.
Making gypsum tiles at home
If you simply mix plaster with water, it will turn out brittle and unsuitable for installation. To avoid this, you must do the following: mix gypsum with lime in the required proportions; carefully mix the solution using a drill with a special attachment;
pour the resulting mixture into molds and leave to dry (there should be no drafts or frosty air in the room).
Making gypsum tiles at home
A common problem that beginners face is the long mixing of gypsum, which leads to the fragility of the product or to the fact that the plaster in the mold does not harden at all and resembles a thick porridge. Another important feature is the removal of bubbles, due to which the finished product has an unpresentable appearance and a not very strong base. To get rid of bubbles, just place the mold on a vibrating table, which you can make yourself by spending 1 hour on it.
In order to give color to a product, you can add powder pigment to the solution, but the cost of such a dye is very expensive, it is sold in large packages, and after opening it has a short shelf life. Therefore, many find an alternative - dyes for paints. Many people add cement to it to give strength to gypsum. But professionals do not recommend doing this; over time, there is a possibility of the formation of fungus and mold, which, alas, are almost impossible to get rid of.
Gypsum decorative stone tiles
Let's calculate in detail the benefits of creating gypsum stone at home.
In a hardware store, a square meter of tile costs $15-20, and the quality of the product in some cases leaves much to be desired (unevenness, holes, pimples, it is clearly clear that the production process was disrupted). But gypsum itself is a cheap material and you don’t need to purchase expensive equipment to produce stone. At this cost of material, 10 square meters decorated with tiles will cost about $200.
The price is clearly too high. If you produce tiles at home yourself, the price is much lower. The most expensive purchase for the manufacturing process is the molds into which the mixture must be poured. Average cost: $65, all other items are inexpensive.
By purchasing this form, you can make an unlimited number of tiles. In this case, the cost will not exceed $3. The mold can pay off if you make custom gypsum stone.
Without a special form, the stone production process will be impossible.
The first forms in which stone was produced were polyurethane. They are directly used in production, as they have a long service life. In addition to gypsum, concrete products can be cast in them, which can be used for outdoor work. These forms are not afraid of alkali, which is present in concrete. Special forms for the production of gypsum stone.
When working with plaster, you need to remember the following rules:
1. If it is not possible to purchase the necessary plasticizers, for better gluing, you can add citric acid to the solution (using the correct proportions).
2. The plaster in the mold hardens for 15 minutes, after which it must be removed and placed on a flat surface to dry completely.
In production, special drying chambers are used, in which the drying process occurs faster. Such a structure can also be built at home if you are going to make gypsum stone not only for yourself, but also for sale. The product dries within 8 hours, after which it can be laid on the walls.
3. The solution is made only for one pour; calculate everything in portions, since the remaining gypsum is unsuitable for the next pour (it will not harden).
Video on the topic: DIY silicone mold for decorative stone
Silicone molds are not as durable. Used only for plaster. When working with such forms, you need to carefully remove the finished product, as the plaster can crumble like chocolate.
Also, to produce gypsum, you will need a deep container (it is better to use plastic products, as the plaster can be washed off better in the future), a drill with a rod attachment in order to stir the mixture, and a flat table.
Why is it convenient to make gypsum stone at home?
1. Convenient molds for casting stone, non-bulky, take up little space.2. No vibration table required.3. Clear and simple painting technology.
4. Low cost of mixtures and substances for producing the material.
In addition to making gypsum stone to decorate their premises, many are engaged in its production for commercial purposes. The costs are low and the payback is quick. Moreover, the product is in great demand in the construction market.