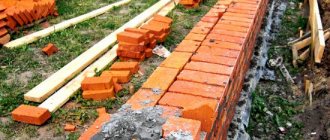
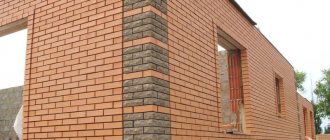
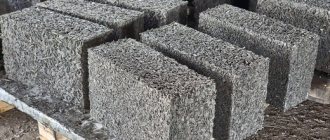
Facing brick is the most durable and high-quality method of exterior finishing of a house.
It is far superior to all other materials in durability, reliability, resistance to external loads, mechanical or atmospheric influences, inferior to other types of cladding, perhaps, in decorative terms.
The usual service life of facing materials for facing bricks is only the initial stage of operation, and the need for care or any maintenance of the surface is completely absent.
The only fairly serious requirement for the material is high-quality installation, performed by a specialist with the skills and experience of this type of work.
At the same time, it is possible to install it yourself, but first you should familiarize yourself with the technology, get a complete understanding of the working methods and the necessary tools.
In this article you will learn how to make a device for laying facing bricks with your own hands.
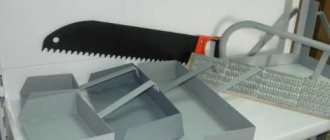
Bricklaying Tools
The work of a mason involves the use of cement mortars. In addition to the basic working qualities, they have some negative properties, in particular the ability to pollute everything around, and especially just laid brick .
If this is not some kind of disadvantage for ordinary material, then the facing brick should be clean. A facade stained with mortar does not have any decorative qualities, rather the opposite. Therefore, when working as a mason, various tools are used, the purpose of which is to speed up, make it easier, and make the laying of the material more accurate and clean.
Several groups of tools are used when laying bricks.
The main ones include:
- Trowel.
- Hammer-pick.
- Joining.
- Mortar spatula.
- Mopping.
Measuring:
- Plumb lines.
- Levels.
- Squares.
- Rules.
- Orders.
- Tape measures, control cords, etc.
The main tool is a trowel (in common parlance - a trowel).
NOTE!
In addition to these tools, a mason can use various auxiliary devices in his work to facilitate and speed up the lengthy masonry process. Most often, various devices are used to regulate and speed up one of the most critical moments of masonry - the process of applying mortar.
Briefly about the main thing
Various tools are used to perform brickwork. For a professional mason who has laid thousands of bricks, a trowel and jointing is enough. However, to control the quality of work, a plumb line and level are necessary. A novice builder will need templates. There are enough of them for every taste. Templates for double, single and finishing bricks, for straight and end seams are available for sale. Conductors simplify the laying process, making it smooth and neat. Anyone can purchase the necessary equipment or make it themselves.
A device that helps make an even layer of mortar during work
The thickness of the mortar layer is the most important point in the masonry process. If the seam is too thick, excess mortar will be squeezed out, which will require prompt removal and constant cleaning of the front surface of the masonry.
A thin layer will not allow you to obtain a sufficiently strong connection between the bricks and will disrupt the solidity of the masonry . In addition, it is very important to constantly maintain the same layer thickness, which can only be done with skill.
An unprepared person will be greatly helped by a special device, with which you can create an even layer of mortar of the same thickness and width. It is called differently, but the most accurate name seems to be “dispenser”.
The dispenser for applying the mortar is a frame without a bottom, placed on top of the brickwork. It always occupies the same position, which can be adjusted in a certain way using special stops .
The internal space of the laid frame is filled with mortar. The side bars of the frame serve as guides, with the help of which the layer of solution is calibrated in thickness.
All mason actions are carried out according to a simple scheme:
- The dispenser is installed on the desired area of the masonry.
- The frame cavity is filled with solution.
- Excess is removed when leveling the layer by running the side surface of the trowel (or a small rule) along the guides.
- As the brick is laid, the dispenser moves along the surface of the row, and there is no need to remove and install a new one each time, the device simply moves as needed.
The device can be of a length suitable for laying several bricks at a time. The only additional point is to apply a layer to the butt (end) surface of the brick, which is not so difficult.
At the same time, there are modified versions of such dispensers, which have a special perpendicular outlet for applying the solution to the bonded part of the brick . With such a device, the work takes on a semi-automatic essence - you only need to control the position of the material, and the amount and geometry of applying the solution are set once and for all.
You can also use a separate end dispenser (in some cases this is much more convenient), which is applied to the newly laid brick and a layer of mortar is applied in a similar way.
IMPORTANT!
When using a dispenser, the speed of masonry increases many times over, and the cleanliness and neatness of the seam are the same as those of the most highly qualified masons.
How to grout masonry joints
Brick jointing is required when restoring old walls. The technology may be associated with the execution of jointing in one color. Very often the mixture differs in color in different areas.
First, the surface of the dry mortar is cut to a depth of 1-1.5 cm using a hammer and chisel. After this, all its remains are removed. Cleaning should be done not only at the seams, but throughout the entire masonry. In order for the treated surface to look beautiful, the wall should be cleaned of dirt before grouting.
You can simplify the task if you blow out the cracks using a compressor unit. This will remove even the smallest crumbs and particles so that the fresh joint has the best adhesion. To prepare for the procedure, you will need a sharp, reliable instrument. This is the only way to remove excess mortar from the surface so as not to destroy the brickwork.
Next, all seams should be moistened with water and the jointing procedure should begin. There is no need to moisten the entire surface at once, since you can limit yourself to a small area that will need to be addressed in the next 1.5-2 hours.
In the store you can buy ready-made grout or dry grout, to which pigments or plasticizing additives have been added. When choosing a solution for jointing, you need to pay attention to its base. The seam can be processed using the following types of materials:
- cement;
- epoxy resin.
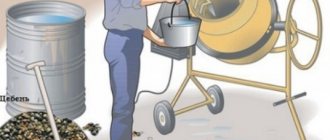
If you prepare the mixture yourself, then such a composition will be inexpensive. The simplest material used for grouting joints is a solution prepared from 2 parts of lime and cement, taken equally. You will also need fine sand in the amount of 10 parts. You should not mix too much of the composition, since its pot life is about 90-120 minutes.
For another recipe, recommended by experts, you will need to prepare ground volcanic traces and 5 parts of sand, which will serve as a filler. This composition is suitable for treating walls that have efflorescence and whitish stains from the seams. The prepared solution must be stirred until it has the consistency of liquid sour cream. It is important that it does not spread, but stays in a lump on the inverted trowel.
Device creation technology
A dispenser for applying mortar when laying bricks can be purchased at a hardware store. At the same time, in practice it always turns out that it is not currently available for sale .
Wasting time searching is ineffective, since there is no guarantee that you will be able to find it in any other store. Usually they immediately start making a homemade dispenser, especially since there is nothing complicated about it.
Required tools and materials
To make a dispenser you will need:
- Plywood, chipboard or wooden slats.
- If available, you can use a plastic tray of the appropriate size. It is more convenient for working with the solution, but it is more difficult to find similar material.
- Electric drill with a set of drills.
- Fastening elements - screws, bolts with nuts, etc.
- Screwdriver.
- Square, ruler, pencil.
- Steel corners.
- Hammer.
- Screwdriver.
The set of tools or materials can be expanded or reduced depending on the complexity of the selected design and the capabilities of the user.
Dispenser design
The device is an oblong rectangular frame. The internal space has a width equal to the optimal width of the solution layer . Since bricks of different widths can be used, you can either make a customizable gap between the planks, or simply make several similar devices for different standard sizes of material.
The frame laid on a brick row should not fall down, which is ensured by the distance between the side planks being several millimeters smaller than the width of the facing brick.
The thickness of the frame corresponds to the thickness of the solution layer - optimally 10 mm . The crossbars at the edges should be raised above the plane of the guides so as not to interfere with the movement of the frame in any direction when a layer of mortar is applied.
Stops are installed on the lower part of the guides to ensure the position of the frame relative to the row of bricks. If they are of sufficient length, these stops can additionally help align the masonry vertically.
The stops are installed in such a way as not to interfere with the movement of the frame along the row of masonry, for which a small gap is made.
Assembly order
The simplest dispenser is assembled as follows::
- The longitudinal guides are connected by two transverse strips along the edges on the left and right. When connecting, several washers are installed under the slats to raise the crossbars above the plane of the frame. These crossbars simultaneously serve as handles for moving the dispenser.
- The distance between the longitudinal guides is made 10 mm smaller than the width of the brick (for a single facing brick this will be 110 mm).
- Metal corners are installed on the reverse (bottom) side of the guides, which serve as stops for adjusting the position of the frame. At the same time, you can make the distance between them unchanged, or move the corners apart a little further and install screws that serve to fine-tune the position of the stop. With the help of such screws you can achieve a certain depth of the seam, which looks very stylish and professional.
NOTE!
The vertical dispenser for the end parts is designed in a similar way, except that there is no crossbar at the bottom; the guides are U-shaped and the edges rest against the row of masonry.
If plastic strips were used for manufacturing, then no special preparatory steps are required. If wooden slats, strips of chipboard or plywood were used, then before starting work you will need to apply several layers of hard varnish (NC or parquet) to the device, which can protect the material from contact with water .
If this is not done, the wood will quickly swell and change its size, which will disable the device. You can use drying oil or similar compositions instead of varnish, but they will take a lot of time to dry, which is not always convenient.
Adviсe
the time or money you spend on making auxiliary tools is more than compensated by the quality and speed of masonry work
- When making a template, it is advisable to immediately lay down a seam thickness of 10 mm. One is ideal for laying walls of one or one and a half bricks.
- To ensure that a wooden or plastic template lasts as long as possible, its most worn surfaces can be protected with wear-resistant parquet varnish. The composition is applied in several layers on the surface of the dispenser.
- After completing the work, all tools must be regularly cleaned of the construction mixture, otherwise they will very quickly become unusable.
Important: the time or money you spend on making auxiliary tools is more than compensated by the quality and speed of masonry work.
Price for work
Today the range of prices is very wide, it all depends on the region and the skill of the worker, for example, the cost of installation work:
- rough masonry costs from 1500-3000 rubles/m3;
- finishing from 2000 to 3500 rub/m;
- rough partition 300 -700 rub/m2;
- finishing cladding 700-1400 rub/m2.
Sometimes builders calculate the cost per piece, from 5 to 7 rubles/piece , but immediately specify what is included in the masonry, whether the laying of roofing felt, masonry mesh and reinforcement is taken into account.
In Crimea, a pricing system is practiced: cost of work = cost of brick , for example, laying one shell rock costs 30 rubles.