Working with aerated concrete blocks cannot be done with bare hands, without additional devices. The specificity of the material requires the use of precise and high-quality tools.
Aerated concrete is a specific building material that is produced in the form of piece elements - blocks. Installation of such materials requires compliance with certain schemes and rules that ensure the strength and durability of buildings. The quality of masonry of aerated concrete blocks depends on the skills and abilities of the worker, as well as on the tools and devices used. The work requires performing monotonous operations that must be repeated with the same result. This is the only way to get smooth and durable masonry without defects. The tool for laying aerated concrete is in many ways similar to the usual mason's set, known since time immemorial. Let's consider all these devices in order:
Trowel
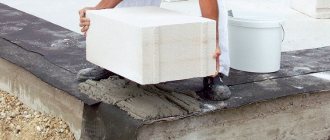
This tool is better known as a trowel. It is a metal plate with a smooth surface, equipped with a handle on a curved bracket. Used for the initial application of the adhesive layer. The trowel is a traditional mason's tool and has been used for hundreds of years. This is not the most necessary tool for laying gas blocks, since the trowel was originally designed for working with thick sand-cement masonry mortar. The trowel is used mainly to remove glue drips or to seal seams when voids appear in them.
Sometimes a trowel is called a bucket-comb.
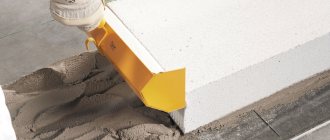
It performs slightly different functions - it scoops up glue and applies it in an even layer to the previous row of gas blocks. Its advantage is a larger volume of glue, which can be applied at a time and speed up the laying process. However, using such a trowel requires skill and experience, since if done ineptly, a lot of glue flows down the sides and makes the masonry sloppy. In order to get a neat and uniform seam without drips, you need to use a trowel of the required width corresponding to the size of the blocks. There are different models on sale with a working part width from 50 to 400 mm. As a rule, an experienced mason has several of these buckets for blocks of different widths.
Auxiliary Tools
In addition to the required tools, special auxiliary tools are used to carry out construction work of good quality and facilitate masonry.
The table introduces some of them:
| Tool name | Peculiarities |
| It is very important during laying, especially the first row, to ensure that the surface is horizontal so that it is in an even line. For this purpose, a building level of any type is used. It is best to purchase a laser tool that has greater accuracy and shows the horizontality of surfaces, diagonals and angles. |
| A spatula is a thin metal blade made of a thin steel sheet, which undergoes minimal deformation during operation. The tool is easy to apply the composition to the surface in a thin layer, rub chips, seams between blocks, clean small protrusions, and level corners in hard-to-reach places. |
| The function of the square is to apply smooth edges on the block before cutting, along which they will be sawed. The square contains a base, a ruler with metric and inch scales. |
| Along with the building level, this is an important device in the process of laying blocks. The cord is used to control the walls for evenness and the absence of distortions, so that there are no problems in the future. The vertical and horizontal surfaces of the masonry are checked with a cord. |
| In addition to the mallet, you also need a regular metal hammer to level the vertical row. But you need to work with it carefully, avoiding destruction of the material. |
Carriage
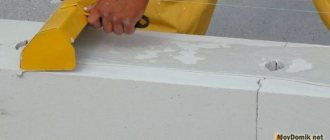
This is an improved bucket trowel that is installed on a row of gas blocks and moves along it, applying an adhesive layer of equal thickness. The jagged edge of the container immediately levels the layer and distributes the glue evenly throughout the entire row. The carriage is convenient because you can immediately place a fairly large amount of glue into it. Application is quick and the job gets done much faster. However, operating this device requires developing some skill, otherwise the glue begins to flow down the sides of the masonry. You have to pick it up with a spatula, spending time and effort. Some craftsmen modify the carriages by installing 5 mm wooden strips on them from the inside. They narrow the strip of glue, which stops flowing out. The block placed on top presses down the glue, which fills in the missing areas at the edges of the row. Experts note the convenience and efficiency of working with carriages, and the skill comes quite quickly.
Lintels in a block wall
In a block wall, lintels must be installed above the openings of doors and windows.
In load-bearing external walls, a depth of embedding into the wall of 200 mm is possible; with an opening width of more than 1.5 m, at least 250 mm is permissible, in other cases 350 mm.
You can fill them with concrete, but it takes a long time and is not convenient. To do this, install the formwork, reinforce it with a spatial frame and pour it.
Reinforcement frame of a concrete lintel
But in this case the masonry stops. If you lay it yourself and are not in a hurry, then you can absolutely safely use this method, it is the cheapest, but also the most labor-intensive. But nothing sticks out of the wall.
The finished lintels are heavy and are placed several in a row to match the thickness of the wall. This method is faster, but it is difficult for one or two people to install jumpers on the scaffolding. And the money is no longer so cheap. Again, nothing will stick out from the plane of the wall.
During construction by a private developer, corners and reinforcement are often used as lintels.
In the partitions, they use 10-12 mm reinforcement, 3-4 pieces, which are embedded in the masonry, a board is tied from below and it is pushed apart from below with a stand, and a solution is applied through the rods. When the solution more or less loses its mobility, blocks are placed. Doorways are easy to make this way.
Rebar lintel over doorway
But in external walls, which are usually much thicker than partitions, a corner is used.
To do this, the corner is cut to size, welded together through a strip and reinforcement in 3-4 places. Then they prime it with a metal primer (otherwise it will rust) and install it on the block. The solution is applied to the shelves and the blocks are installed, only with the holes facing up. This is the most expensive method; the corner shelf extends beyond the wall. But also the most reliable. And fast.
Serrated and regular spatulas
A spatula is a tool in the form of a metal plate, slightly wider towards the end, on a straight handle. A notched trowel is no different from a regular trowel, except for the notches in the form of rectangular or trapezoidal protrusions of a certain size (there are spatulas with different tooth heights; for gas blocks, spatulas from 3 to 5 mm are used).
Despite the similarities, the use of a notched spatula and a regular spatula are noticeably different. As a rule, a regular spatula performs auxiliary functions - initial application or cleaning up glue drips. A notched trowel performs a more important task - it evenly distributes the glue over the surface. At the same time, the thickness of the resulting layer changes depending on the angle of inclination of the tool, therefore, you need to develop the habit of holding the spatula at the same angle.
Light version
As can be seen from the above description, finishing with plaster, mesh and putty takes a lot of time. You can cheat and apply only putty to the walls. The best choice for this case is Glatt+Full putty from the German company Pufas. It evens out and fills uneven areas, creating a thick layer thanks to its composition - Glatt+Full consists of cellulose mixed with gypsum.
Work with putty must be done quickly, as it sets very quickly. After just 60 minutes this putty hardens. Once cured, Glatt+Full can be floated in the same way as regular putty.
Before applying the composition, you should first treat the wall with a primer. In this case, it is better to choose Ceresit CT 17, a water-dispersed primer that does not reduce the vapor permeability of the base. After the primer has dried, a layer of putty is applied to it. The mixture is leveled with a grater. After a day allowed for final drying, the putty is wiped off with a grater.
Hacksaw
When laying aerated concrete blocks, there is often a need for trimming to adjust the length of the walls to the design values. Aerated concrete is a sufficiently soft and friable material that it can be cut with a regular carpenter's hacksaw. However, its dimensions are inconvenient for working with blocks whose width reaches 40 cm. Therefore, there are special hacksaws for aerated concrete with increased blade length and tooth height on sale. Their teeth are equipped with carbide tips so that the tool retains its functionality longer and does not require frequent sharpening.
Hook for tying reinforcement
The hook is made from 50 cm of round timber with a diameter of 5-6 mm. The end is sharpened and curved. The handle is made from a piece of PVC pipe. To prevent the hook from falling out of the pipe, the heel is bent.
A similar hook can be made for a screwdriver.
Planer and float for aerated concrete
Often there is a need to level the plane of an aerated block after unsuccessful trimming or to connect to irregularly shaped elements. For this, a special plane and grater are used.
The plane is a wooden base with several knives (up to 10 pieces or more) located over the entire area of the sole. With its help, you can quickly plan out unevenness and adjust the shape of the end or side to other structural elements.
The grater is a platform with a handle; coarse-grained sandpaper is fixed to the sole. Using a grater, you can level the plane, remove marks from the plane, and remove unevenness and defects in the factory cutting of blocks.
Reinforcement bender
This device will come in handy at the very first stages of construction. Someone bends reinforcement with their bare hands, but you can quickly make a homemade mini-machine for bending reinforcement.
There are many versions of this device; in essence, it is just a lever with stops for fittings. The simplest option can be made from a piece of pipe, a garage hinge and a corner.
The pipe is welded to the corner. A hole is made into which half of the garage hinge will be inserted. A handle from a corner is welded to the loop. A bend limiter is welded from corner cuttings.
Wall chaser
This tool is necessary for aerated concrete or aerated silicate blocks. With its help, longitudinal recesses are made for laying reinforcement that strengthens the masonry and takes on mechanical loads. Unlike electric wall chasers, manual tools can be used in field conditions where it is not possible to connect to electrical networks. The relatively soft material is quite easily processed by the cutting edge, leaving a neat and even recess of the same width.
Equipment for sawing gas blocks
You can use special equipment, mechanical or hand tools, since the abundance of tools allows. But how effective are they? A hand saw or saw for wood requires additional refinement, setting the teeth using a grinder.
Unread message Natalya Sh. Exit Exit Registration. Foam concrete forums Skip. Foam block processing - cutting, sawing, drilling Load calculations, house, insulation, pouring roofs and floors.
And even in this case, such a homemade tool will not last long. A reciprocating hacksaw, electric saw or band saw should make precise and even cuts, and productivity will be greater.
But the high cost of such tools does not live up to expectations; it’s another matter if you need them for other purposes. Special tools for processing and laying gas blocks will simplify and significantly speed up the work process.
Such a tool will allow you to easily cut a block right on the construction site, while maintaining clear lines. Gas block is a durable material, but when using the right tools, it can be processed. It can be given any shape and angle of inclination, length and width of the block. Its main advantage is the completely Teflon coating of the canvas. This feature reduces mechanical friction, thereby increasing operating speed and reducing tooth wear.
Teflon protects against corrosion and preserves the tool for a long service life. Re: Construction from foam concrete. The fact is that I am installing smart home systems, and I needed to make a small recess in the foam concrete. Our hammer drill is powerful, I'm afraid it will break.
Tips for choosing
Or can you not be afraid and do it boldly? Re: Processing foam blocks - cutting, sawing, drilling Foam blocks can be drilled.
Experts advise choosing a hacksaw made of thick metal for cutting aerated concrete, the teeth of which have Victory tips. Wet material will resist cutting much more strongly and the hacksaw will get stuck
For a reciprocating saw, it is important to choose a special blade for aerated concrete
This method is fast and quite effective, but the chains quickly become dull, and sometimes even break and jam. In addition, when cutting with such a saw, a very large amount of harmful dust is generated.
There is a special tool that is specifically designed for cutting gas, foam and other lightweight blocks. It's called:.
Therefore, if you plan to saw in this way, be sure to protect your respiratory organs from dust. When choosing a tool for cutting aerated concrete, there is no need to chase cheapness. As a rule, cheap does not mean reliable. However, it is better not to rely on your intuition, especially if you have no experience in this matter, but to read reviews or talk with knowledgeable people.
Usually people without experience who want to build a small object for themselves opt for hand tools.
Pincer grip
This useful and very convenient device for laying aerated concrete blocks allows you to save effort when carrying or lifting material. The gripper is designed on the basis of double pliers that clamp the side surfaces of the block and hold it under the influence of gravity. At the top of the device there is a convenient elongated handle, which makes it easier to lift or carry the block. Craftsmen who have to lift hundreds of blocks during the working day highly appreciate devices that make physical labor easier.
In conclusion, it should be noted that many tools for working with aerated concrete blocks can be made independently. Often homemade devices turn out to be more effective, since they are made by experienced people who understand the specifics and features of aerated concrete masonry. However, making homemade products requires certain skills and time. For busy people this is not always possible, therefore, most specialists prefer to use ready-made factory-made tools.
