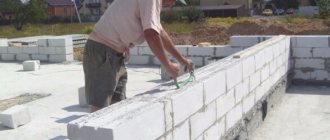
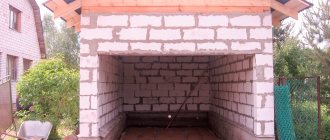
Facade finishing is an obligatory stage in the construction of a private house. If a material such as aerated concrete was used to build a house, then the plaster for facade finishing must have certain properties.
Plaster for aerated concrete must be specific for the reason that the material from which the house was built needs good protection from various adverse factors.
Before purchasing material for plastering walls outside, you should study its properties in detail.
Requirements for facade plaster for aerated concrete
The purpose of plaster is to protect the surface of the walls from the outside from factors that can destroy the structure of the aerated concrete material. These include both atmospheric phenomena and human factors. If there is no coating on the walls, or it does not meet certain requirements, then the blocks will collapse in a fairly short time.
To better understand the properties that plaster for finishing a facade should have, it is necessary to remember the features of gas silicate blocks. They are characterized by a high level of hygroscopicity, which often causes cracks to appear on the surface of the walls.
Due to strong temperature fluctuations, the blocks also gradually crack. Therefore, the requirements for plaster for aerated concrete, which are based on the features of this material, are as follows:
- high level of adhesion to wall material;
- high compressive strength;
- good frost resistance.
Facade finishing
Features of plastering walls outside
Aerated concrete has a distinctive porous structure, and the pores are open. The latter significantly increases the vapor permeability of walls made of such material. To protect them and decorate them, special facade plasters are used, the use of which does not impair vapor permeability. Therefore, it is not recommended to use polystyrene foam insulation for aerated concrete walls.
Paint and varnish materials must also meet this requirement. Consequently, film-forming paints cannot be used for painting facades.
Plastering of aerated concrete walls outside the premises should be carried out only after the building has settled and interior work, including “wet” processes, has been completed. After all, the solutions used contain a large amount of liquid, which, when the walls dry, will evaporate and be removed through the pores of the aerated concrete. If the outer coating interferes with it, it will begin to accumulate inside the material. The latter will cause the finish to peel.
Requirements for compositions
Plaster for walls made of aerated blocks must certainly be different:
- resistance to external atmospheric influences;
- good adhesion;
- resistance to frequent temperature changes;
- strength;
- vapor permeability;
- moderate density;
- excellent thermal insulation properties;
- wonderful decorative look.
If the exterior plastering of a house made of aerated concrete is not completed, then over time the surfaces of the blocks darken and become deformed.
Types of plaster
Plaster is produced in the form of dry mixtures, which subsequently independently transform the solution, and in the form of ready-made solutions.
There are several types of this material, their purposes are also different:
- The mineral look is used to decorate the external or internal surface of walls . These include the lime-sand variety and the cement-sand variety. Apply a very thin layer.
- Acrylic type is used to give high resistance to the coating . This surface is not subject to mechanical damage. The acrylic type is resistant to water, is able to maintain integrity, that is, it does not crack due to its high plasticity properties. When applied, it is able to fill any small cracks and irregularities; it is highly electrostatic, which is the reason for its rapid contamination.
- The silicate type is similar in properties to the acrylic variety, but does not attract dirt as much.
- The silicone type is considered universal ; it has a number of properties that can provide the external surface of the walls with the necessary characteristics. It is characterized by resistance to cracking. In addition, it is less dirty due to its dust-repellent properties. This type of plaster on the facade can be used to cover the surface of the walls using the previous material that was previously used to decorate the house. This type of plaster penetrates well even into the smallest cracks and pits, creating a smooth surface.
Types of plaster
Which plaster is not suitable for aerated concrete and why
Cement plaster is not suitable for working with aerated concrete
One of the most popular types of plaster is a cement-sand mixture. However, it is completely unsuitable for working with gas blocks. Regardless of what material the blocks themselves were laid on (adhesive mortar or cement), the use of this finishing material is unacceptable for the following reasons:
- The vapor permeability of cement is lower than that of aerated block . This is the main reason why you should avoid using this type of plaster.
| Among professionals, there is one rule: the finishing must correspond in terms of vapor permeability to aerated concrete blocks. This allows us to ensure an optimal microclimate for such a building. Therefore, it is extremely undesirable to use insulation materials such as polystyrene foam and polystyrene foam for aerated concrete walls. |
- Moisture content is also an important indicator for aerated blocks . In cement-sand mortar it is increased, since mixing it requires the addition of a fairly large amount of water. Since aerated concrete is characterized by high moisture absorption, it will absorb water from the solution, which not only can destroy the structure of the blocks themselves, but also reduce the quality of the plaster solution.
- Cement mortar is characterized by low adhesion rates . This is explained by the large weight of the solution and the presence of large impurities in its composition.
Gypsum plaster is a good option for plastering aerated concrete walls. But at the same time it has a number of disadvantages over the façade:
- The vapor permeability of such compositions leaves much to be desired.
The appearance of a white coating - efflorescence
- When it snows or rains, such compounds get wet quite quickly.
- On such a surface, spots may appear that need to be painted over.
- Contains more water than specialized plaster mixtures for aerated concrete.
How to choose
The choice of plaster is based on properties that are determined by the composition of the material.
By paying attention to such characteristics, you can choose the required type of plaster.
In the case of a house built from foam blocks, it is prohibited to use cement-sand plaster. It is not able to provide the required level of vapor permeability in combination with aerated concrete.
IMPORTANT!
The best options for finishing the facade of a house made of aerated concrete blocks would be the acrylic or silicone variety . Silicate is also a good option. Otherwise, everything depends on financial capabilities.
The silicate variety is considered the most expensive, but in any case, saving on the external decoration of the facade will entail even greater costs in the future. Since the surface of the walls will not be sufficiently protected, it will subsequently require significant investments in repairs.
Characteristics of plaster
Why do you need external wall decoration?
External finishing of walls made of gas silicate blocks is necessary to solve a number of problems:
- protection of walls from mechanical influences;
- preventing contact of material with rain or melt water;
- protective layer for external thermal insulation;
- creating an attractive appearance, decorative design of the facade.
It is noteworthy that most unprepared developers consider only the decorative aspect, without taking into account the need to protect the walls from external influences. The most popular are two finishing methods:
- installation of cladding (siding, façade panels, etc.);
- external plaster of aerated concrete.
The first type has become widespread due to its design feature, which makes it possible to create a ventilated gap between the sheathing and the wall. Air circulates freely in it, ensuring the removal of moisture from the walls or layer of external thermal insulation. However, facade plaster is no less popular due to its advantages:
- attractive, solid appearance;
- the ability to visually monitor the condition of the walls;
- strength, high protective properties of the finishing layer;
- There are a lot of options and techniques that allow you to get walls with different types of relief or surface texture.
In terms of complexity, both types of finishing are approximately equal, but the cladding can be installed in a landscaped area without the risk of staining and damaging the design elements. When using “wet” compounds, the risk of damage to landscaping elements increases significantly. At the same time, the maintainability of external walls covered with plaster is significantly higher than that of a facade with installed cladding. Cracks or peelings that appear can be detected at an early stage and defects can be promptly eliminated, while the condition of the walls under the cladding is unknown.
Conditions for application and surface preparation
Given the properties of aerated concrete to quickly absorb moisture, it is necessary to provide it with protection from getting wet . If the material is wet, then this is not the biggest problem in the finishing process, the main thing is not to let it freeze in this state. Frozen moisture in blocks promises the appearance of cracks and destruction of the material.
It is very important, after the laying of aerated concrete blocks has been completed, to allow it to dry completely . This is the reason why it is recommended to finish the facade only in warm weather.
If a concrete-sand type of mortar was used to bond the blocks together, then it is worth considering that more drying time is needed. This is explained by the fact that the seam is significantly thicker than the one made with a special adhesive composition.
Surface preparation
If it is impossible to carry out finishing work in the warm season, the surface is covered with a deep penetration primer. It can reduce water absorption. Additionally, the walls are covered with plastic film. The recommended conditions for carrying out such work is a period with temperatures at night above 0 degrees.
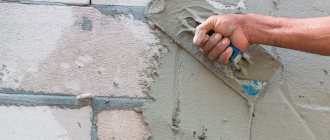
Before you begin applying plaster to the walls, do the following:
- The first step is to ensure that the surface is as smooth as possible . This is achieved by filling all the recesses and cracks with cement mortar;
- after this, use a plane or grater for aerated concrete blocks, with the help of which all irregularities are finally eliminated . If the surface has various pits or cracks, then in the future this will cause increased material consumption;
- The last thing in preparing the walls is cleaning them from dust and dirt particles . This is done using a brush or roller moistened with water. These tools are used to process the entire surface of the walls, after which some time is given for the material to dry completely.
Cement mortar - calculation
The modern market offers a large selection of various plaster compositions for aerated concrete, and finding a suitable one in Moscow or the regions is not difficult. But, nevertheless, many craftsmen are still thinking about finishing the facade of an aerated concrete house with cement mortar. This option is considered unacceptable for a number of reasons.
Why you shouldn’t plaster aerated concrete with cement mortar:
- The cement mixture does not demonstrate sufficient adhesion for reliable adhesion to the smooth surface of the aerated block. Then a dense solution with a lot of weight can simply become covered with cracks and peel off.
- Moisture enters the aerated concrete from the cement mortar, reducing adhesion and compromising the integrity of the plaster layer due to uneven and accelerated drying.
- Poor vapor permeability of the cement mixture does not allow compliance with building codes; as a result, microclimatic parameters are violated, which is especially important in residential premises.
It is not difficult to calculate the volume of finishing material. Usually, on the package with the finished mixture, the consumption per square centimeter is indicated, provided that the layer thickness is 1 centimeter. Next, you simply need to multiply the number of square meters (obtained by multiplying the height of the wall by the length) by the number of centimeters in the layer and the number of kilograms of consumption.
So, to finish a wall of 10 square meters (5 length and 2 height) with a layer of 3 centimeters, subject to a plaster consumption of 8 kilograms per 1 m2 with a thickness of 1 centimeter, you will need: 10 x 3 x 8 = 240 kilograms of the mixture.
If you plan to prepare the plaster mixture yourself, then you need to know the proportions and volumes of materials. The thickness of the layer and the area of the walls are also taken into account.
So, to finish a wall with a total area of 60 square meters with a layer of 2.5 centimeters you will need:
- Volume of solution per square centimeter: 1 x 0.025 = 0.025 m3.
- With a cement to sand ratio of 1:4 per square meter, you will need 0.02 cubic meters of sand and 0.005 m3 of cement.
- To plaster 60 square meters you will need 0.3 cubic meters of cement and 1.2 m3 of sand.
- But 0.3 cubic meters is not 300 kilograms, since the density of cement is high and one liter contains 1.5-1.7 kilograms. This means you will need 300 x 1.6 = 480 kilograms of cement. The required number of kilograms of sand is also calculated: 1.2 x 1.55 = 1860 kilograms.
- It turns out that per square meter of plaster you will need 7.5-8.5 kilograms of cement and 31 kilograms of sand.
Insulation for aerated concrete
One of the issues that owners of private houses face during the construction process is the issue of insulating walls from the outside.
NOTE!
Foam insulation is used quite rarely, since the level of vapor permeability of such material is 10 times less than that of aerated concrete . In addition, it is not recommended to insulate a building in areas with a humid climate with this material.
This is explained by the fact that the space between the insulation and the wall will be filled with moisture, and this is fraught with the appearance of rotting processes on aerated concrete.
- Mineral wool is most often used for insulation, since its level of vapor permeability is significantly higher . Such insulation allows you to create and maintain the necessary microclimate for the room.
- Polyurethane foam is very convenient in the application process . It is characterized by a high level of thermal insulation qualities. It is applied by spraying, which, in addition to the ease of the process, provides a seamless surface.
- Plaster can also be used to insulate walls . For this, sawdust, perlite, and expanded glass are added to the solution. Insulating walls in this way is quite convenient and practical; the only thing worth considering when insulating in this way is the complete loss of the breathable properties of aerated concrete. Compared to insulation using mineral wool, this method has rather low efficiency.
When choosing a material for insulation, you need to take into account the climatic conditions in which the house is located and your capabilities. The best option for insulation is the use of mineral wool, however, in each case the choice of material is individual.
Insulation of foam block
How to properly plaster the walls of a house made of aerated blocks
One of the main misconceptions is that the main purpose of plaster is to protect the outside of walls. The only problem is that if such walls are not primed, then with the arrival of spring they will “give up” the accumulated moisture. And since there will be a layer of plaster on the outside, all the moisture will go inside the house. As a result, cracks are possible on the internal walls.
Plaster is applied to the interior walls of the house using pressure
Advice! Priority for protecting external walls exists only if the construction of a house takes place in close proximity to the sea, lake or any body of water.
Carrying out simultaneous finishing of internal and external walls is also unacceptable. The fact is that in this case, the moisture that the gas block will somehow absorb will simply have no way out. And its settling inside the block will only accelerate the processes of its destruction.
Yes, plaster for external use on aerated concrete has good vapor permeability. But still they will not be enough to quickly remove moisture. And this becomes especially critical when the average air temperature at night drops below zero. As a result, the gas block will begin to quickly collapse.
Taking into account all of the above, it should be noted that the most profitable and correct option is this: first, the internal plaster is applied, and after this layer has dried, the external plaster is applied . In this case, the moisture accumulated inside the aerated concrete blocks will have an outlet, which will not bring negative consequences for the building itself.
Surface primer
The role of priming is to provide the wall with water-repellent properties. Therefore, the composition of the primer material should be based on acrylosiloxane.
Such material is able to provide protective properties and prevent precipitation from destroying the material.
The surface on which the priming composition will be applied should not be cracked or contaminated.
It is recommended to carry out the priming process at a temperature of 10 to 25 degrees Celsius .
Priming begins after the surface of the walls has been completely prepared, namely, all dust has been removed and all irregularities have been eliminated. Once the cleaning water has completely dried, the priming process begins.
You can often come across recommendations that the material for priming must be diluted with water in a 1:1 ratio. However, this is wrong; such a technique will significantly reduce the properties of adhesion to the surface. You don’t have to worry about this property if the wall is pre-prepared correctly.
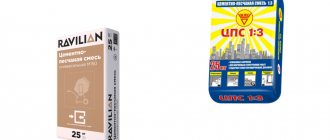
The most common plaster mixtures for aerated concrete
There are several types of facade plaster compositions that have proven themselves when working with aerated concrete:
| Types of plaster |
| Decorative facade plaster
|
| Cement-lime dry composition
|
| Ready-made silicone mixture
|
| Ready-to-use silicate solution
|
Most popular manufacturers
Plaster mixtures for finishing aerated concrete are available in the product lines of all major plastering manufacturers. Mixtures of popular brands are distinguished by exact correspondence of qualities to the declared indicators.
Among the popular manufacturers are the following companies:
- German concern Henkel (develops and produces plasters under the Ceresit brand);
- Austrian brand Baumit;
- the Knauf company, which initially produced gypsum mixtures, also produces cement-based mixtures;
- Krasland company;
- Bolars (Uniplast mixture);
- A number of plasters for aerated concrete are produced by the company Pobedit.
From the Ceresit line, the brands CT 24 and ST 77 and others are most often used for aerated concrete. ST 24 is a lightweight cementitious, frost-resistant, vapor-permeable plaster mixture for leveling for universal use. ST 77 – façade acrylic aerated concrete plaster, ST 35 – decorative “bark beetle” mixture for façade use.
Popular in the Baumit line are the cement-lime composition Baumit HandPutz for universal use, the silicone composition SilikonTop, the silicate mixture SilikatTop, and the acrylic Nanopor Top.
Among the Knauf mixtures suitable for aerated concrete walls are gypsum Knauf-Profi, gypsum polymer Eisberg, gypsum with polymer additives Rotband, Goldband, cement Grunband (thermal insulation), Sevener.
The Krasland company produces compositions specifically for aerated concrete walls, for example, Aerated Concrete-2.
Requirements for plaster on aerated concrete
The products have high moisture absorption and vapor permeability. Therefore, the main requirements for plaster are excellent protection of aerated concrete from moisture penetration. With all this, the mixture must also be vapor-permeable so as not to disturb air exchange. Then condensation will not accumulate.
Plaster for gas silicate blocks must meet the following parameters:
- High adhesion rates - about 0.4 MPa.
- Vapor permeability indicators are from 0.17 to 0.2 mg (m*h*Pa).
- Moisture absorption is less than 5% by weight.
- Frost resistance indicators – 50 cycles or more.
- Minimal shrinkage after drying.
- Density after drying is from 500 to 1 thousand kg/m3.
- Strength after drying is about 0.29 mPa.
- Compressive strength class CS1.
When wet, it should dry quickly. The minimum number of drying and wetting cycles is 250. By choosing the right plaster for the surface of an aerated concrete wall that meets most of the requirements, you can be sure that it will last for decades.
Plastering and surface reinforcement technology
After the primer layer has completely dried, begin applying the plaster solution.
Application can be done using two methods:
- Thick layer . This method consists of applying plaster in one layer, after which it is leveled and grouted.
- Thin layer . It is characterized by applying the material in thin layers several times. The advantage of this method is the ability to prepare the surface for applying a decorative type of plaster, namely a leveling layer. It is also possible to apply special compounds that provide sound insulation properties.
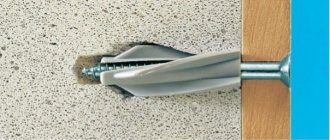
But, before starting to apply plaster, it is necessary to carry out the reinforcement process using a metal mesh. Due to this, you can achieve the maximum level of adhesion between materials and the wall. The mesh is fixed after applying a thin layer of plaster . And after that they are covered with the same layer of material.
Reinforcement
After the plaster has dried, the surface becomes monolithic. In some cases, it is permissible to attach the mesh to self-tapping screws . The mesh is attached with an overlap of up to 50 cm.
IMPORTANT!
Reinforcement is used regardless of the chosen method of applying plaster, but there is no need for it if the thickness of the layer of material for plastering is no more than 2 cm.
Otherwise, reinforcement occurs depending on the application method:
- If a thick-layer application method is chosen, then the reinforcing mesh should be under the primer layer , after which the plaster is applied. The reinforcing mesh is covered with a layer of primer, which is leveled and dries, after which a layer of plaster is applied. Then they wait 2 days and start painting the walls.
- If a thin-layer application method is chosen, then after attaching the reinforcing mesh, apply a leveling solution and wait for it to dry completely . After this, the surface is primed and a finishing layer of decorative plaster is applied. When it dries, begin painting or processing with any other selected material.
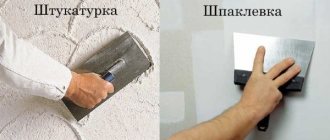
Plaster
Sectional diagram
The process of plastering an aerated concrete facade
Plastering gas silicate blocks does not require any special skills. You just need to adhere to the application technology and take into account the working conditions. Let's look at everything step by step.
Under what conditions should I work?
According to the instructions, the interior finishing is done first, namely wet processes, and then, after drying, the exterior. The main requirement for an aerated concrete wall is dryness. Maximum humidity 27%. Otherwise, everything is fraught with delamination of the material.
It turns out that you need to start finishing work in dry and warm weather, at temperatures from +5 to +30 ℃ and with a maximum humidity of up to 80%. Spring and summer are the best option. If it was not possible to finish the outside of the house over the summer and autumn, the walls are prepared for frost. To do this, they need to be treated with a deep penetration primer in two layers. And in the spring, plaster is applied for gas silicate blocks.
Heat, strong wind, direct sunlight - all these are negative factors. The solution will dry quickly and will not adhere firmly to the aerated concrete. Cracks will form and the material may peel off.
Preparing the walls
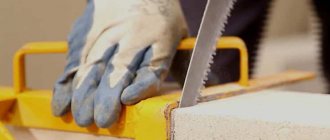
Since aerated concrete blocks have ideal geometric shapes, the walls are even and smooth. No additional leveling layer is required. Another thing is the presence of dents, cracks and chips. They are sealed with an adhesive composition, the same as for laying aerated concrete.
You need to mix it with a construction mixer, put it on a spatula and seal it, forming a flat surface. All you have to do is wait until it dries completely and rub these places, removing any imperfections. Then clean the walls from dust and dirt with a brush.
Primer
As mentioned above, deep penetration formulations are needed. They have strengthening properties. Thanks to this, a strong elastic film is formed that allows steam to pass through. However, aerated concrete will not absorb moisture as much, and adhesion will increase. Top best primers: Knauf Grundiermittel, Siltek E-110, Aerated concrete-contact-1.
A layer of primer is applied directly to the aerated concrete. You need from 1 to 3 layers with breaks for drying. Everything depends on the climate. If the region is dry and warm, then priming is done in 1 layer; if the climate is damp and humid, then in 3 layers. A roller and brush will help you transfer the composition onto the walls without leaving any gaps. The layer is smooth and continuous. Use a narrow brush to coat hard-to-reach areas.
Plastering and reinforcement
If the finishing layer of plaster is less than 1 cm thick, then it does not need to be reinforced. There is enough primer. When the thickness is more than 1 cm, the use of reinforcing fiberglass mesh with a cell size of 3x3 mm is required. It is important that it is resistant to alkaline environments. The layer will be durable and strong.
Let's consider the technology of plastering walls made of aerated concrete:
- The plaster is mixed. All proportions are indicated on the packaging from the manufacturer. To do this, you need a clean bucket or other container; it is filled with warm water. Pour the dry mixture into the water and stir with a construction mixer until ready. After kneading, leave it for 10 minutes until it is ready.
- Using a wide metal spatula, apply the solution to the surface from the corner. The tool is held at an angle of 45° to the wall. The main thing is to apply the mixture evenly. The optimal thickness is 5 mm.
- A mesh is laid on top of the undried solution, straightened out and sunk into it. To do this, press on the surface with a trowel or spatula, rubbing the mixture. If necessary, add a little mortar on top and level it out. Having fixed the mesh on the treated area, another area is processed and the process is repeated. The overlap of the reinforcing mesh is 4–5 cm.
- Metal or plastic corners are fixed to the corners to protect them from damage. The process is reminiscent of installing a mesh: applying the solution, recessing the corner and molding. The same is done on the openings of windows and doors. All you have to do is wait for it to dry completely.
The packaging indicates how long it will take for the layer to dry.
How to properly reinforce plaster
A metal mesh with small cells can be used as a reinforcing layer, for example, a steel mesh with a wire diameter of 0.1 mm and a cell pitch of 0.16x0.16 mm (average price 950 rubles/sq. m = 2,850 rubles/ roll) or fiberglass mesh (for example, reinforcing fiberglass mesh with a cell pitch of 50x50 mm (approximate price 17.60 rubles/sq.m = 880 rubles/roll).
Reinforcement of plaster with mesh. The mesh is attached with an overlap of 50 mm. At the same stage, the corners of the building are formed using a perforated corner with a mesh. The mesh helps prevent cracks in the plaster due to shrinkage of the building. Thus, the plaster of the aerated concrete facade will not be covered with a web of small cracks. The mesh is embedded in the applied solution using a spatula. It is especially important to install the mesh in high-tension areas, near windows and doors.
Advice. Attaching the mesh to a dry wall will not give any result, because the mesh will be fixed to the base with self-tapping screws. If it is installed on a solution, it will form a monolith with the solution and will move with it.
- leveling the plaster layer along the grid;
Next, you need to wait until the first layer dries completely. Otherwise, it may fall off under the weight of the second layer. Since this method involves thin-layer application of the solution, you will need to wait 3-4 days. The thicker the layer, the more. You can check whether the layer is dry using water. If you spray it on the wall and the water soaks in, it’s time to get to work.
Note. When the plaster dries, it must be protected from the influence of environmental factors (moisture, snow, rain).
- applying a second layer of plaster. This layer is considered leveling, so increased attention is paid to the evenness of application and the formation of a smooth surface;
- applying the third (finishing) layer of plaster mixture followed by grouting if necessary;
- painting a plastered wall made of aerated concrete or applying a textured plaster mixture, for example, Pobedit-Bark Beetle (340 rubles/25 kg). For painting aerated concrete, only paints for exterior use are used. For example, Nova Facade (590 rubles/7 kg), Gasbetonbeschichtung from Dufa (2674 rubles/25 kg), ROLPLAST Gordianus (3700 rubles/10 kg), Dyotex (concentrate, 5500 rubles/15 kg).
- application of water repellent. This is a special solution that professionals recommend applying a year after painting, after completing all facing work. A water repellent will give any surface additional water-repellent properties. The special water repellent for aerated concrete “Neogard” (350 rubles/1 l) has proven itself well.
Aerated concrete putty
When deciding how to putty aerated concrete, you need to know that there are three types of finishing materials on the market, similar in purpose, but differing in their composition. All this is facade plaster for aerated concrete, sold in the form of a ready-made mixture. Designed for thin-layer finishing of plastered surfaces.
Silicate plaster Baumit SilikatTop Kratz Repro Ready-made silicate plaster, for example, Baumit SilikatTop Kratz Repro 3.0 mm (3,700 RUR/25 kg)
Silicone plaster Baumit SilikatTop Kratz Repro Silicone plaster, for example, Baumit SilikonTop (3300 rub/25 kg) Acrylic plaster Ceresit CT 77 Acrylic plaster, for example Ceresit CT 77 (3800 rub/25 kg) Facade “coat” Weber.pas akrylat or Weber.pas akrylat Fur coat 615C 1.5mm (1800 RUR/25 kg)
Finishing of aerated concrete
To work, you will need finishing plaster for aerated concrete. It is mixed according to the instructions. The finished solution is transferred to the wall using a wide spatula. The thickness of the layer is from 0.4 to 1 cm. Since this is the final layer, its application must be approached more responsibly and carefully. When processing adjacent squares, watch for the formation of stripes along the edges. Excess is immediately removed with a spatula.
It doesn't end with applying the mixture. After setting, but before its final hardening, you need to grout. It will eliminate all defects and bring the surface to perfection. Metal or polyurethane grater. The tool is applied to the wall, pressed and the layer is smoothed with rotational movements. There is no need to press hard to avoid dents and scratches.
Finish painting can be applied only after the walls are completely dry. As an option, applying decorative structural plaster (lamb, bark beetle, fur coat). The thickness of this layer is minimal. This completes the exterior plastering of aerated concrete for exterior work.
Gas silicate walls are warm, reliable and durable. But in order for them to fully perform their functions, they need to be protected. And plaster is the most affordable and easiest option for this. As you can see, the technology is simple and anyone can do the job. You just need to take into account the features of aerated concrete, stock up on tools and materials and start the process according to the instructions.
Finishing layer
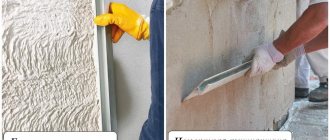
The finishing layer is made using plaster, which belongs to the decorative class. You can also additionally use paints and varnishes. The choice of decorative plaster is purely individual and depends more on the design decision than on any special properties.
Before applying the final layer of plaster, grouting is carried out, after which the finishing work begins . The only thing that needs to be taken into account regarding the plaster for the finishing layer is its vapor permeability property. Paint should have similar properties.
Finishing
How to plaster aerated concrete outside
There are several types of plasters that are suitable for cellular concrete. The options provided below are used for aerated concrete and have all the necessary qualities. We will look at them, find out the advantages and disadvantages, which will help you decide on the best option.
List of mixtures for finishing work on aerated concrete walls:
- Mineral based.
- Silicate based.
- Silicone based.
- Acrylic based.
All features and characteristics depend on the composition of the mixture.
Mineral compositions
These are thin-layer mixtures made specifically for finishing walls made of aerated concrete. It is called mineral because it is made from chips of marble or other materials. You can buy the mixture or make it yourself.
To create you need:
- Lime.
- White cement.
- Marble chips and other fillers.
The range of colors is small, but by painting the surface can acquire any color. You just need to take into account that the paint and varnish material must also be vapor permeable.
Mineral-based façade plaster for aerated concrete has the following advantages:
- Vapor permeability.
- Affordable price.
- Not afraid of the influence of biological microorganisms.
- Not afraid of temperature changes.
- Fire resistance.
- Easy to care for.
- After drying it does not crack.
- Environmentally friendly.
Disadvantages of mineral-based plaster:
- Not enough flowers.
- Difficulty at work.
- Short operational period (about 10 years).
- Sensitive to vibration.
After application, aerated concrete walls are painted to protect them from moisture.
Silicate compounds
The main binding component is potassium liquid glass.
Advantages:
- Easy to apply.
- Protection from moisture.
- Vapor permeable.
- Can be painted.
- Inexpensive.
- Long service life.
- Excellent decorative qualities.
Silicone compounds
Is it necessary to plaster aerated concrete blocks? Yes, this way they will be reliably protected from moisture. Silicone compounds are ideal for this purpose, as they are considered one of the best.
Advantages:
- Moisture protection.
- Easy to apply.
- Not afraid of atmospheric influences.
- Vapor permeable.
- Long operational period.
- Has various fillers.
- Elastic.
Silicone facade plaster goes on sale in finished form.
Acrylic compounds
Least used for aerated concrete blocks. Although it has good strength and decorative properties, however, the vapor permeability indicators are low. Therefore, it should not be considered for exterior decoration. Condensation will form and all the negative factors associated with it.
Video description
For detailed video instructions on applying Farbe silicone plaster, watch the following video:
The company also provides the opportunity to order free samples of Farbe plaster - this will speed up the process of selecting colors for the facade, and will also help you verify the quality of these products.
Silicone facade plaster “Bark beetle” and “Lamb” Source myfarbe.ru
Baumit Silicone Top. A high level of adhesion and ductility is achieved thanks to the base of the mixture - silicone resins. The coating remains decorative for a long time due to its dirt-repellent properties. Wide choice of material color palette (up to two hundred shades).
Weber.pas silicone. Mixture based on silicone emulsion. It is possible to select the appropriate grain size. Optimal resistance of the material to moisture, temperature, and dirt.
Baumit Silikat Top. Silicate type of plaster. The coating is durable and has good vapor permeability. The composition has different grain sizes and up to two hundred tinting variations.
Primer of the surface before plastering Source en.aviarydecor.com
Tools for working with plaster
For finishing aerated concrete blocks, standard tools are used, which are also suitable for other plastering works. You will need any convenient container for mixing the solution, as well as a construction mixer or drill with an attachment. The following devices will be needed:
- a plaster ladle or trowel for spreading the mortar onto the surface;
- construction float, trowel or trowel for rubbing the base;
- spatulas of different sizes, including angular and serrated, for applying mortar and treating walls;
- metal or plastic beacons for laying an even plaster layer;
- a rule or strip for smoothing the mortar between the beacons and checking the quality of work;
- level for assessing the condition of the plane and installing beacons;
- reinforcing mesh to strengthen the plaster layer;
- brush and roller for applying primer.