General rules
Partitions made from aerated concrete blocks have several important requirements for use.
Firstly, they cannot be load-bearing - the slabs or reinforced concrete monolith must still rest on the main walls. Secondly, the partitions themselves must rest on the foundation or the lower floor. Thirdly, they should be connected to at least one adjacent wall. In addition, aerated concrete blocks must be able to withstand the weight of hanging furniture. For example, each fastener can hold a cabinet or shelf that weighs 25 kilograms and there should be no problem. Installation must be carried out so that the partition fits tightly with the floor and adjacent structures. Both the light weight of the blocks themselves and maximum sound insulation are important.
If aerated concrete blocks are planned to be placed between the living room, kitchen or other rooms with different temperatures, then care should be taken for thermal insulation
But at the same time, it is important to strive to ensure that the thickness does not increase much and allows you to save space. It is important to comply with fire safety conditions, because in the worst case, aerated concrete can prevent the spread of fire for no more than a quarter of an hour
Experts highlight impressive advantages of such structures. The material is easy to process, so you can give it the most convenient shape and size using a regular hacksaw. By following the installation rules, you can get a neat partition with a perfectly flat surface and neat seams, the thickness of which ranges from 1 to 3 millimeters. All this is possible, since a special cement adhesive is used for masonry. The porous structure means that the light weight and small thickness are complemented by fairly decent sound insulation and thermal insulation. In addition, the material is relatively inexpensive.
There are also disadvantages to aerated concrete blocks. The design is not very durable and largely depends on the materials used. Aerated concrete absorbs water, which sometimes makes finishing work difficult. It may well happen that a layer of the same plaster simply will not stay on the surface. Finally, it is quite difficult to attach any fasteners to the gas block. Some of them simply refuse to hold on, while others oxidize and become rusty.
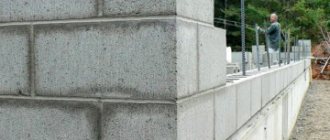
Aerated concrete partitions are usually erected when the external walls are already standing. If their length and width are too large, then the frame will have to be reinforced with reinforced concrete structures. At the joints of ceilings and partitions, an expansion joint filled with polyurethane foam or mineral wool is used. The edge joints are processed in the same way. It is also recommended to use reinforcing elements to connect the partition to the wall. In this case, all adjustments are made with a regular hacksaw.
Flooring materials
It is recommended to first prepare the necessary materials for arranging the floors. These include:
- Wooden beams. Material: solid wood or laminated veneer lumber. Their dimensions should not be less than 50x150 mm. They should not have weakened areas or large knots that could affect their load-bearing capacity. The wood must be dry at the time of installation. The specific dimensions of the beams depend on the length of the span to be covered and the pitch of their installation. This provides a calculated load of 400 kg per square floor.
- Boards for flooring and flooring.
- Wooden logs.
- Wooden blocks 5x5 cm.
- Roll and coating waterproofing to prevent contact between wood and aerated concrete. If there is direct contact between these materials, the difference in thermal characteristics will lead to the formation of condensation, causing the wood to rot.
- Mineral wool type insulation.
- Material for internal floor lining. OSB, plywood, lining, drywall, etc. can be used.
- Antiseptic and heat-resistant impregnations. They are necessary for impregnation of beams and boards. Impregnations prevent wood from rotting, damage by pests, and fire.
- Cement and sand to create an armored belt.
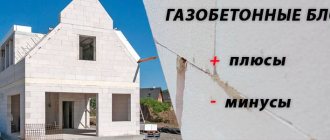
Features of aerated concrete partitions
Let's start with the advantages that aerated concrete has in comparison with other popular partition materials:
Aerated concrete for partitions is chosen for its light weight and low load on the floors and foundation;
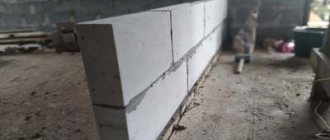
The table shows the approximate weight of high-density blocks
Smooth, large-sized blocks are quickly and easily laid, so erecting a partition takes a minimum of time and is cheaper in terms of labor costs;
One block replaces several bricks
- It is easier to lay aerated concrete blocks with your own hands, as it is easy to process;
- The strength of the material is less than that of brick, but is quite sufficient to serve as the basis for hanging structures and furniture;
- The price of one cubic meter of aerated concrete blocks is almost half that of the same volume of brick.
Therefore, it is not surprising that when choosing a material for a partition - brick or aerated concrete - they are increasingly choosing the latter option. If we compare it with a frame structure lined with plasterboard or other sheet material, then here too its clear advantage can be seen.
It lies in the fact that you can hang a shelf or curtain for curtains on an aerated concrete wall anywhere. Whereas in frame partitions it is necessary to plan the embedded parts in advance to enhance their load-bearing capacity.
Special fasteners successfully solve the problem of insufficient strength of aerated concrete
Sound protection level
The airborne noise insulation index for interior partitions between rooms, a room and a kitchen, a room and a bathroom, according to regulatory requirements, must be at least 43 dB. The higher this indicator, the better the design prevents the spread of household noise - from spoken speech, radio, TV. However, it does not take into account the isolation of low-frequency sounds from a home theater or operating engineering equipment (ventilation, pumping). With equal airborne noise insulation indices, a massive partition attenuates low-frequency sounds much better than a lightweight frame partition. It is also important to take into account that holes in the partition (for example, cracks in a doorway) significantly reduce the level of sound insulation. There are many nuances in matters of acoustics, and if for some reason it is important to perfectly soundproof a room, you should contact an acoustics engineer.
Traditional types of interior partitions allow you to provide a comfortable level of sound insulation. Structures made of massive and at the same time porous materials - ceramics, aerated concrete, gypsum concrete, shell rock - absorb and reflect sounds of any frequency well. Such partitions, about 10 cm thick, provide an acoustic insulation index of 35-40 dB, and 15 cm thick - up to 50 dB. In order, if necessary, to improve the sound insulation of systems made of these materials, create an air gap between two rows of masonry or additionally line the wall with plasterboard.
Multilayer structures are also effective, in which outer hard layers that reflect sound (for example, plasterboard sheets) are combined with soft layers that absorb it. In frame partitions, mats or slabs of basalt fiber are used as soft layers, which are laid between the cladding. At the same time, the level of sound insulation of frame systems is higher, the greater the mass and rigidity of the cladding layers, the wider the gap between them and the better the insulating properties of the soft material. Therefore, noise absorption will significantly improve the use of a double layer of cladding and special sound-, rather than heat-insulating, materials.
To achieve the same soundproofing effect, sometimes you have to choose between thick monolithic and narrow multilayer partitions. The latter can save useful space in the house.
The thickness of the brick internal partition of the house
The brick for the partition is selected taking into account the thickness of the partition. Increased thickness can be obtained by using one-and-a-half and double products. It is more advisable to use single or half brick indoors. Brick partitions are usually calculated taking into account the height of the floor. This value is 1/25. If the floor height is 3 m, then the thickness of the new wall will be 15 cm.
Which brick to choose
Brickwork of walls must be carried out in accordance with SNiP. They allow the use of hollow bricks, which reduces the weight of the structure, but worsens sound insulation. Brickwork of walls can be done in 1 piece, half and quarter. In the latter case, the masonry is done on edge, and the wall thickness will be 65 mm. By erecting a half-brick partition, you can get a wall 120 mm thick. It can be installed in a bathhouse or any other room in the living space.
Brick partitions are built from different products, which have their own composition and sound insulation strength characteristics. The walls of a house, for example, can be built from white silicate brick, which, however, has quite an impressive weight. The most common is red ceramic brick, which is distinguished by its versatility. With its help they build baths and private houses. But for stoves in the bathhouse and chimneys, fire-resistant fireclay bricks are used.
In a bathhouse, you can build not only a partition from brick, but also a wall, which will be located next to the stove. It is best to build a brick partition from solid brick, which does not have thermal insulation properties. They are not needed when you have to lay interior walls. Work can be carried out in half a brick or in a whole product. It all depends on what characteristics the partition should have. A fire wall, for example, is most often made as thick as possible in order not only to contain the flames, but also to reduce the temperature in adjacent rooms. The thickness of the wall in this case is important for fire protection properties.
The size of the bricks is usually standard, but before starting work it is important to decide which brick to use to build a partition in a bathhouse or indoors. Consumers often decide which products to choose - silicate or ceramic
At this stage, you can ask what composition the blocks have. The first ones have 10% lime and 90% sand. But ceramic ones are mainly made from fine-grained clay. This largely determines the characteristics of both options for building materials. For example, the density of hollow bricks of these two types is different; it is higher for sand-lime bricks. This also applies to thermal conductivity, but the water absorption of bricks is at the same level
If the consumer cannot decide which brick to build a partition in the bathhouse from, he can also pay attention to the weight. Silicate products weigh 3 kg, while ceramic products weigh 2.6 kg maximum
Another type of brick is facing, but of course it won’t be possible to use it to build a partition. This material can be used if the wall is not very aesthetically attractive, but you still want to complement the interior with masonry. Facing bricks are good because they are thin, light in weight and easy to install.
Masonry and reinforcement of load-bearing walls.
The laying of the second and all subsequent rows of load-bearing walls is carried out similarly to the first row:
- corner blocks are laid, their position horizontally and vertically checked with a building level, a construction cord is stretched between the blocks and blocks are laid along it in a row with the position leveled using a mallet;
— the mortar mixture is applied to the row bed and to the side surface of the block using a YTONG® notched trowel of width corresponding to the width of the block and protrusions (teeth) up to 5 mm high, which ensures a uniform seam of 2-3 mm;
— ligation of blocks must be carried out in compliance with the requirements l ≥ 0.4 • h, but not less than 10 cm.
Reinforcement of rows of load-bearing walls in one- or two-story houses is carried out every 2 rows on the third, reinforcement of the corners of the house frame every row or according to the project. For masonry made of aerated blocks ≤ 365 mm, using a YTONG® wall chaser, two parallel grooves 4 cm wide and 4 cm thick are formed for the reinforcement; tying the reinforcement in the corners for walls ≤ 365 mm and >365 mm thick is shown in the figures.
Important:
When building on moving soils, on lightweight foundations, or using reinforced concrete floor slabs, it is recommended to strengthen the corners of the load-bearing frame, as well as the wall openings of windows and doors using O-blocks reinforced with a lattice of 10 mm reinforcement and poured with monolithic concrete.
What it is?
An opening in a wall made of aerated concrete blocks is a hole in stone masonry for access to another room. Openings are window and door. Window openings are arranged in the middle of the wall, with approximately the same distance from the ceiling and floor.
Window elements must be reinforced with lintels, since the floor slab will have an impact on the structure. The openings for the window can be laid out at the initial stage of construction when laying aerated blocks on the walls, and can also be cut out in a ready-made wall if redevelopment is suddenly contemplated.
Openings for doors can be made both on load-bearing and on internal walls and partitions. A passage on a load-bearing wall is often the main entrance to the house or exit to the backyard. The passages in the partition walls are made for the further installation of interior doors.
Such openings also require reinforcement above the passage to avoid excessive loading. The door passage runs from the floor to the ceiling, sometimes from the floor and not reaching the ceiling a few tens of centimeters.
General provisions
The technology of construction from YTONG® aerated blocks is quite accessible to anyone without experience, and the quality of masonry as a whole is determined only by the ability and desire of the mason to strictly adhere to the requirements of the instructions, which are as detailed as possible by units and elements in the brand’s books on the page baubuch.ytong-silka.de.
This material outlines the basics of masonry as concisely as possible with recommendations for the simplest and most effective design solutions for a low-rise private house made from standard aerated blocks and related brand products.
Important:
In terms of labor costs and financial investments, it is optimal to lay external load-bearing walls on a par with the selection of the thickness (width) of the material according to the strength class and reduced heat transfer resistance for a specific climatic region of the country.
Installation recommendations
Areas of application of aerated concrete blocks.
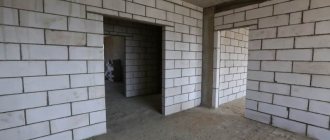
Having decided to install interior partitions with your own hands, you need to know the mandatory rules for masonry. Such rules require that in three adjacent rows the vertical seams do not coincide with each other. This arrangement of rows is called the rule for ligating sutures.
Also, it is not allowed to install a newly made partition close to the ceiling in the house. There should be a distance of 15-20 mm between the top of the wall and the plane of the ceiling. The resulting gap after finishing the masonry must be filled with any elastic material (silicon sealant, polyurethane foam, etc.). This requirement is due to the fact that the load to which the gas partition block will be subjected from the ceiling may be critical. This will lead to cracking of the wall or its complete collapse.
An important aspect of the installation is the alignment of the aerated concrete partition with the adjacent walls. Here, new structural elements must be tightly connected to the old walls. To do this, grooves 2-3 cm deep are made in the plane of the wall, into which the partition blocks should be mounted.
Step-by-step instruction
Self-construction of a partition consists of several technological operations :
- markings;
- waterproofing;
- installation of anti-vibration pads;
- laying blocks and attaching them to walls;
- reinforcement according to the layout of the rows;
- production of doorways, through niches and lintels over openings;
- arrangement of connections to the ceiling;
- finishing.
Each stage is performed in compliance with technology.
Marking
It is convenient to use a laser level for marking.
Most often, aerated concrete partitions are built after the construction of the building frame . If done earlier, at the stage of installing the interfloor ceiling, damage to the blocks or destruction of the entire partition may occur.
Use a laser plane builder or make do with a bubble level and plumb line:
- At the intersection of the ceiling and opposite walls, mark two points . One of the sides of the partition will be located in these places in the future.
- Use a paint cord to mark a straight line connecting the previously marked points.
- Using a plumb line, project the markings onto the floor .
- The upper and lower marks are connected by a line, which will indicate the junction of the partition with the walls.
Valera
The voice of the construction guru
Ask a Question
To prevent mistakes, check the accuracy of drawing the line on the floor. To do this, control measurements are taken several times across the entire width of the room using a plumb line. The marks on the ceiling and floor must match along the entire length.
Waterproofing and vibration prevention
If the partition is installed in a damp room, waterproof the wall from the floor. The surface is cleaned of dirt, concrete layers left by masonry mortar. Use roofing felt or other bitumen-based material. It is simply laid on the floor or glued with rubber-bitumen mastic for reliability.
A vibration damping layer is attached over the waterproofing and along the walls . It serves as protection against cracking of blocks and plaster from vibrations, and also reduces the level of noise penetrating into neighboring rooms.
as a vibration damping pad :
- mineral wool cardboard;
- sheets of expanded polystyrene up to 5 mm thick;
- pieces of cork lining;
- soft fibreboard.
If the gasket is not installed on the walls in advance, after the construction of the partition is completed, the cracks are foamed with assembly adhesive for aerated concrete blocks.
Laying the first and subsequent rows
If for horizontal alignment it is necessary to lay a layer of glue more than 20 mm, use a cement-sand mortar.
The level of adjacent blocks must be maintained when laying the first row ; glue consumption and, to a greater extent, the reliability of the entire structure depend on this.
Algorithm for laying aerated concrete blocks:
- A straight strip is nailed along the mark on the wall , which will provide convenience when aligning the partition vertically.
- Along the floor markings, a construction mesh made of polymer or metal - this will reduce the likelihood of cracking the walls.
- Work begins from the load-bearing wall , at a distance of 1–5 mm from which the first block is installed. For leveling, apply gentle blows with a rubber hammer.
- After laying the first row, the mortar is allowed to harden , since when installing the second row, movements are possible that violate the geometry of the wall.
- The block is attached to the wall using a soft metal suspension . Rigid corners and rods embedded in a load-bearing wall are not used, since vibrations will gradually destroy the block.
- To ensure ligation of rows , one block is sawed in the middle. If there is a doorway in the partition, then markings for cutting are carried out taking it into account. In some cases, the block will have to be cut differently.
- Before laying each next row, the previous one is leveled with metal floats . Protrusions and irregularities between adjacent blocks are cut off. The surface should be flat and horizontal, which will prevent excessive stress in the blocks.
- Stretch the marking cord to facilitate alignment of the second and each subsequent row.
- A special adhesive for aerated blocks is used as a binding solution . The composition is distributed using a purchased or homemade carriage. After each application, the body of the device is cleaned of glue, as it sets quickly.
- After three rows lay the first reinforcement layer. A recess is made in the surface into which glue is placed. Reinforcement is placed in the groove along the entire length of the partition and the recess is filled with glue.
- Continue laying out rows until they reach the ceiling.
- Between the last row and the ceiling a compensation gap of 15 - 20 mm is left, which is filled with polyurethane foam upon completion of construction.
The blocks are adjusted to size using a file. Cutting with an angle grinder creates a lot of dust, which is difficult to completely remove before applying glue to the block.
The procedure for making openings
Layout diagram
Aerated concrete partitions are not load-bearing walls, therefore reinforced concrete lintels are not installed above doorways .
To place blocks above standard doors with a width of 600 to 800 mm, use a steel corner with shelves of 30–50 mm. The corners should be 50–60 cm longer than the opening to ensure reliable intersection with the walls of the partition.
If the width of the span requires the installation of two blocks, they are cut so that the seam is above the middle of the doorway.
For long arches, they use not a corner, but a channel with a width suitable for the block. The channel is embedded in the wall. Supports are installed under the arch partition so that the channel or corner does not bend. The support is removed after the glue has dried.
An alternative option for arranging the floor is the production of a reinforced belt :
- A wooden box is made as wide as a partition and 4–5 cm high.
- Lay three reinforcement rods with a diameter of at least 12 mm.
- Fill the box with glue or cement-sand mortar.
- Install aerated concrete blocks without waiting for the solution to dry.
- The formwork is removed after 2-3 days, when the glue has completely hardened.
The rows above the lintel are installed last.
Before finishing, if necessary, the partition is grooved, electrical wires are laid, and socket boxes are installed.
General requirements
Under what conditions will the internal partition be used?
- She is not load-bearing. A slab or monolithic reinforced concrete floor rests on the main walls;
- The basis for it is the lower floor or foundation of the house (ribbon, screw or slab);
- It is adjacent to one, two or more (depending on the shape of the wall and the presence or absence of openings) adjacent walls.
Here are the key requirements put forward for such partitions:
- Mechanical strength, in particular, the ability to withstand loads created by hanging furniture (cabinets, shelves, etc.). Each fastener can bear a load of up to 25 kg;
- Resistant to horizontal loads. It implies a reliable connection between the wall and the base, with adjacent structures and strong adhesion between the masonry elements;
- Light weight, eliminating a dangerous increase in load on the floors;
The porous structure of aerated concrete provides a density of only 300-1200 kg/m3
Maximum sound insulation. Really, would you like the noise of the TV behind the wall when you're trying to sleep?
Comparison of fire resistance of aerated concrete and heavy concrete
- The building material must be environmentally friendly and not emit harmful substances into the air of a living space over the entire range of operating temperatures;
- Finally, the price of building materials is important to the thrifty homeowner. It is clear that low-cost solutions will have an advantage.
Thickness
The thickness of the wall affects sound insulation, but thick partitions increase the load on the floors, and an increase in thickness reduces the usable area of the room. In most cases, it is more rational to use “partition” blocks for a non-load-bearing partition, as products with a thickness of 100 - 150 mm are called.
Soundproofing
For partitions, sound insulation is an important point. Especially if a large family lives in the house. Here the calculation is based on the airborne noise propagation parameter (Rw). According to the regulatory document SP 51.13330.2011, this parameter should be 52 dB for partitions between residential premises.
In this case, the standard for the partition between the bathroom and the room should be 47 dB. Accordingly, from this parameter it is possible to derive the thickness of the walls, which satisfies the standards. Do not forget that sound insulation of a partition can also be achieved with the help of finishing materials - finishing with sheet products on a wall with the additional use of sound-proofing material.
Airborne noise is a type of sound vibration that travels through the air (music, human speech, TV sound). Do not confuse sound insulation from airborne noise with insulation from impact noise, which arises from vibrations inside structures and spreads through adjacent elements. This could be the sound of footsteps or impacts from falling objects.
Calculation of the sound insulation index depending on the thickness of the blocks and brand
| Brand of aerated concrete | Wall thickness, m | Sound insulation index (combined data on masonry with glue and cement mortar) |
| D400 | 0,100 | 31 — 35 |
| 0,250 | 46 — 49 | |
| 0,300 | 50 — 52 | |
| D500 | 0,100 | 35 — 37 |
| 0,250 | 49 — 52 | |
| 0,300 | 52 — 55 | |
| D600 | 0,100 | 37 — 39 |
| 0,250 | 52 — 53 | |
| 0,300 | 55 — 56 | |
| D700 | 0,100 | 37 — 39 |
| 0,250 | 53 — 55 | |
| 0,300 | 56 — 58 |
The table shows that density directly affects the soundproofing properties of the material, so if the partition is supposed to reduce noise levels, then it is better to make it from a denser material. It must be remembered that the main airborne noise comes through the openings. If the purpose of creating a partition is not to improve sound insulation, then density is not a key parameter.
High-density aerated concrete (D600 and higher) is justified in seismically active regions. According to regulations, products with a lower density cannot be used in these areas.
When building “for yourself” there is no need to comply with all soundproofing standards. Here you need to proceed from your needs and budget.
Aerated concrete can be laid on a special adhesive for masonry, on a cement-sand mortar or polyurethane adhesive foam. Let's look at the differences.
- Cement-sand mortar - grade must be at least M100. At a price per 1 kg - the most profitable option (150 - 200 rubles per 25 kg). At the same time, gas blocks with a thin seam cannot be placed on the DSP, so the consumption is 4 - 6 times higher (16 - 19 kg per sq. m.) than when using glue (3 - 6 kg per sq. m.). This option is used in cases where aerated concrete blocks have significant deviations in geometry. A thick seam (10 - 12 mm) allows you to compensate for unevenness, but creates additional “cold bridges” and reduces the uniformity of the partition.
Working with DSP is associated with certain difficulties in delivering and lifting bags. The work involves “wet” processes that involve a lot of dirt. It takes a long time for the solution to gain strength. In addition, people without some experience in masonry will find it difficult to maintain the same joint size.
- Mineral adhesive for cellular concrete - in consistency and composition, this material resembles tile adhesive. Has the brand M100 - M150. The glue can be used for masonry with a thin seam (2 mm); this method is applicable to gas blocks of the first category. The price for 1 kg is higher than for 1 kg of DSP (250 - 300 rubles for 25 kg), but at the same time, due to lower consumption, the glue is more profitable. The glue is supplied dry and diluted on site.
Working with polyurethane foam glue virtually eliminates “wet” processes, so there is no dirty work involved in mixing dry mixtures. At the same time, an important disadvantage of masonry on polyurethane foam is the requirements for the geometry of the blocks: since the seam is minimal, it does not compensate for unevenness on the products, therefore, before applying glue, the surface of the products must be floated.
If the partition is installed on a foundation, then its load-bearing capacity and the evenness of the base must be taken into account. To eliminate the curvature of the supporting base, a cement-based solution of at least M100 is usually used.
The brand of solution is indicated by the letter M and a digital value that reflects the compressive strength of the material. Do not confuse the brand strength of cement and the brand strength of mortar. When producing a cement-sand mixture (CSM), cement is mixed with sand and water, as a result of which the grade strength of the final product is lower.
- Differences of up to 2 cm can be leveled with a layer of mortar up to 3 cm without reinforcement.
- Differences from 2 to 4 cm should be leveled with a solution using a 50x50 mm mesh.
- If there is a difference exceeding 4 cm , then it is necessary to use concrete pouring in formwork with reinforcement.
- For differences of more than 5 cm, it is necessary to use reinforced concrete in formwork with the addition of fine-grained crushed stone.
- Differences of more than 10 cm are leveled with concrete gravy with the addition of crushed stone and reinforcement.
In order not to overload the floors and foundation, it is recommended to use the lightest options for partitions. The load-bearing capacity of partitions and foundations is calculated, so it should be considered in the context of the entire building structure. If a partition is being erected in an apartment in an apartment building, then the redevelopment must be approved by the housing inspectorate.
Advantages of laying partitions from aerated concrete
- Environmentally friendly, confirmed by a hygienic certificate. The created radioactive background is 54 Bq/g, with acceptable levels for residential premises being 370 Bq/g.
- Low heat conductivity, allowing it to be effectively stored inside the building.
- Good sound insulation properties.
- Non-flammability (destruction does not occur when directly exposed to open fire for ≥ 4 hours).
- Thin (≤ 3 mm) joints when using special adhesives for aerated concrete.
- Low specific gravity due to the porous structure of the material.
- Durability.
- Low price.
- Smooth surface of all edges and identical overall dimensions.
- Ease of processing with conventional saws with pobedit tips, grinders or electric jigsaws.
- Low complexity of installing various grooves for laying utilities and reinforcement.
- High speed due to the increased (compared to brick) geometric dimensions and ease of work, allowing you to build a partition from aerated concrete with your own hands.
- The installation of non-load-bearing partition structures does not require approval from administrative authorities.
Installation of wooden floors in a house made of aerated concrete blocks
If the construction of a house is carried out from aerated concrete, the best floor for it is wooden.
This is the most economical option that can be made by hand. Installation requires only two people. Another advantage of wood is its light weight, which is very important for aerated concrete.
Wooden floors in aerated concrete houses can be interfloor, basement and attic. The fundamental difference between them is small, but there are some features of their arrangement.
What is an internal brick wall, its features and functional purpose
Stationary interior partitions inside the house are used for zoning the premises; they separate rooms and are erected both during the construction stage and after its completion.
It is not so difficult to create brick structures with your own hands; they are absolutely durable and can withstand hanging furniture and appliances.
What is the difference between an interior wall and a load-bearing wall:
- It is of secondary importance; it does not take on the entire weight of the building, only a small part of it if it rests on the ceiling.
Demolition of the partition will not entail any consequences, unlike the destruction of the main wall. - There are no strict requirements for the materials from which the interior wall is made. They do not bear such a heavy load as the one from which external walls are erected.
- Partitions inside the same house can have different properties. Since they belong to different rooms. For example, an ordinary room partition has a different coating from the one that will be in the bathroom or sauna. Different thicknesses and materials of manufacture are allowed.
- They do not contact the street and are located exclusively inside the building.
Purpose of partitions inside the house:
- maintain as much free space in the room as possible;
- withstand hanging shelves, appliances, cabinets, etc.;
- have an aesthetic appearance, decorate the inside of the house;
- create an opportunity for privacy for the inhabitants of the house;
- provide sound insulation and comfortable living;
- divide the territory into functional zones.
Brick, as a material with high density and good thermal insulation properties, meets all necessary requirements.
Factory packaging of pallets.
YTONG® aerated blocks are supplied from warehouses stacked on pallets with plastic film packaging for protection from external influences.
It is better to unpack the film on one side of the pallet, facing the place of laying, and save it when using all the blocks.
Subsequently, the film can be successfully used to protect:
- “freshly laid” rows of masonry from drying out too quickly in direct sunlight on a hot day;
- masonry when there is precipitation during the construction season or snow during construction in the winter;
- any other YTONG® products, tools, fixtures, etc. in the absence of sheds or temporary structures for storing building materials;
- the floor inside the house or the lawn outside while preparing the mortar mixture.
Requirements for a gas block partition
Aerated concrete partitions must be characterized by certain features. Firstly, the design should be quite durable. Secondly, you need to build a wall that will well soundproof adjacent spaces. Thirdly, the wall must be safe in terms of fire resistance.
If the partition will have to separate rooms with different temperature conditions, it will be required to isolate one room from another so that you can live comfortably in the house. If you carry out the correct finishing, adding a layer of insulation, the wall will meet all these requirements, and in addition, it will be inexpensive.
Optimal dimensions of aerated concrete partitions
The dimensions of the aerated concrete blocks determine the dimensions of the partition. Today time is especially valuable. If you want to complete renovation or construction in a short period, it is better to use large-sized products, the length and width of which are 750 x 625 mm, respectively. The thickness can be 75 or 100 mm. This block format allows you to reduce glue consumption, speed up work and ensure ease of installation due to their low weight, which does not exceed 32 kg.
If the gas block will be used to construct a self-supporting partition, class B2.5 products should be used. This recommendation is true for walls more than 3 floors high. If this value is lower, the block strength should be B2. To build a standard partition from aerated concrete, products with a size of 30 cm are used. If it is necessary to separate one room from another, blocks with a width of 15 cm should be used. The density here should be D300, since the issue of sound insulation in this case is very important.
More about sizes
The dimensions of the gas block are one of the important factors when choosing this material. Modern manufacturers produce products with thicknesses from 75 mm to 200 mm. These sizes are suitable for interior partitions, but the most common dimensions are blocks of 625 x 100 x 250 mm. Experts do not recommend using 75 mm blocks for long walls, as they become loud and make living inside the house uncomfortable.
Block selection criteria
The choice of aerated concrete blocks depends on specific calculations. Let's look at the main parameters that you should pay attention to.
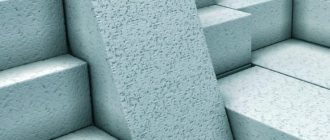
In the Soviet years, aerated concrete blocks were divided into heat-insulating, structural-thermal-insulating and structural. Formally, these names depended on density. The first category included materials up to D400, the second - from D400 to D900, the third - products with a density above D900. Because of this, this classification is often mistakenly given in articles. There is currently no formal division tied to density. All aerated concrete is considered to be structural and thermal insulating.
- Description: “Partition” aerated concrete block)
Category
Aerated concrete blocks are divided into categories depending on geometric parameters. The first category (I) is characterized by minimal deviation from dimensions (deviation in height +-1 mm). It is this category that should be used for partitions, as it is suitable for masonry with a thin seam.
Strength
Strength determines the ability of a material to resist mechanical stress. The strength classes of aerated concrete blocks indicate the force applied per unit area, after which the product collapses (N/mm.sq.). In the case of a partition, this is the weight of the masonry; if the partition is load-bearing, then there is also the weight of the floors, but in a finished building it is problematic to erect such a partition from aerated concrete. Strength is indicated by the letter B (B1.5, B2, B2.5, B3.5, B5).
Density
This parameter is related to the strength and thermal conductivity of the material. The more pores inside the block, the better its thermal insulation properties, but at the same time the lower its strength and density. Density is indicated by the letter D (D300, D400, D500, D600, D700).
Another myth spread on the Internet is that increasing the density allows you to increase the force to pull out the fasteners. In fact, the main parameter that affects the reliability of holding fasteners by a partition is compressive strength. Density does not significantly affect the retention of expansion dowels only.
When using dense blocks, the wall thickness must be higher to ensure the necessary thermal conductivity, but for partitions within the same living space this is not critical.
The ratio of density and strength of aerated blocks
| Strength | Density | Initial modulus of elasticity (MPa) |
| B1.5 | D250, 300, 400 | Up to 1100 |
| B2 | D300, 400, 500 | 1000 — 1500 |
| B2.5 | D300, 400, 500, 600, | 1300 — 2500 |
| B3.5 | D400, 500, 600, 700 | 1700 — 2900 |
| B5 | D500, 600, 700 | 1900 — 3200 |
Dimensions
The blocks can have a flat butted plane, or they can have a profiled edge (groove-ridge, groove-groove, groove-plane). This configuration does not affect the physical and technical characteristics of the material, but simplifies the work with products. For example, there is no need to smear the bonding surface with mortar and grind the blocks against each other.
- Description: Tongue-and-groove gas block)
At the same time, small thickness blocks are used in partitions in most cases. Tongue-and-groove gas blocks are often used as wall material.
Aerated concrete wall structures
Aerated concrete for external walls is produced in several types. Each of them differs in technical parameters and scope.
Types of blocks
The type of wall block can be determined by the marking, which indicates its specific density in kg/m3. The higher it is, the stronger the material, but the lower its energy efficiency. The lower, the higher the porosity and the lower the strength.
- D300 – D500 – heat-insulating types of blocks;
- D500 – D900 – structural and thermal insulation;
- D1000 – D1200 – structural.
The photo shows the difference between materials with different specific densities. When choosing the type of material, it is necessary to take into account the purpose of the building and the type of walls. If for outbuildings the thermal insulation characteristics are not of great importance, then for residential buildings they are no less important than load-bearing ones. Therefore, during their construction, the construction of aerated concrete walls is usually carried out in D500 - D600 blocks.
Types of aerated concrete walls
One of the main tasks when designing such a house is determining the thickness of the walls and their design, taking into account heat conservation standards. Calculation of aerated concrete walls is made based on the thermal conductivity coefficient of the material and climatic conditions in your region.
There are several options for constructing external walls:
| Type of design | Description |
| The single-layer structure consists of blocks plastered on the outside using reinforcing mesh. |
| Double-layer with thermal insulation | The plaster layer is applied on top of the insulation attached to the walls. |
| Double-layer with lining | Load-bearing walls consist of a series of aerated concrete blocks and bricks with a mandatory ventilation gap between them. |
| In this case, the insulation layer is covered with sheet facade materials along the sheathing. |
In the middle zone of our country, if aerated concrete is used in the construction of a house, a wall 40 cm thick and finished with plaster is a completely acceptable option. In colder regions, multilayer structures are built.
Location of windows and doors in the outer wall
In single-layer walls without insulation, windows and doors should be placed exactly in the middle of the width of the wall.
If the wall is two- or three-layer, that is, insulated from the outside, then the window and door frames are moved closer to the insulation. In some designs, the box can even protrude completely or partially beyond the plane of the outer wall into the insulation layer.
When choosing the installation depth of a window along the width of the wall, you should, if possible, adhere to the condition that the heat transfer resistance of the wall layers before and after the window are approximately the same.
This arrangement of the window and door along the width of the wall will ensure minimal heat loss through the slopes, bypassing the frame.
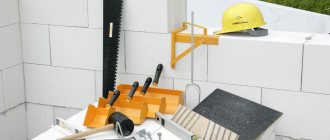
Tools and Supplies
Under construction
- Mallet.
- Spatula or trowel.
- Hacksaw.
- Planer for gas blocks.
- Container for solution.
- Construction mixer.
- Corner.
- Mooring beacons and thread.
- Hand tool for creating grooves.
Consumables:
- adhesive-based solution;
- fittings;
- concrete.
Lintels are of primary importance in creating a window opening. Options that can be used:
- Ready-made factory solutions. The use of jumpers created specifically for gas blocks at the factory significantly speeds up the construction process. They are suitable for window openings up to 2.5 m wide.
Physically, they represent an aerated concrete block (D500-D700 strength) inside which a reinforcement cage is mounted.
They do not create cold bridges and are lightweight. The result is a homogeneous structure with the wall, convenient for finishing. You need to buy ready-made blocks that correspond in size to the gas blocks that make up the wall, so that there are no gaps during installation. For load-bearing walls, the elements can be heavy, up to 200 kg, which requires equipment to lift.
- U-blocks. Aerated concrete blocks in the shape of the letter U, inside of which a reinforced frame and insulation are placed. Suitable for openings up to 3 m in length.
- Monolithic concrete lintels. An inexpensive but labor-intensive option that will take time to create. The block turns out to be very durable and can withstand heavy loads. The sizes can be any.
- Metal corners (width at least 50 mm). The most budget option, suitable for a window width of no more than 1.2 m, the size of the masonry above the lintel should be ⅔ of this width.
After construction
- Hammer.
- Saw on wood.
- Sandpaper or plane.
- Tool for creating grooves.
According to builders, using a hand saw for work is problematic; creating one part of an opening out of 4 can take a whole day and the cut will turn out uneven. It is advisable to use an electric saw, but it quickly breaks down.
In order not to ruin expensive equipment, it is recommended to buy a separate saw for these purposes from Chinese manufacturers at a budget price.
Reinforced concrete belt for supporting the roof truss system
Approximately half of private houses are built with an attic. To increase the volume of attic rooms, a house structure with attic walls is often used, which are a continuation of the load-bearing walls of the house on the attic floor. The height of attic walls is usually in the range of 0.7 - 1.2 m.
The roof truss system of a house with an attic rests on attic walls. To ensure the stability of the attic walls of the attic when exposed to roof loads, along the top of all load-bearing walls
perform a monolithic reinforced concrete belt. The Mauerlat of the roof truss system of a private house rests on a monolithic belt of the attic wall.
| Monolithic reinforced concrete belt of the attic wall of the attic. The Mauerlat and roof truss system are attached to the belt |
The design of a monolithic belt for supporting a roof is in many ways similar to a monolithic belt at the floor level.
The height of the monolithic belt is not less than 15 cm. The minimum cross-sectional area of the monolithic belt is not less than 250 cm2. A monolithic belt is often made across the entire width of the outer wall if the wall is insulated from the outside. If the wall is without insulation, then on the outside there is space left for laying a layer of insulation, which eliminates the cold bridge through the concrete belt.
For a hipped roof, the belt along the outer walls is made a continuous ring, as in the figure. If the roof is gable, then in the belt you can leave gaps in the gable walls for installing windows.
Possible difficulties and errors
When building a gas silicate partition on their own, inexperienced builders sometimes make a number of mistakes. To avoid complications later, you need to follow some simple rules:
- you cannot save money by filling the seams between blocks with mortar;
- when attaching the partition to the supporting structure, you need to remove the plaster from the wall, and only then attach the anchor to the wall;
- debris between the blocks should be removed and the solution should be applied to a clean surface so that the structure does not subsequently crack;
- the binder solution squeezed out of the seams should be removed with a spatula and not rubbed in;
- You need to correct the position of the sections within 15 minutes with a rubber mallet after laying them on the solution, checking the evenness using a level;
- all irregularities on the surface of the silicate sections are smoothed out with sandpaper;
- all bumps or depressions are sealed with putty only after the masonry has dried, then the entire surface of the wall is primed;
- finishing work begins only after the constructed gas silicate wall has completely dried.
Reinforcement of reinforced concrete monolithic belt
Reinforcement is placed in a monolithic belt.
| Reinforcement of a monolithic reinforced concrete belt |
To reinforce the belt, working reinforcement with a diameter of 10-12 mm is used. The reinforcement bars are connected (anchored) along their length, placing the ends on top of each other over a length of 40-50 bar diameters.
To fasten the roof Mauerlat, anchors are embedded into the concrete of the belt. It is also possible to secure the Mauerlat to the belt using spacer dowels.
Installation of a brick partition: installation of a reinforced concrete lintel
The installation of brick lintels in a partition is, from a constructive point of view, a complex process. An inexperienced person is unlikely to be able to assemble it on his own the first time. In terms of bending strength, such a structure cannot compete with a reinforced concrete lintel. They are usually used when constructing brick walls independently in houses and apartments.
You can purchase a ready-made element. But if it is not there, it is realistic to cast a concrete lintel in formwork with four pre-laid reinforcement bars, which must have a cross-section of at least 10 mm. The rods are connected using metal wire into a frame. It is necessary to ensure that the thickness of the lintel matches the height of the rows.
Partition connectors: steel corners
Combination with the use of steel corners - a cottage modification of this method is the use of two steel corners. They are screwed to the wall along the partition line. The distance between them should correspond to the width of the area. After the wall is erected, it is additionally screwed to it or nailed to the opposite brackets of the corner beam. Unfortunately, this method will significantly complicate the process of plastering the wall. Therefore, you must first secure the corners with reinforcing mesh so that the plaster does not crack along the fastening line.
Soundproofing of aerated concrete
Although sellers of gas silicate blocks talk about high sound insulation performance, they greatly exaggerate. Even a standard block 200 mm thick conducts sounds and noise well, and thinner partition blocks even more so.
Comparative characteristics of sound insulation of partitions made of different materials
According to standards, the sound resistance of partitions should not be lower than 43 dB, and it is better if it is higher than 50 dB. This will provide you with silence.
Sound insulation standards for different rooms
To get an idea of how “noisy” gas silicate blocks are, we present a table with standard indicators of sound resistance of blocks of different densities and different thicknesses.
Sound absorption coefficient of aerated concrete blocks
As you can see with the block, at 100mm thick it falls slightly short of the lowest requirement. Therefore, when finishing aerated concrete, you can increase the thickness of the finishing layer in order to “reach” the standard. If normal sound insulation is required, the walls are additionally sheathed with mineral wool. This material is not soundproofing, but it reduces noise by approximately 50%. As a result, sounds are almost inaudible. Specialized soundproofing materials have the best performance, but when choosing them, you need to look at their vapor permeability characteristics so as not to trap moisture inside the gas silicate.
If you need absolutely “quiet” walls, experts advise installing two thin partitions with a distance of 60–90 mm, which should be filled with sound-absorbing material.
Possible mistakes
Difficulties and mistakes made when laying aerated concrete partitions can arise in the following cases:
- Purchasing low quality material that does not have labeling, certification or warranty from the manufacturer.
This applies to gas blocks, cement, glue and all other consumables. Blocks must have a high D density. - Errors in calculating the shape of the wall, its thickness and external load.
A well-drawn professional drawing from a local architectural bureau of urban planning or a construction company that provides this type of service can protect against this problem. - Lack of waterproofing, anchoring and construction technology. Such errors will contribute to the rapid destruction of the partition or the appearance of cracks on the wall, which will require additional financial costs to eliminate the problems, with additional time spent.
- Failure to comply with temperature conditions. Recommended temperature for indoor work is +5 °C. At warm temperatures, work proceeds quickly, and solutions and glue harden well.
- Construction of walls immediately after pouring the foundation. It is necessary to comply with the technical conditions for starting work, in accordance with GOSTs, so that there is no destruction or cracks in the future.
In order to avoid errors in work, it is necessary to adhere to the following standards when working with gas blocks:
- GOST 21520-89;
- GOST R 57334-2016/EN 771-4:2011;
- SP 339.1325800.2017;
- STO 501-52-01-2007;
- STO NAAG 3.1–2013.
Aerated concrete blocks are a lightweight and very practical material that is easy to construct, following technological rules.