When constructing a private house, developers use various types of blocks, which are laid next to each other using cement-sand mortar or special glue. Foamed concrete blocks are popular. Foam block masonry has its own characteristics. When planning to lay foam concrete blocks with your own hands, you should study the rules for installing the first row, as well as the technology for laying and strengthening the remaining rows using reinforcement. To increase the stability of the masonry, it is important to understand how to reinforce the openings. Let's look at the features of the technology.
How to lay foam blocks on glue - step-by-step instructions
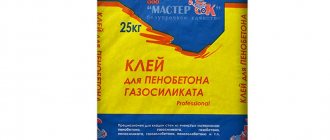
Blocks made of cellular concrete make it possible to connect or glue them traditionally. Making decisions related to the choice of masonry technique can have an impact on further heat loss in the house. With the development of building materials, doubts arise about the use of methods for connecting brickwork elements. Adhesive for foam blocks makes it possible to create a thin-layer seam with a thickness of 1 to 3 mm. Compared to traditional 15 mm seams, this solution provides many significant advantages in laying foam blocks .
TPE synthetic building material
From the table above it can be seen that cellular concrete as the basis for capital construction is inferior in some parameters to brickwork. But even these differences cannot serve as a sufficient argument in favor of the traditional material: since porous concrete combines the advanced qualities of different materials, its effectiveness must be assessed comprehensively.
Economic component
Regardless of the density of cellular concrete, it is much lighter than brick, which reduces the load on the foundation, and this provides significant savings on foundation construction and construction work. Significant savings are achieved through the use of a special adhesive solution during installation.
Its consumption is significantly less than cement due to the required thickness (2–3 mm versus 5–10 mm), as well as the adhesion density of the blocks, which do not require additional lubrication of the seams. When working with porous concrete, labor productivity, ease and simplicity of assembly increases: the latter is such that two workers can erect about 100 m2 of wall surface.
Thermal insulation properties
The ability to retain heat in cellular concrete is comparable to that of wooden structures, but the thickness of the walls is not limited in size and may well be the same as that of brick structures. The thermal insulation capacity of a wall made of porous concrete, all other things being equal, is 3 times greater than that of clay brick and 8 times that of panel concrete.
The structure is installed in such a way that the occurrence of “cold bridges” in the seams between the blocks is eliminated. Cement mortar has high thermal conductivity, which, taking into account its thickness, makes the masonry ineffective. It fits much more tightly, and if you use slabs, the number of potential gaps (seams) is minimized.
Synthetic material does not require additional insulation and can reduce heating costs by up to 30%. Walls made of porous concrete are characterized by high thermal inertia. Therefore, the temperature in the room from the wall heated from the outside by the sun’s rays will reach its maximum in approximately 8 hours, but will still be lower than with brickwork.
Cellular concrete has an amazing ability to accumulate thermal energy and release it when the thermal load in the room changes. In summer, they retain heat from the street, keeping the room cool, and in winter, retaining the heat of heating devices, they release it when the heating is reduced.
Steam-water balance
Vapor permeability is an indicator characterizing the ability to pass humidified air or steam. Cellular concrete blocks have a high vapor permeability value, which helps maintain a favorable microclimate and reduce humidity in the house. This prevents fungi and mold from developing.
The amount of moisture absorption indicates how much water the material can absorb. When wet, the thermal insulation material loses its properties and can also be physically destroyed. Porous concrete has a fairly high percentage of moisture absorption. But this is not critical if during installation you waterproof the foundation and the bottom of the walls, as well as places that can potentially accumulate moisture.
Fire safety and sound insulation
Cellular concrete belongs to fireproof materials of class A1, which are allowed to be used in the construction of objects even of hazard categories I and II. This is an excellent fire-resistant material that can withstand direct exposure to open fire for 70 minutes without losing its properties. Studies have shown that when heated to 400°C, the rigidity of porous concrete increases by 80%.
Sound insulation in houses made of cellular concrete meets all standards and requirements without organizing any additional measures. Characteristic is the fact that the value of this indicator is higher for products with lower density, since they have a larger specific volume of the air gap.
Despite the fact that the material is synthetic, it meets all environmental safety standards, including the radiation component. Therefore, we can say with confidence that building materials made from porous concrete have every chance of becoming a monopoly in the capital construction market.
Advantages of a thin seam when laying foam blocks
Minimal seams between the blocks eliminate cold bridges - due to the thickness of the seam, there is a significant impact on reducing heat loss. It should also be kept in mind that any mixture that does not combine elements of cellular concrete is a material that conducts heat 4 times more easily, so the less it is, the better the wall will be insulated. Heat loss from 1 mm joint thickness in a single-layer wall made of foam blocks is only approx. 4%. A wall built from the same blocks, on mortar with a traditional joint thickness of 12 mm, generates heat losses that exceed 25%.
A thin seam gives greater load-bearing capacity of the wall
You may come across a misconception, especially among “experts,” that the thicker the seam layer, the more the wall can withstand greater loads. The situation is completely opposite - the seam is the weakest element of the wall. The thinner its layer, the stronger the wall and can withstand more loads. Here we can use an analogy for superglues, which glue two surfaces together within a few seconds, forming a strong connection only if a very thin layer is used.
The use of a thin seam provides economic advantages
It is worth noting that the cost of making 1 m2 of wall also depends on the quantity and price of the mixture that we must use to connect the brickwork elements. Walls made of 20 cm thick blocks have an adhesive consumption of approx. 2.4 kg and approx. 0.6 liters of water for every m2 of wall. Using cement mortar for the same wall thickness, 24 dm3 of mortar is consumed - 7.5 liters of water and 42 kg of dry mixture.
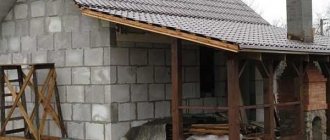
Rules for laying a foam concrete block
Every mason knows that walls made of foam blocks are built much faster than walls made of brick. This is due to the significantly larger block size with less weight, even compared to one-and-a-half bricks (ratio is 1:13). Thanks to this, the process of laying foam blocks is much easier and simpler.
In addition, foam concrete is excellent for processing, which is very important when constructing complex structures. What technology will be used to build the walls and how to lay the foam block largely depends on the method of its manufacture
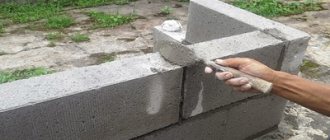
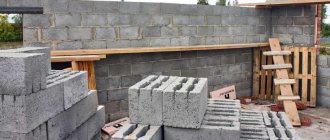
- Laying should begin from any angle, observing maximum accuracy when laying the foundation block.
- There should be no voids between the seams.
- To increase the strength of the walls, the masonry is reinforced.
- Before installing the ceiling, a reinforced concrete belt is laid.
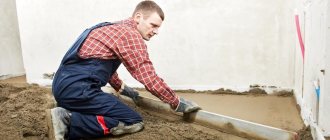
- The first row of foam blocks, regardless of their manufacturing technology, is laid out on cement mortar.
- When laying, it is necessary to bandage at least 0.4 times the height of the foam block.
The initial row must be checked by level and, if necessary, adjusted. We should not forget that the shape of the future building depends on its evenness.
Cast foam block
Masonry material made by injection molding does not have clear lines, so the blocks must be prepared before starting work:
- clean sharp corners and too large burrs;
- cut off significant irregularities;
- remove chips.
Cast foam blocks are laid on a cement-sand mortar, which is applied with a notched trowel or trowel to automatically adjust the height of the applied layer. Vertical seams, as a rule, should be 8-15mm, and horizontal seams - from 10 to 15mm.
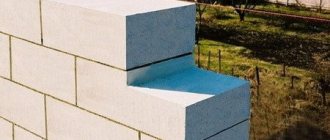
Cut foam block
Blocks made using cutting technology are laid using an adhesive mixture. The wall turns out smooth, which facilitates its subsequent finishing.
Advantages of using glue:
- minimum size of seams (1-2mm) – low mixture consumption;
- the absence of so-called “cold bridges”, which has a positive effect on thermal insulation;
- the ability to select a mixture based on characteristics and manufacturer.
Wall reinforcement
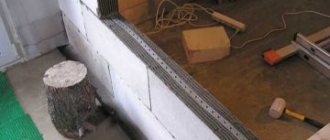
Foam block masonry must be reinforced. To do this, after three or four rows, the seams are reinforced with welded wire mesh (diameter 4-5mm), which serves as additional protection against cracking and increases the stability and strength of the walls. Reinforcement is also carried out in the area where the lintels support.
It should be noted that reinforcing masonry from cut foam blocks will be somewhat problematic. The use of an adhesive composition implies a low seam height, therefore, to be able to lay the reinforcing mesh in the blocks, grooves are cut out using a wall chaser or a grinder.
A monolithic reinforced belt, installed under the floor slabs, helps distribute the point load more evenly. It is made 10-20 cm high and is additionally insulated.
Step-by-step instructions - how to lay foam blocks on glue
Foam concrete blocks are placed on an adhesive solution. They require a very smooth and clean surface, so the surface of the blocks must be sanded and dust removed before applying the solution. To ensure that the seam has the appropriate thickness, the solution is applied with special trowels:
- The surface of the first layer of brickwork elements must be leveled with a special trowel and leveling solution, and then thoroughly cleaned with a brush from small particles and residues after grinding. With the same grater, we can remove uneven surfaces from vertical surfaces.
- It is necessary to lay waterproofing on the foundation. The first layer of blocks should be laid on a base of ordinary cement-lime mortar. Place the first element directly on the prepared mixture. You need to remember to maintain the ideal level of the first elements and their alignment.
- The contents of the bag of glue must be poured into a container with a measured amount of water recommended by the manufacturer, then mixed using a mechanical stirrer until a homogeneous mass is obtained so that there are no lumps in it.
- A layer of adhesive solution 1–3 mm thick is applied to the cleaned surface. The solution should be applied using a regular spatula that matches the width of the walls. When laying on thin-layer mortar, the blocks are not sprayed with water. Control of the correct location of masonry elements in the corners of the building, as well as along the walls, should be checked using a level and a cord. Unevenness of individual brickwork elements is corrected using a rubber hammer.
- In the same way we lay each subsequent layer of foam concrete.
- Before plastering the surface with mortar, fill in the potholes and damage that may occur during masonry. Thanks to the use of adhesive solutions, as well as special tools designed for applying glue, you can significantly reduce time and optimize glue consumption.
Considering that the blocks are produced with high precision, this allows for a number of advantages arising from the possibility of using glue for foam blocks. The choice of this technique for connecting brickwork elements is the optimal and safe option, regardless of historical habits and solutions that do not withstand the pressure of current technical requirements.
Foundation construction
At the place where the building will stand, you need to use ropes to mark the places for digging trenches. The depth of the trenches can be from 50 cm to 1 meter. Crushed stone and then sand are poured into the bottom of the dug trench. Each layer is well compacted.
Then the formwork is installed, which must be lined with polyethylene or roofing felt. A frame is installed in the formwork, connected from reinforcement 10-12 mm thick, and then concrete is poured. The ratio of cement to sand and crushed stone when preparing the solution should be 1/3/5. The cement used is grade M400, no lower.
The foundation is poured at a time and gains its strength within 4-6 weeks. After this, you can begin building the walls.
How to lay foam block on glue
One of the fastest and most economical ways to install foam blocks is to attach them with glue. The technology of applying the composition and its quality determine the strength of the entire object.
Foam block is a cellular material with high thermal insulation properties. However, when fastening blocks of material with a regular solution, all the protective properties of the material are reduced significantly. If you fasten the walls of an object with mortar, it will need additional insulation, which will lead to high costs. A building made of foam blocks, erected using special glue, does not require expensive thermal insulation materials.
A few words about finishing
Finished walls can be plastered from the inside with tile adhesive or the same one you used for masonry. The layer of plaster in this case should be 5-7 millimeters. During the finishing process, it is necessary to glue the reinforcing mesh. Therefore, the glue is applied to the surface in two layers - a mesh is glued to the first fresh layer, and after it dries, a second, leveling layer is applied.
You can plaster walls made of aerated concrete using tile adhesive
In most cases, it makes no sense to use plasterboard and other sheet materials for finishing, since the walls of their aerated blocks are smooth. Absolutely any materials can be used as a finishing coating - wallpaper, tiles, decorative plaster, plastic panels, etc.
As for exterior finishing, the best option is siding with preliminary insulation with mineral wool using the “ventilated facade” technology. You can learn more about the process of finishing foam concrete from other articles on our portal.
Types and composition of adhesives
Adhesive compositions for porous materials are produced from dry substances consisting of the following components:
- Portland cement. Thanks to this substance, the glue becomes durable after drying. In addition, it is Portland cement that ensures rapid hardening of the composition.
- Modifiers. Substances are added to the mixture to increase its hydrophilic properties. They retain moisture in the seams, preventing them from drying out.
- Sand. Quartz particles give the composition strength, which allows for seams between blocks of up to 3 mm.
- Polymers. The elasticity of the mass is achieved precisely due to the presence of polymer in the composition. Thanks to the plasticity of polymers, the adhesive fills the voids of the material, improving the strength of the connection.
Almost all adhesive compositions contain the above components. The recipe and number of inclusions differ among different manufacturers.
Based on their properties, adhesives for foam blocks are divided into:
- Winter. The compositions are created specifically for use at low temperatures. This glue can be applied at temperatures from 5 to -10˚C. The peculiarity of winter glue is that it dries very quickly. Therefore, when working, the composition is mixed in small portions and immediately applied to the surface. Adhesion at low temperatures is ensured by the presence of antifreeze components in the composition. You need to dilute the glue with hot water 55-60˚C.
- Summer. The operating temperature of the glue ranges between 5 and 35˚C. The mixture remains in working condition for one and a half to two hours, during which time it must be applied, otherwise it will harden. The main component of summer glue is fine cement.
What mistakes can occur when installing foam concrete walls?
When laying blocks with your own hands, an inexperienced builder may make the following mistakes:
- Incorrect installation of the first row of products will lead to the need to lay a thick layer of adhesive mixture on subsequent rows; the supporting structure may shift vertically.
- Carrying out work in humid weather and freezing temperatures often causes wall destruction.
- Incorrect application of the mixture and incomplete filling of the joints. Such actions lead to loss of the wall’s thermal insulation qualities and loss of strength.
- Lack of preparatory work to clean surfaces from construction debris and dust. Poor quality connection of parts leads to cracks in the structure.
- The lack of reinforcement causes a general weakening of the wall.
Soil shrinkage will inevitably lead to the appearance of cracks on the surface of the supporting structure, so window and door openings must be reinforced. To prevent the occurrence of point loads from floor slabs in the upper structure, it is necessary to create an armored belt.
Calculation of the amount of glue
When purchasing glue, be sure to ask your consultant about how many foam blocks the composition will be enough for. Most often, the average consumption of the composition is written on the packaging, so if you are planning to build a non-standard structure with large seams or an unconventional application method, carefully study the characteristics of the glue. Buy glue based on generally accepted characteristics in construction:
- the composition is applied with a thickness of 1 mm;
- working surface area 1 m2;
- the surface does not have serious flaws (the difference per 1 m2 does not exceed 1.5 mm);
- The mass of the dry composition is 1.5 kg.
15-25 kg of glue is used per 1 m 3 (depending on the thickness of the seam). These indicators indicate that a standard 25 kg package is enough for 1 m 3 of working surface. The maximum glue consumption (28-30 kg) occurs with a large width of the foam block and an ambient temperature of 5 to 25 degrees. There are situations when glue consumption reaches 40 kg per 1 m 3; such waste occurs due to the following factors:
- roughness and defects of foam blocks;
- a large number of layers and their thickness;
- professionalism of the worker doing the masonry;
- air temperature.
In many ways, the consumption of glue on foam blocks depends on their quality: the smoother they are, the less binder is consumed. With average quality blocks, glue is applied at a depth of 2.5-3 mm.
A few words about choice
How to choose the best adhesive mixture
Despite the fact that all adhesive compositions consist of almost the same components, their characteristics are often different
Therefore, when choosing, pay attention to the following parameters:
- Strength. The compressive strength of high-quality glue after 28 days is 6-7 MPa. For external load-bearing walls, it is advisable not to use compounds with a strength of less than 5 MPa;
- Adhesion. Must be at least 0.2 MPa. It is advisable to use compounds with adhesion of 0.5-0.6 MPa;
An important parameter is the time during which masonry adhesive can be used
- Time to use the solution. As a rule, the solution can be used within 120 minutes after preparation;
- Frost resistance. The optimal value is 40-50 cycles.
It must be said that some manufacturers add perlite to the composition, which increases the thermal insulation properties of the glue. True, if you insulate the walls, for example, with mineral wool, the presence of perlite in the glue will not affect the thermal insulation properties of the walls.
Well-known manufacturers of mounting adhesive
Unfortunately, adhesive mixtures do not always correspond to the characteristics that manufacturers indicate on the package. Therefore, I will list the manufacturers who produce high-quality masonry adhesive for aerated concrete blocks:
| Brand | Peculiarities |
| Ceresit. This is a German brand owned by Henkel, whose history goes back more than 100 years. During this time, he became famous all over the world, and does not really need any introduction. Like other Ceresit products, the adhesive for aerated blocks does not cause any complaints. | |
| Kreisel. This is another German company that gained fame in the last century and has its production facilities in many countries around the world. Kreisel adhesive can be used for laying interior and exterior walls, as well as for rough surface finishing. | |
| Volma. A domestic manufacturer whose products are not inferior to foreign analogues. In particular, the glue has excellent characteristics and its price is quite affordable. | |
| Found. A young Russian company that, in just over 10 years, has managed to become one of the leaders in the domestic building mixtures market. This is due to the excellent price-quality ratio of products, including adhesive mixtures. | |
| Bergauf. Another German brand that is well known all over the world. The peculiarity of Bergauf glue is that it can be laid at temperatures down to -50 degrees. |
There are also other manufacturers who produce high-quality compounds. To avoid making a mistake with your choice, be sure to check for a certificate of conformity. In addition, purchase mixtures in large stores that have equipped warehouses. The fact is that storage conditions greatly affect the properties of the glue.
How to calculate quantity
Calculating the required amount of glue is not difficult. Basically, all you need to do is count the number of cubes of blocks. One cube of block requires approximately 25 kg of glue, i.e. one bag.
A bag of glue is required to lay a cube of blocks
Depending on the brand of the block and the glue itself, the consumption may vary. The manufacturer usually provides more accurate information on the packaging.
How to choose the best glue for foam blocks
It is not difficult to calculate the amount of glue per square meter of surface; it is much more difficult to choose a high-quality composition. The choice of such solutions is very large, so purchasing a suitable composition is not easy. When purchasing glue for foam blocks, it is worth remembering the following recommendations:
- The cheapness of the composition may indicate that low-quality components were used for its production. Therefore, you should not be guided by low cost; as a rule, cheap adhesives are made with the addition of coarse sand.
- Between a new and a well-known brand, it is better to choose the second one. Large companies sometimes provide a guarantee on their formulations. The main thing is that large enterprises carry out strict quality control and the entire process is automated.
- Decide on working hours in advance. If the installation will be carried out during the cold season, glue for the foam block with frost-resistant inclusions is required.
- It is better to purchase the composition with a reserve of 20-30 kg. During the laying process, much more glue may be used than planned.
When constructing a building from foam blocks, it is important to maintain a balance in the thickness of the seam. Do not try to save on the mixture, because too thin a layer will not create sufficient adhesion of the material, which can cause destruction.
The feasibility of self-construction
You can build a box of foam blocks yourself without experience in similar work. Advantages of building with foam blocks over brickwork:
- Mixing the solution. Stores sell ready-made adhesive mixtures for aerated blocks; just add water according to the instructions. The reliability of a structure made of foam blocks is not affected by which solution is available: M150 or M50.
- Glue dispenser. It allows you to apply the masonry mortar evenly, ensuring uniform joint thickness.
- Ensuring vertical corners and laying blocks is possible without special skills. There is no need to draw corners on several layers and then fill in the rows. Large but lightweight foam blocks are stacked like cubes.
Financial feasibility. The price of a foam block 300x300x600 mm is 30-45 rubles, which is 3-5 times less than analogues: non-autoclave aerated blocks - 120 rubles, autoclaved ones - 210 rubles. When purchasing by pallets, the cost will be less. Price 1 sq. a meter of turnkey house made of foam blocks will cost 18 thousand rubles, and self-construction will cost 972 thousand rubles.
As you can see, if there is no fear of construction, then you should build it yourself.
Well-known manufacturers of mounting adhesive
Construction from foam blocks has been popular for many years, so the range of adhesives for the material is quite rich. According to reviews, the following brands are more popular among specialists.
Volma
The glue is produced in the form of a powder, which includes cement, fine inclusions and polymers. Manufacturers recommend applying glue in a layer of 2 to 5 mm in thickness. Volma glue is optimal for laying slabs and concrete blocks. In addition to its main purpose - adhesion of polymer blocks, the composition is suitable for leveling walls.
The material is packaged in standard 25 kilogram bags.
Titanium
At first, this foam material was not very actively used by professionals precisely because of its structure. However, the quality of buildings using it confirms its characteristics. Titanium was created as a replacement for traditional cement-based adhesives. This glue for foam blocks is very easy to apply, it is simply distributed over the block and the next one is placed. This form of release significantly speeds up the construction process. Tubes of glue are produced in 750 ml containers; the cost of such a container ranges from 300-450 rubles per piece.
When working with foam compounds, it is important to follow a number of rules that will ensure the strength of the masonry:
- If you do not have experience in construction work, you should not work with such compounds yourself. It is better to entrust the process to specialists knowledgeable in these matters.
- Buy only high-quality foam blocks. Be sure to inspect the material for damage or defects; any defects may cause poor-quality masonry.
- Make sure that the foam layer does not exceed the thickness recommended by the manufacturer.
- Despite the high quality of the foam, it must be processed after application. Outside the building, the walls are treated with cement so that the foam material is not destroyed by ultraviolet radiation.
- The first row of masonry is fastened with cement, and foam is used to coat the subsequent ones. This rule is mandatory, ignoring which will lead to serious violations of the entire construction technology. Cement is able to withstand heavy loads, which are exerted by all rows of foam blocks; foam will not withstand such loads.
Foam adhesives are recommended for the construction of small buildings.
Knauf
The manufacturer has proven itself to be the best; Knauf compounds have high performance characteristics. Gypsum and polymers give similar properties to the glue. The glue is suitable not only for laying foam blocks, but also for leveling walls and rough finishing. Among other things, the material is absolutely environmentally friendly and safe for people and animals.
To work, each square meter will require 5 kg of mixture. The material is produced in paper bags with a capacity of 30 kg.
Construction of walls in an apartment or house - important points
When planning the construction of walls and partitions, pay attention to the following points:
horizontal floor surface and absence of defects. The floor should be cleared of any remaining construction debris and any uneven areas and cracks should be carefully sealed. Installation of the first row of blocks is carried out only on a pre-planned surface; preliminary calculation of material requirements
Before starting work, it is important to calculate the number of blocks, the need for an adhesive mixture, taking into account the size of the walls and the volume of masonry. Using a calculator posted on professional websites, it is easy to quickly perform calculations; performing markings that meet the project requirements
The outline of the future wall or partition should be marked on the floor. Laying and fixing the steel profile on the floor will allow you to clearly determine the location of the masonry and will facilitate further construction operations; locations of future openings. Interior openings are formed during the process of laying blocks and reinforced with steel reinforcement placed in a pre-made groove. Situations arise when the location of the opening changes. For such openings it is worth using a reciprocating saw.
Foam concrete blocks are placed on glue or cement mortar
Before starting work, carefully study the technology of laying blocks and purchase materials in the required quantity.
Impurities
When working with dry glues, some craftsmen add various impurities, such as resin or foam. Such inclusions increase the adhesion of the material to foam blocks. There are also adherents of the traditional recipe, who are inclined to the standard dilution of the mixture (the one indicated on the package). Experts explain their choice by the fact that resins reduce the mechanical strength of the masonry. In addition, additional additives are unnecessary expenses.
Remember, if you use cement rather than glue to work with foam blocks, the blocks should be wetted before applying the solution. This improves the elasticity of the cement.
Studio apartment - partition options
The area of the apartment does not always allow the use of building blocks for partitions.
To divide the space into zones in a studio apartment, various types of partitions are used:
Apartments with an open plan have become very popular.
- stationary;
- sliding
The following materials are used for the manufacture of sliding partitions:
- glass;
- mirrors;
- plastic.
The main advantages of plastic and glass partitions:
- expanded color range;
- versatility;
- compactness;
- rational use of space.
A significant advantage is the feeling of increased volume when using mirror partitions. The disadvantages include the high cost of the material, as well as the ability to perform work only by professional builders.
How to lay foam block on glue? Tips from builders
High-quality and fast installation of systems:
When constructing any building, you should understand the details of how to lay foam blocks on glue before you begin constructing load-bearing walls. No one will argue that the development of technology has greatly facilitated the construction process and reduced its cost significantly: foam block structures grow much faster than brick ones and have advantages.
In particular, it is possible to lay fitted foam blocks with an extremely thin seam not exceeding 3 mm, which provides serious heat savings in an already built house: the material itself is an excellent heat insulator, and cooling can only occur through the joints, which are minimal.
If you use glue when laying foam blocks and achieve 1 mm seams, then the heat loss will be only 4%. Which is important for saving money allocated for heating the home.
By using regular mortar and having traditional joints of 12 mm, you increase this figure to 25%. In addition, seams in a structure are always a weak spot. The thinner they are, the stronger the wall. Laying with glue is also good because there is no need to mix the solution in large quantities. And the work itself becomes less dirty. A nice bonus is that this modern building material is cheaper and lighter than classic brick.
How to lay a foam block on glue: the process is not very different from the traditional use of a solution, but it has its own characteristics and subtleties, without which you can get a not very reliable wall.
Types of foam blocks
When purchasing masonry material, you need to know that it is made in two ways:
- casting The starting base is poured into molds. Technology is like making bricks. The edges of such blocks are not ideally even, so they are usually placed on mortar;
- cutting. The bottom line is that a slab is first cast, which is then cut into blocks of the required size. The result is extremely straight edges that can be joined almost closely.
A person who wants to get smooth walls without cold bridges in the form of cement joints should opt for the latest type of foam block.
Things to consider
- Before laying the walls, special attention is paid to the foundation. Good impressions from the high thermal insulation properties of the material are somewhat worsened by its lower strength compared to brick. If the foundation is not strong enough, in the spring the walls may well begin to move and crack;
- Before starting masonry, the foundation is waterproofed;
- Like all adhesives, a solution intended for bonding foam blocks requires clean and smooth surfaces. So you will have to sand the joining surfaces and carefully clean off the resulting dust with a brush;
- Foam blocks have dimensions of 20x30x60 cm. For Russia (in any case, its central zone and northern regions) such wall thickness is insufficient. Therefore, in most cases, if a full-fledged house is being built, and not a garage, the foam block is placed in 2 rows. An alternative option is to lay it flat, although the thickness of the walls will still be less than recommended - 30 cm instead of 40;
- To compensate for insufficient strength, reinforcement is used. In each 4th row laid out, when the glue has firmly set, a groove is sawed into which metal rods with a diameter of 5 mm are placed. You can also use mesh for reinforcement, but then you will have to cut grooves for all the cells, which is more painstaking and requires additional measurements;
- Unlike brick, foam block does not require wetting. On the contrary, it is not recommended to build walls from it in high humidity - the glue will dry much longer.
Wall masonry
So, the foundation is reliable, the waterproofing has been laid, the blocks have been cleaned, and the tools have been prepared. You can start building a house.
A base of ordinary cement-lime mortar is poured. A cord is stretched from corner to corner to control the evenness of the order.
The bag with the adhesive solution is opened, the volume of water specified by the manufacturer is measured into the container intended for it, into which the mixture is poured. The mechanical mixer works until the mass becomes homogeneous and all lumps are broken.
The first, bottom row is mounted into the substrate. Each subsequent installed block is coated with glue from the end and pressed tightly against the previous one. The solution is applied with a spatula having the width of a foam block (20 cm) to the entire surface in a layer of about 2-3 mm. The exposed glue is removed with a trowel.
The location of the next row is based on the brick principle: offset. There should not be joints of four elements at once. From the bottom seam between two adjacent blocks, the top one should be moved to the side by at least a third of the length.
All subsequent rows are placed only on the adhesive solution. The verticality of the corners is regularly checked with a plumb line, and the absence of curvature of the wall itself is checked using a cord. If a separate element is slightly out of the general row, it is knocked into place with a rubber hammer.
All rows of walls are laid out in the same way. They should not reach the planned height by a third of a meter (or 2 rows) - this height is allocated for the reinforced belt.
Armopoyas
The need to create it is caused by the same insufficient strength of the foam block. The upper floor slab and roof place a significant load on the walls. For better redistribution and strengthening of the entire structure, a reinforced belt is needed.
- There is plank formwork around the entire perimeter of the house. The boards are fastened to the walls from below with self-tapping screws, and to each other using scraps;
- To maintain the shape of the gutter, at least every 1 meter, its opposite sides are pulled together by crossbars;
- Sand-cement mortar is prepared. For greater rigidity, crushed stone is often added to it;
- The solution is poured into the gutter. Keep in mind: you need to fill it in one go, without interruptions to prepare a new solution, so it is better to prepare the mixture with a reserve or accurately calculate the required volume;
- The armored belt is compacted by tamping, vibration or bayoneting and left for 3 days to set;
- When it is completely dry, the formwork is removed and it’s time to install the ceiling. Since the reinforced belt has worse thermal insulation properties, it will have to be additionally insulated.
In principle, even an inexperienced builder can handle the construction of such walls, since laying foam blocks on glue is much easier than laying bricks on mortar.
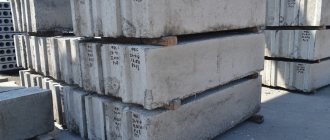
How to properly lay a foundation from FBS blocks
DIY rugs - unusual ideas for using in home and garden design
When carrying out work, it is important to know exactly how to lay foundation blocks correctly. In some cases, the technology describes the operating methodology in detail.
This serves as a guarantee of the implementation of the laid down technical indicators of the structure.
During construction, the quality and accuracy of each stage are monitored
Particular attention is paid to the technology of creating and sealing connecting seams between rows of FBS. The optimal size is 1.5 cm
The foundation blocks are laid on top of cement mortar. According to the main parameters, the technology is similar to standard brickwork. To control verticality, a plumb line and hydraulic levels are used.
The beginning of work consists of performing a certain set of preparatory activities.
- Detailed breakdown of the future structure with fixing the corner points of the building. To do this, it is optimal to use a cord that is attached to a cast-off. This way it is possible to preserve the axes for the entire construction period and create precise contours of the foundation.
- After removing the fertile layer, a pit of the established depth is dug. The walls of the pit can be left with any slope.
- Before installing FBS blocks, the bottom of the pit should be prepared. It is covered with sand to create a cushion 10-15 cm thick. Depending on the geological structure of the sole, a different cushion design is selected, which may contain 2 layers. The sand is carefully compacted. In clay areas (and on loams) it is necessary to erect a monolithic cushion. The dimensions of the pillow should be slightly larger than the dimensions of the foundation.
- It is necessary to accurately transfer the axes of the removed foundation onto the created base. To do this, the cords are pulled along the points on the cast-off, and a plumb line is lowered at the intersection points.
- The construction of foundation walls begins with the installation of lighthouse blocks. These are corner blocks and partition points. They play a key role in the geometry of the entire structure and are installed with extreme precision.
- After installing the lighthouse blocks, they proceed to completing the first row. Joint seams are carefully created between them using mortar.
- The installation of the second row of foundation blocks is carried out with ligation, similar to brickwork.
- When arranging the base, you should leave gaps in the places where communications are connected, so as not to break the blocks in the future and not to violate the integrity of the structure.
- After reaching the established mark of the top of the foundation after the construction of all the block belts, the upper part of the masonry is filled with a reinforcing belt. To ensure the strength and evenness of this part of the structure, a special mesh or several rows of rods are laid.
- Waterproofing, if necessary, is carried out with bitumen mastic or prepared liquid rubber.
Installation of FBS blocks
Do not leave the joining seams unfilled with mortar, otherwise the load-bearing capacity of the base elements will be significantly reduced.
The use of FBS greatly simplifies the work while maintaining the high quality of the final result.
After studying the technology, builders who know how to lay foundation blocks proceed to carry out the work. With proper care and attention, the design is efficient and reliable.
►Heating: ◄
Advantages of credit cards when renovating a private home
Activities of Justices of the Peace of the Russian Federation
Popular models of autonomous and energy-dependent septic tanks from Topol-Eco
Fixed pipeline supports
How high should the foundation be raised above the ground?
Construction of a cesspool. Calculation of the volume and depth of the pit
What is cheaper, to build a house or buy a ready-made one?
Which is better PGP Volma or Knauf?
How to lay porcelain tiles on the floor?
What is the difference between a drill and a screwdriver?
How to fill a warm water floor?
How to attach foam to the wall? List of proven methods
Disadvantages of houses made of sip panels. Sharing my personal experience
Aluminum heating radiator Global ISEO 350 5 sections
Help for your batteries - oil radiators
Relief plaster: tips for selection and application
We save wisely when building a country house from timber
What could be the design of a fence on a suburban area?
How to make slopes from plasterboard with your own hands
Which foundation to choose for construction on heaving soil
How to independently calculate reinforcement for a foundation
How to make a drywall frame with your own hands
Konner Modern 600 mm
How to calculate the required foundation area on your own
Finishing the kitchen with decorative plaster: from theory to practice
Sanding a house made of timber: what is it for, how is it done, prices for services
How to make a foundation for a bathhouse with your own hands
Problems of building a foundation on clay, choosing the type of foundation for a house
DIY miter box. How to use it
Bathroom renovation
HEATING MOSCOW. HIGH QUALITY OF WORK
DESIGN PRESTIGE LLC was founded in 1999. The company's employees have Moscow registration and Slavic origin, payment is made in any convenient way, and if necessary, work is provided on credit.
Russia, Moscow, Stroitelny proezd, 7Ak4
The company's office is located near the districts: Mitino, Tushino, Strogino, Shchukino.
Nearest metro stations: Tushinskaya, Skhodnenskaya, Planernaya, Volokolamskaya, Mitino.
Nearby are the following highways: Volokolamskoe Highway, Pyatnitskoe Highway, Leningradskoe Highway.
How to lay foam blocks: step-by-step instructions
Foam block walls are erected much faster than brick walls, which explains their enormous popularity. Buildings built using this material are cheaper and at the same time have excellent performance characteristics. We think that the question of how to properly lay foam blocks with your own hands probably arises among many owners of suburban areas. Therefore, let's look at the technology of constructing walls from this material in more detail.
Types of foam block
There are only two types of foam blocks available: molded and cut. The technology for laying them is somewhat different. In the first case, the blocks are cast in molds. In the second, a huge slab is first made by casting, which is then cut into individual elements. Casting blocks are much inferior to split blocks in terms of evenness of edges. They are laid like bricks using cement mortar.
The split blocks are held together with a thin layer of a special adhesive mass. This gives the developer certain advantages. Firstly, in order to lay foam blocks, you do not need to mix a huge amount of concrete. Secondly, adhesive seams do not constitute cold bridges. Thirdly, walls made of cut bricks are much smoother.
Tip: You can choose both domestic and imported glue. Both of these options have good adhesive properties. If you can’t buy special glue, you can use a frost-resistant mixture designed for laying tiles.
How to put foam blocks on glue
The technology for laying blocks on concrete mortar is no different from the method of laying bricks. Therefore, we will not consider this method here. Let's take a closer look at how to lay foam blocks on glue with your own hands.
The construction of walls from this material can be done either in one row or in two. The second method is most often used. The fact is that this allows you to obtain the optimal wall thickness for central Russia of 40 cm (the foam block has dimensions of 20 * 30 * 60 cm). Laying with glue, in the same way as with cement mortar, is done with bandaging of the seams.
Paste a VALID AdSense code in Ads Elite Plugin options before activating it.
Important: Pay maximum attention to the reliability of the foundation. The thermal insulation characteristics of a foam block are better than those of a brick, but in terms of strength it is still inferior to the latter. Therefore, walls built on a weak foundation may simply “tear” in the spring.
Laying is done as follows:
- The first row of foam blocks is laid on the concrete solution. When building walls with your own hands, ideal evenness of surfaces can be achieved by using a cord stretched between rows. The verticality of the corners is checked using a plumb line;
- Starting from the second row, glue is used. The surface of the foam blocks of the first row is coated with it, after which the first block of the second is installed. Its end is also coated with glue. The second block is pressed against it, etc. It is important to prevent the presence of voids in the seams. The blocks are pressed tightly enough so that the glue sticks out a little. Subsequently, it is cleaned off with a trowel.
Reinforcement of foam block masonry
Foam blocks, the installation of which with glue, as you can see, is not particularly difficult; the material is not as durable as brick. Therefore, walls must be reinforced. To do this, grooves are cut out in the blocks using a grinder. Foam concrete can be processed very easily, so this operation will not take much time. Reinforce the wall with 5mm rods every four rows.
A concrete monolithic armored belt two rows high of brickwork must be installed along the top of the finished wall. This will allow the load from the floor structure to be distributed more evenly on the walls. The armored belt, since the thermal conductivity of concrete is higher than that of foam concrete, should be insulated.
Well, we think we have answered the question in sufficient detail about how to lay foam blocks with your own hands. Maintain horizontal and vertical walls, and also do not allow voids to appear in the adhesive joints, and then you will have a reliable, beautiful and warm home.
Final stage
You can check the wall for unevenness using a level or a stretched cord and a plumb line. You can use a laser level or level. The masonry is completed with special monolithic U-blocks with reinforced metal fittings. The thickness of the belt should be at least 10-15 cm. Construction with your own hands can be continued after 25-30 days, after the concrete has completely hardened.
Subtleties when laying foam blocks:
The first thing you need to pay attention to is the foundation. If it is to be mounted from concrete blocks, then a reinforced concrete belt must be attached to all this, or the foundation must be filled with a solid monolith; For laying on glue and cement mixture, pay attention to the geometry of the blocks, they must be even and the same size; The glue does not carry any special warnings, the main thing is that it has good adhesive properties; To avoid heat loss, when using a cement mixture, foam blocks should be laid in two rows, thereby covering the vertical seam
If you are using glue then this is optional.
If it is necessary to use a reinforcing belt, it is worth considering additional thermal insulation, since without it, foam blocks have better performance.
To avoid heat loss, when using a cement mixture, foam blocks should be laid in two rows, thereby closing the vertical seam. If you are using glue then this is optional.
It’s easy to figure out how to lay foam blocks or aerated concrete. By following all the above tips, you can easily build a house with your own hands, and experienced builders will tell you that laying a house out of foam blocks is not only profitable, but also much easier than, for example, building a house out of brick. Aerated concrete is also laid according to the same principles. The main advantage that attracts many people to build from foam blocks is the ease of construction with their own hands. It is enough to erect load-bearing walls and one supporting partition, and you can design the space as you like, provided that the foundation is reliable. Now everyone knows how to lay foam blocks correctly, now all that’s left is a little work to do.