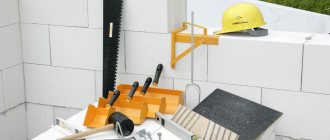
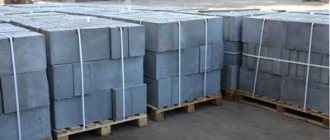
In this review of construction tools, we will consider only those needed for laying aerated concrete. We will not consider other necessary tools, such as a hammer, grinder, jigsaw, hammer drill, concrete mixer and others.
The most necessary tools for laying aerated concrete blocks:
- Trowel;
- capture;
- carriage;
- bucket-row;
- saw;
- wall chaser;
- grater;
- mallet;
- square;
- drill;
- level;
- cord.
Now let's look at each of these tools in more detail.
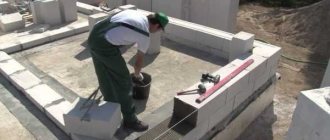
Carriage
The aerated concrete carriage is the most convenient tool in our review. Working with it goes very quickly, and the thickness of the seam is as uniform as possible. During the work process, the carriage is filled with masonry glue and driven along a row of aerated concrete blocks, the glue is evenly distributed along the jagged edge of the carriage.
Carriages come in different sizes, and these sizes were created specifically for gas blocks.
DIY aerated concrete tool
A DIY aerated concrete tool will provide an opportunity to reduce the cost of masonry. Thanks to the simplicity of its design, even an inexperienced person can cope with the task.
Making a wall chaser from a grinder
In order to make a tool, it is recommended to install an additional disk on the grinder. The first disc is fixed using the usual method. In order to attach the second disk, you need to use another nut, which has a lock washer for fixation.
Hand protection while working with the tool is ensured thanks to a special casing, which is recommended to be installed beforehand. It ensures that dust is directed in the opposite direction when working with the tool. It is recommended to attach a vacuum cleaner mechanism to the rear of the casing. It is recommended to use clamps to secure the tube.
Homemade trowel
When making a homemade trowel, you need to take into account that the maximum load falls on the junction of the handle and the work bucket. Initially, a bucket template is cut out of paper, according to which markings are made on a sheet of steel. Cut out the workpiece. Next, using a mallet, we bend the ladle into the required shape on the anvil. Welding is used to fasten the seams.
Using a grinder, we make teeth on the working edge. To ensure a strong fastening of the handle, you need to drill a hole through its entire length. We also make a hole in the bucket that corresponds to the diameter of the rod. The rod is inserted into the hole of the bucket so that it is covered by the cap. On the other side of the rod, a thread is cut. We put a wooden base on the handle and secure it with a nut. In order to improve the quality of the connection, we place a washer-grower under the nut.
Planer for aerated concrete
The plane scraper is intended for leveling protruding parts of aerated concrete blocks. It is made from a wooden board, which has working elements on one side and a handle on the other. For working elements, carbide saw segments are used in the amount of 8-10 pieces.
Take a board whose thickness is 50 millimeters. Along its edges on each side you need to make 4-5 cuts at an angle of 65 degrees to the longitudinal axis of the base. You need to insert pre-prepared pieces of saw into the prepared grooves, first applying glue to them. The plane can be used after the glue has completely dried.
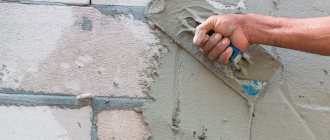
Regular trowel and notched trowel
You can use a regular construction trowel and a notched trowel . Apply glue with a trowel and level it with a spatula. This pair can be used to process both horizontal and vertical surfaces.
The disadvantages of these tools are that it becomes more difficult to regulate the thickness of the glue, and this thickness depends on the inclination of the spatula; the greater the inclination, the thinner the layer. You will always need to hold the spatula at the same angle.
Overview of tools for laying gas blocks
Instructions for laying aerated concrete require the use of a large number of tools. In accordance with their purpose, they are divided into main and auxiliary. It is not necessary to use the second group of tools when working. But, with their help, the construction process is facilitated.
Carriage
This is a convenient tool for aerated concrete, which speeds up the laying process. The carriage makes it possible to obtain the thinnest seam possible. When working, masonry glue is poured into the carriage. The tool is carried out along a number of gas blocks. During the manipulation, aerated concrete adhesive is evenly distributed along the jagged edge of the carriage and over the aerated concrete. There are different sizes of carriages that completely correspond to the width of the blocks.
Regular trowel and notched trowel
Trowel ladle for aerated concrete is widely used in the construction of buildings from this material. Using a tool, an adhesive solution is applied and distributed over the surface of the block. There are a number of teeth on the edge of the trowel, which ensures uniform application of the solution to the aerated concrete and high-quality adhesion of the blocks to each other.
The production of tools is carried out from polished galvanized rough metal sheet. Thanks to this material, the trowel can fully withstand heavy mortar. The tool is used for thin masonry - up to 3 millimeters. The trowel ensures uniform coverage of the surface with glue. When using the tool, the possibility of the solution spreading over the surface is eliminated.
The trowel is intended for applying glue, and the notched trowel is intended for evenly distributing it over the surface. When using these tools, it may be difficult to adjust the thickness of the glue, which depends on the inclination of the spatula. That is why when working with a tool it must be kept at the same angle at all times.
An ordinary spatula can be used for putty. This is a thin metal spatula, the material of which is durable metal. Thanks to this material, the likelihood of tool deformation during use is minimized. Using the tool ensures that the adhesive mixture is applied to the surface in a thin layer. The spatula is used for grouting chips, seams, and also for cleaning small protrusions. The tool is necessary for leveling corners in hard-to-reach places.
Bucket with teeth
A ladle for aerated concrete is used to apply the adhesive mixture to the surface of the block. Thanks to the universal design of the tool, it is possible to distribute the mixture evenly over the surface.
Aerated concrete grater
If, during the construction of walls made of aerated concrete, unevenness is observed in the material, then the use of this tool is recommended. It can also be used to equalize the height of blocks, which differ by several millimeters.
The tool is made in the form of a small board, which is equipped with a handle, which provides a strong grip. Using this tool, minor irregularities can be eliminated. The grater is intended for grinding the surface before applying plaster and putty. This tool is intended for grinding the material before laying each new row.
Wall chaser
A wall chaser for gas silicate blocks is used when there is a need to make grooves for laying communications. This tool can be electric or manual. The second option is more convenient, as it is characterized by low noise production and does not create dust. Its use is recommended if there are cells in the material.
An electric wall chaser is designed for making grooves in solid building materials. In appearance, this tool is similar to a grinder. Special discs are used to cut grooves. The device is noisy and also requires the use of protective equipment - headphones, glasses and a respirator.
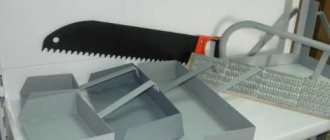
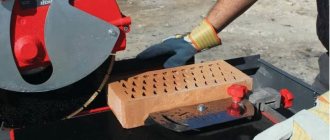
Hacksaw
Part of a block is often required to complete a row. Its sawing is carried out using a hacksaw for aerated concrete. If there is a need to cut a large number of blocks, it is recommended to use an electric band saw. In appearance, the tool is similar to a regular saw. But for its production, the most durable materials are used, which eliminates the possibility of deformation of the plate.
Square
In order to apply smooth and straight lines to the aerated concrete before cutting, it is recommended to use a square. It consists of a base and a ruler, which has an inch metric scale. Tools are made from a variety of materials. Most often, builders use metal or wooden squares.
Rubber mallet hammer
To ensure an even layer of glue and laying aerated concrete blocks on the same plane, it is recommended to use a rubber hammer. Due to the versatility of the production of the tool, the possibility of damage to aerated concrete blocks while working with it is eliminated. A rubber hammer is used to ensure high-quality removal of irregularities.
Grab on aerated concrete
To ensure convenient carrying of the material, a special grip is used. The tool is made of metal, which ensures its long-term operation. Ease of use of the device is ensured by the presence of special handles.
Drill screwdriver
If there is a need for holes for fastenings in aerated concrete, it is recommended to use a drill and screwdriver. This is a non-impact tool when working with which the possibility of destruction of the material is excluded.
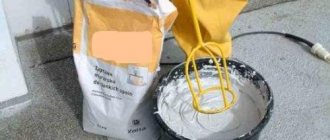
To make holes in aerated concrete blocks, it is recommended to use an electric drill. It is best to use a tool that has medium or maximum power. To make holes in aerated concrete, it is recommended to use only high-quality drills. It is recommended to first purchase a set of drills, which can be used to achieve various purposes. In order to mix the solution during its preparation, you can put special attachments on the drill. This will ensure the ability to prepare a high quality adhesive mixture.
Construction cord
Using this device, walls are checked for evenness and distortion. There is a small loop at one end of the cable and a weight at the other, which makes it easy to use. The cord is used to check vertical and horizontal surfaces. To check the evenness, the cable is hooked into a loop on a peg and tensioned.
Construction level
The instrument belongs to the category of electronic devices and emits two lasers - vertical and horizontal. Distinctive features between levels of different brands are laser power and accuracy classes. The tool ensures the construction of planes at right angles.
Building level
To ensure the correct placement of aerated concrete blocks during the construction process, it is recommended to use a building level. The tool can be electronic or mechanical. For laying blocks, it is recommended to use a level at least 80 centimeters long.
Bucket with teeth
A bucket with teeth makes it possible to apply an even layer of glue in any direction. A bucket for aerated concrete costs about half as much as a carriage (about 500 rubles).
Wall chaser
This tool is necessary for aerated concrete or aerated silicate blocks. With its help, longitudinal recesses are made for laying reinforcement that strengthens the masonry and takes on mechanical loads. Unlike electric wall chasers, manual tools can be used in field conditions where it is not possible to connect to electrical networks. The relatively soft material is quite easily processed by the cutting edge, leaving a neat and even recess of the same width.
Aerated concrete grater
If there are unevenness on the blocks, or the height of the blocks differs by a couple of millimeters, then in such cases it will be convenient to use an aerated concrete trowel , which will even out the unevenness. Thus, the laying of the next row of blocks will be simpler and of higher quality.
You can also use a float to level the horizontal plane of the walls, which simplifies the interior and exterior decoration of the house.
Tips for choosing a tool
The choice of tools for laying aerated concrete with your own hands should be carried out in accordance with certain rules:
- To make sawing blocks easier, it is recommended to use a reciprocating saw for aerated concrete.
- It is not recommended to cut blocks using a conventional hand saw. Experts recommend the use of an alligator saw, the blade of which has pobedit tips. This tool ensures fast and high-quality sawing of blocks.
- To level the blocks you need to use a grinder. During work, dust protection must be used.
- Lifting of aerated concrete blocks should be carried out using a homemade diamond grip.
- To ensure convenience during construction, you need to move the blocks using a special device.
- To determine the longitudinal position of the block, it is recommended to use a building level, the length of which is at least 2 meters. The transverse measurement is carried out with a tool that has a shorter length.
- The material should be pressed onto the solution using a rubber mallet.
Tools for aerated concrete blocks must be selected carefully and taking into account the characteristics of the material, which will have a positive effect on the convenience of its laying and durability.
Drill (screwdriver)
If it is necessary to make holes in aerated concrete for fasteners, for example, for anchors or dowels, then it is necessary to use non-impact tools so as not to destroy the already fragile material.
It is better not to use a hammer drill; a regular drill or screwdriver will be quite sufficient.
Hacksaw
When laying aerated concrete blocks, there is often a need for trimming to adjust the length of the walls to the design values. Aerated concrete is a sufficiently soft and friable material that it can be cut with a regular carpenter's hacksaw. However, its dimensions are inconvenient for working with blocks whose width reaches 40 cm. Therefore, there are special hacksaws for aerated concrete with increased blade length and tooth height on sale. Their teeth are equipped with carbide tips so that the tool retains its functionality longer and does not require frequent sharpening.
Construction level
A high-precision electronic device that emits two lasers, one strictly vertically, the other strictly horizontally. Levels differ from each other in accuracy classes and laser power.
The more powerful the laser beam, the better it is visible, this is especially important on a clear sunny day. In general, the level helps to construct planes at right angles.
Pincer grip
This useful and very convenient device for laying aerated concrete blocks allows you to save effort when carrying or lifting material. The gripper is designed on the basis of double pliers that clamp the side surfaces of the block and hold it under the influence of gravity. At the top of the device there is a convenient elongated handle, which makes it easier to lift or carry the block. Craftsmen who have to lift hundreds of blocks during the working day highly appreciate devices that make physical labor easier.
In conclusion, it should be noted that many tools for working with aerated concrete blocks can be made independently. Often homemade devices turn out to be more effective, since they are made by experienced people who understand the specifics and features of aerated concrete masonry. However, making homemade products requires certain skills and time. For busy people this is not always possible, therefore, most specialists prefer to use ready-made factory-made tools.
Instructions for use
Device for laying blocks
The procedure is elementary. To work you need an adhesive solution, the consistency is normal. The adhesive spreader is placed at the end of the wall row and work begins.
Step No. 1 - loading the device with adhesive solution
Loading the adhesive dispenser
Using a spatula, glue is loaded inside the box. There is no need to put a lot of solution - it will be difficult to work with.
Step No. 2 - forming an adhesive layer
Apply a layer
1 Pull the device away from the comb. If the glue spreader gets stuck, then you need to move it back and forth a little, and it will go easier.
Apply glue to the end of the block
2 Don’t forget about treating the end of the previous block in the row with glue. Apply glue.
Forming the layer thickness
3 Remove excess with a notched spatula.
Step No. 3 - install the block
Place a block along the cord
We install gas silicate locally. Align with the cord. The block installation cycle is completed.
Step #4 – repeat the cycle
We follow the cycle algorithm shown in the steps in the photo below.
Apply glue
We process the end
Removing excess
Installing a gas silicate block
If necessary, we knock
Step No. 5 – quality control of installation, elimination of defects
Level check
1 After laying several blocks (3-4), until the glue has set, we check the quality of installation.
2 Using a bubble level, we check the level of the laid out blocks in two planes.
We hit the block with a mallet
3 If necessary, we eliminate defects. We use a mallet.
A super device for laying aerated concrete that will save you time and effort
Working with gas silicate (gas blocks) compares favorably with conventional brickwork. Silicate blocks are much larger in size than bricks, and therefore the installation process is significantly accelerated, where the formation of the adhesive layer takes more time and effort.
This can and should be fixed. Therefore, we are making a simple device for laying blocks that will save your time and effort.
Content:
“Adaptation” for forming an adhesive layer
The essence of this product is very simple - maximum acceleration of the application of the adhesive layer for laying blocks. To do this you need:
- Make a box on a skid. It should move easily along the row of the wall and will not move off it. To do this, the side walls should hang from the row by 1-2 cm
- The device is equipped with a spatula for uniform application of the solution - it is better to use a notched trowel. At the same time, fix it at an angle of 40-50° - this way it will be better to apply glue to the row
- Since the width of the adhesive layer is needed to be somewhat narrower than the block row - excess glue will not be squeezed out when installing the block - the device must be equipped with restrictive bars from the inside.
Recommendations for laying walls in two blocks
When erecting walls in two blocks, the vertical seams should be “deep” bandaged, the depth of which should be at least 100 mm.
To connect the walls with each other, it is necessary to make an inclined groove with a dressing depth of at least 200 mm; a vertical groove cannot be made. For the construction of internal walls and partitions, the same rules should be followed as for external walls. External and internal walls should be connected to each other by ligating blocks. In this case, the mating depth must be at least 200 mm. The connection of partitions with load-bearing walls is ensured using flexible connections made of steel strips, which are fixed in the seams of the walls in the right places.
Mechanical tools
In addition to manual types of devices, mechanical tools are also used, which are very important for work. Their choice should be made with greater responsibility. This is due to the fact that the price of the equipment is much higher, the work they perform is more responsible and mistakes made will be quite difficult to correct.
Electric drill device
When laying aerated concrete, an electric drill is a necessary tool for aerated concrete. A unit with medium or maximum power is best suited, which depends on the softness of the aerated concrete blocks.
Tip: To work with an electric drill, you should purchase a set with high-quality drills that will be used for different purposes.
Of no small importance is the presence of attachments for mixing the glue when preparing the solution. This will allow you to produce a better quality mixture.
Nozzle for mixing the solution
Hammer
When laying various lines and channels in aerated concrete walls, a hammer drill is required. You should purchase special drills for the equipment that will help you drill holes for communications and form openings for windows and doors.
Grinder for cutting aerated concrete
With a grinder you can trim walls, their individual elements, and round corners, if necessary.
Tip: An angle grinder should be chosen with adjustable power and speed. This will make it easier to choose the mode that will be most convenient for work.
For an angle grinder, you need to purchase several circles, preferably of different sizes, so that if they become dull or broken, they can be replaced.
When choosing any electric tool, you need to pay attention to its brand and manufacturer. It is better to give preference to equipment that has certain guarantees and positive consumer reviews.
Electric saw for aerated concrete
Reciprocating saw for aerated concrete
How to lay the first row of a wall made of aerated concrete blocks?
Characteristics of aerated concrete blocks.
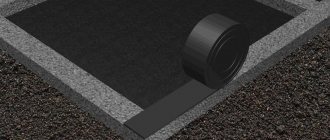
Laying walls from aerated blocks begins from the corners of the building and continues along its entire perimeter. But before you start laying the first row, you need to lay 1 or 2 layers of roofing felt on the foundation to ensure waterproofing. The first row of aerated blocks is laid on a cement-sand mortar with a ratio of 1:3 and a thickness of up to 3 cm. After this, using a special plane or sanding board, you need to remove all irregularities from the first row of masonry. Starting from the first row, you need to carefully control the height of the masonry using a stretched mooring cord and levels.
When there is a gap in the masonry of the first row that is smaller than the length of the entire gas block, you need to make an additional block for this place. When you install the additional block, you should carefully coat its ends with glue. Use a level and a mooring cord to check that the unit is installed correctly. Level the wall blocks using a rubber mallet.
Purpose and features of devices
As with other construction work, when creating brickwork it is customary to use special tools and devices. Most of them are usually purchased in specialized stores, but it is also acceptable to use homemade devices. Of course, the latter are often approached by more experienced craftsmen who deal with similar work quite often.
Let's take a closer look at what standard tools exist and what their purpose is.
Trowel (or trowel). This device is a compact paddle with a flat surface for easier holding. It is necessary for laying the binder composition on brick blocks. Then this composition is carefully distributed with a trowel. Using this device, excess pieces of mortar are also removed.
Joining. This device looks like a narrow groove fixed to the handle. Jointing is required for high-quality molding of seams, control over the level of their thickness, and removal of excess pieces of composition. The joints are convex and concave
In addition, when choosing this device, it is important to consider its profile.
- Small hammer. A well-chosen hammer will be needed to trim brick parts to give them the required dimensions and shapes. Also, with the help of this tool, it will be possible to correct minor installation inaccuracies on a binder solution that has not yet fixed (or is not completely fixed).
- Building level. Most construction work cannot be done without this device. A level allows you to check whether the base you are working on is horizontal or vertical. The most popular are bubble and laser models. The latter, of course, are more expensive, but they are easier to use.
- Plumb. This is a device that is a weight in the shape of a cone or bullet. It is attached to threads that do not have elasticity. Thanks to the plumb line, the craftsman has the opportunity to control the verticality of the structures being erected in relation to the displacement of the thread fixation point on the horizontal section.
- Template, slats, rules and other devices that are necessary to control the conformity of the shape of the structure.
- Mooring. This item is a high-density, inelastic thread. It extends along the rows of brickwork and is used as a guide to linearity.
- Order. Simply put, this is a large ruler that corresponds to the smallest width of a row of blocks.
- Cuvette. Otherwise, this tool is called a dispenser. It is a small tank without a bottom. The walls in it can be either straight or beveled. With the use of a dispenser, it becomes possible to correctly measure the required amount of binder solution for a specific section of the seam and immediately give it the required length and width.
- Order dispenser. This is a ditch, supplemented with marking mechanisms. In addition, such devices are often distinguished by an adjustable length and the presence of support mechanisms.
- Complex dispenser. This “assistant” consists of a level and other KPIs. It may also contain additional components necessary for forming shaped seams.
Masonry hooks
Hooks can be made from profile pipe. To connect the two handles, plates cut from corners are welded to the pipes. The two handles are connected with a bolt for free movement. The hinge needs to be moved towards the edge to increase grip strength.
The gap under the handle should not be too large, but sufficient for a two-handed grip. When folded, the width of the gripping part should be 5-7 mm larger than the block, so that there is no too much movement of the handles.
The gripping plates are cut from 5 mm thick channel. There is no need to make it thicker so that it is convenient to move the block directly to the glue. One plate has dimensions 75x85, the second 90x75. The second plate is longer because the pipes are fixed offset.
The handle must be made non-slip, and a cap must be placed on the end of the pipe to prevent the hand from slipping off.
The gripping force is very powerful; the device easily lifts 2 heavy concrete blocks. Nothing falls out. But safety precautions must be observed.