How to lay a gas block: a step-by-step guide
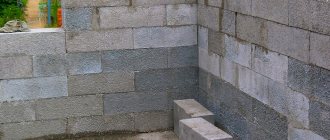
The first row of blocks requires increased laying accuracy, since the accuracy and ease of laying subsequent rows and the wall as a whole depends on it.
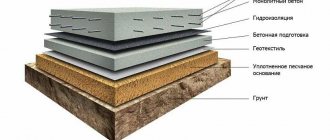
The installation of waterproofing units between the foundation (basement, plinth) and aerated concrete masonry must be carried out in accordance with the decisions made in the project or in accordance with the album of technical solutions.
A mooring cord is stretched between the lighthouse (outer) blocks.
The blocks are laid on opposite sides of the wall, further laying is carried out from the outer blocks to the center using a cord.
The height of the beacon blocks is selected based on the block located at the highest point.
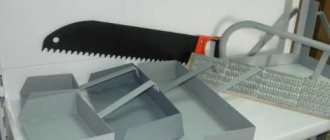
If it is necessary to obtain a cut block, the cut is made with a hacksaw for aerated concrete using a square. In multi-story construction, the use of a band saw is recommended. After cutting, be sure to clean the surface with a sanding board.
The first row of blocks is laid on a leveling layer of cement-sand mortar.
The height of the first row of blocks is adjusted using a mooring cord stretched between the outer blocks of the wall. The position of the blocks is controlled by a level and adjusted using a rubber mallet.
Existing unevenness in the masonry is eliminated using a sanding board or plane. Small dirt and dust are removed with a brush.
Subsequent rows are laid on a special adhesive solution.
Preparing the adhesive solution
Masonry using adhesive mortar has several advantages over masonry using cement-sand mortar:
- The use of an adhesive solution eliminates the formation of cold bridges.
- Laying in a thin layer reduces the likelihood of uneven installation of blocks.
- In terms of strength characteristics, masonry with adhesive mortar is significantly superior to masonry with cement-sand mortar.
Water is poured into a plastic container in the volume indicated on the packaging. With constant stirring, the dry mixture is gradually added.
The mixture is stirred until a homogeneous plastic mass is obtained, so that when applied the solution does not spread and is not too thick.
15 minutes after the first mixing, the solution must be mixed again.
During the work process, the solution should be stirred to maintain its consistency.
The average pot life of the solution is 2-2.5 hours.
Time to adjust the position of the installed block is 10-15 minutes. The thickness of the applied layer is 2-5mm.
The use of solutions not intended for laying aerated concrete is a violation of construction technology!
Preparatory work
The preparation process before erecting aerated concrete walls consists of several stages.
Mixing the mixture
First, prepare a container of the required size, as well as an industrial mixer. To prepare the adhesive solution, use dry composition and plain water. The beating process continues until the mixture being prepared has a uniform consistency. After this, no more than 20 minutes are allotted for its use, otherwise it hardens and accordingly loses its properties. Therefore, it is recommended to make small portions in order to be able to produce them in a short period of time.
When carrying out construction work in low temperature conditions, a special frost-resistant type of mixture must be used. So, components are added to its composition that reduce the freezing degree. As a result, the solution retains its properties even at low temperatures.
Marking
Before starting laying, markings are required. It is made along the axes of the surfaces of the structure being built. To do this, products are laid out on the line and their size is adjusted to fit one clear horizontal line. Fitting is carried out by using the above tools for aerated concrete in the form of a saw or a regular hacksaw for processing. It is important that all products are cut evenly. When bandaging is carried out, grooves are first made in the materials in which the reinforcement will be laid.
Load-bearing wall masonry
The next row of walls is laid after the cement mortar of the first row has set. The laying of the second and subsequent rows is done with dressing in half a block. In some places, block overlap is allowed less than half a block, but not less than 10 cm.
The position of the blocks, as when laying the first row, is controlled by a stretched mooring cord and level.
The mortar is applied to the surface of the blocks using a trowel or carriage made to fit the width of the masonry or a trowel used in tiling work. The solution must be applied evenly over the surface of the masonry.
Using a trowel, the solution is also applied to the vertical surface of the blocks.
The project may indicate that the adhesive solution is not applied to the vertical surfaces of the blocks of the tongue-and-groove system; such a decision is justified if subsequent double-sided plastering of the walls is provided, and the load on the block is significantly lower than the load-bearing capacity.
The ends are cleaned using a sanding board or plane. The length of the outermost block must be at least 10cm.
The mortar protruding from the seams is removed using a trowel. Rubbing the solution is not allowed.
The alignment of the masonry is repeated after laying each row of blocks.
After laying each row, the deviation from the horizon will be checked using a level.
If it exceeds the established tolerance, the deviation is eliminated when laying subsequent rows. After 2-3 rows in height, the evenness of the masonry is checked with a level.
Selecting Tools
In order for the laying of aerated concrete to be correct and durable, it is impossible to do without the use of special tools. To prepare a concrete solution you will need an industrial mixer and a mixing container. In order to apply the mixture, you will need several trowels of different sizes. To fit aerated concrete blocks together, use a special hammer and a measuring level. If you plan to process an aerated concrete block, then it would be a good idea to stock up on tools such as a marking ruler, a plane, a saw, a grout, equipment for forming grooves, drill attachments, a drill, and a brush.
Connection unit for external and internal load-bearing walls
During multi-storey construction, the connection node is carried out in accordance with the construction project or an album of technical solutions
Load-bearing external and internal walls made of aerated concrete are placed on the dressing.
The masonry in the place of the future wall is controlled. All irregularities are eliminated with a plane. Dirt and dust are removed with a brush.
Blocks are laid on the dressing on opposite sides of the wall, further laying is carried out from the outer blocks to the center using a cord.
The height of the stacked blocks is controlled by a level and adjusted using a rubber mallet; the vertical and horizontal position is also controlled.
At wall joints, the vertical joint of aerated concrete blocks is always made using a special adhesive solution.
Reinforcement
The purpose of reinforcement is to increase the load-bearing capacity of the masonry. Reinforcement reduces the likelihood of cracks. The need for reinforcement of certain sections of the wall is assessed for each specific object.
The need for reinforcement and the location of the reinforcement are determined at the design stage. It is necessary to reinforce the first and every fourth row of masonry, support areas of lintels and areas under window openings, parts of the wall with increased load.
Long walls are reinforced, for which it is necessary to provide resistance to lateral loads (wind). Using an electric or manual wall chaser, grooves are made in the middle part of the masonry blocks corresponding to the length of the reinforcement. Depending on the width of the masonry or project, reinforcement in one or two belts is possible. The groove must have dimensions of at least 25x25mm and be at least 60mm from the edge of the block in the case of reinforcement in two crowns.
For better adhesion to the solution, the dust remaining in the grooves must be removed with a brush or a hair dryer.
The groove, previously moistened with water, is filled with cement mortar approximately halfway and reinforcing bars with a diameter of 6-8 mm are laid. Individual rods are placed in a groove with an overlap of 300-350mm.
After immersing the rods, the groove is completely filled with mortar, the excess is removed with a trowel, the surface is leveled with a plane or sanding board, and the dust is removed.
Types of materials
The correct choice of blocks affects the success of construction
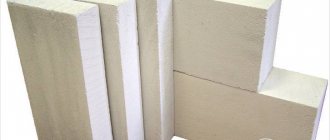
When choosing a material, you need to pay attention to which density group it belongs to.
Table with technical characteristics
In the documents this parameter is designated by the letter “D”. Density affects the thermal insulation of a gas block. It increases with high porosity of the material.
There are several types of blocks, differing in density:
- thermal insulation – D900 and higher;
- structural and thermal insulation – from D500 to D900;
- structural - from D300 to D500.
When constructing the walls of a residential building, it is recommended to use material with a density of at least D500.
The standard size of a gas block is 62.5x25 cm. Its width depends on the scope of application:
- load-bearing walls – 30–40 cm;
- partitions – 10–15 cm;
- internal walls – 20–25 cm.
Construction of door and window openings
In future locations for installing window and door units, it is necessary to provide concrete reinforcement of the wall in advance for installation of fasteners.
Using a manual wall chaser, grooves measuring 70x70mm are installed in the vertical parts of the opening.
Concrete is poured sequentially, in sections with a height of 400-600mm.
Wooden plugs are temporarily secured with nails.
The plugs are removed after the solution has completely set.
U-block lintels
To cover openings in walls made of aerated concrete blocks, both prefabricated and on-site monolithic lintels are used.
Site-fabricated monolithic lintels are monolithic reinforced concrete structures poured into the cavity of U-blocks.
The reinforced concrete part must have reinforcement corresponding to the calculations. The best solution for reinforcement is a reinforcement cage.
The U-shaped blocks are placed on temporary supports. As a support, you can choose a board and timber. The base must be reliable and rigid so that the lintel does not bend during pouring.
U-blocks are installed in the design position, vertical joints must be glued.
The depth of support of the lintel must be at least 250mm.
The thicker U-block wall should be on the outside of the wall.
The evenness of the masonry is checked and, if necessary, the position of the partition is adjusted. Read more about laying aerated concrete partitions.
The reinforcement frame is laid closer to the inside of the wall.
Insulation is installed if required by the project.
The U-block is wetted with water, the cavities are filled with fine-grained concrete of the class specified by the project. After pouring, the concrete must be compacted by bayoneting.
The surface of the poured concrete is leveled flush with the top edge. Removal of temporary supports is allowed only after the concrete has completely hardened. Work on laying blocks on the lintel continues only after the concrete has completely hardened and the full load-bearing capacity of the lintel has been achieved.
Do-it-yourself aerated concrete house: step-by-step independent construction of a house
Building a house from aerated concrete is not exactly an easy undertaking, but compared to brick or the same log house, you will have to put in much less effort. We will build a simple one-story house on a strip foundation.
If you wish, you can change the characteristics of the building at your discretion - you just need to master the order of laying out the walls, all other activities are carried out as standard for houses made of any materials.
| Characteristics of aerated concrete blocks (indicators) | Autoclaved aerated concrete (gas silicate) |
| Density, kg/m3 | 500 |
| Compressive strength class | B 2.5-3 |
| Frost resistance, cycles | F50 |
| Relation to moisture | Requires protection |
| Relation to fire | Does not burn |
| Operational thermal conductivity, W/m*C | 0,14 |
| External wall thickness (Moscow region), m | 0,5 |
| Monolith Possibility | No |
Connecting blocks with reinforced concrete
The connection of aerated concrete walls with reinforced concrete frame elements is not fundamentally different from the connection of an aerated concrete partition and a load-bearing wall. In the case of using aerated concrete blocks to fill a reinforced concrete frame, the junctions of the blocks with reinforced concrete are filled with cement-sand mortar.
Aerated concrete masonry is connected to a reinforced concrete column or perpendicular wall using metal ties installed every 2-3 layers of blocks. One part of the connection is laid in the masonry seam and secured with special nails, the second part is attached to the side surface of the pillar or wall.
The junctions of the blocks with the floors or beams of the frame structure are filled with polyurethane foam.
Roof construction instructions
Once the frame of the house is ready, you can proceed to installing the rafters. Everything here is individual, you need to focus on the features of the roofing structure.
There are several options:
- complex structures, such as hip, attic - the optimal solution for a residential building made of aerated blocks;
- lean-to is suitable for covering sheds and other outbuildings;
- gable, as a rule, is used for country houses.
Regardless of the type of structure, it is imperative to use insulating layers, including steam, hydro and thermal insulation. When arranging a residential attic, soundproofing material is additionally installed. To secure them, it is convenient to use wooden slats, which will also serve as sheathing.
It is necessary to install insulation under the waterproofing; you can choose polystyrene foam, polystyrene foam, but, as a rule, in this case, mineral wool is used.
Finally, you need to install the roofing, here you should focus on your own preferences and available means, among the most popular materials are bitumen and ceramic tiles, slate, metal tiles, corrugated sheets.
Installation of roofing material must begin from the bottom. This fastening of the sheets allows sedimentary moisture to drain without getting under the roofing. Construction of a house made of aerated concrete takes on average 6 months. The duration of the work depends on experience, complexity of the project, and level of mechanization.
