Our construction company is engaged in the installation of sheet piling walls for any purpose in the Moscow region and in other regions of the Russian Federation.
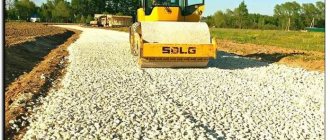
The cheapest option for installing a sheet piling wall is to use boards as part of a sheet piling fence.
In this case, the fence is thin walls between the sheet piling posts, enclosing and strengthening the walls of the pit, and also protecting it from moisture, snow, etc.
Collection device: from boards 5 cm thick
STANDARD GESN 29-02-005-01
| Name | Unit |
| Collection device: from boards 5 cm thick | 100 m2 collection |
| Scope of work | |
| 01. Preparation and installation of fastening elements. |
The price does not contain overhead costs and estimated profits; accordingly, the direct costs of work for the period 2000
(prices of the Moscow region), which are calculated based on
2014 standards with additions 1
. For further calculations, this cost must be multiplied by the conversion index to current prices.
You can go to the page of the same standard, which is calculated on the basis of prices for March 2014. The basis for applying the composition and consumption of materials, machines and labor costs are GESN-2001
| № | Name | Unit Change | Labor costs |
| 1 | Labor costs of construction workers Grade 3.8 | person-hour | 153,69 |
| 2 | Labor costs for drivers (for reference, included in the price of the EV) | person-hour | 0,51 |
| Total labor costs for workers | person-hour | 153,69 | |
| Workers' compensation = 153.69 x 9.4 | Rub. | 1 444,69 | |
| Payroll for drivers = 10.26 (for calculating invoices and profits) | Rub. | 10,26 |
OPERATION OF MACHINES AND MECHANISMS
By clicking on the link in the code or name of the resource, you will be redirected to a page indicating the driver’s remuneration and a list of rate codes in which this resource is used.
| № | Cipher | Name | Unit Change | Consumption | Article number Rub. | Total RUB. |
| 1 | 021143 | Truck-mounted cranes when working on other types of construction 16 t | mach.-h | 0,51 | 115,4 | 58,85 |
| 2 | 331532 | Electric chain saw | mach.-h | 11,5 | 3,27 | 37,61 |
| 3 | 400003 | Flatbed vehicles, load capacity up to 10 tons | mach.-h | 0,25 | 105,42 | 26,36 |
| Total | Rub. | 122,81 |
By clicking on the link in the code or name of the resource, you will be redirected to a page indicating the weight of the unit of measurement of the material and a list of pricing codes in which this material is used.
| № | Cipher | Name | Unit Change | Consumption | Article number Rub. | Total RUB. |
| 1 | 101-1805 | Construction nails | T | 0,02 | 11978 | 239,56 |
| 2 | 102-0061 | Edged softwood boards 4-6.5 m long, 75-150 mm wide, 44 mm thick or more, grade III | m3 | 6,9 | 1056 | 7 286,40 |
| Total | Rub. | 7 525,96 |
TOTAL BY RESOURCES: 7,648.77 RUB.
TOTAL PRICE: RUB 9,093.46.
Look at the cost of this standard at current prices open page
Compare the price value with the value of FER 29-02-005-01
To draw up an estimate, the price requires indexation of the transition to current prices. The price is compiled according to the standards of GESN-2001 as amended in 2014 with additions 1
in
2000
.
To determine intermediate and final price values, the DefSmeta
Methods for immersing sheet piles to enclose a pit
In construction practice, two methods of driving sheet piles are used - impact driving and vibration driving.
The most common method is impact driving. This technology has a key advantage - when the sheet piling is driven by impact, there is no decompaction of the soil near the driving point, which accompanies the process of vibration driving.
Expert advice! As a result of decompaction of the soil, the walls of the pit collapse, which can violate the design slope of the excavation (the walls of pits of different depths, according to GOST requirements, must be located at a strictly defined angle of inclination).
The impact method has a number of restrictions on its use - due to the destructive effects on the foundations of nearby buildings, it cannot be implemented in densely built-up areas of the city, near architectural monuments and historical buildings.
The vibration method does not have such limitations, however, this method demonstrates high immersion efficiency only when working on non-cohesive soils - sandy soil, sandy loam and slightly moist clay.
Rice. 1.5: Larsen sheet pile vibration driving
Depending on the technology used, pile driver installations are equipped with mounted diesel hammers or vibratory hammers. During operation of a diesel hammer, the sheet piles are immersed in the ground as a result of shock dynamic influences, which are transmitted to the structure fixed in the head of the hammer. There are two types of diesel hammers - tubular and rod. Today, tubular hammers, as more advanced designs, have almost completely replaced rod-type hammers from use.
Rice. 1.6: Tubular and rod diesel hammers
The operating principle of vibratory hammers is radically different. Such devices are equipped with uncentered unbalances, which, in the process of multidirectional rotation, generate high-frequency vibration vibrations (from 500 to 1500 k/min). Vibrations are transmitted to the sheet pile, rigidly fixed in the head of the unit, then the vibration along the sheet pile passes to the soil layers in contact with it, which are decompacted and, under the weight of the vibratory loader structure, the sheet pile is lowered into the ground
Rice. 1.7: Diagram of an electric vibrator
Why do you need a pickup?
The base of the strip foundation is a natural visible continuation of the underground part of the foundation. And after the construction of the house is completed, all that remains is to cover it with durable and reliable finishing material.
To finish a columnar foundation, it is necessary to build a false base. Its structure is somewhat reminiscent of a small continuous fence, supported by pillars. This is a pick-up. And in addition to the decorative function, it serves to protect the underground from precipitation and debris, and the penetration of pets. And with proper insulation, the fence protects the soil under the house from freezing, reduces the impact of heaving forces on the pillars, and improves the thermal protection of the building.
Common mistakes during construction
When arranging the pick-up, technology violations may be committed, which lead to difficulties during construction and a reduction in the service life of the base:
- Work is carried out until the final shrinkage of the building, which can take 5–6 months.
- They use building materials that are untreated from rotting and fire.
- They take a large step of the sheathing, which affects the strength of the structure.
- When making the base, they do not provide for communication entry points; they do this already at the cladding stage, which delays the work.
- They do not leave a gap between the suspended fence and the blind area.
- The layout of the adjacent territory is sloping towards the house, which facilitates the flow of water towards the walls of the building.
The pile foundation must be equipped with a false base. The work is not very difficult even for a novice master. To build it, a simple power tool is enough. The result of finishing work will be noticeable in the first year of operation of the house.
Materials for collection
Collection materials can be:
- board (grooved or regular);
- logs;
- natural stone:
- bricks, building blocks;
- concrete;
- basement siding;
- cement-bonded particle boards and other sheet materials for finishing facades.
Wooden fences
Quite often, the fence is made from the same materials as the foundation pillars. And although logs for poles are now used mainly only for temporary structures, timber for wooden houses is not uncommon, even if they stand on brick or concrete supports.
With the classical technology of making a wooden plinth, it is made from short logs placed vertically between the ground and the first crown. For this purpose, the “groove-tenon” principle of connecting elements is used. The process looks like this:
- between the pillars they dig a trench with a depth of 30 to 50 cm;
- For sandy soils, the bottom is compacted; for clay soils, a sand cushion 15 cm thick is additionally filled and compacted;
- between the pillars, logs with the groove upward are placed and secured to the bottom - jams;
- prepare short logs to the height of the pick-up, cut out tenons at both ends;
- the logs are inserted with a tenon into the groove of the jam;
- On top of the tenons of the logs, horizontal logs are “planted” with a groove - plantings that are connected to the lower crown.
The same technology can be recommended for houses made of timber, where short timber is used instead of logs for picking.
In the modern version, a tongue-and-groove board, block house or imitation timber is used for wooden girders. This type of false base is classified as lightweight - hinged. In this case, installation of the sheathing is carried out on a wooden frame made of a 100x50 mm or 50x50 mm bar, attached to pillars and foundation beams (analogous to the grillage of a pile foundation). And the lower edge of the fence “rests” against the covering of the blind area. This technology is similar to making a fence from basement siding.
For wooden scaffolding, it is important to treat each element with antiseptics before carrying out work.
Covering the base with siding
When making a columnar foundation with your own hands, PVC base siding is the easiest to work with. In addition to simple installation, its list of advantages includes resistance to moisture and mechanical stress.
The manufacturing process has the following sequence:
- Galvanized profiles or wooden blocks impregnated with an antiseptic are vertically attached to the pillars and foundation beams.
- All elements of the sheathing are placed in the same plane. If a wooden block is used, and the pillars are made of reinforced concrete, then pieces of roofing felt (or similar material) must be laid between them.
- Just above the level of the blind area, a starting strip is attached to the sheathing.
- The panels are installed in accordance with the manufacturer's instructions.
- The ebb is attached along the top line of the base.
Pickup from corrugated sheets
Like the previous option, this type refers to light (mounted) systems. Installing wall corrugated sheets as a fence is in many ways similar to making a fence:
- between the pillars along the perimeter of the house, a galvanized metal pipe of rectangular cross-section 20x40 mm is attached in two rows;
- strips of corrugated sheets cut to size across the waves are attached to the pipes using special screws;
- An ebb is mounted on top of the base.
Cement particle board pick-up
This type also refers to lightweight hanging systems. The manufacturing technology is not fundamentally different from the previous version - for installation they use a vertical sheathing attached to pillars and foundation beams. The differences are as follows:
- Preparation of sheet material - the slabs must first be cut to size: in height - from the top line of the plinth to the blind area, in width - to the distance between the middles of adjacent sheathing elements (but not more than 60 cm).
- Drilling holes - the diameter should be 0.5 mm larger than the corresponding screw size. This is necessary to compensate for changes in the geometry of the DSP due to fluctuations in temperature and humidity.
- Finishing: filling the seams with elastic sealant, priming the surface of the slabs, painting with facade paint.
Finishing the plinth (facade) with clinker or ceramic tiles from DSP is not recommended. The layer of glue on the slab will simply “tear” due to daily or seasonal fluctuations in humidity
Brick
There are two options for making a columnar foundation made of brick - you can immediately use a facing brick or choose an ordinary brick and then cover the base. But the preparatory stage and the construction process follow the same algorithm:
- Dig a trench up to 50 cm deep and 30 cm wide.
- Compact the bottom, leveling it.
- Fill in a layer of sand (or sand-gravel mixture). The thickness of the pillow is at least 15 cm.
- Lay a separating layer - a geomembrane or dense polyethylene.
- Formwork is installed to pour the concrete base for the masonry. Based on the minimum layer of concrete around the reinforcement (3 cm), the height of the base should be at least 7 cm.
- A reinforcing frame is knitted from wire with a diameter of 5 mm.
- Concrete is poured, compacted and left to mature.
- Remove the formwork and lay out the wall in half or one brick. They use a standard order with ligation of corners and rows (for collecting into one brick).
- Vertical waterproofing of the underground part of the base and cutting off horizontal insulation along the top row are carried out.
Instead of ceramic bricks, you can use cinder block or natural stone to construct the backyard. The first option is cheaper and faster to manufacture. Natural stone is more difficult to install and adjust to size, but it does not require finishing.
Concrete
Like brick (stone) infill, monolithic concrete refers to a “heavy” plinth, which requires penetration into the ground.
The manufacturing process of a monolithic pick-up has a standard technology:
- dig a trench;
- compact the bottom;
- fill a cushion of sand;
- lay a separating layer;
- install formwork;
- knit a volumetric reinforcement frame;
- concrete is poured;
- remove formwork;
- carry out waterproofing measures;
- the base is covered with plaster, tiles, base siding, and corrugated sheeting.
Why are the last two options rarely used? They are among the most expensive and labor-intensive, and although a “heavy” fence will cost less than the base of a strip foundation, it may turn out to be more expensive to manufacture than the pillars themselves.
What to make it from?
Formworks can be made from various materials. The choice should be based on the rationality of using one type or another for a particular case. The material used determines the cost of the structure.
Structures made of boards, chipboard, plywood
They have their own characteristics, in particular, a higher price compared to plywood or chipboard formwork. Therefore, you need to consider some rules to choose the best option.
It is important to assemble the structures correctly to avoid defects on the molds being cast. Advantages of wooden formwork and structures made of plywood and chipboard:
Advantages of wooden formwork and structures made of plywood and chipboard:
- reasonable cost;
- ease of installation.
Disadvantages: the need for high-quality strengthening.
Wood materials are lightweight, making them easy to store and transport. They are characterized by smoothness and strength if the structure is assembled correctly without violating the distance between the struts. The optimal step is 0.6-1 m.
Steel, asbestos-cement or plastic pipes
Steel formwork is characterized by maximum strength and maximum load-bearing capabilities compared to other types of structures. Fixed structures last longer than removable ones.
Steel formwork is somewhat difficult to use in terms of delivery to site and installation. To do this, you will need to use a lifting device.
Steel structures have the following advantages:
- Ability to withstand heavy loads generated by the concrete composition;
- Smooth surfaces of poured forms;
- Possibility of using formwork almost unlimited number of times.
Features of asbestos-cement pipes:
- good rigidity and strength of the assembled structure;
- cast construction;
- attractive design;
- resistance to negative temperatures and aggressive influences.
Asbestos-cement formwork is lower in cost than any other types. The diameter of the pillars can be 12.2-52.8 cm, and the length is 3.95-5 m.
Plastic columns are a new tool used in construction. Their advantages:
- high resistance to aggressive environments and frost;
- durability;
- variety of sizes of structures and their sections.
The disadvantages include the high cost, but this is fully justified by the unsurpassed quality. The ability to choose the right size allows you to save on labor costs to adjust the desired parameters.
Concrete blocks
Concrete blocks are permanent structures. There is a hollow space inside them, and the structures themselves have clear outlines. Their versatility is determined by the thermal, hydro and sound insulation of the created base.
The widespread use of concrete blocks is due to a number of their advantages:
- The structure has no cold bridges.
- Quick foundation creation.
- High strength and reliability.
- Easy installation.
- The ability to conveniently lay the necessary communications.
- Smooth surface.
- The ability to use blocks for the walls of a building.
- Durability.
Sheet metal
This type is used in cases where it is necessary to strengthen the structure of the foundation and obtain a flat surface of any configuration. The technology is used for industrial construction.
The formwork consists of several metal sheets connected by overlays or anchors. The structure is installed on a durable frame.
To prevent sheet deflection, specialists use a strictly defined number of connections. The calculation is carried out to ensure the exact geometry of the base.
Disadvantages of sheet metal:
- high cost;
- the need to use thermal insulation;
- heaviness of the structure.
Using roofing felt
If you use it for formwork, after a few years the layer adjacent to the column will freeze. Heaving acts tangentially to the base of the column and lifts it out of the ground. As a result, the building is destroyed.
Since roofing felt is a cheap material, many people strive to use it in construction. In addition, it forms a waterproofing layer, which increases the service life of the foundation.
To strengthen the structure, specialists perform installation in the following ways:
- additional clamps are used to ensure the vertical position of the structure;
- the diameter of the supporting elements should not be more than 250 mm;
- use reinforcement, steel mesh or chain-link to strengthen the structure;
- Be sure to create a cushion in a pit of crushed stone and sand.
Insulation
For a strip foundation, it makes no sense to insulate only the base - the main heat losses occur due to the high thermal conductivity of the entire reinforced concrete base. The strip foundation acts as a large heat exchanger between the “warm” floor and the cold soil. And the base of a columnar foundation (as well as a pile foundation) must be insulated. This will not only increase thermal comfort inside the building, but also protect utility lines running in the underground from freezing.
The insulation technology itself depends on the type of insulation, although the choice of thermal insulation materials is limited. It can be:
- expanded polystyrene;
- penoplex (extruded polystyrene foam);
- sprayed thermal insulation (PPU).
Depending on the nature of the location of thermal insulation, there are two types of technology: external or internal insulation.
External insulation is carried out for “heavy” walls made of brick, stone, blocks and monolithic reinforced concrete. The work is no different from insulating the base of a strip foundation:
- Prepare the surface - clean it from dirt and dust.
- When insulating using the “wet” method, foam plastic slabs are attached to glue in the underground part, and glue and umbrella dowels are attached to the above-ground part. Then the above-ground part of the surface is reinforced with fiberglass mesh, plaster is applied or facade tiles are glued.
- When facing with sheet materials (siding, corrugated sheets), a sheathing is installed in the above-ground part, between which sheets of polystyrene foam are laid or polyurethane foam (PPU) is sprayed. Then the façade panels are mounted on the sheathing.
Internal insulation is used for “light” (hinged) insulation. In this case, sheets of expanded polystyrene are attached between the sheathing elements, after which the cladding is carried out.
Video description
About the rules for installing a safe sheet piling pit:
The final cost of the pit depends on a number of important factors. First of all, the type of material used is taken into account, for example, boards, pipes, metal piles, Larsen sheet piling. The cost is also affected by the type of equipment used (pile driver) that is used to drive the sheet piles. The main cost item is the volume of work performed. However, the overall cost can be increased as a result of the need to use retaining boards around the perimeter, which act as supports to strengthen the wall.
The elements of the metal tongue interlock with each other like puzzles Source pdoshka.ru
Fence for columnar foundation
Today, when the popularity of private construction has increased greatly, many people independently arrange the foundations for future buildings. At the same time, when construction is not the main profession, it is very difficult to provide for all the nuances. The foundation is the main component of any building. It is not enough to build it, observing all technological stages. In order for the house to be warm, and the foundation to be strong and last for many decades, you need to pay special attention to the arrangement of the foundation in the final stages of its finishing. For example, a fence must be installed for a columnar foundation.
What is a pick-up
Before talking about how to properly carry out picking and what materials are best used for it, it doesn’t hurt to first understand what it is and what its main task is.
Any building has a base, even those whose base is pillars. Unlike a monolithic strip foundation, a columnar foundation leaves a lot of free space under the structure, which must be insulated so that the heat does not escape from the house in winter and the floor is warm. It is also necessary to protect this free space from precipitation.
That's what pick-ups are for. They are installed between the supports of the building. The following materials can be used for them: bricks, wooden boards, rubble boards.
The height of the fence from the surface of the ground should be at least 50 cm. Experts recommend installing a high base of the house, as this promotes greater heat retention in severe frosts. In addition to thermal insulation qualities, the fence also plays an aesthetic role.
Of course, every builder who builds a foundation on his own has a question: how to make a fence for a columnar foundation? Work on its construction can be divided into several stages. Let's consider a device for collecting from boards.
- A trench is dug between the supports of the structure, the depth of which should not be less than 20 cm.
- A layer of coarse sand or crushed stone is poured onto the bottom. It is advisable to use a mixture of these materials. After backfilling, they are moistened with water and compacted well.
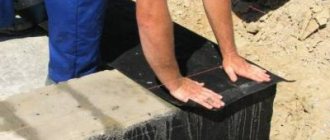
- A beam is attached to the supports, in which special grooves for the boards are pre-made. The thickness of the board varies between 2-5 cm.
- The boards are laid on a compacted layer of sand and crushed stone and inserted into grooves on a beam or log.
- All boards must be treated with special means that protect the wood from rotting.
- The lower part of the fence is covered with expanded clay or other porous material with high thermal insulation properties.
Typical methods for strengthening walls
To prevent shedding and sliding of the soil when creating pits, wall fastenings should be installed. Excavations with vertical walls more than 1-2 meters deep - the more precise value is determined depending on the type of soil - must be reinforced.
The method of fastening is specified by the work plan (work plan). Its choice depends on the size of the pit, the type of soil, the presence of groundwater, as well as the nature of the construction itself, for example, the use of heavy equipment causes vibrations that can lead to collapse.
It is recommended to strengthen the walls of the pit using equipment. If they are not available, then it is allowed to manufacture the necessary elements on site.
They must meet the following criteria:
The thickness of the boards used is not less than 4 cm for soils of natural moisture (except for sandy ones) and not less than 5 cm for soils of high humidity.- The racks must be mounted at a distance of no more than one and a half meters from each other.
- The vertical distance between the spacers should be no more than one meter.
- The top boards must extend above the top edge of the pit by 150 mm or more.
Existing strengthening techniques make it possible to create pits with vertical walls of great depth, while the likelihood of collapse is negligible.
Therefore, if you carefully comply with all the requirements imposed by regulatory documents for the construction of pits, then the structure can be made as strong and safe as possible.
Horizontal frame method
For dry soils that can hold sheer walls with a excavation depth of 2 meters, it is permissible to use a horizontal frame fastening method. In most cases, wood is used as a material.
Boards with a thickness of 50 mm or more are placed along the walls of the pit. Their task is to support the soil, preventing it from moving. The boards are fastened by surprise - a special element rests on two of them, located on opposite walls.
The spacers are mounted at a distance of one and a half meters in length and about half a meter in height from each other.
Both special frames and individual elements can be used as spacers : in the simplest version, these are round wooden blocks, slightly longer than the width of the pit, with a diameter of 12-18 mm.
Sliding tubular spacers are more effective; they are lightweight and easy to operate. Tubular frames can also be used.
The frame fastening method allows you to use a small amount of material and requires less labor compared to other methods. However, its use is limited and depends entirely on the stability of the soil on which construction work is carried out.
Horizontal solid
This fastening method is similar to the previous one, however, in this case, boards 50-60 mm thick are installed without a gap, close to each other . They are positioned horizontally - one on top of the other - and are fixed by vertically placed posts that press the spacers.
In this case, the racks are dug or driven into the bottom of the pit. Using a sledgehammer or hammer, a timber or board is driven into the ground next to the wall with several blows. The racks are installed at a distance of 2-3 meters from each other.
Then the spacers are installed. If these are adjustable tubular elements, then simply place them in the right place and adjust them to the desired length. If wooden elements are used as spacers, then they are made in length slightly larger than the width of the pit and “moved” into the desired position by hitting them with a hammer.
Horizontal solid fastening is used when the soil is dry, with a tendency to local sliding, or, if it is dense, when the excavation depth is more than three meters.
Also, continuous installation of boards is needed to strengthen walls on loose soils and soils of high humidity; in this case, the use does not depend on the depth of the pit.
The topmost board should be mounted so that its outer edge is higher than the edge of the pit. This is necessary so that the soil from the surface does not crumble inward.
Horizontal with gaps
Installation is carried out similarly to horizontal continuous fastening . The boards are installed on the soil walls one above the other with an interval of 20-40 cm, possibly more, depending on the characteristics of the soil.
When installing enclosing structures, to ensure a gap between the boards, it is necessary to use bosses or pads. They will hold the fastening elements temporarily until the spacers are installed. It is recommended to use boards 50x180 mm, and spacers with a diameter of 130 to 180 mm.
This method can significantly reduce the consumption of material for the manufacture of fasteners, however, it can only be used for a limited type of soil: dry and natural moisture with an insignificant influx of groundwater. Used when the pit depth is 3-5 meters.
Vertical solid
On loose, water-saturated, unstable soils, as well as in places with quicksand, vertical solid fastenings perform well. This method is highly reliable and allows you to reliably strengthen the walls of pits in difficult hydrogeological conditions.
To hold the boards in a vertical position, not only spacers are used, but also the cantilever pinching effect . A slot is made along each wall the size of the board thickness. The lower end of the board is placed into the created cavity.
Thus, the fence, placed along the entire perimeter of the pit, is securely fixed in the lower part. All that remains is to finally secure the boards by installing spacers.
With vertical continuous fastening, it is necessary that the walls of the pit are plumb, otherwise, even at a small angle of inclination, the spacers can jump up under the pressure of the soil.
The technology of this strengthening method implies that the pressure boards, which are directly affected by the spacers, are located horizontally. They are placed in the central and upper part of the wall. The spacers, together with horizontally located pressure bars or boards, form the frame.
Installation procedure:
- When the next section of the pit is dug, two such frames are placed at the bottom at a distance of one and a half to two meters from each other.
- The frames are temporarily secured using special guy wires.
- There is a gap between the wall of the recess and the frame; boards are placed there to form a recess. The boards must be installed simultaneously on both sides of the frame.
- Then the spacer frames are moved apart, clamping the vertical boards.
For additional reliability, spacers are sometimes installed in the lower part, but this is not necessary, since the lower edge is “pinched” by the soil.
Required distances between spacer frames:
- vertically up to one meter;
- horizontally about one and a half meters.
If the pit depth is 5 meters, then 4 spacers are used for each frame. If the depth is greater, then the number of spacers is increased to 5. The maximum excavation depth for this method is 6.5 meters, however, installing vertical boards turns out to be technically difficult even with a length of more than 4.5 meters.
Using inventory equipment
When strengthening the soil, inventory fastenings are often used . They come in different designs. A common feature is that they are all a set of collapsible sliding frames and special panels. The final structure consists of individual sections.
Inventory elements are pre-prepared devices, usually reusable. They can be either mass-produced or individually manufactured for a specific project or projects.
They are easy to use and can significantly reduce the time and labor required for installation, help save material, and make work safe.
To carry out the installation, you should perform the following sequence of actions:
- After the pit section has been dug, the frames are assembled.
- The frames are placed in a pit.
- Then all the necessary inventory panels are lowered into the excavation.
- The panels are laid in the gap between the frames and the wall on both sides to the entire depth of the pit.
- Next, the frame racks are moved apart by rotating special nuts. The frame presses the panels tightly against the walls.
- First, the procedure is carried out on the lower and upper shields, and then the spacer is activated at all intermediate levels.
- At the final stage, rigid linings are installed on the spacer frames, which help to increase the stability of the structure.
Sliding frames are made of metal, and inventory panels can be made of moisture-resistant plywood, steel, or bitumen-impregnated cardboard can be used to create them. The choice of shield type depends on the construction conditions and acceptable financial costs.
Most often, metal inventory ladder fastenings are used to strengthen excavations up to three meters deep made by earth-moving machines. There are specially designed systems that are designed to strengthen the walls of wide pits. Such devices are heavy and require the use of cranes for installation.
Typical dimensions of spacer frames are a height of about 3 m, a diameter of 6.3 cm. The panels used have a length of up to 3.2 m, a width of 60 to 100 cm. The walls of the pit must be vertical. Can be used on any, even the most difficult, soils.
Cementation
The most reliable methods of strengthening pits include cementation . This method is widely used in cases where work is carried out in densely built-up areas, where buildings are located very close and it is not possible to make a gentle descent to the bottom of the pit.
Cementation is also chosen for the reason that, unlike sheet piling reinforcement, it does not require work that causes strong vibrations and can lead to the destruction of the foundations of buildings surrounding the construction site. There are two types of cementation: dry and wet.
In the first case, a dry mixture of sand and cement is fed into a hose and moved due to the pressure of the air flow.
In this case, the speed of movement of the mixture reaches 65 m/s. In this case, water is supplied to the hose nozzle. During wet cementation, a ready-made solution is supplied to the hose, and compressed air is supplied to the nozzle , which produces splashing, which is necessary for uniform spraying.
With dry cementation, it is possible to achieve a layer thickness of 70 to 100 mm at a time. With the wet method, the maximum possible thickness is 30 mm.
The procedure for strengthening the walls of a pit using the cementation method:
- Creation of a pit, the soil is removed to a depth of one to three meters, and the walls are leveled to a state corresponding to the design documentation.
- A metal or polymer mesh is laid. It is mounted on slopes so that the concrete can remain on a vertical surface.
- The concrete mixture is sprayed layer by layer onto the mesh. It is supplied under pressure using special equipment.
- They drill inclined or horizontal holes and wells. The procedure must be done before the concrete sets.
- Reinforcement is placed in the wells, and then concrete mixture is supplied there. In this way, “anchors” are created that will help hold the soil.
- Another layer of concrete is sprayed.
Strengthening the pit using the cementation method is carried out sequentially. The procedure is repeated after deepening every 1-3 meters.
Sheet piling
This method is one of the most reliable methods of strengthening ; it is suitable for recesses of any width and shape. Wood, metal, and reinforced concrete structures of various shapes can be used as sheet piles to strengthen the pit.
>A popular material that is used to implement this method is Larsen tongue - a steel profile of a special shape.
To strengthen the walls, the sheet pile is immersed in the ground using one of three methods:
- impact driving;
- vibration method;
- pressing.
Pounding is used to strengthen pits located in the following types of soil:
- in weak sandy,
- in the dusty
- marshy,
- and also in cases where there is a high groundwater level.
Sheet piling is especially necessary if there is a danger of flooding of the pit. This method is recommended to be used when the depth of the object exceeds five meters.
Wall in the ground
The method is well suited for creating walls or foundations in both water-saturated and dry soils - loose, dusty and others.
Creating walls as a closed loop with subsequent waterproofing of the bottom allows you to reduce the number of special types of work associated with water depletion and freezing of the soil.
The absence of construction operations associated with vibration allows work to be carried out in cramped conditions, in built-up areas, in places with multiple underground communications without damaging nearby structures.
Work order:
- Strengthening the top of the soil to prevent it from collapsing during the operation of earth-moving equipment.
- Preparation of a bentonite, clay solution, which, during the creation of a pit, will create excess pressure on its walls, thereby preventing their destruction.
- Filling the top of the pit with mortar.
- Development of the soil to the required depth under the auxiliary solution, with its replenishment as necessary.
- Installation of reinforcement and filling with concrete mixture and displacement of auxiliary mortar.
- Formation of concrete walls with subsequent development of the soil remaining inside the structure.
- Arrangement of the bottom of the structure.
The “wall in the ground” device is suitable for creating objects up to 60 meters deep, while objects with a shallow depth (from 3 to 5 meters) are not economically feasible. To develop a pit, as a rule, grab equipment is used.
Difficulties may arise when using the method if the soil contains underground cavities, loose, silty areas , as well as solid inclusions that cannot be processed with excavation equipment.
Materials used for the collection device
Wooden boards can be replaced with cement-bonded particleboard. But this material has a significant disadvantage - low thermal insulation properties. Therefore, the slabs will have to be additionally insulated from the inside, covered with slag or expanded clay.
If brick or stone is used as the pick-up material. The technology of the device is similar to the technology of removing from boards, but in addition to the sand layer it is necessary to install a welded metal frame (steel wire with a diameter of 5 mm is suitable for it), which is filled with concrete. Next, stones or bricks are laid on the cement mortar.
Of course, a fence made of natural stone looks beautiful and very organic, but in this case it will be quite difficult to carry out the laying, especially for those who are faced with such a task for the first time.
In addition to boards and bricks, asbestos cement sheets can be used for lightweight structures (for example, garden houses). This construction option is quite economical. In order to protect the material from moisture, it is impregnated with drying oil and coated with weather-resistant paint.
How to insulate a fence
Wooden columnar foundations with a fence must be insulated, because if you leave an unclosed free space under the floor, not even the most powerful boiler will be able to cope with the heat loss resulting from such an illiterate approach to insulating the house. In order to increase the thermal insulation of a house, do the following:
- a frame made of a metal profile is attached to the support posts;
- sheets of expanded polystyrene or polystyrene are attached to the assembled frame;
- on the outside, the heat-insulating material can be covered with sheets of corrugated sheets; they are secured with self-tapping screws;
- when the pick-up is installed and an additional layer of thermal insulation is attached to it, the free space of the trench is completely covered with slag;
- if drainage or sewerage pipes pass between the supports, do not forget to install holes for them;
- It is also necessary to take care of ventilation. It is advisable to place the ventilation holes 20 cm from the ground level, equipped with grilles. For the winter period they are closed with plugs. The size of the windows is sufficient to maintain 10x15 cm.
Useful tips
The installation of a columnar foundation must comply with certain standards. For example, the thickness of the fence will vary depending on the material used for its construction.
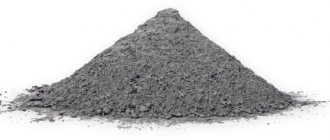
- for concrete mortar this parameter is 10 cm;
- for natural stone – 20 cm;
- for brick – 12 cm;
- for boards – 25 cm.
In addition to thermal insulation, you need to remember that any material must be reliably protected from the harmful effects of precipitation, for which it is protected with a waterproofing layer.
Experts recommend waterproofing using bitumen mastic and roofing felt. To do this, the bitumen is heated and the outer surface of the intake is treated with hot water. Roofing felt is applied to the bitumen, treated again with hot bitumen and a layer of roofing felt is laid again.
From the outside, the fence can be waterproofed with a layer of cement mortar. It is prepared by maintaining a 2:1 proportion of sand and cement. The solution is applied to the wall, leveled, sprinkled with a layer of dry cement and wait until it sets. After this, a layer of rolled waterproofing is laid on top. Next, it is trimmed with decorative material: special panels imitating masonry, corrugated sheets, decorative stone.
Diving methods and necessary equipment
There are several options for installing fencing. The choice depends on the type of soil and purpose.
Hammering (impact method)
A piledriver is a self-propelled vehicle with wheels or a caterpillar track. The equipment consists of:
- Chopper mast. This is the guide beam of the formwork. Made of steel. The sheet pile and loading equipment are attached to it.
- Winch blocks. Necessary for lifting and installing sheet piles.
- Immersion mechanism. Hammer or vibratory hammer.
The hammer is made in the form of a rod or pipe, along the guides of which the hammer moves. He strikes the tongue.
In diesel hammers, the striker is driven by combustion of fuel.
Before installation, a soil survey is carried out. On heavy rocky, rocky soils, a leader well is first drilled. Due to this, the driving is silent.
After this, a hole is drilled in the metal pile in order to hook the pile and secure it in a cap placed on the hammer.
Installation must be done carefully so as not to tear the tongue out of the lock - this cannot be corrected.
Vibrating
Vibration immersion is an installation method using a pile driver with attachments. The technology is practically no different from the impact method, with the exception of the functioning of the hinged mechanism.
With this method, the piles will have to be sheet piled using a vibratory hammer. Due to frequency vibrations, the density of the soil decreases, and the pile gradually sinks into the ground to the required depth.
Depending on the vibration frequency level, three types of vibratory hammers are produced.
Low frequency
The equipment is designed for installation of Larsen sheet piles on low-density soils. It is large in size and weight. The oscillation frequency does not exceed 9.17 Hz. Dynamic force is up to 1700 kN.
Midrange
Universal vibrator. They are convenient for installing both sheet piles and pipes. The operating frequency ranges from 10 to 30 Hz. The maximum dynamic force reaches 270 kN.
High frequency
The mechanism consists of:
- 2- or 4-shaft vibration exciter (depending on the number of electric motors);
- dynamic load absorber;
- hydraulic head.
The operating frequency exceeds 30 Hz. The equipment can function independently, but is more often used in combination with a jib crane.
Screwing or pressing
Recommended soil is clay, loam, sand and other types with low density.
The risk of damage to the pile during installation, as in the case of driving, is eliminated.
Pressing into the soil is carried out by a special mobile installation with a hydraulic unit, which firmly compresses the pile, moves down, gradually plunging it into the ground.
The main disadvantage of pressing is the large size and weight of the equipment, which significantly complicates transportation and the process of preparation for installation. The source of electricity must be very powerful.
To transport all the necessary parts, a minimum of 5-6 trucks will be required, which will affect the total cost of the project. Therefore, this method is used when building large areas.
Combined (vibration pressing)
A combination of pressing method and exposure to frequency vibrations. Well suited for soft soil. The scope and place of application are not limited.
To simplify installation, it is recommended to mark the perimeter of the pile walls.
Using washout technology
This method is used as an auxiliary method with one of the above installation methods.
The operating principle is as follows:
They are attached to the pile on the sides or in the center of the tube. Water pressure is supplied through them at a pressure of 0.5 MPa. Water, getting under the tip of the tongue, which is located below, erodes the soil. It is important to ensure that the soil is eroded evenly, otherwise the verticality of the installation will be disrupted.
Photo. 1 – hammer; 2 – cable; 3 – pressure hose; 4 – flush pipe; 5 – pile; 6 – pipe tip; 7 – discharge pipeline: 8 – pump; 9 – suction pipeline.
How to protect your pick-up more reliably
It is not difficult to make a fence for a columnar foundation with your own hands, but it is important to protect it as much as possible from the factors that will negatively affect it. In particular, we are talking about wood, since it is this material that is least resistant to dampness and precipitation.
Each board that will be used for the collection device must be carefully treated with special compounds. You should not skimp on such products, since constant dampness and moisture will create excellent conditions for the development of colonies of fungi and mold on the wood. This, in turn, will lead to the fact that the foundation of the house will not last long.
Currently, there are a huge number of wood antiseptics. It is advisable to choose one that does not contain toxic substances for humans and animals, and also does not cause metal corrosion. It is also advisable to choose a product with increased fire resistance.
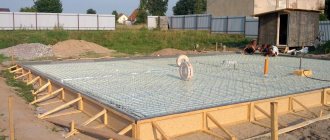
Do not forget that when installing a concrete base under the screed, it is necessary to lay a reinforcement cage. Considering that the depth of the foundation is small, when moving soil, a concrete base that is not reinforced with a metal frame may crack, which will lead to the destruction of the backfill.
When building a columnar foundation, experts recommend leaving more space under the floor. This gives a more aesthetic appearance to the building itself. When the base is very low, it visually creates the impression that the building itself is built directly on the ground, while a high base, on the contrary, looks more attractive, and the space under the floor is subject to significantly less moisture formation.
It is worth noting that preliminary calculations for the base of pillars should include calculations for the construction and installation of the fence. That is, when you start the actual work, you should already know exactly what material you will make it from, how to waterproof it and how to insulate it. If you decide to make it from wood, be sure to think about the tools that will be needed to process the wood.
Application of piles and boards
Sheet piles are used in various ways: fencing hydrological objects, preventing water from entering the construction area and ensuring the safety of structures and buildings.
Depending on the complexity of the work, a suitable material for tongue and groove is selected: wood, metal or reinforced concrete.
In pits where there is a possibility of groundwater penetration, various types of piles are installed. Previously, builders used only wooden fences, but modern installation technologies allow metal and concrete fences to securely hold the ground.
Wooden piles
Wood and steel products began to be used earlier than other materials. Externally, the structure resembles a wooden palisade made of timber with tongue and groove and logs. Sometimes builders use thick planks in a prefabricated structure.
Installation of wooden fencing is done by driving boards into the ground. The use of sheet piling structures made of wood places a large economic burden on the construction company.
Wooden structures after work are almost impossible to remove from the ground without damaging the surface.
Reuse of such a product is precluded by reduced safety after use.
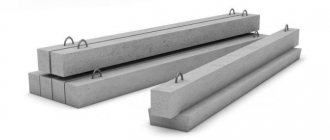
Reinforced concrete piles
Piles made of reinforced concrete structures are installed using locks that seal the entire structure. Trapezoidal tongues and grooves are components of the lock elements. During installation work, piles are installed one into the other.
Installation of piles is carried out using driving equipment with increased technical power. Piles made of reinforced concrete material are not removed for re-work, since they serve as the outer shell of the foundation.
Such piles are often used in the construction of bridges and dams. Transportation is aggravated by the appearance of cracks on the surface of the product. The length of such products does not exceed sixteen meters.
Steel sheet pile supports
Metal material is used repeatedly, and, moreover, it is easy to transport and install at a new facility. Steel sheet pile supports are used in modern construction for a number of reasons:
Retraction of sheet piling
Our construction company is engaged in the installation of sheet piling walls for any purpose in the Moscow region and in other regions of the Russian Federation.
The cheapest option for installing a sheet piling wall is to use boards as part of a sheet piling fence.
In this case, the fence is thin walls between the sheet piling posts, enclosing and strengthening the walls of the pit, and also protecting it from moisture, snow, etc.
For what purposes is this technology used?
During the installation of sheet piling, random shedding of soil occurs; this is additionally influenced by such factors as: unfavorable weather conditions, heterogeneous soil, inclusions of construction waste and freezing/thawing of soil in winter. This is true for all, without exception, earthworks. To prevent such consequences, a fence made of boards or sheets, also called a false plinth, is used, placed between the supporting elements. In addition to creating optimal conditions for the construction of a zero-cycle, this technology also has aesthetic significance in the perception of sheet piling as a whole.
What are dowels needed for?
Sheet piling is a continuous wall made of sheet piles connected by tongue-and-groove locks. Sheet piling walls are used:
- to strengthen the walls of pits: they prevent the collapse of the soil, the penetration of groundwater into the site, and also localize the construction zone and stop the movement of soil around the pit;
- for strengthening unstable slopes, railway embankments, highways. Prevents slope destruction, landslides, etc.;
- to strengthen coastlines, prevent sloughing and erosion;
- for installation of various hydraulic structures: dams, bridges, dams, berths;
- for fencing underground communications;
- for creating collectors, fencing landfills, etc.
For any questions call
Types of sheet piling walls
Sheet piling fences differ in the material used to make the sheet piling:
- wooden;
- reinforced concrete;
- PVC and composite;
- metal.
Metal ones, in turn, are divided into profile (Larsen tongues) and tubular. Tubular – high strength with increased stability, used in particularly difficult conditions. In most cases, Larsen tongues are used, most often trough-shaped.
Wooden tongues are almost never used today: they are cheap, but disposable. They deteriorate in the ground and cannot be removed without damage. Reinforced concrete has high strength. Theoretically, they can be dismantled, but this is never done because the process of removing them from the ground is too difficult and expensive. Reinforced concrete walls are left at the immersion site and included in the foundation design.
Plastic and composite sheet piles can be reused many times, but they are most often also left in the ground: due to their aesthetic appearance and resistance to corrosion, they are used as an integral part of the design when strengthening embankments. In terms of strength characteristics, they are inferior to metal piles.
Metal tongue and groove piles are used almost everywhere. They successfully combine high strength, stability, relatively low weight and dimensions. Up to 20 cycles are used, providing customers with a number of savings opportunities:
- you can rent sheet piles;
- buy used ones, their price is lower;
- sell after use. Our company buys back used sheet pile and returns up to 80 percent of the cost to the customer.
Picking up Larsen is also a way to save money, more on that below.
Installation technology
There are practically no differences between vibration and impact immersion technologies. The only difference is the features of the functioning of the attachments. Slinging and sequencing are absolutely identical.
The fencing is installed using the following technology :
- material is delivered to the site;
- distributes the sheet pile of the construction site;
- the contour is marked , a pile driving machine is used;
- slinging and moving the sheet pile to the installation site is carried out
- the head of the loader is mounted on the tongue , the fence is placed in place of driving;
- The tongue is vertically aligned , guiding immersion is carried out;
- the sling is dismantled, the sheet pile is immersed to the depth specified in the project.
Each sheet pile is immersed in this way. The work continues until a closed fence around the perimeter of the pit is obtained.
When all the sheet piles are buried in the ground, you can start digging a pit without fear of its walls collapsing Source speccypro.ru
What is a pick-up from boards for a pit?
On water-saturated unstable soils, sheet piles are installed as a continuous wall. The profile piles are rotated 180 degrees relative to each other and connected with locks. In plan, the structure resembles a sinusoid - in this form, the stability of the wall is maximum. The pipe piles are not unfolded, but they are also installed closely.
On dense soil, in which stability is higher and the pressure on the wall is correspondingly lower, sheet piles can be placed not closely, but at intervals. The gaps are covered with boards, steel sheets, etc. This is the rebate. It allows you to save money (fewer tongues will be needed). Subsequently, the backfill is used as formwork when pouring the foundation.
If the soil is dense but saturated with water, this measure is not enough: the intake is permeable. In this case, water reduction measures are necessary, that is, additional costs. Calculation will show which will be more economical in your case.
We not only do sheet piling, but also design fencing. If necessary, we conduct soil tests. If you contact us, we will together with you choose the option that is suitable in terms of hydrogeological conditions and the most economical in cost.
Regulatory requirements for arrangement
Strengthening walls when creating pits is regulated by building codes and regulations. Thus, SP 381.1325800.2018 regulates the rules for the calculation and design of retaining structures, which include devices for strengthening pits.
SNiP 12-04-2002 defines general safety requirements for excavation work, in particular, it establishes the required steepness of slopes and the maximum permissible depth of excavations, which
do not require the installation of a strengthening system:
- one meter is the maximum permissible pit depth for sandy soils;
- 1.25 m for sandy loam;
- one and a half meters for clays and loams;
- up to two meters for high density soils.
For pits with a depth of less than three meters, the strengthening system must be made in accordance with the standard design. At greater depths and in difficult hydrogeological conditions, strengthening is done in accordance with an individual project. The condition of fastenings, slopes, and walls should be checked regularly.
Arrangement of slopes is also one of the methods that helps prevent the walls of the pit from collapsing . However, this requires a large amount of excavation work, which can significantly increase construction costs.
In places where there are many buildings and structures, for example, in cities, it is impossible to make slopes and therefore the walls of the pit are made vertical, and to prevent collapse, various methods of strengthening them are used.
Types of pickups
The pick-ups differ in the material they are made of. The cheapest and simplest option is a pit with a fence made of boards. For installation we use boards 5 centimeters thick. Installation example (I-beams as load-bearing elements):
- We lay the boards in layers of 0.5-1 m, starting from the bottom and moving up, along the entire height of the tongue.
- To install the I-beams behind the shelves, we make a groove of the same height as the width of the board (10 cm). The depth of the groove is different: 6 cm to one edge, 10 to the other.
- We insert the board into the groove, place it behind the I-beam shelves, and center it.
If pipes are used as load-bearing elements:
- We weld a corner to the pipe, the length is equal to the thickness of the soil layer, 5 or 10 cm. The weld seam is 5 millimeters.
- We place the boards to be installed at one end by a corner, and fasten the other with the same corner 8 cm long (welded to the next pipe).
An option designed for higher loads is a device for collecting from pipes or steel sheets.
What does the cost of a collection device consist of?
The cost of collection depends on the material of manufacture, volume, urgency and working conditions, on the need for additional operations (water reduction, etc.)
Arctic Hydro Stroy carries out fencing installation work (including turnkey) in all regions of Russia. Our services:
- hydrogeological assessment of soil;
- testing of soils and piles;
- wall design;
- drawing up estimates and technological maps;
- transportation of material and equipment;
- leader drilling;
- immersion of sheet piles;
- collection device;
- strengthening of finished walls (reinforced belt, spacer systems, etc.);
- dismantling and removal of sheet piles after completion of work.
From us you can buy or rent sheet piles (new and used), as well as rent piling equipment.
At your service:
- high-quality and maneuverable equipment;
- large assortment of tongues;
- skilled workers;
- SRO approval;
- fast deadlines;
- low prices;
- preparation of all necessary documents;
- work guarantee.
Calculations and cost of fencing
Calculations are required to determine the configuration, size of the wall and additional reinforcement. This will achieve the necessary strength and stability of the entire structure. In the calculation process, indicators of the overturning effect, the forces of the retaining walls, the coefficient of performance of the structure in the soil and the reliability of the wall are taken into account. The latter may have different differences depending on the type of fence and soil characteristics.
When determining the strength, the resistance of a meter of wall to loads, the resistance of the strapping, the standard resistance and the coefficient of operation of the structure in the ground are taken into account. The last indicator is the tensile strength of the locks, which takes into account horizontal loads, radial force, operating conditions coefficient and the standard tensile strength of the locks (varies depending on the type of steel).