© StroyPartner LLC
2009-2018
Address: 119071, Moscow, 2nd Donskoy proezd, 4 building 1
One of the main stages in the construction of a floor made of reinforced concrete slabs is the sealing of rustications - the seams between them and holes with mounting loops (if any). It is better to do this immediately after laying the products, so that the narrow cracks do not become clogged with construction debris, which is problematic to remove from them. The technology of work directly depends on the overall dimensions of the seam.
Work instructions
Floor panel installation diagram.
- Removing everything that remains of the old cement screed and plaster. To do this, use a drill, chisel, or spatula. Clean off old filler.
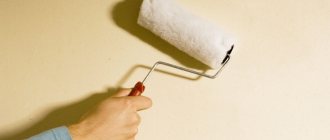
- Clean the surface from dust. The deep penetration primer is diluted as written on the label. The width of the hole to be sealed should correspond to the width of the brush. That is, it should go inside easily.
- According to the instructions written on the package, we dilute the dry construction mixture. This is easy to do with a mixer.
- All cracks are filled with the solution you prepared. In deep rust, apply several layers of solution. Allow each new layer to dry completely. If the seam is wide enough, use other materials to pre-fill it.
- After the solution has dried, coat the entire rust with PVA glue and glue the sickle onto it. Its width should be 2 cm larger than the hole itself. Apply putty to the serpyanka, followed by sanding with fine sandpaper.
Stone buildings in Rust: How to build directly in stone?
People who are not used to getting calluses have the following question about the game Rust - “how to build straight into stone.” That is, how to improve buildings to the level of stone immediately during construction, and not suffer with a straw frame. Unfortunately, if you play on a server from the Official or Community sections, you won’t have this option in principle. Perhaps in the future the developers will somehow solve this issue by adding new features to the game, but at this stage the classic servers will not allow you to do this. There is a solution: find a server where the “bgrade” plugin is installed.
You're unlikely to find it by its name, but it's worth a try. Basically, such plugins are not indicated in the name of the servers, because they are not of primary importance for most players. Therefore, go to the “Mods” tab and visit each server. Check to see if the /up or /bgrade commands work for them. Enter these words in the chat the same way as they are written, also use slashes, but do not include quotation marks.
If after entering a bunch of English words appear in front of you, then the plugin is there, that’s good, and then we’ll discuss what to do. If all you receive in response is the message “unknown command”, then continue searching.
Rust. How to build directly in stone using plugins?
So, if you were able to discover the plugin and received a message about how to use it, then, with at least a little knowledge of the English language, you should figure out the management principles yourself. Sometimes their control panels are even translated into Russian. The bottom line is that if you come across the bgrade plugin, then use the following commands.
"/bgrade". Example command: "/bgrade 2". By entering it into the chat, you will automatically upgrade everything that you build with your hands to the level of stone. For the process to proceed, the corresponding resource must be available in the inventory. As you understand, 1 is wood, 2 is stone, 3 is metal, 4 is armor. You can also set the period for which the plugin is activated. Type "/bgrade t". Changes are made on an ongoing basis. That is, in the future, whenever activated, the plugin will work for a specified period of time. You can change it by setting a new time after entering the appropriate command.
If you come across up, then it works on a similar principle. Enter “/up WITHOUT SPACE” in the chat and thereby enable automatic improvement. The walls and all other elements of the building will be created immediately as stone, iron or armored, depending on the number you specify.
And that’s all, Dear Friends. We hope that the guide “Stone buildings in Rust: How to build directly in stone?” was useful for you. Look for more guides for all games on our website! Good luck with your raids, and enjoy your game in RUST!
Installation of floor slabs on the foundation and walls
Installation of floor slabs is carried out using a crane, which is logical in itself.
The surfaces on which floor slabs are laid must be as smooth as possible. The slabs can be laid either on a “dry” or on a cement mixture. It is better to use cement when laying the slabs, which will somewhat limit the degree of their freedom and make the floor slabs a real bond between the load-bearing walls. When laying cement, it is necessary to lay a rod (rod) that will go from one slab to another. Firstly, the rod is needed to put all the slabs on the same level; it will prevent two adjacent slabs from moving vertically. Secondly, due to it, all the cement mixture will not be squeezed out from under the slab, which will ultimately create reliable adhesion between the wall and the slab.
The slabs can be moved with a crowbar for about 10 more minutes, which will allow you to accurately align them in place if this could not be done with a crane. Naturally, the slabs should be mounted as perpendicularly and parallel to the load-bearing walls as possible. With an overlap of at least 120 mm onto a load-bearing wall.
Also note that the protruding flange of the slab, if there is one, should be at the bottom, and above the flange there should be some kind of thinning that creates a gap towards the top. It is into this gap that cement will be poured to connect two adjacent slabs. More on this further...
Installation of rustics and stretching of arches
One of the most common types of finishing of plinths and facades is to break them up into separate stones of different shapes and sizes. Rusts are ribbons or seams that separate stone from stone; they are made horizontal and vertical, of various shapes, widths and depths. The front surface of stones can be smooth or textured, from solutions of different colors and shades on one stone or individual shades on stones located in different places or in rows.
Before making rustications, the surface of the walls or plinth is marked with stones using a beating cord or ruler. Rusts are stuffed with steel rulers, cut with a saw or grinder, and decorated using inset smooth wooden slats. Complex rustications are drawn out using templates.
A steel ruler (Fig. 16) is used to fill in rustications over the fresh, uncured layer of covering. A steel ruler 5–15 mm thick is applied to the marked line and, with a hammer blow, it is deepened 5–10 mm into the plaster. Then the ruler is carefully removed so as not to tear the edges of the rustications.
rice. 16. Installation of rustications
Thin rustications are sawed through with a grinder or saw along the hardened plaster covering. Sawing is carried out by three people: one works with the tool, and two support the rule according to which the protective casing of the disk moves. The width of the rust may vary. Usually two cuts are made, and the solution between them is scraped out with an old chisel. Rough rusts are corrected and rubbed with trowels.
With the help of slats, rustications of considerable width and simple profile are created. Planed and lubricated wooden slats of trapezoidal cross-section are rubbed or driven into the fragile plaster. Depending on the required depth of rust, the slats are installed in the ground or in the cover. After the solution has set, the slats are removed and damaged areas and edges are straightened.
Rusts, consisting of architectural fragments, are pulled out. The surface of the hardened soil is divided into stones, rules are hung and, at the same time as the covering, the rustics are pulled out. If the rusts are deep, the plaster soil underneath them is removed. Depending on the size of the stones and the shape of the rustications, two or three people pull them out. Two workers apply the coating solution, the third holds it out with a template. First, horizontal stripes of rust are pulled out, then vertical ones. After pulling out the horizontal and vertical rustications, they are rubbed with a planed wooden strip, which is moved along the previously extended rustications.
At the same time as rustications, stones are often pulled out, for which a template of the desired shape is made. Having completed the first row of rustications along with stones, the rules are transferred to the next row of stones. In this case, one end of the template moves along the previously elongated rustication. You can pull out stones through a row, and pull out the middle row without rules, only with a profile board, the ends of which are moved along the previously extended rustications. The vertical rustications are pulled out using a second template. In the process of this work, care must be taken not to throw mortar in the horizontal rustications in the places for passing the template when pulling out the vertical rustications.
Pulling out the arches
Curvilinear rods on arches are pulled out using templates mounted on slats.
On semicircular arches, the rods are pulled from one center (Fig. 17). The board is attached between the slopes and the center is found. A pin is driven into the center and, using twine or slats, the junction of the curved part and the straight part is determined. Straight rods are not brought to the curved rod by half the length of the sled and then cut with a ruler.
rice. 17. Extending a semicircular and pointed arch with plaster
On pointed arches, the rods are pulled from two centers, which, depending on the rise of the arch, can be located closer to the middle of the arch or further from it. Having strengthened the board and determined the centers, drive pins in the centers and extend curved arcs: the first is slightly longer, beyond the vertical axis, and the excess is cut off, the second is as close to the first as possible. The under-drawn part is cut with a curved ruler or the same template - a grater. The straight parts of the arch are pulled out as usual.
Complex arches are drawn from several centers. The more complex the arch, the more centers that have to be placed both on the reinforced board and on the walls. First, the first two centers are found, from which the lower sides of the arch (arc) are pulled out, then other centers are used to pull out the upper arches. Then they first pull out one of the upper arcs (drawing it by the axis and cutting off the excess), after which the second arc, as close as possible to the first, is cut off the missing part. Then the remaining curved and straight parts of the arch are pulled out.
What tools are needed to seal joints?
Before sealing the seams on the ceiling between concrete slabs, you need to prepare the necessary tools:
- Chisel and hammer. Used to widen the seam and remove all remnants of concrete and previous plaster from it. You can take a hammer drill with a spatula for this, but this requires a certain skill, otherwise it may turn out sloppy. Do not use a regular spatula for this job; most likely the blade will break or bend.
- A brush with metal bristles, which is convenient for removing small debris from crevices.
- An ordinary thin brush for final cleaning of the seam and subsequent application of primer.
- Spray bottle with a thin spout. Needed for wide seams and cracks where it will be necessary to use polyurethane foam. Water is poured deep into the seam so that the foam adheres better to the base.
- Foam gun. An additional tube is included with the foam container, but if you have to process a large number of seams, it is better to buy a construction gun. It can be cleaned, and foam in professional cans costs more.
- Two metal spatulas - large and small. The large one is for basic filling of cracks and the small one is for applying the mixture to the tool and finishing small parts.
- Container or bucket for preparing the mixture.
- Coupled and fine-grained sandpaper for sanding the putty mixture before finishing.
Sequence of sealing operations
Primary and secondary filling of any floor joints is carried out according to the general principle :
cleaning of debris and dust, washing and drying the surface between the slabs;- priming (2 layers) and antibacterial treatment;
- purchasing quality materials and tools;
- preparation and dilution of solutions;
- performing work according to a pre-developed plan.
Preparation for the process
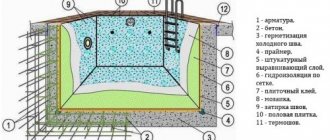
Monolithic floor slab with cold joint.
Rusts are seams between ceiling slabs. They are very common in houses built in the last century. Sealing rust is mandatory if you want to give the ceiling in your room a decent look. An untidy seam on the ceiling will spoil the entire appearance of the room.
It is impossible to repair the ceiling well if you do not properly repair the rusts between the ceiling slabs. During operation, the house may undergo shrinkage, which often leads to differences and displacement of slabs, and the formation of rust. To properly repair and seal them, you will need the following tools:
- hammer;
- chisel;
- perforator;
- narrow spatula;
- metal brush.
To carry out work on sealing these elements between the ceiling slabs, you must purchase the necessary materials from a hardware store:
- polyurethane foam;
- primer;
- serpyanka;
- skin;
- plaster;
- gloves, safety glasses.
The work ahead of you will be carried out on the ceiling. If you are not going to change the floor, then cover it with paper, oilcloth or cardboard.
- Do the preparatory work. Remove old plaster or whitewash. Take a good look at the seams that you have to seal, determine what work needs to be done to ensure that the seal between the slabs is of high quality.
- After inspecting the seams, you begin to prepare them for work. To ensure a high-quality seal, you need to expand them. This is done using the tools that you have prepared.
- Small seams between the slabs are simply picked out with a spatula or cut with a chisel. Don’t be afraid to make them wider. Level their walls; to do this, use a hammer drill by inserting a spatula-shaped attachment into it.
The configuration between the floor slabs should resemble a cone; this will make the seal stick much better.
Use a wire brush to clean the seams between the slabs until no more debris comes out.
Preparations for the work of sealing the rusts have been completed.
Materials and tools
For this we need:
- – Gypsum plaster, preferably Rotband,
- – Primer, several spatulas,
- - Brush,
- – A mixer for mixing the mortar, although for small volumes of work required, you can mix the plaster manually.
Before starting to seal the rust, it is necessary to wash off the whitewash and thoroughly clean the ceiling seams for good adhesion of the material to the concrete base and, accordingly, long service life. We are talking about whitewashed ceilings because, as a rule, the painted bases have already been freed from rust during the preparatory work for painting the ceiling with acrylic paint.
Technology of work execution
- Floor seams are usually sealed simultaneously with ceiling repairs, so it is more convenient to carry out the preparatory work as a complex. The old coating is removed from the ceiling: whitewash or water-based paint is moistened with water from a spray bottle, left for 10-15 minutes and removed with a wide spatula until the plaster is applied. If the ceiling is covered with a thick layer of putty, it is cleaned only in those places where it has poor adhesion. If there are traces of rust on the ceiling, they are removed with special compounds. The seams between the slabs are opened: the old putty and plaster that are poorly secured in the joints are removed. If necessary, you can use a hammer drill. After processing, the seam should have a U-shaped or slightly expanded inward shape so that the putty holds better. Remove dust from the resulting seam by sweeping it away with a brush and wiping it with a damp sponge.
- Inspect the resulting seam. If its width is more than 3 cm and its depth is small, it is sealed with polyurethane foam. To do this, lightly moisten the seam with clean water and apply foam from a balloon. Wait for it to expand and begin to harden, after which the excess is removed, cutting it off with a knife so that a triangular-shaped depression with a maximum depth of 0.5 cm is formed at the seam site. If the seam is deep and not wide, it must be sealed with polystyrene foam, polyethylene foam or any other elastic material. The seam is pre-treated with a deep penetration primer and dried well. The seal is secured using a moisture-resistant sealant; the surface of the concrete must be dry. The sealant is placed deep into the slab, and the seam on the outside is sealed with NTs grade cement mortar so that a small depression remains at the joint. The cement mortar is dried.
- Putty for rust with residual elasticity, for example, latex, is applied to the prepared recess with hardened mounting foam or cement mortar. Level it flush with the surface of the slab. It is convenient to put putty into the seam using two spatulas: apply a sufficient amount of putty to the wide one, and put it into the seam with the narrow one, compacting and smoothing it inside the seam. After applying the putty to part of the seam, smooth it out with a wide spatula, removing excess.
- The solution is dried for 24 hours and the joints are puttyed. Apply a layer of preliminary putty to the seam and adjacent surface of the floor slabs and glue sickle or paint mesh over it, pressing it into the layer of putty. Iron with a spatula along the direction of the seam. The width of the serpyanka or mesh must be at least 20 cm. Dry the putty and, after drying, level it with sandpaper. Apply another layer of preliminary putty with a finer grain to the entire ceiling, leveling it with a wide spatula. Dry and sandpaper. After this, a layer of smooth finishing putty is applied, dried, smoothed with fine sandpaper and painted.
- If the floor slabs have a height difference of more than 1 cm, the ceiling will have to be plastered after sealing the seams. Plastering is done with a gypsum-based composition over a reinforcing painting mesh. The ceiling is treated with a special “concrete-contact” primer containing solid particles - it creates a rough layer on the surface of the slabs and facilitates the adhesion of the solution. The mesh is attached to a layer of plaster, carefully smoothing it out. After the plaster has completely dried for 2-3 days, you can begin to putty.
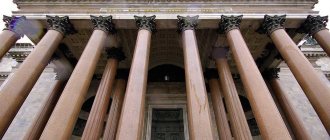
Greetings from Ancient Rome – rusticated facades
We see rustications on the facade everywhere: on architectural monuments in the classicist style, architects who built in the Art Nouveau style loved rustication on the walls, administrative buildings in the Stalinist Empire style, modern mansions - rustication of walls is one of the most common techniques of architects.
A little history
Only experts know that rustication (from the Latin rus - village, rough, uncouth) was first used by the Romans for practical purposes, as protection from noise and waterlogging of the base. True, then the term “rust” meant facing stone.
The next surge of interest in decorating facades with cut stone occurred during the Renaissance. The beautifully preserved palazzos of Florence show facades clad in cut stone with rustications of various shapes.
Italian architects, invited by Ivan III, brought rustication to Moscow: the facade of the Palace of Facets, built in 1486–1491 by Marco Ruffo and Antonio Solari, is decorated with cut stone in the shape of diamond rustication, this is the first building with decoration of this kind in Russia.
In the era of classical architecture, in France, rustication began to be done on plaster, which made this type of finishing much cheaper, easier to perform and more popular.
In modern construction, the term “rust” refers to a stone or surface (quadra) and the recess between the quadra.
Classics of the genre - how rustication was done on plaster
What is rustication? Depending on the type of recesses, different devices are used for filling plaster. What is common to all techniques is that the condition of the fresh plaster should be such that it holds its shape, but at the same time, it is very difficult to work with a solution that has set too tightly.
The easiest way to add rustication is to use a metal ruler with a thickness of 5 to 15 mm: a pattern is drawn on a freshly plastered facade, then the ruler is driven into the mortar using the drawing with a hammer. If the work is done well, the result is a simple but effective drawing.
The second method is suitable for performing French rustication - horizontal stripes: long wooden slats, according to preliminary markings, are driven into the fresh coating. Remove the slats after the solution has dried, before applying the finishing coat.
You can cut rustication with a saw using the rule; the method is used to create thin, shallow relief.
The method of drawing out plaster is more complicated; here you will need the help of one or two people: one prepares the solution, the second performs the rustication: a pattern is marked on the hardened primer, then the template is fixed, and during the application of the final coating the template is removed.
The profile of the template is made of wood or metal; based on the type of rustication, they are distinguished:
- Greek - alternating large and small stones with a surface imitating polished stone.
- Rectangular has recesses between rectangular squares; it is used when the thickness of the plaster layer is small.
- The beveled one has a triangle-shaped cross-section and requires a thick layer of plaster.
- Rounded - does not have clear outer corners, since the surface of the square is rounded on all sides, and the recess between the squares is triangular in shape.
- Grooved - has the opposite shape to a rounded one - the rustication is semicircular or oval, square with sharp edges.
- Figured rustication is the most complex, the profile resembles an architectural break, it is performed on the thickest layer of plaster using a template.
The surface area highlighted with rustications - recesses (quads) can also be made in various shapes:
- Under a torn stone.
- Prism.
- Pyramid (diamond).
- Rectangular grooved.
Rustovka today
Technology has long moved forward, but the love for rustication remains. True, instead of ashlar masonry, rustics are now done in other ways:
- Cladding with natural stone.
- Facing with ready-made elements made of polystyrene foam or polyurethane foam.
- By cutting, on plaster according to special templates.
Stone cladding
A rusticated facade made of natural stone, as a very expensive type of finishing, is rarely performed in unique buildings. How to do it:
- A metal mesh is attached to the surface of the wall.
- A wire is attached to the back of each plate.
- The wall and the back surface of the slab are coated with special glue using a notched trowel.
- The wire is screwed to the mesh.
In addition, there are special fasteners for slabs; in this case, the slab is hung on fasteners and additionally fixed with glue.
Cladding made of synthetic materials
There are many varieties of facing stones made of polystyrene foam or polyurethane foam on the construction market. Using these elements, you can quickly and easily give an unremarkable box the look of a classic mansion.
Facade decor is lightweight, durable, and weather-resistant. Attached with glue or using a special rustication profile.
Carrying out rustication on plaster
This method has not undergone any changes since the 30s–50s of the last century, when the Stalinist Empire style was in fashion.
Summary
As many years ago, facade rustication is in demand both in the architecture of public buildings and for decorating the facades of individual housing. Traditional methods of rustication - cladding with natural stone or stretching a profile over wet plaster - are very expensive and labor-intensive ways to decorate a facade.
Modern technologies make it possible to decorate the facade of a house with applied stucco molding made of polystyrene foam or polyurethane foam without much expense or effort.
Reasons for water penetration through cracks and how to deal with them
If, after inspecting the roofing material, no defects were identified, they proceed to repair work. Otherwise, the roofing material is first repaired and partially replaced. Most often, roofing felt, which is mainly used when covering high-rise buildings with a soft flat roof, becomes unusable.
This material is quite affordable, sold in rolls and provides excellent protection from water and other environmental influences. It is excellent for waterproofing floors.
Before finishing the roof with roofing felt, rolls are unrolled on the roof surface; if necessary, it is additionally heated with a special burner to ensure better adhesion to the surface.
If you reliably protect your roof from moisture, you will never see water stains on your ceilings, and the design of the room will not be spoiled.
What are rusts
From time immemorial, natural stone or its imitation has been used in the decoration of building facades, the visible part of which is a smooth or faceted surface roughly processed by chipping. If such cladding is not streamlined, the result will be a plane with a monotonous texture that does not have any artistic appeal. Therefore, the joints of stone finishing elements with each other are made in the form of a dividing strip of a fixed width - rustication. Sometimes such a stone itself, finished with a strip of a fixed profile along the perimeter of the front part, is called rustication.
Sealing: preparation of seams
First of all, it is necessary to clean the seams between the floor slabs; to do this, they are cleaned with a steel brush or cut with chisels.
Before you start sealing the seam, you need to clear it with a steel brush or make notches with a chisel.
After this, the gap between the slabs must be filled with tow and sealed. At the same time, after compaction, the tow should not reach 15-20 cm to the front surface. If, for example, the ceiling was previously painted with oil paint, chalk or lime whitewash, then it is necessary to clean it or wash it down to pure concrete. If the seams between the floor slabs were previously sealed with any material, it should also be removed if it does not hold firmly, peels or peels off. If the old seal is held tightly in some places, there is no need to knock it down; let the seam seal remain in its place. Then you need to level the surface of the slabs on both sides of the seams, remove or knock down protrusions and other irregularities.
Features of filling seams
Sealing seams requires preparation and selection of the necessary equipment. To carry out the procedure you need:
- sanding paper, metal brush
- spatulas of different widths and lengths;
- knife;
- drill with impact function;
- spray;
- deep penetration primer mixture;
- cement (for filling large and wide rusts);
- insulation, waterproofing (if necessary);
- mesh for surface reinforcement;
- sealant;
- putty mixture (starting and finishing).
Sealing of seams is carried out in a robe, safety glasses and gloves. For this you will need a stepladder. The specifics of the procedure depend on the size of the rust:
| Seam type | Filling Features |
| Joint of shallow depth more than 3 cm wide | Preparation of the joint involves the use of polyurethane foam. When it hardens, excess fragments are cut off and a groove up to 5 mm deep is formed. After this, elastic putty is applied the seam Excess material is immediately removed, and the surface of the rust is smoothed |
| Large depth, width more than 3 cm | Such joints are pre-clogged with insulation (foamed polyethylene or polyurethane foam). To secure it, use a sealant that is resistant to moisture. The sealing is carried out using cement, but a groove of about 5 mm is left in the seam. As soon as the solution hardens, apply latex putty on top of it and smooth it flush with the slab |
| Deep narrow rustication | A fragment of foamed polyethylene must be treated with sealant and pushed into the joint. After laying the insulation, the seam is sealed with cement, maintaining a 5 mm groove. After the solution hardens, it is filled with latex putty. |
After the joints between the floor are sealed, you can begin finishing.
Sealing the ceiling seam from the bottom side
Inter-tile seams - rustications are filled with concrete during installation, then the ceiling is primed, puttyed and painted, unless other finishing is provided.
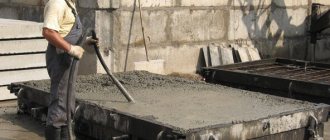
Sequence of sealing rusts
Before concreting, the seams are thoroughly cleaned of dust and mortar residues with a wire brush ; for better adhesion of the mortar to the slab, the side surfaces can be primed.
- The prepared fresh concrete solution is unloaded into a container and delivered to the work site;
- If the width of the rustication is small, the filling is carried out at one time, if the width of the area is large - in several layers, but no more than after 2...3 hours;
- A concreting area of small width is bayoneted; for a large one, it is compacted with a vibrator;
- For the first week, the surface of the monolith is moistened with water daily;
- After 28 days, the formwork is removed.
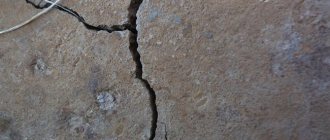
Uneven shrinkage of the house
It's unpleasant when cracks appear on the ceiling. This often happens due to::
- Uneven settlement of the building;
- Incorrectly selected brand of concrete;
- Poor quality concrete.
Let us dwell on the causes of uneven precipitation. It may occur in the following cases:
- Structural defects - incorrectly designed foundation;
- Foundation construction without taking into account geology, soil freezing depth and groundwater depth;
- Poorly performed work on the construction of the foundation and masonry of walls;
- Poor quality building materials.
To understand the reason for the appearance of cracks, it is sometimes necessary to order a construction examination.
Purpose of rustics on the ceiling
When the interfloor floors of a building are prefabricated, the presence of slab joints is a natural factor. Once upon a time, the perfection of these connections was not given much importance - strength and tightness were more important. Therefore, the mounted floor slabs were often not located strictly in the same plane - their installation levels could differ by several centimeters. In addition, the range of finishing leveling materials was not rich - cement-sand, cement-lime mortars and chalk-based adhesive putty. The elasticity of these materials was low, so soon after finishing the seams, cracks appeared even between slabs mounted in the same plane.
The ceiling rustication helped solve the problem - a straight demarcation groove of a fixed section, which was made along the seam between the slabs in the joint filling material. Such rustications on the ceiling, with their strict geometry, masked differences in the level of installation of the slabs, the longitudinal cracks between which also became less noticeable, as they ran along the bottom of the rustication furrow.