Strong supports are the key to the reliability and durability of any structure. To understand how to concrete pillars for a canopy, you need to calculate the likely loads and decide on the construction material. Strict compliance with the requirements will ensure long-term and trouble-free operation.
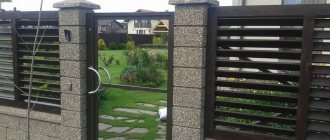
Sectional view of a concrete pillar Source oprofnastile.ru
Standard installation technology
The strength of the entire structure directly depends on how correctly the support posts are secured. Typically, builders have to choose from the following options:
- Driving in. Relevant only for particularly dense soils. Its variation should be considered the installation of screw piles.
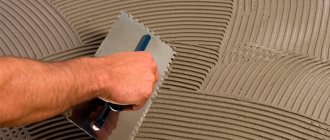
- Concreting. This is the most reliable way to install strong supports for your canopy. This technology does not require the use of any complex equipment, because mixing the solution and other work can be done with your own hands.
- Fixation using reinforcing bars. The technology is used in areas that were previously subjected to concreting or asphalting, and whose opening is extremely undesirable. First, pins are driven into the ground to a depth of 90 cm, to which metal poles for the canopy are attached by welding.
Work options
Let's figure out how to properly concrete pillars. The examples below are easy to implement and durable. The main thing is to follow technology and use only high-quality materials.
We will not figure out how to install pillars without concreting, since manually hammering the supports into the ground is very labor-intensive. This option for carrying out work is best done using special equipment.
The supports are driven in using special pneumatic or hydraulic equipment.
Metal supports and their concreting
The technology for installing poles for a canopy outlined below allows you to complete it within 24 hours.
To achieve this, the following activities are carried out:
- Preliminary site clearance.
- Marking the location of future supports: driving in auxiliary stakes in the corners, pulling a rope (thread) between the corners, driving in intermediate equidistant pegs along the string in increments of up to one and a half meters.
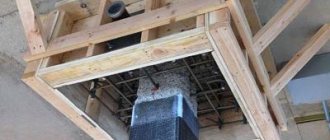
- In marked places, holes of calculated depth are dug and filled with a mixture of sand and crushed stone. During the filling process, the mixture is compacted with a tamper.
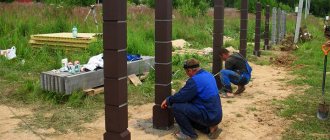
- The finished metal supports are installed one by one in the holes and filled with a concrete raster. At the same time, they strictly monitor the adjustment of the verticality of the racks using a plumb line or a building level.
Sergey Yurievich
Construction of houses, extensions, terraces and verandas.
Ask a Question
Within 7 days after concreting metal piles, they must be ensured complete rest - do not pump or test for strength.
Trusses as frame elements
Trusses serve as an additional connecting part when arranging a canopy. They give the frame greater stability and strength (read: “How to make a frame from a profile pipe for a house - theory and practice”). You should draw a special drawing for them. According to the standards, calculations are required for pipe trusses with an inclination angle of more than 6 degrees. But experts believe that you need to start from 8 degrees.
The fact is that in winter, fallen snow will accumulate on the roof surface at a slight angle of inclination. The optimal value is 15 - 20 degrees. This slope of the roof slope is suitable for coverings made of corrugated sheets, slate, plastic, polycarbonate and other modern materials.
Farms can take the following form:
- triangular;
- arched;
- rectangular;
- broken;
- trapezoidal.
Inside the trusses, racks, purlins, braces, and struts are additionally installed. The drawing must indicate both the dimensions and the list and quantity of materials that will be required.
Since the trusses consist of hollow parts, the weight of the frame for arranging the canopy will be insignificant. Horizontally, they are fastened together crosswise using elements made from profile metal products with a small cross-section (read: “Characteristics of fasteners for profile pipes, “Crab”, clamps, advantages of use”).
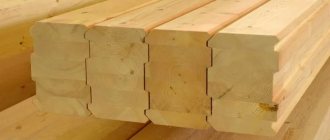
Next, install a sheathing of timber 50 millimeters high. It is needed to fix the roof covering. Wooden beams should be pre-treated with an antiseptic or painted to prevent damage to the wood.
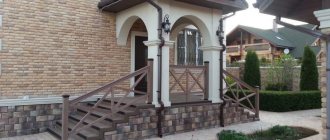
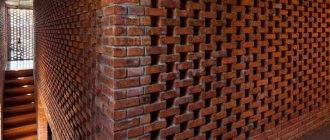
Brick pillars
Brick or stone supports for a canopy involve the parallel construction of a solid concrete foundation. The algorithm of this technology consists of the following steps:
- Marking the location of the supporting elements for the canopy.
- Digging square holes with a depth of up to 60 cm and a cross-sectional area that exceeds the same parameters of a brick support.
- Covering the bottom of each hole with a sand cushion and gradually compacting it layer by layer.
- Installation of formwork and laying waterproofing.
- Installation of reinforcement frame and concrete pouring.
- Stopping all construction activities for a while - the pause will allow the solution to harden.
- Dismantling the formwork and treating it with a waterproofing compound.
- Backfilling and direct laying of columns. If the support posts are finished with facing bricks, they will acquire a special gloss, and such masonry can be strengthened with reinforcing wire mesh, which is recommended to be laid at least every other row.
What is a columnar base?
A columnar foundation using reinforced concrete is the safest and most durable structure that is installed on heaving soils, because this type of foundation is less susceptible to heaving than others. Pole foundations are quite versatile - they are often used where monolithic strip foundations cannot be used.
A columnar foundation is a structure made of supporting pillars connected by a rigid frame. The foundation pillars can be either reinforced concrete, or made of asbestos-cement pipes (they are reinforced from the inside and filled with concrete), or made of metal pipes filled with a mixture of sand and concrete and covered with waterproofing on the outside.
To reinforce support pillars, wire with a diameter of 6 to 12 mm or metal rods is mainly used. To save money, many people use remnants of gas or water pipes, metal corners, etc. instead of fittings.
Wood supports
Wooden poles for a canopy also require a monolithic foundation, immersed in the soil by 50-60 cm. The wooden poles for a canopy are attached to it using special embedded parts. The layer between concrete and wood should be sealed with a layer of waterproofing, and the beams should be treated with an antifungal solution.
Subsequently, the natural wood surface must be coated with an appropriate paint and varnish composition, which additionally protects the wood elements. This technology not only protects wooden parts, but also guarantees high aesthetic and decorative performance.
Characteristics of profile pipe products
In order to build a canopy frame from a profile pipe and make all the necessary calculations, you should determine the characteristics of the manufactured pipe products. For products with a square cross-section, the required values are given in special tables.
For rectangular pipes, the maximum load size is calculated on the larger side. The result can also be seen in a specially compiled table, where, in addition to the desired value, the span length and pipe dimensions are indicated.
Aligning the rack
The more vertical the supports are, the more stable your structure will be. The most accurate instrument here is a plumb line, which will accurately determine the degree of vertical position of the racks.
During the process of concreting the foundation, the columns are leveled using supports (metal or wood), which are dismantled after the solution has hardened. Correction is possible only during the first hours of concreting.
To level the pillars in height, experts recommend marking in advance the level of immersion in the ground in their lower part. Such marks will become a reliable guide in further installation work.
You can ask your question to our author:
Construction of the structure
Installation work is carried out in stages:
- Before making a canopy from pipes, first prepare the foundation.
- Then the materials listed in the drawing are measured and cut.
- Trusses are made.
- The side walls of the structure are assembled.
- Connect roof trusses and finished sections.
- Check the correct assembly of the elements using a level and tape measure.
- Mount and securely fasten the frame to a previously prepared area.
- Metal surfaces are treated with protective compounds.
- Prepare materials for roofing, install them and fix them.
- Trim off excess roofing.
- They restore order in the surrounding area.
When preparing the foundation for the structure, soil is removed from the places where the supports from the profile pipe will stand. A layer of crushed stone is poured onto the bottom of the dug holes. Then, in order to secure the racks, a mortgage is installed on which bolts are welded. If desired, reinforcement is used to add additional strength to the structure.
Advantages of columnar foundations
Columnar foundations have a lot of advantages over other types of foundations, and this applies not only to buildings on heaving soils. Among the undoubted advantages are:
- Acceptable cost of construction. Depending on the materials for the manufacture of a columnar foundation, its laying will cost half as much as installing a strip foundation and three times less than a slab foundation on both heaving and normal soils;
- Possibility of self-bookmarking. Making such a base does not require special skills. No professional help is needed;
- Easy to install. You can save a lot of time and effort by using prefabricated reinforced concrete slabs in the construction of a columnar base on heaving soils.
How to make a lean-to canopy from corrugated sheets: step-by-step instructions
We already have ready-made drawings, now we’ll tell you in detail how to build a lean-to canopy from corrugated sheets with your own hands. Let's start by choosing a place for it on the site. A canopy, like any building:
- must be at a distance of at least one meter from the boundary and at least five meters from the red line of the roadway;
- placed so as not to shade the neighboring plot;
- if possible, it is installed with a slope in the direction opposite to the prevailing wind in the area.
In addition, if wood or other flammable materials will be used in the construction of the shed, fire safety requirements must be taken into account when choosing a location. Otherwise, there is complete freedom to choose a place.
Top ↑
Construction of the canopy foundation
The area under the future canopy must be prepared before construction. Remove debris, mow the grass, remove at least the top 100 mm of soil around the perimeter and level the soil surface. After this, you can begin marking the foundation:
- Drive the pegs in the place where the corner supports are installed so that you get an even rectangle.
- Stretch a nylon thread or other thin rope between the corner pegs. Make sure it is strictly horizontal.
- Measure the distances to the intermediate supports and mark them, driving in pegs exactly under the nylon thread so that all columns are on the same line. Measure distances not along the ground, but only along the rope.
- Remove the nylon thread.
At this point, the marking is completed, and you can begin installing the steel poles. At the place where the pegs are installed, drill a hole with a hole drill to a depth of 200–300 mm below the freezing level of the soil in the area and pour a 100 mm layer of sand and gravel mixture onto its bottom. Place the pipe exactly in the center of the hole and carefully drive it in so that it stands vertically without additional support. If the ground is too hard and you can’t drive the post, use wooden blocks to install it, but try to drive them into the ground so that you get a kind of tripod. Place spacers between the pipe and the walls of the well only as a last resort. Check the support for verticality and, if everything is in order, fill it with concrete.
Concreting supports for a lean-to canopy made of corrugated sheets
The pipes are concreted with a classic M200 mixture of crushed stone, sand and cement, combined in a ratio of 4.8:2.8:1. Concrete is poured into the well gradually, and when the hole is filled to approximately every third, it is carefully compacted by immersing a scrap or thin pin into the mass a couple of dozen times in a circle. This removes voids that appear in the thickness of the solution during its pouring. After concreting, the pillar is checked again for verticality and the process is repeated for all other supports.
The finished foundation should be allowed to stand for one to two weeks so that the concrete has time to gain strength. Concreting work is carried out when the temperature at night no longer drops to zero and, especially, sub-zero values. It is also not advisable to pour concrete on very hot days.
Top ↑
Installation of frame with trusses
After the concrete has hardened, the installation of the frame begins. First, the upper part of the columns is cut off, if they are not at the same level, and one 80x80 mm profile pipe is welded horizontally to the tops of the supports located on one side. Then, since the canopy is made of corrugated sheets, the inclined pipes of the roof slope are attached, connecting the opposite columns. After this, the lower chord of the truss and its internal frame pipes are welded. The last thing to do is the sheathing.
Design diagram of the finished frame of a lean-to canopy made of metal profiles (click to enlarge)
When welding a frame, structural elements are first “baited” with an intermittent seam and checked for horizontalness or compliance of angles. A continuous seam is made only after this, since cutting and transferring it is much more difficult.
At the end of the work, all welds are cleaned, the frame is primed and painted in two layers. Open parts of pipes are closed with plastic plugs.
Top ↑
Covering the canopy roof with corrugated sheeting
The corrugated sheet begins to be laid on the roof slope from the side opposite to the direction of the prevailing wind. Try to use sheets that are long enough to completely cover the width of the slope and avoid transverse joints. There is nothing complicated about this: any metal profile manufacturer produces sheets up to 6 m long, and for most the standard is twice as long - up to 12 m.
The corrugated sheeting is laid on a lean-to canopy with a slight overhang, aligned along the outer edge and attached to the bottom of the profile through a wave into each transverse pipe of the sheathing. The second and subsequent sheets are attached with a longitudinal overlap in one wave according to the same pattern. But the fastening itself in the place of overlap is made at the top of the profile.
Layout of corrugated sheeting on the roof of a lean-to canopy with two overlaps: longitudinal and transverse (we recommend avoiding)
To fasten the corrugated sheets, use metal-colored roofing screws with self-sealing gaskets. If the thickness of the metal of the sheathing does not allow screwing them in immediately, make a hole at the fastening point with a thin drill, the diameter of which is less than the diameter of the screw. This allows the self-tapping screw to be securely fixed in the profile pipe.
The self-tapping screw is screwed in strictly perpendicular to the plane of the sheet, controlling the force: it is important to clamp the screw tightly enough so that the gasket is pressed tightly against the metal, but not to pinch it, otherwise the connection will be leaky. Pinched screws can be easily identified by the gasket squeezed out beyond the washer.
After installing the roofing, the ends of the lean-to canopy and its upper side can be covered with a wind strip. This will give the canopy a more complete and aesthetic look, and will also further secure the covering and reduce the likelihood of it being torn off by strong winds.
Top ↑
Features of installing canopies and awnings on an asphalt surface
- Sometimes it is necessary, even in a summer cottage, to install support posts on a concrete or asphalt surface. In this case, we also weld the pennies onto a profile or round pipe, drive the reinforcement pins into the asphalt (to a depth of 20-40 cm), and finally, weld the bearing bearings of the supports to the pins.
- Attached-type canopies - adjacent to the building on one side - differ in the number of supports, their location, and installation method. As a rule, the vertical posts of such canopies are strengthened on embedded parts that are pre-concrete.
- If the canopy is planned to be lightweight, portable, with aluminum support tubes, then when installing the canopy it will be enough to stick the tubes into the ground.
The process of installing support structures, as you can see, is simple and does not require special skills. All you need is desire, patience and the appropriate tools - and you can install the supports for the canopy yourself. As for the roof for the canopy, you can choose from the materials suggested below:
- polycarbonate (the lightest material);
- tiles;
- slate;
- corrugated sheeting;
- roofing felt;
- polycarbonate
In addition to basic construction tools, you will need a welding machine. It is advisable to invite an assistant, since it is more convenient for two people to fix the support posts in a vertical position.
Source of the article: https://idachi.ru/stroitelstvo-i-remont/besedki/metallicheskie-stolby-dlya-navesa.html
Construction of a reinforced concrete “collar”
This technique is nothing more than installing additional weight on top of the fence supports. It is not always effective and applicable because it requires a lot of space around the pillars. The work is carried out as follows:
- The stand is placed in the hole so that its end does not rest against the bottom. Around it, within a radius of 50 cm, soil is removed to a depth of 120 mm.
- The bottom of the pit is compacted and covered with sand, which should also be moistened and compacted.
- Several pieces of periodic profile reinforcement are welded horizontally to the rack so that its ends are in the pit.
- The pit is filled with a thick concrete mixture.