The effectiveness of underfloor heating depends on several factors. One of the main ones is a properly laid warm water floor cake. A pie is a pattern of layers that make up a heated floor.
There are several options for making a pie:
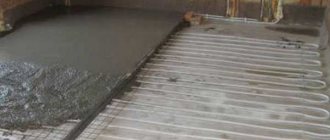
- on the ground, in this case, a cement screed is always placed on top of the pipes (about pipes for a heated water floor) (on which the thickness of the screed for a heated water floor depends);
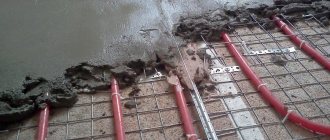
- along joists or on a wooden base - the screed is not poured;
- on a concrete slab: you can make a floor with or without a screed.
The thickness of the warm water floor cake is from 5 to 15 centimeters.
This depends on the installation method, the type and thickness of the insulation, and the presence/absence of screed.
Manufacturing technology
Before you start pouring the floor, it is important to carefully prepare the base, consisting of several layers. The main recommendations are to use fine-grained filler in the concrete mixture and lay it along the beacons in one go
Laying the underlying layer
This layer consists of a compacted sand cushion with a height and a crushed stone bedding (fraction 30-50 mm) with a height of 7 to 10 cm each. The purpose of this layer is to protect the lower part of the slab from exposure to moisture from the soil and to act as a leveling base.
The soil characteristics that must be taken into account before proceeding with floor installation include the following:
It is important to remove the plant layer of soil when preparing the base. Otherwise, due to shrinkage, the concrete structure will simply collapse. Sand is used when groundwater levels are low to the surface, as it is capable of absorbing moisture. When using crushed stone on wet soil, capillary rise of moisture is excluded.
Sand and gravel backfill
Special installation with water supply for sand compaction
To reduce the cost of work and get a high-quality result at the preparation and design stage, it is necessary to take into account some nuances:
- After laying the finishing material, the level of the finished floor should coincide with the level of the threshold of the entrance opening.
- It is necessary to prevent the floor screed from resting on fragments of the base or foundation that protrude from the internal walls.
- During the process of compacting the sand layer, it is irrigated rather than spilled through with water.
Installation of footing and waterproofing
The purpose of the waterproofing material is to prevent the insulation and screed from getting wet under the influence of moisture.
Recommendations for waterproofing are as follows:
- When directing bitumen roll materials, two layers are created. The overlap is at least 15 cm when positioned perpendicularly.
- When using film, the direction of gluing the sheets does not matter. The main thing is to overlap and carefully seal the joints.
- The EPDM membrane is laid in one layer.
Finishing screed
The installation of a concrete footing with a height of 5 to 10 cm allows you to create a flat and rigid base for the waterproofing layer (gluing film, fusing bitumen). Otherwise, when using rolled bitumen materials or PVC film, their installation becomes significantly more complicated due to the divergence of joints on loose ground.
Bitumen waterproofing
Laying insulation
Strips of insulation or a tape of the same name are used as a damper layer. The tape is glued directly to the inside of the foundation or plinth around the perimeter of the room.
Being, in fact, a ceiling, the ground floor is not rigidly fixed to the walls of the room. Therefore, it has the following qualities in the field of insulation:
- The contact points between the floor and the plinth, due to the presence of a lower insulated layer, are completely protected from heat loss.
- Using a damper layer installed around the perimeter of the room between the screed and the wall, the room can be protected from vibration and noise.
- Sealing and leveling work, which is required when laying slabs, will not be required in this case.
- The advantage is the lack of free space (underfloor) under the floor structure.
Floor insulation with penoplex
Reinforcement
A floating screed involves introducing utility pipes into the room before pouring the solution - heating, cold and hot water supply, sewerage.
Reinforcement
Concrete pouring options
Plaster beacons or metal profiles, which are used when pouring mortar, can increase the productivity of the work performed and obtain a high-quality coating.
The peculiarity of the work is that you cannot walk on the reinforcing mesh while pouring the floor, so there are two ways to carry out the work.
When pouring the mortar from the far corners of the room towards the door, the reinforcing mesh inside the concrete is given the required level of rigidity, so the free areas of the reinforcement do not move. This method is called "tracks".
Movement around the pouring area can be carried out using ladders - suitable stands made of brick or timber installed in the mesh cells, on which the boards rest.
After 3 days the floor can be finished.
Necessary concepts
In order to understand how concrete can be used for heated floors, let’s define some concepts. It is important for us to distinguish between the types of floor heating systems, the levels and purposes of the screed, and the methods of its installation.
Classification of TP (warm floors)
At the moment, the market offers several different systems mounted in the horizontal plane of the floor. Some are used as the main heating, some only increase the level of comfortable stay in the room.
Heating systems can be water or electric. The latter are distinguished by the heating element used.
The device offers electric horizontal heating systems based on the following elements:
- cable;
- film;
- thermomat;
- rods.
Classification of electric heated floors
Stages of work on pouring screeds
Due to the design of the horizontal heating system, the screed is done several times.
To understand the process, we divide the filling into 3 stages:
- Rough screed . Apply to the intended base for leveling. Performed when necessary.
- Leveling screed , which is poured over the thermal insulation material. The system is directly installed on this layer.
- Final fill . This is a pour over the heating system. Arranged if necessary.
Types of screeds
In addition to different heating systems and the need for different levels of pouring, there are other screed options other than pouring the floor with concrete mortar.
There are 3 types of screeds used when installing heated floors:
- Wet screed: the usual method of pouring concrete or cement-sand mortar.
- Semi-dry screed: leveling the floor with a ready-made compound, a certain degree of humidity.
- Dry: an ideal way to level the floor, recommended only as a rough layer.
Floor frame
Basic elements of a wooden floor
First, let's study the main constituent elements and main rules:
- The underground space from the pads to the floorboard must be at least 1 cm (and no more than 25 cm for floors on the ground). This is necessary for good ventilation inside the frame.
- Logs are transverse bars that serve as the basis for further cladding with boards. They can rest on beams, a concrete slab, posts, and even on the ground (when using pads).
- The width of the logs when laid on a slab should be in the range of 80-100 mm and 100-120 mm when laid on posts or beams. The thickness when laid on a slab should be 25-40 mm, and when laid on posts - 40-50 mm.
- Beams are horizontally laid structural elements that perform load-bearing functions. They are supported at least at two points on load-bearing walls.
- Columns (linings) are used to level the base. For logs with a thickness of 40-50 mm, linings are installed every 80-110 cm.
- The pitch of laying the logs depends on the thickness of the sheathing. For example, if you use the thinnest floorboard 21 mm, then the step of laying the logs should not exceed 30 cm.
- It is best to use a thicker floorboard 35 mm, and make a standard laying step of 60 cm, especially if you are going to insulate the base. This way you won't have to cut the insulation to width.
General information
Mandatory layers in the construction of a water floor. A heated floor consists of various materials that require installation in a certain order. The floor structure is otherwise called a “pie”; heating elements in the form of water circuits or cables, screeds, and reinforced bases are used as layers.
Main functions of cake layers:
2.protection of heating devices from moisture.
3.direct the movement of heat along the required trajectory.
5.protection of the system from negative external phenomena.
Features of installation on concrete. The layers of the cake laid on concrete slabs look like this:
1.concrete base, which can consist of a mixture of cement or monolithic concrete slabs.
2.layer of waterproofing in the form of polyethylene film.
3. a thermal insulation layer with a reflective surface; as a rule, polystyrene foam or cork is used as a material.
5.water pipes for heating.
7.finishing the floor.
Features of installation on the ground. It is possible to lay a water floor directly on the ground if there is a high soil density, also if the groundwater lies at a depth of more than five meters from the foundation.
Laying a floor on the ground is slightly different from laying it on concrete. Installation steps:
1.The soil surface is cleaned and leveled.
3. Expanded clay or gravel of 8 centimeters is placed on the sand, the layer is carefully compacted.
5.lay mesh for reinforcement.
6. Fill with a rough screed layer of 10 centimeters.
8. polystyrene foam insulation, the height of the room dictates the thickness of the material for insulation, it varies from 5 to 15 centimeters.
Next, the heated floors are laid according to the general scheme: a layer of reinforcing mesh, heating circuits, a layer of concrete or substrate, and a floor covering.
Features of installing a pie in a frame house. The first step is to attach the beams to the surface of the foundation, providing a rough version of the floor. Between the wooden beams and the piles, a layer of waterproofing made of roofing felt, waterproofing or linochrome is laid. The materials are sold in rolls and must be laid out in two layers.
Take one of the options as a basis:
what is the name of a girl who has changed her gender to male?
1.wooden beams, which are considered the main ones.
2. lay both the main and secondary beams.
Beams that play a secondary role are called logs. They allow you to increase the laying step of the main beams. Installation turns out to be costly in terms of materials and time. Laying joists reduces the height of the room. The remaining layers are placed on wooden logs.
Features of installation on wooden logs:
1. cranial bars are secured to the sides of the main joists.
2.layer of boards.
5.laying of load-bearing beams equipped with insulation.
7.layer of working covering made of thin plywood.
8.laying decorative covering.
Attention! This installation method does not require a concrete screed.
If the flooring will be finished using laminate, then you don’t have to lay plywood; you can lay the laminate directly on the water circuits.
Fill the rough screed and determine its thickness
For a warm floor to be durable, a rough screed is required. Before pouring, it is recommended to divide the surface with slats, the step between them should be 1 meter. In this way, you can fill the solution in strips.
READ MORE: How to prepare a floor for laminate
The process begins with laying 1 m2 of reinforcing mesh 3 cm thick in the center of the room, and the joints of the floor and walls are taped with damper tape. It is better to take concrete grades M100 or M200. Cement should be poured from the far corner of the room, towards the door, with a thickness of 50 to 100 mm.
When the mixture dries a little, the slats need to be removed and the gaps filled with solution. The screed is covered with polyethylene and constantly moistened until it completely hardens. After this, everything is cleaned of dust and primed.
It is possible to use dry screed; it is gaining popularity today, since there is no work with concrete, thereby making the process faster.
What else will need to be taken into account in the process of designing a heated floor?
In the process of developing a project for a heated floor system, it is recommended to make a schematic drawing indicating the laying of pipes, main dimensions, distances and indentations, and furniture placement.
Collector group
At the design stage, the type of coolant is determined: in 70% of cases water is used, since it is the most accessible and cheapest substance. Its only drawback is its reaction to temperature changes, which result in a change in the physical properties of water.
Floor pie with pipes in screed
Antifreeze based on ethylene glycol or propylene glycol with special additives that reduce the chemical and physical activity of liquids is often used as a coolant for underfloor heating. In any case, the type of coolant must be taken into account at the design stage, since its properties form the basis for hydraulic calculations.
Antifreeze as a coolant
You will also need to take into account the following nuances:
One circuit is installed per room. To place the collector, choose the center of the house. If this is not possible, then to regulate the uniformity of coolant flow through circuits of different lengths, flow meters are used, which are installed on the collector. The number of circuits connected to one collector depends on their length
So, with a circuit length of 90 m or more, no more than 9 circuits can be connected to one collector, and with a circuit length of 60 - 80 m - up to 11 loops. If there are several collectors, each has its own pump. When choosing a mixing unit (mixing module), it is important to take into account the length of the circuit pipe. A more accurate calculation would be based not only on data on heat loss in the room, but also on information on heat influx from household equipment and equipment, from the ceiling, if a heated floor is also installed on the upper floor. This is relevant when calculating for a multi-storey building, which is built from the upper floors to the lower ones. For the first and ground floors, the thickness of the insulation is taken to be at least 5 cm, for higher floors - at least 3 cm
Insulation on the second floor is used to prevent heat loss through the concrete base. If the pressure loss in the circuit exceeds 15 kPa, and the optimal value is 13 kPa, it is necessary to change the coolant flow towards a decrease. You can lay several smaller contours in the room. The minimum permissible coolant flow rate in one loop is 28-30 l/hour. If this value is higher, then the loops are combined. Low coolant flow leads to the fact that it cools down without passing the entire length of the circuit, which indicates the inoperability of the system. To fix the minimum value of coolant flow in each loop, use a flow meter (control valve) installed on the manifold.
Connecting pipes to the collector
Recommendations for choosing materials
Here is a list of equipment and building materials that will be used to install a water heated floor:
Why you shouldn’t use mineral wool for thermal insulation of floors. Firstly, you will need expensive high-density slabs of 135 kg/m³, and secondly, porous basalt fiber will have to be protected on top with an additional layer of film. And the last thing: it is inconvenient to attach pipelines to the cotton wool - you will have to put a metal mesh.
Explanation regarding the use of masonry welded mesh made of wire Ø4-5 mm. Remember: the building material does not reinforce the screed, but acts as a substrate for securely fastening pipes with plastic clamps when the “harpoons” do not adhere well to the insulation.
Option for attaching pipelines to a mesh of smooth steel wire
The thickness of the thermal insulation is taken depending on the location of the heated floors and the climate in the place of residence:
Note. If you want to accurately calculate the thickness of thermal insulation according to the SNiP method and find out the thermal characteristics of various insulating materials, go to the instructions for covering ceilings.
In heated floors, 3 types of pipes with a diameter of 16 and 20 mm (DN10, DN15) are used:
Polypropylene pipelines cannot be used in TP. Thick-walled polymer does not transfer heat well and elongates significantly when heated. Soldered joints, which will definitely end up inside the monolith, will not withstand the stresses that arise, will become deformed and will leak.
For beginners, we recommend using metal-plastic pipes to install heated floors on their own. Causes:
a wild field in the history of Russia is
To successfully select and assemble a collector block, we suggest that you study a separate manual on this topic. Here's the catch: the price of the comb depends on the method of temperature control and the mixing valve used - three-way or two-way. The cheapest option is RTL thermal heads, which operate without mixing and a separate pump. After reading the publication, you will definitely make the right choice of control unit for heated floors.
Homemade distribution block with RTL thermal heads that regulate flow based on return flow temperature
Choosing mats
There are several main types of mats for heated floors that are used when installing these systems. They may differ in appearance, type of material used for manufacturing, functionality, etc. Let's consider each of the main variations.
Mats for water heated floors
Table. Types of mats for heated floors.
Type Description
Rolled with foil
This option is the best if heated floors are not installed on the ground floor and act as an addition to the main heating system of the house. These products are made of penofol or polyethylene foam, and are coated with aluminum foil on top. Thanks to the top layer, they are able to reflect heat inside the room without letting it out
Therefore, during installation, it is important to ensure that the foil side is facing up. Also, on such mats the pipes themselves will not be fixed; you will still have to think through a system for fixing the contour
It is usually fixed to a reinforcing mesh laid on top of a layer of mats. But this is the cheapest option for this kind of insulation. It is sold in rolls and can have a thickness of 2-10 mm. When laying a layer of such material, it is necessary to seal the seams between the individual parts with foil tape to prevent heat leakage through the cracks.
Mats with film
These are polystyrene foam mats, which additionally have a layer of foil, as well as a polymer film. It is easier to lay pipes on such a surface, since there are markings on the film. This is an excellent option for mats to achieve high thermal insulation performance. Mats can be made in the form of separate slabs or panels connected to each other. The heating circuit will still have to be secured using clamps and reinforcing mesh laid on top of a layer of mats.
Profile mounting
The base is the same polystyrene foam, but they are stamped differently, and special protrusions are created on them during the production process - the so-called bosses. These protrusions can have different shapes - from round to multi-faceted. They are located at a certain distance from each other and with a certain pitch, and are used to fix the heating circuit pipes. In this case, there is no need to fix the floor heating system separately - the pipes fixed between the bosses will still not be able to move anywhere during the screed pouring. Also, such mats are equipped with locking connections at the ends, which simplifies their installation. The layer of mats will be continuous, without cracks or gaps. Pipes with a diameter of up to 20 mm can be laid on such mats. The thickness of the mats themselves can vary between 10-35 mm. The height of the bosses is approximately 20 mm.
Flat
There are also simple flat mats made of high-density polystyrene foam, about 5 cm thick. They are not subject to mechanical deformation, do not deteriorate over time, are strong and retain heat well. An excellent option for arranging floors on the ground floor or in a private house. They are afraid of the impact of cement, and before pouring the screeds they will have to be additionally covered with film.
How to choose the right mats for heated floors
Three ways to insulate a concrete floor over floor slabs.
Such insulation can be carried out when there is space in the basement for this work (at least 1 meter). The basement soil is not specially covered in any way. Ventilation is needed in the basement (the required amount is determined by calculation). A reinforced screed is poured over the slab from above. Reinforcement from a mesh with a cell of 100×100 made of wire with a diameter of 3-4 mm.
To insulate the concrete floor of the first floor, from below, from the underground side, EPPS is used, density 30-35 kg/m3. The thickness of the EPPS is determined by calculations for a specific construction region, but not less than 50 mm. Eps on the underground side can be plastered over a mesh, but this is completely optional. This material is not afraid of moisture, but there is no sunlight (EPS is not recommended to be left for a long time under the influence of UV).
Insulation of the floor from above from the room under the screed
- Reinforced concrete screed.
- Expanded polystyrene.
- Vapor barrier.
- Hollow core slab.
This scheme is used if there is no longer access to the space under the slabs. A reinforced screed is poured on top of the insulation. Reinforcement from a mesh with a cell of 100×100 made of wire with a diameter of 3-4 mm.
To insulate the concrete floor of the first floor, polystyrene foam with a density of 30-35 kg/m3 is used from above the room under the screed. A vapor barrier film must be placed under the insulation on the slab. The thickness of the insulation is determined by calculations for a specific region of construction, but not less than 50 mm.
Insulation of the floor from above from the room, using logs
- Floor.
- Superdiffusion membrane.
- Mineral wool.
- Vapor barrier.
- Hollow core slab
- Laga.
This scheme is used if there is no longer access to the space under the slabs. A reinforced screed is poured on top of the insulation. Reinforcement from a mesh with a cell of 100×100 made of wire with a diameter of 3-4 mm.
To insulate the concrete floor of the first floor, from above the room, using logs, mineral wool or fiberglass wool is used. The density for mineral wool is 20-40 kg/m3 (both slab and roll positions are possible). For fiberglass the density is 11-17 kg/m3, slab and roll positions are also possible. A vapor barrier film must be placed under the insulation on the slab. The top of the insulation can be covered with a superdiffusion membrane (for rooms such as a kitchen). The thickness of the insulation is determined by calculations for a specific region of construction, but not less than 50 mm.
Insulation of the concrete floor of the first floor
If the house does not have a basement, then often the floor in it is built directly on the ground. This is a practical and inexpensive solution, but due to the fact that there is contact with cold ground, such a floor must be insulated to make it comfortable to use. Today we will tell you how to insulate a concrete floor on the first floor. Let's look at several options that can be used both at the construction stage and on the finished floor, which was not initially insulated.
Why is floor quality so important?
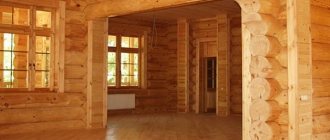
When building a house, they care not only about its beauty, but also about making it warm and cozy. Insulating the walls is only half the battle. The house must be protected from the cold from below. Wood is a natural material that is susceptible to rotting, so reliable insulation from moisture is also important. And finally, it should look beautiful and match the interior decoration of the room. In order for all goals to be achieved, it is not enough to lay the boards on a concrete base.
The floor in the house should be smooth, warm, beautiful and durable. All these qualities are achieved by laying the floor in several layers:
- base;
- heat and vapor barrier;
- rough floor;
- fine coating.
Concrete floor pie layer diagram
Concrete floor in a wooden house
Looks like a layer cake, doesn't it? That's why it's called floor pie. Its proper arrangement will help to avoid:
- high energy costs for heating the house;
- excessive moisture, which will inevitably lead to the appearance of mold and mildew;
- rotting of internal wooden structures.
Technological requirements
The correct installation of the floor on a concrete slab is carried out in accordance with construction requirements and standards. They characterize the design features of all elements.
In addition, they must meet standard requirements specific to a given situation: be durable, moisture-resistant, wear-resistant.
When making a floor for a living space, you need to think about heat and sound insulation in advance. If we talk about standard technological requirements, we can identify a number of norms characteristic of this situation.
| Characteristic | Name, technical specification | Short description |
| GOST 31358 - 2007 | Dry cement-based construction floor mixture | Properties and composition of cement mixture. Use for floor |
| GOST 10178 - 85 | Cement | Technical features and requirements for the material used for the screed |
| GOST 25328 - 82 | Cement for mortar | Regulatory data regarding the composition and characteristics of the mixture |
| GOST 24640 - 91 | Additive for cement | Type and method of use of the additive used for filling floors |
| GOST 7473 - 94 | Concrete mix | Compositions, manufacturing technology and use of concrete-based mixtures |
| SNiP 2.03.01-84 | Concrete and reinforced concrete structure | Installation of reinforced concrete structures, floor screeds with reinforcement |
| SNiP 3.02.01-87 | Earthwork base and foundation | Subfloor installation process |
| SP 52 – 101 – 2003 | Concrete and reinforced concrete structures without prestressing reinforcement | Concrete reinforcement process |
| SNiP 2.03.13-88 | Floors | Floor design, installation requirements |
Design, material selection and installation must be carried out based on the requirements presented in these documents. Compliance with the standards will allow you to create a surface that will meet all established parameters.
Among other things, it will have the following characteristics:
- A smooth and durable base will be created, convenient and practical for the safe movement of people.
- It will be of high quality, wear-resistant, durable.
- In accordance with sanitary and epidemiological standards, a foundation will be created that is harmless to humans and provides good living conditions.
- The operational standard characterizes ease of maintenance and possible repair.
All documents were developed by specialists and engineers, so it is not recommended to neglect them.
The role of OSB in floor construction
Laying OSB or plywood to level a floor
OSB or OSB is used to achieve one or all of 3 objectives:
- To level the floor and hide defects.
- To ensure good sound insulation. The multilayer structure successfully absorbs noise.
- To insulate the floor and make high-quality waterproofing. The natural-based material is characterized by increased moisture resistance and excellent heat retention.
Features of the use of the material
OSB (OSB) is not always attached to the floor. If the concrete base has large differences in height or significant unevenness, the slabs are fixed on wooden beams. The latter successfully act as lags.
OSB (OSB) is laid on a relatively flat surface without using lag. The thickness of one slab is often enough to level the surface. It is fixed with OSB (OSB) using dowels or self-tapping screws.
The material is highly moisture resistant, but still absorbs a small amount of moisture. Because of this, it expands a little. Compression-expansion can be compensated by leaving gaps (up to 3 mm) between the OSB (OSB) boards.
After laying the material, finishing work can begin. Although, it is not necessary to use tiles, laminate or linoleum. OSB (OSB) material itself is considered a representative warm covering for the home. It just needs to be cleaned and covered with several layers of varnish.
https://youtube.com/watch?v=-RDUYBM7u1k
Basement pie in a frame house
The basement floor requires increased attention to insulation, since it is this part of the house that is most vulnerable to cold weather. The basement ceiling borders the cold zone of the basement, while other ceilings do not have such contact.
Basement floor pie. 1 - floor joists.
The correct arrangement of the plinth overlap guarantees:
- Moderate costs for heating the premises on the first floor.
- No mold or fungal growths.
- No rotting of wooden floor elements.
The floor pie along the joists is described in detail in the section “The correct floor pie along the joists of a frame house.” The installation of a basement floor requires additional attention to detail:
- The required insulation thickness is at least 200 mm. Otherwise the floors may be cold.
- The wind barrier should be extended to the edges of the room and carefully glued.
- The mandatory use of bars along the joists ensures the presence of a ventilation gap between the floor boards and the insulation. This prevents the formation of rot and mold.
The floor of the 1st floor requires high-quality insulation in order to maintain a comfortable temperature throughout the house.
Wood floor pie
The basic principles of creating a wooden floor pie are accurate calculation and verification of all parameters. The choice of wood is no less important. Typically the following types are used in construction:
- pine can only be used if the board is not very resinous. This floor will bring a very pleasant pine smell into the room;
- oak is the most reliable and durable material;
- maple is easy to process and moisture resistant;
- Larch is comparable in strength to oak and has natural protection against insects. The most expensive option.
The tree must be treated with an antiseptic against rotting and a fire retardant, which reduces its flammability.
Neomid Base Eco Proff – deep-penetrating universal antiseptic
Characteristics of a concrete base
When faced with the question of which floor is better, many come to the conclusion that a concrete base is one of the most unpretentious.
It is superior to wood for many reasons, the main one of which is its immunity to the formation of decay processes.
In addition, concrete will not creak over time and has a fairly durable surface that is practically resistant to mechanical stress.
Concrete is not susceptible to stress and is durable
Moisture resistance indicators compared to wood are also excellent. However, it should be borne in mind that some of the disadvantages of a wooden floor can be eliminated by using modern technologies.
Water
Device
A water heated floor is a system of pipelines installed in a system of layers of a heated floor cake. This requires laying pipes with hot water in a “snake” pattern, evenly covering the entire area of the room.
Water heating is carried out either autonomously, using a boiler (for example, gas or electric), or connected to the central heating system, if possible. A characteristic feature of this design is a softer heating mode compared to electric; the water temperature does not exceed 70-80 degrees, which is fire safe, but quite sufficient for heating, given the radiation area.
Another feature is high thermal inertia; after switching off, such a floor cools down slowly. At the same time, laying a warm floor under the tiles with your own hands in this situation is not particularly difficult.
Pie
Solving the question of how to properly lay a heated floor under the tiles begins with the correct arrangement of the pie.
The tile water floor pie includes the following layers:
- Rough floor.
- A layer of insulation that eliminates unproductive losses - heating the subfloor.
- Waterproofing film.
- MAC mesh.
- Heated floor pipes.
- Screed layer.
- Tile.
This composition of the pie is most suitable for a concrete subfloor, since for wooden structures the composition of the pie changes:
- Subfloor (plank flooring).
- The sheathing, as thick as the diameter of the pipes, provides a gutter to keep the pipes safe.
- Heated floor pipes.
- Cement strainer.
- Tile.
For wooden subfloor structures, there is no point in laying a layer of thermal insulation, since the structure of the wooden floor itself is, in fact, a continuous thermal insulating layer, and the flooring made of boards has good thermal insulating properties. It is these moments that determine the thickness of the warm floor under the tiles.
Tools and materials
To work you will need:
- Pipes (preferably metal-plastic).
- Connecting fittings.
- Self-adhesive tape.
- Reinforcement mesh.
- Cement, ready-made composition for screed.
- Tiles, tile adhesive.
- Waterproofing film.
- Hacksaw for metal.
- Sharp knife.
- Hammer, pliers, container for mixing cement composition, etc.
You may need much more tools, it all depends on their availability, on the accepted work scheme and on the skills of the master. At the same time, warm floors under tiles: technology and specifics will directly depend on these factors.
Laying
Laying tiles on a heated floor is based on simple principles. The work stages look like this:
The area of the room is divided into zones with a maximum area of 40 square meters. m
It is especially important if the room has complex geometry, forcing the use of division to obtain simpler sections. This is necessary for a better choice of pipe placement - snake or snail. A layer of insulation is laid
For the best quality work, it is best to use extruded polystyrene; it does not allow water or steam to pass through, and is an excellent heat insulator. In addition, it is quite tough and durable material. A layer of waterproofing is laid - best of all, polyethylene film. It will not allow water from the screed to seep between the insulation boards and will cut off the steam that seeps through the screed when the heated floor is turned off. Laying the MAK reinforcing mesh, which protects the insulation and waterproofing during installation and pouring of the screed. Pipeline installation. Sections of pipes are attached to the mesh to fix the position. Do not fasten it too tightly; temperature deformations are possible. Corrugated inserts are attached to compensate for temperature expansion, the pipeline is connected to water and pressurized. (At a minimum, it can be kept filled with water for several days). Filling the screed. At this time, the pipes must be under operating pressure. The screed is allowed to dry, after which the tiles are laid on it.
Attention! Do-it-yourself installation of a heated floor under tiles on a wooden base is approximately the same, only instead of laying insulation, slats are placed on the floor, forming recesses for placing “snake” zigzags. Some stages of installation, if necessary, can be supplemented with any operations
At the same time, installing a heated floor under the tiles will still be the most convenient way of heating
Some stages of installation, if necessary, can be supplemented with any operations. At the same time, installing a heated floor under the tiles will still be the most convenient way of heating.
Finish coating
The installation of water floors ends with laying the finishing coating. It could be:
The process of laying parquet boards on a heated floor
- laminate;
- tile;
- linoleum;
- parquet.
The only condition for choosing is the labeling of materials - manufacturers indicate whether the coatings are suitable for heated floors. Particular attention should be paid to laminate and linoleum.
Carpet is less preferred as a finishing material due to its high thermal conductivity and fire risks. If the heating system is installed on a wooden floor, then most often they use parquet and, less often, ceramic tiles, due to their heavy weight. [ads-pc-2][ads-mob-2]
Types of floors and their features
Choosing a ceiling and making floors in a wooden house
Houses can have different designs. It must be taken into account when arranging floors. Laying the first floor floor depends on whether there is a basement or whether it will be laid directly on the foundation. Reliable thermal and steam protection is needed here.
For interfloor ceilings, sound insulation is more important, since the main load of heat conservation and protection from moisture is borne by the lower and upper floors.
The photo shows an example of a ceiling
The attic space must also be separated from the living space by an insulated floor to avoid heat loss through the ceilings of the upper floor.
Semi-dry screed
The main distinguishing feature of semi-dry screed is the use of a composition with lower humidity, namely, with a significantly smaller amount of water in the solution. The quality of the solution can be easily checked by hand.
A small amount of the mixture is clamped in a fist. Water should not flow from the resulting lump, and it should not crumble. The photo shows the composition of the correct consistency.
The composition of the semi-dry screed, when clenched into a fist, should not release water or crumble
Semi-dry screed has some advantages over concrete pouring:
- lower cost;
- ease of leveling the surface;
- the heat and sound insulation characteristics of such a floor are much higher;
- does not shrink when dried;
- the readiness period is much shorter.
The heating system is installed in a semi-dry screed
Preliminary preparation: learning the intricacies of installation
Floor pipe laying diagrams.
- It is best to make projects for a warm water floor with the involvement of specialists in this field, because they will most accurately calculate the required heat supply, equipment power and the layout of the main pipes;
- It is necessary to install a thermal water floor exclusively on a flat surface, only then will the distribution of water occur efficiently and without stagnation;
- in order to obtain the highest quality thermal insulation, you need to make a substrate with a thickness of 3 to 15 cm, and its density should be at least 35 kg / cubic meter. m;
- if the area of the heated room is more than 100 square meters. m., then you will need to divide it into several areas with an approximate size of 35-40 square meters. m. Thanks to this, it will be possible to reduce the temperature load on the concrete screed. Accordingly, you don’t have to worry about it cracking;
- when installing pipes for heated floors along the walls, you need to make an indent of about 150 mm;
- It is imperative to lay a damper tape around the perimeter of the room and between areas; it will compensate for temperature fluctuations on the concrete screed;
- Only strong and flexible pipes should be used to create a water floor. It’s great if you can find seamless ones with a diameter of about 20 mm;
- When laying pipes, you need to avoid creating unnecessary joints, then you will be able to avoid the occurrence of leaks under the floor. Ideally, you need to connect pipes only at the outlet and inlet of the collector;
- The floor surface must be smooth and clean; protrusions and irregularities of about 10 mm are allowed. If they are larger, then you need to make a rough screed;
- where there are bends in the pipes, there should be no kinks, otherwise the water circulation will be disrupted;
- It is possible to fill a heated floor only after the hydraulic system has been completely checked and adjusted;
- the length of the pipe system for underfloor heating should not exceed 100 m, otherwise the efficiency will be greatly reduced.
Calculation and development of underfloor heating scheme
To properly install a heated floor under a screed with your own hands, consider a number of important points and requirements:
First, we will propose a more correct, albeit complex, design option. After reading our instructions, calculate the heating power in any of 3 ways - by volume, area or heat loss of the room. Then determine the laying pattern, diameter and distance between adjacent pipes, taking into account the thermal resistance of the coating - laminate, linoleum or tile.
Note. The method for calculating the pitch of laying pipes under tiles and other types of coverings is explained in the following manual.
Let us present a simplified version of the scheme development practiced by many builders:
An important nuance. When calculating the length of the heated floor branches, do not forget to add the distance from the room to the point of installation of the comb with a pump mixing unit. To avoid making mistakes with loop lengths, watch the training video:
Let us explain why to install wiring for batteries. Having laid pipe loops without calculation, you do not know in advance whether the power of the TP will be enough on the coldest winter days. If a problem arises, you should not heat heated floors above 55 °C; it is better to turn on the high-temperature radiator network.
Composition of the “pie” of heated floors on the ground
There are many schemes published on the Internet, varying in composition. Confusion is usually caused by the use of film vapor and waterproofing between the different layers of the “pie”. Let us explain each element of the classical scheme of a warm water floor installed on the ground (the layers are listed from bottom to top):
Important point. The described scheme is correct when using polymer insulators that do not allow moisture to pass through - extruded polystyrene foam, polystyrene foam and polyurethane foam. If fire safety rules require the use of basalt wool, an additional layer of film must be laid under the screed to protect the insulation from getting wet on top.
Craftsmen often simplify the design of heated floors - they place the insulation directly on the sand cushion, without pouring rough concrete. The solution is acceptable under one condition - the sand must be carefully leveled and compacted using a mechanized method - a vibrating plate.
When installing a wooden floor on joists, it is better to avoid screeding. Use the “dry” method of installing the TP - padding from boards or chipboard and metal dissipating plates. Thermal insulation material – mineral wool.
Scheme of TP on a concrete floor
This method of floor heating is advisable to use in rooms above cold basements or on insulated balconies (loggias). It is unacceptable to install a water pipeline above the living rooms of apartment buildings, although some owners ignore the ban.
Advice. In multi-storey buildings or dachas with periodic heating, it is easier and cheaper to install electric heated floors - cable or infrared made of carbon heating film.
The TP “pie”, arranged above a cold room, is made in the same way as heating on the ground, but without a sand cushion and rough screed. If the surface is too uneven, heat-insulating boards are laid on a dry mixture of cement and sand (ratio 1: height 1-5 cm. Heating circuits above heated rooms can be laid without waterproofing.
Mounting options
Features of the dry screed pie. The dry screed layer is made of bulk material; a layer of plasterboard or plywood is placed on it.
Attention! It is better to use expanded clay as a bulk material, which has a high level of thermal insulation. Features of laying layers under heated floors in a bathhouse. Traditionally, heated floors for a bath room are laid directly on the ground
Therefore, the floor is raised above the ground. To do this, lay beams measuring 7 by 10 centimeters. The beams will reduce the load and distribute it evenly, and will also help level the base of the floor. Also
Features of laying layers under heated floors in a bathhouse. Traditionally, heated floors for a bathhouse are laid directly on the ground. Therefore, the floor is raised above the ground. To do this, lay beams measuring 7 by 10 centimeters. The beams will reduce the load and distribute it evenly, and will also help level the base of the floor. Also
Waterproofing roofing felt is placed in two layers on a foundation with pillars for support.
Next, a layer of supporting beams is laid, which are placed directly on the foundation along the edges, and in the center - on several columns. Logs are mounted to the beams, which are made thinner in the center by a couple of centimeters. This procedure will ensure the system is tilted.
The cranial blocks are attached to the bottom of the lag using nails or self-tapping screws. The bars are laid out in a T shape to lay the rough covering on them.
Insulation suitable for a bath is laid on the rough surface. The material is attached to the joists using a stapler.
Which surface is best for the base of the pie. Any surface is suitable for water heated floors. In apartments, the base is a concrete floor slab. In a private house, as a rule, the floor is laid on a wooden base. To install a water-type floor, you will need to check the quality of the ceiling; it must withstand the load of a heavy structure.
If you are planning to build a new building, then the ideal choice would be to lay the pie on the ground, which will be laid simultaneously with the construction of the house.
Classification
A complete analysis of the element allows us to identify several categories of floors, divided by purpose. These are industrial buildings, residential buildings, public institutions and livestock buildings.
There are several more distinguishing features, first of all, division by type: monolithic, roll and piece. Analysis of the installation site is divided depending on the location: above a heated room, floor construction on the ground, along the interfloor ceiling.
Regarding sanitary standards, there are 3 types of floor installation:
- single-layer, made of material that complies with GOST for heat loss and sound transmission;
- separate structure, made of a separate layer of sound insulation, screed and finishing coating;
- hollow, made along logs (cuts) with heat and sound insulation laid between them.
You can understand how to make a good floor while meeting numerous requirements only after fully familiarizing yourself with the standards.
Design of a water heated floor
The first question that needs to be dealt with immediately is in what capacity the water heated floor will be used. Arranging a heated floor for independent use has some differences from combined heating, in which there are several sources of room heating.
The key difference between heated floors, which are the only source of heat, is that there is no need to use a mixing unit. The heating circuit is connected directly to the boiler. In this case, the heating temperature is brought to 45 degrees, and its adjustment is carried out directly on the boiler.
To combine underfloor heating and radiator heating, it is necessary to install a mixing unit. It's all about the operating temperature of the radiators, which should reach 70 degrees - and this is too much for underfloor heating. It is for these purposes that a mixer is used - it adjusts the temperature of the coolant separately for each circuit.
Each floor of a multi-storey private house must have its own collector unit and mixer, and they all must be connected to a single riser. It is best to install collector units at the central point of the floor - in this case, the length of the pipes to each room is the same, and this makes setting up the system much easier.
The best option would be to use factory-made manifold cabinets that have passed a series of suitability tests. To select a cabinet, you need to know the number of inputs and outputs, pump power and characteristics of the mixing unit. The manifold cabinet is installed in the wall, after which all the necessary circuits can be connected to it. Of course, such cabinets are not cheap, but the high reliability and safety are worth it.
Also at the design stage it is necessary to determine the number of pipes required to equip the system. You can take an approximate value, according to which 5 m of pipes are required per 1 m2 of room area. The best and most popular option are cross-linked polyethylene pipes, which are lightweight, easy to install and have a long service life. Metal pipes are also quite reliable, but they are more difficult to work with and are more expensive.
The next design stage is choosing a pipe laying scheme from the following list:
- "Snake". This layout method is optimal for small spaces. The laying step is about 20-30 cm. The “snake” is quite simple, but it is not practical to use it in large rooms - the laying step for effective heating will have to be made very small, and even in this case the heat will be distributed unevenly throughout the room.
- "Spiral". This method is more complicated than the previous one, but the efficiency of this layout is much higher. If installed correctly, the entire floor will heat up evenly, and the load on the pipes will be reduced. Typically, a spiral layout is used in rooms larger than 15 m2.
Stages of work
Installing a heated floor in an apartment or private house is a set of measures that are carried out in a strict order:
Recommendation. Install the TP during the construction of the building, immediately after the construction of partitions between rooms. This will allow you to provide the required height of the thresholds and freely fit the “pie” under the floor covering. If doorways with low thresholds have already been formed in residential premises, try to get out of the situation using the suggested methods.
Let's move on to a detailed consideration of each stage of arranging heated floors.
Pie under dry screed
The instructions in this case will be as follows:
- A layer of damper tape is laid around the perimeter of the entire room.
- Sand or fine expanded clay is placed on the ceiling and leveled. Experts advise using an expanded clay base, as it insulates heat better than sand.
- Heat-distributing aluminum plates are laid along the contours of the pipes. To move around the laid system, you can use plywood boards - walkways.
- We lay a dry screed on top, namely: two drywalls, while covering the seams between the rows.
How to make a screed for a warm water floor, detailed video:
Installation of heating circuits - step-by-step instructions
First of all, the base is covered with a waterproofing film with an overlap of 15...25 cm on the walls (thickness of thermal insulation + screed). The overlap of adjacent panels is at least 10 cm, the joints are taped. Then the insulation is tightly laid, the seams are filled with polyurethane foam.
Next, let's look at the points on how to make a heated floor yourself:
Advice. During the heating process, the monoliths will expand and move relative to each other. Therefore, it is better to pack pipes crossing the boundaries of the slabs in special protective covers or put on thermal insulation sleeves.
After assembling the system, you need to fill the contours of the heated floors with water and check the tightness of the joints by pumping up a pressure of 2-4 bar (focus on the response threshold of the boiler safety valve). The technology for filling and releasing air from each TP loop is described in detail in the next material.
It also doesn’t hurt to start the boiler, warm up the heated floors without screed, and visually verify the correct operation of the system. How to install underfloor water heating is shown in the video: