The bathhouse - the room in which you steam - is designed to maintain high temperature and humidity. Therefore, it has certain specifics in the choice of materials and designs, namely:
1) To maintain high temperatures even in winter, the structure must be well insulated.
This applies to all structures - walls, ceilings and, especially, the floor, since it cools more than other structures and is in maximum contact with water.
2) Since the bathhouse is always humid, when setting it up it is important:
- properly drain the water; make a hydro- and vapor barrier for its structural basis; use materials in the cladding that do not deteriorate from moisture.
3) Internal lining materials in the bathhouse are operated at high temperatures (up to 80°C with wet steam and up to 130°C with dry steam). This means that it is necessary to line the internal surfaces with materials that can withstand high temperatures well and do not emit harmful substances.
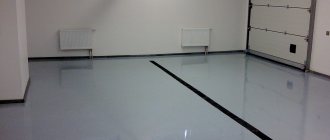
Choosing flooring material
The pros and cons of each of them are assessed individually by the customer. Wood is a “warmer” material, pleasant to contact with human skin and absolutely environmentally friendly.
Being in humid conditions most of the time, the wood will become damp, blacken and rot (and it cannot be treated with antiseptics, because it will “release” chemicals into the atmosphere when the temperature and humidity rise). Therefore, the wooden floor in a bathhouse is usually replaced every 5-8 years, depending on the frequency of use. Concrete is not susceptible to rotting and colonization by microorganisms, so it is more durable.
Bath floor options
Perhaps we should start with the fact that the floor of the bathhouse must have a drain through which water is drained, connected to the sewer or going into a drainage hole. For water to flow by gravity, the floor must have a slope going either to the center of the room or to one of its corners. Typically, this slope is 1-2 cm in height per 1 m of floor length.
There are two main types of bath floors, with different design solutions – wooden and concrete.
1.
The wooden floor in a bathhouse is made similarly to the floor in a house, but differs from it in its enhanced waterproofing protection, since it has to deal directly with water and steam. It is a structure of beams that rest on a foundation grillage and free-standing columns. A subfloor is sewn underneath them (the boards must be impregnated with antiseptics and water repellents), on which the insulation is laid.
The latter is covered on top with a reinforced waterproofing layer, on which the finishing coating is laid. These can be boards or ceramic tiles laid on a layer of glue on a cement-sand base. The wood must be dense enough so that it does not absorb water, and the tiles must have an anti-slip coating that protects a person from falling on a wet surface and getting injured.
It is important that the subfloor boards and insulation do not become damp from moisture coming from either above or below, otherwise the insulation will lose its heat-saving properties. And if a layer of waterproofing protects it from moisture from above, then from below it is necessary to ensure insulation of the foundation, drainage and external waterproofing of the basement so that water and cold, which cause frost or condensation, do not penetrate into the basement space.
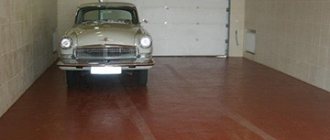
2. The floor in the bathhouse can be made of concrete. Because a bathhouse is a small room, and such a floor, although quite material-intensive, has a guaranteed service life.
For comfortable use of the bathhouse, it is important to make the floor warm. Its optimal design is as follows: first, the soil under the foundation is compacted at the required height, then the area is covered with crushed stone, which is leveled with a layer of 12-15 cm. It is advisable to impregnate the crushed stone with bitumen.
Concrete is also laid out on this base in a layer of 12-15 cm and leveled using the rule. Then the concrete gains strength in a humid environment for 2-3 days. The next layer is heat insulating.
To make it, expanded clay or expanded polystyrene chips are mixed into the concrete mixture. In principle, it is possible to lay extruded polystyrene foam, which will need to be protected with waterproofing, and again filled with concrete mortar on top. The top layer of concrete is also necessarily covered with a layer of waterproofing, on which, in turn, the finishing coating will be placed.
What is possible waterproofing of the floor in a bathhouse?
As already mentioned, in the case of a wooden floor structure, waterproofing is installed on top of the insulation, protecting it from moisture that can penetrate through the finishing material of the floor.
The waterproofing layer can be made of a coating material on which roofing felt is laid in several layers. As a coating waterproofing material, you can use mastic, which is sold ready for use. or molten bitumen.
You can also use euroroofing felt as insulation, a new generation material that is less labor-intensive to install.
It can be used if the insulation can withstand high temperatures, since euroroofing material is a weldable material.
Waterproofing the floor in a bathhouse, if it is made of concrete, can be rolled-coating, penetrating, polymer-cement and cement.
The first condition for a high-quality waterproofing device is the preparation of the base, which should be as smooth as possible and free from bumps and depressions.
Before laying waterproofing consisting of roll-coating materials, it is advisable to prime the surface. After which hot bitumen or cold mastic is applied to it, onto which roofing felt is laid in several layers.
Penetrating waterproofing is done using a special powder, soluble in water (for example, “Penetron”, “Infiltron-100”), the effect of which is that it crystallizes in the pores of concrete, not letting water into it, but leaving it permeable to steam.
Polymer-cement waterproofing is a ready-made mixture (for example, “Ceresit CL 50”), or a two-component composition in which a mixture of cement and additives is mixed with a liquid polymer (“Maxseal Flex”). The good thing about the material is that it can bridge cracks up to 5 mm.
Waterproofing, called cement waterproofing (“Hydrostop”), is a dry mixture specially prepared for waterproofing rooms with high humidity. It contains hydrophobizing and polymer modifying additives. The prepared mixture is called coating waterproofing and is applied over a primer onto a prepared and moistened base.
If sheet insulation is used when installing a concrete floor, it should be protected from moisture on both sides using plastic film or roofing felt, covering the ends and ensuring that the seams overlap.
It doesn’t matter what size the bathhouse was built, care must be taken to ensure that wastewater is removed from the premises.
Before creating a floor with a drain in a bathhouse, you need to consult with construction specialists. This is the only way to avoid reworking the entire system in the future. Read an overview of the types of sauna stoves on this page.
The photo shows the drainage device in the bathhouse
Attention and the right approach will guarantee the long-lasting service of the walls and foundation of the building. In addition, only a properly constructed floor can prevent the formation of fungus, rot and unpleasant odors. It is for this reason that it is incredibly important to carry out sewerage.
There are two main ways to bring your plans to life:
- The first option involves installing a drainage system; the second option involves installing a drainage system so that it is connected to the central sewerage system.
The drainage system must be carried out with special care; no allowance should be made for the simplicity of the design. After all, in fact, water will flow into the drainage by gravity.
For this reason, it is necessary to arrange the floors in the bathhouse very dense and with a slight slope. You can also install a drain hole in the floor. A metal or asbestos gutter can be installed underneath it.
Advice! Many experienced specialists say that a trench can be installed between the room where ablution will be carried out and the steam room. To bring this to life you will only need to raise the partitions a little.
This is how the water will flow down an inclined slope into the gutter and be discharged directly into the sewer or drainage well. In most cases, wells of this type are installed close to the building. The overall dimensions of the drainage will depend on the number of people taking a bath at the same time.
Finishing screed
The final floor screed should be done as follows:
- Along the entire perimeter of the room, glue a special damping tape 1.5-2 cm thick so that it “catches” the EPS boards.
- Using a mesh with cells 10 x 10 cm and a wire thickness of about 3 mm, lay the reinforcing layer. At the same time, it is placed on stands (caps from ordinary plastic bottles are suitable).
- Dilute the solution of CPU M 500 and sand (ratio 1:3).
- Pour in the finishing layer and level it using a rule or trowel.
After this, the layer will “mature” for about 35 days, during which the surface must be moistened with water daily so that it does not crack.
In the process of creating a screed described above, there is no stage of installing guides. The fact is that if you screed the floor using beacons, you will have to create an unreliable and rather cumbersome structure. In addition, the beacon can change its position due to the fittings. Therefore, the easiest way during the formation of the “pie” is to follow the chalk marks on the walls, and after the concrete has completely hardened, cover the floor with a self-leveling compound.
Kinds
Today, baths can be built from various building materials: reinforced concrete slabs, brick, wood or timber. Consequently, the floors will have different designs. Read a review of sauna stove manufacturers.
The two main types of flooring that are most popular among the population are:
wooden floors in a bathhouse with a drain - this option is very durable and reliable, but despite this, wooden floors have many disadvantages. They rot and get very wet.
Water flows down through the cracks between the boards; concrete floor with a drain in the bathhouse - this type of bathhouse floor is durable and highly durable. It should also be noted that not everyone can install such floors, because it is necessary to maintain the slope of the surface and make it absolutely flat. When pouring a concrete floor, it is necessary to use additives that affect the waterproofing qualities of the coating.
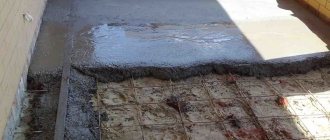
The photo shows the process of waterproofing a floor with a drain in a bathhouse
As for the device for draining water in a frame bath, removable wooden floors would be the ideal option. This is when all the elements can simply be taken outside to dry.
How to fill floors?
The floors in the bathhouse need to be given special attention. Their flooring can be done using several methods.
The first option is very simple - the floors are laid on wooden logs without fixing them with nails, and it is necessary to maintain a gap of five millimeters between all floor elements. This option can be considered ideal, because if something happens, you can simply take all the elements of the floor structure outside to dry. You can read the instructions on how to insulate a bath here.
In the event that the first option, in the opinion of the bath attendants, will be inconvenient and very painstaking, you should use the second option. You can make permanent floors that will be particularly durable.
This option involves maintaining a special slope, and a device is installed under the floor system that is responsible for collecting water and distributing it in the receiver. With all this, it is worth remembering about the ventilation of the room. The presence of ventilation is a mandatory element of any bathhouse. The riser can be made from either asbestos or metal.
It is then placed on the drain. The diameter of the drain system cannot be less than ten centimeters. A cap is installed on the “top” of the system.
After some time, the drainage system will need to be cleaned, as well as the drainage system itself. It is performed in several stages.
In the first stage, wastewater is separated from limescale. At the second stage, biological treatment is carried out through a filter system. Soil can act as a natural filter.
In the event that visits to the bathhouse will occur quite rarely and no more than 4-5 people will use the room at a time, then it is worth installing the most primitive water drainage system.
It will be enough to use the most affordable, so-called budget option - this is a device at the base of the construction of a pit for washing departments. As for the walls, it is advisable to lay them out with bricks or cover them with liquid glass.
If the number of people simultaneously visiting the bathhouse exceeds 6-10 people, then a more complex structure should be arranged. It will be necessary to lay a pipe and only then bring it into the drainage or central sewer system. An overview of the types of columnar foundations for a bathhouse here: https://banya-gid.ru/stroitelstvo/fundament/obzor-vidov-fundamenta-stolbchatogo-dlya-bani.html.
At the moment, economical and environmentally friendly systems are very popular among those who like to take a steam bath. These usually include wells equipped with biological filters and septic tanks.
Video
Watch the video for recommendations on how to organize water drainage in a bathhouse:
In such systems, natural sedimentation of water occurs. After time, the water will be distributed throughout the surrounding area. The sludge settled at the bottom of the settling tank will become a “home” for microorganisms.
They thrive in the alkaline solution of wastewater and feed on what is contained there. They themselves purify water. Installation of a septic tank must be carried out only in low-grade areas.
Any extensions to the house that will be used as a bathhouse or sauna need to be protected as much as possible, since the humidity there will constantly be increased.
Of course, if this is a summer option, then cracks are made in the floor boards to allow moisture to naturally escape.
But if this building is for use all year round, then you need to take seriously the insulation and waterproofing of the floor in the bathhouse.
Recommendations from experts
To ensure that the flooring in the bathhouse lasts at least 10 years, experts recommend paying attention to the following subtleties:
- During the installation process, floor boards must be secured with self-tapping screws at the junction of adjacent elements. In this way, warping of the coating can be prevented;
- During use, wood will inevitably swell under the influence of water. To eliminate the possibility of severe deformations, during the installation of the floor, a technological gap of 3-4 cm is left between the wall and the mounted planks;
- When installing non-leaking floors, it is advisable to place plywood under the larch planks, which minimizes the contact of the wood with the screed.
General information about floors in rooms with high humidity
You can build a bathhouse using a variety of materials, but wood is most often used. Due to increased humidity and the influence of steam, the tree quickly begins to rot and is exposed to other negative factors.
If the insulation is done correctly, then such problems will not arise and the structure will last much longer. Any materials will be damaged even after a single contact with water. Therefore, it is important to take the following steps:
waterproof the floor and foundation;
install a vapor barrier and waterproofing to prevent condensation;
It is worth making protection for the roof or attic.
You should also make a small slope in the area of the floor towards the drainage system so that the water flows into the sewer and does not stagnate in the room. To install the drain, it is better to use polymers or other stainless materials. There should be no metal surfaces under your feet, as they get very hot or cold. It is better to drain away from the place where water procedures are taken.
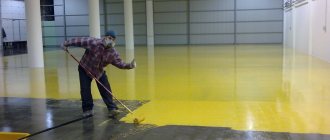
Laying mortar and curing concrete
Begin laying the mortar from the corner farthest from the door. Everyone decides for themselves whether they are right or left. A portion of the solution is laid out between the guides, leveling it a little. Then they take the rule and, resting it on the beacons/guides, stretch the mixture, leveling it along the way.
Leveling the solution using the rule
You can simultaneously move the rule a little to the right and left. This makes it a little easier to distribute the composition evenly. Having achieved the filling of all voids, leveling the solution, lay the next portion, gradually filling the entire space. During work, it is advisable not to take long breaks so that the edges do not have time to harden and “stick.”
If you have installed guides, once the concrete is hard enough to hold its shape, you can pull them out. After some time (about a day after installation), the holes remaining after pulling out the guides are sealed with mortar. When using beacons, they are left in the floor and no additional work is required.
Curing
In order for the screed to be strong, the concrete must harden and not dry out. Therefore, for the first three to four days at normal humidity and low temperature, the surface of the screed is moistened with water - 2-3 times a day. At high temperatures, the surface is covered with polyethylene foam. It is also necessary to ensure that there are no areas with different temperatures: sunlight should not fall (close the windows), if work is carried out in winter, the heating should not work.
After the screed has hardened a little, the traces from the guides must be sealed with mortar.
It is advisable to leave the floor without load for 3 weeks, but the minimum period is 1 week. If you want to increase the strength of the screed and speed up its “readiness”, you can add a plasticizer.
Bathroom floor waterproofing technology
The most important thing in installing waterproofing is how moisture will be removed from the room:
1. A solid surface that does not allow moisture to pass through, with an installed water drain.
2. Floor with leaking elements, created from sanded boards, in which there are holes and drainage is installed below. But this option is suitable exclusively for using a bathhouse in the summer.
Stage 1. Determination of the “zero” level
First, determine “zero” (mortar filling level), which should be equal to the bottom of the doorway, and mark it around the perimeter. To do this, make marks a meter from the bottom of the opening (as shown in the diagram) and transfer them to the walls of the entire room (obviously, it is better to use a laser level for this). Next, measure back 1 meter down from these marks and draw a second line - it will be the “zero” along which the floor will be filled. To simplify the procedure, hammer nails in the corners and stretch the cord.
Scheme for determining the zero level: AB - level standard, CD - the highest floor level for the future screed
Zero level circuit
Features of penetrating waterproofing
The simplest option would be to treat with bitumen mastic applied to a smooth surface, which protects well from moisture, but leaves a long-lasting odor in the room.
If the bathhouse or sauna is large in area, then you can make concrete waterproofing. Processing using polymer-cement materials is well suited. They level the floor and provide seamless protection that better protects against moisture penetration.
The nuances of waterproofing a wooden floor in a bathhouse
Wood is subject to a large number of destructive processes that can damage its structure. Therefore, the floor in the bathhouse must be properly protected from rotting and fungus. The boards need to be impregnated with special protective substances and have good waterproofing:
before laying the floor, wooden logs must be treated;
Traditional recipes for processing lag
Here are examples of folk recipes for how to treat bathhouse floor joists. The most common means is machine processing, used for preserving logs. A large number of recipes are based on a combination of oily waste, various salts and diesel fuel. According to the craftsmen, it will be enough to coat the beams only with oil. With this method you can stop wood rotting that has already begun.
This method is popular due to the existence of a large amount of used oil. Of course, the remedy is effective. The waste contains many active substances that suppress the reproduction of all biological organisms. Due to high chemical reactivity, joists should not be completely covered with used oil. This material cannot be used in a bathhouse. It is considered relatively safe to treat small areas of the most affected areas of timber: the ends and notches. These parts are the most accessible for harmful microorganisms to penetrate deep into the fibers.
Waterproofing a concrete floor in a bathhouse
Concrete is a strong and reliable material, but without proper thermal insulation it can freeze during the cold season. Therefore, in addition to protection from moisture, it is best to provide maximum protection against cold penetration into the room.
When making a screed, check the evenness of the surface and apply waterproofing mastic in several layers to the cleaned, dried mixture. A thin membrane or dense roofing material in the form of rolls is also laid.
All seams are soldered using a hair dryer. Afterwards, a reinforced mesh is laid on which a new layer of concrete screed will be placed. Next comes the final finishing of the floor.
Preparing the filling mixture
In order for a bathhouse to have a strong and reliable foundation that will last for decades, you need a high-quality solution, which you can prepare yourself or purchase in hardware stores. To make the solution yourself, you need to purchase high-quality components, because the grade of concrete and the strength of the base directly depend on them. It is better to use expanded sand for mortar; it will provide the concrete with increased strength.
To prepare the solution in a concrete mixer, you need to pour two buckets of sand, five liters of dry cement and fifteen liters of water into the machine. Mix the resulting mixture thoroughly until it has a homogeneous consistency and add ten kilograms of perlite to the concrete mixer and add two liters of water. Mix the solution and turn off the machine for ten minutes, then turn on the equipment and mix the components until excess liquid begins to come out. Stir the solution until a consistency similar to thick sour cream is formed.
Return to contents
Waterproofing with liquid glass
Liquid glass can be used to waterproof floors made of any material.
This is an economical and fast finishing method. After application, the substance turns into a dense crystalline base. The material looks like molten rubber and is very easy to apply to any surface.
It prevents not only the penetration of moisture, but also traps air, preventing the room from freezing. The glass is applied to the subfloor, and after hardening it helps to waterproof, prevent the occurrence of bacteria that are hazardous to health, and protect against electricity and fire. Such protection can be used for no more than five years; it is prone to self-destruction.
Read also: How to insulate the ceiling in a bathhouse?
You shouldn’t mix a lot of glass at once, it crystallizes quickly, and there is a chance you simply won’t have time to apply the entire mixture in a timely manner.
You don’t have to worry about humidity during application; unlike other materials, glass is not sensitive to this and will perfectly protect the room after hardening. It is better to apply the material in uniform stripes, after which you need to level the surface using a spatula. Share:
A bathhouse is a room with a high level of humidity; its walls and ceiling are regularly exposed to water vapor, and the floor is also exposed to water. Therefore, when building a bathhouse, it is imperative to take care of waterproofing the floor in all rooms. The method of its implementation depends on the type of flooring.
The floors of the bathhouse, as a rule, are laid on the ground, and in the washing compartment a large amount of water is poured onto them. Therefore, conventional waterproofing between rough and finished flooring, as, for example, in a bathroom, is not enough in this case. A whole range of measures is required:
- Waterproofing the foundation Waterproofing the base of the floor from the ground side Ensuring water drainage or arranging a drainage system Walls, ceilings and outlets of all communications also need waterproofing
If the bathhouse is built on a concrete foundation, a sand and gravel cushion is placed under it, and after the concrete is poured and hardened, the foundation is vertically and horizontally waterproofed.
First, it is coated with bitumen mastic, roofing material is glued on top of it, preferably in 2 layers, all joints are sealed.
A cushion of sand and gravel is also poured under the concrete base of the floor and compacted well. A layer up to 15 cm thick is sufficient. Before pouring concrete, the pad is impregnated with bitumen.
The drainage system needs to be thought out before pouring the foundation and concrete base, so that, if necessary, lay trenches under the drain pipes, dig a drain hole or pit. In this case, it is necessary to take into account the nature of the soil and the type of flooring. Possible options:
- If the soil is sandy and absorbs water well, 25 cm of crushed stone is poured on top of the sand, and the floors are made to leak. Water seeps through the cracks of the wooden flooring or drilled holes in the floor, passes through the drainage layer of crushed stone and is absorbed into the sand. If the soil absorbs water poorly, the floors are made leak-proof, with a slope towards one of the walls or towards the middle of the room. In the lowest part of the bathhouse, a sewer grate is installed, and under it - an inclined drainage chute, through which water flows into a pit, drain well or septic tank. Before pouring the concrete base, a drainage hole is dug under the floor, a container with sealed walls is installed in it and drained at least 10 cm from the bottom, the end of an inclined pipe through which water will flow into the septic tank outside the bathhouse
If a pit or drainage hole is made directly under the floor of the bathhouse, it is necessary to install a water seal so that unpleasant odors from the septic tank do not penetrate into the bathhouse. To do this, an inclined metal plate is attached to the edge of the pit from the pipe side; its lower edge is not fixed and is located 5 cm from the bottom.
Stage 3. Further backfilling
Once you've finished with the base layer, start adding gravel. Fill the material with a layer of 10 cm, water and compact. To make it easier to control the thickness, drive a number of pegs of the required thickness into the base and align them to the same level. When compaction is complete, pull them out.
Next, fill in a 10-centimeter sand cushion using the same pegs. Pour water over the sand and compact it. Let us add that here you can use any sand, even with various kinds of impurities.
Cover the sand with a similar layer of crushed stone (the fractions of the latter should be approximately 5 cm). Compact the crushed stone, sprinkle a thin layer of sand on top, level and compact. If you notice that there are protruding edges of crushed stone left on the surface, then remove them or lay them in a different way. Remember that the result should be a flat plane without any corners.
Waterproofing concrete floor
In the sections of the bathhouse with the highest level of humidity - the steam room and the wash room - a concrete floor is often made with a porcelain stoneware finish; it is more reliable than ordinary floor tiles. On top of such a covering, you can lay several wooden gratings, making a collapsible flooring, which is periodically taken out of the bathhouse for drying. Concrete screed can be destroyed by moisture, so a layer of waterproofing is required between it and the finishing coating.
Waterproofing begins after the screed has dried.
When arranging it, a slope is formed towards the drain, but there should be no depressions or bumps on the surface, and it must be thoroughly cleaned of dirt. The technology for screeding with a slope is the same as when leveling the floor on an open balcony. To reliably protect the screed in a bathhouse, it is recommended to combine coating waterproofing with lining waterproofing.
- First, mastic is applied in 2-3 layers, and if the first layer is spread in the longitudinal direction, then the second layer is spread in the transverse direction. Rolled material is glued on top of the mastic - PVC film, membrane, roofing felt
You can also limit yourself to applying bitumen, bitumen-polymer mastic, or use penetrating waterproofing, which seals the pores of concrete.
Instead of expensive concrete or polymer-cement penetrating waterproofing, you can apply liquid glass. It has excellent adhesion to concrete, fills all cracks well and is completely waterproof after hardening. The main disadvantage of this composition is its fragility; usually after 5 years the silicate mass is destroyed.
If a concrete floor is insulated with high-density mineral wool or extruded polystyrene foam, it is advisable to protect the insulation on both sides. A water vapor barrier membrane is laid on top of the rough screed.
Before finishing the screed, the insulation is covered with rolled waterproofing. It is advisable to reinforce the screed in order to reduce the load on the insulation, so the film or membrane must be dense enough so that it is not damaged by the reinforcing mesh.
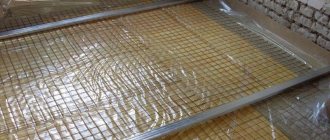
Reinforcement
Floor reinforcement is an important stage in its construction. Reinforcement in the form of a road mesh allows the floor not to sag, distributes the load correctly, and prevents the concrete from cracking. The cross-section of the mesh rods should be five centimeters. The length of the cells is fifteen centimeters. If you lay the reinforcement correctly - at a distance from the insulation of less than two centimeters, a reinforcing frame is formed.
The reinforced rigid mesh does not lie on the ground - it is raised by at least a third of the thickness of the screed and fixed on a stand. Soft - attached to pins. For very high loads, a reinforcement cage with rod thicknesses from 0.8 cm to 1.6 cm is used.
Waterproofing a wooden floor
Leak-proof wooden floors are usually made in the dressing room, rest room, where the humidity level is lower and a minimum of water gets on the floor. However, joists and subflooring need waterproofing. Solid floors, unlike leaking floors, can be insulated; the insulation on both sides must be protected with a water barrier.
- The joists and transverse support bars that are laid on them are wrapped in waterproof film or other sufficiently elastic rolled material, not forgetting to protect the ends. A subfloor made of boards or plywood is attached to the support bars and covered with rolled waterproofing in several layers, overlapping and extending onto the walls. The joints of the film are glued with tape, and the roofing material is glued with molten bitumen. Insulation with mineral wool or expanded clay is performed on top of the first layer of waterproofing. The insulation is covered with 3 layers of roofing material, fastened with hot bitumen
Important! There must be a ventilation gap of at least 2-3 cm between the waterproofing layer and the finished floor. Therefore, a sheathing is made on top of the subfloor, and the thickness of the bars must be greater than the thickness of the insulation so that the sheathing protrudes above its surface. The finished floor is already laid on it.
As for leaky floors, the main task is to waterproof the joists on which they are laid. The logs can be treated with an antiseptic and wrapped in a layer of rolled waterproofing.
If they rest on concrete or brick piles, the piles must be covered with roofing felt. If under the slatted floors instead of a layer of crushed stone there is a concrete base with a slope, then it is waterproofed from below. Either geotextiles are laid over the compacted soil under the sand cushion, or the sand and gravel cushion is impregnated with bitumen.
Learn more about waterproofing wooden floors in the bathroom here.
Arrangement of the base
Beacon system for creating a funnel-shaped floor slope in a bathhouse.
Buildings with a bathhouse require a solid foundation, so before you start concreting the floor, you should carefully prepare the base for it. When working with concrete, it is important to provide it with a flat surface; to do this, the soil is compacted and sloped at a slight angle to the well for drainage. A layer of gravel is also poured onto the ground at an angle, and a clay layer is laid next to the foundation.
To prevent the concrete base in the steam room from being cold, the floor should be made of two layers. To do this, lay the first five-centimeter tier of concrete, heat-insulating material is placed on it, after which they begin laying the second layer. However, do not forget to carefully compact the layers. The second tier should be combined with the reinforcing mesh. When the preparation is completed, begin screeding the base.
Return to contents
Video
Consequences of installing a wooden floor in a bathhouse without waterproofing the base. Recommendations for floor restoration taking into account errors.
The floors in any room of the bathhouse need waterproofing, but it should be especially thorough in the washroom and steam room. If the floors are insulated, a layer of thermal insulation is protected from moisture on both sides. Minimal waterproofing is required when installing cold, leaky floors, since they are well ventilated, and the flowing water goes into the ground. Properly performed waterproofing and drainage will extend the life of the floor and the bathhouse as a whole.
Sources:
- semidelov.ru
- banya-gid.ru
- nastroike.com
- delaempol.com
There are no similar posts, but there are more interesting ones.
Water circuit diagrams
Before starting work on the independent construction of water-heated floors in a private house, you need to think through the layout of the heating elements.
There are two main options for placing pipes on a concrete surface:
“Snake” is the simplest installation diagram for installing water floors in a private house. The disadvantage of this method is the temperature difference between the coolant at the time of entry and exit, so the second part of the pipeline will be less warm. The pipes are laid parallel to the walls in the form of loops.
“Snail” is the positive side of this method in its ability to distribute heat evenly, but it is more difficult to lay the heating element yourself using this scheme. The heated floor contour is arranged in a spiral from the walls to the center, and back.
To increase the efficiency of the floor and save material, it is better for cottage owners to make a combined heated floor design. It consists in placing the highway in the central part of the room in a “snail” pattern, and along the perimeter in a “snake”. If the laying step is correctly calculated, the temperature will be optimally comfortable.