It not only hides the seams between walls and floors, communications and wires, but is also used as room decor. How to attach plastic skirting boards to a concrete wall will determine its service life, as well as the appearance of the room.
The installation of fillets itself is simple, but its correct location relative to the floor and walls will depend on the quality of the work performed.
How to fix a plinth to a concrete wall?
The use of skirting boards solves two problems at the final stage of arranging rooms. The first is sealing the technological seam, wires, flaws, the second is adding the final touches to the interior. The presence of a plinth is a mandatory criterion, without which the renovation of an apartment or house will not be complete. The appearance and service life depend on how it is attached. Improper fixation will lead to cracks and the product falling off.
If you are going to install a plastic baseboard with your own hands, you must first remove from the room all objects that may interfere with work or move them to the center of the room, and also remove all debris along the walls. The walls must be prepared, it is necessary to remove unnecessary irregularities and clean them from dust.
You should start working from the far corner of the room and gradually approach the exit. Installation of plastic skirting boards is possible in any room where it is needed. It is important to ensure a tight fit to the wall and floor. Which fasteners to choose for the panels depends on the material of the walls and floor covering.
Towards a concrete wall
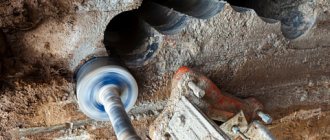
When the walls are built of concrete or brick, the installation of plastic skirting boards is carried out using liquid nails or dowel nails.
To drywall
When the walls are pre-finished with plasterboard, this option uses screws with dowels (butterfly) for plasterboard. If a metal profile is laid along the floor, you can use metal screws, and installation can also be done using liquid nails.
To the floor
The plinth is attached directly to the floor quite rarely: this is done if it is necessary to close a large gap between the floor covering and the wall or when the structure of the wall does not allow the plinth to be securely fastened to it. In this case, the mounting methods are the same as on the walls, but there is a nuance. The plinth itself must be turned with the wide side towards the floor, and the narrow side towards the wall, so that the height will be less than the width, or choose products with a wide base.
Attaching plinth to concrete wall
Varieties
In the process of manufacturing skirting boards, various materials are used, depending on this, the skirting boards can be:
- wooden
- plastic
- metal
- from MDF
If repairs are carried out in an apartment or private house, then wooden or plastic skirting boards are used for the work. MDF skirting boards are a rarer element, while metal skirting boards are more suitable for industrial premises.
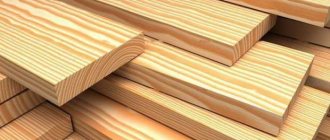
- To make wooden plinths, wood of any species is used, this fact affects the cost of the material. The wood used in production is oak, alder or larch. The main area of application is edging floors made of parquet, laminate or wooden boards. Manufacturers present their products in several versions, in the form of a triangular or figured shape. The only drawback of such products is the use of special tools, a saw or a hacksaw, to cut off the desired fragment.
Wooden plinth
- MDF products are made from compressed wood fibers covered with veneer. The external characteristics are excellent; it is very difficult to visually distinguish a wooden plinth from MDF products. As for the strength characteristics, this material is noticeably inferior to its analogue. But you can’t do without advantages; it’s an affordable price that attracts most consumers.
MDF products
- Plastic plinth is a priority material for modern renovations. Unlike previous options, it has multiple advantages: it is resistant to humidity and ultraviolet rays; has many color options, which allows you to choose the most suitable color to match the floor covering.
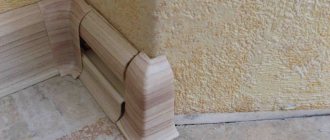
Plastic skirting board
Installation methods
So, you have chosen the main material, now you can tell us how to attach the plinth to a concrete wall. There are several ways - let's talk about each one in order.
Installation of plastic skirting boards with cable duct
The good thing about these products is that they are easy to join along the length and at the corners. For this, there are additional elements that are selected by color and profile. The plinth is cut at a right angle before joining.
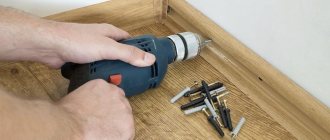
To install products with a cable channel, you will need self-tapping screws and plastic dowels.
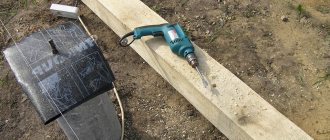
How to attach a plastic skirting board to a concrete wall is shown below.
Clip mounting
This installation method can be used for both plastic and wooden planks.
Each manufacturer has its own form of clips, but they all have the same fastening principle:
- Places for installing clips on the walls are marked. The distance between them is usually about half a meter. But there may be other requirements, which the instructions will tell you about.
- Next, as in the previous case, holes are drilled at the marking points, dowels are inserted into them and the clips are secured with self-tapping screws.
- After laying the cable, the plinth snaps onto the clips. If necessary, it can be easily removed.
Installation of wooden skirting boards
Products made of wood and MDF often have to be fastened in an open way, by drilling or punching through them. In addition to dowels, in this case, finishing nails with a small, almost invisible head are sometimes used.
The installation principle is the same: marking, installing dowels into holes in the concrete wall, screwing.
Note. If you decide to nail the baseboards, instead of plastic dowels, insert wooden plugs into the holes.
However, there are some differences you need to be aware of:
- To make accurate markings, you need to drill the baseboards and screw self-tapping screws into them so that only their tips stick out from the back side. Then place the products against the wall and turn the screws a little more so that marks remain on it. These will be the marks for future holes.
- They do the same with nails, punching them right through the planks.
- If the products are veneered, it is necessary to make a neat countersink for the screws according to the size of the heads. Otherwise, when screwing in, they may damage the top layer.
- If the plinth needs to be joined along the length, it is better to saw off the joining parts not perpendicular to the outside, but at an angle. This way the junction will be less noticeable.
Calculation of material costs
Calculating the need for material will not be much of a problem. It is necessary to measure the perimeter of the room, subtract the dimensions of the doorways from it, divide the result by the length of one batten and round the resulting number up. It is necessary to take into account the number of trimmings. It is better to take one more profile than to assemble one side of the room from several fragments.
There is no point in closing the corner in those places where cabinet or upholstered furniture will be placed close to the wall. It is enough to cover only open areas.
There is one more little thing that should not be forgotten - components. In accordance with the layout of the room, you will need internal and external corners, connecting elements, one right and one left plug for each door.
Fastening plastic skirting boards with glue
With perfectly smooth walls, installation of profiles can be carried out using a special adhesive such as “Liquid nails”. In the assortment of our online store this is SOUDAL 48A glue. The fastening process is as simple as possible - apply a layer of glue on the back side and press the baseboard to the seat. While the glue has not set, you can level the profile by lightly tapping. If the walls are uneven, the plinth on liquid nails needs to be pressed down with something, so in this case it is better to use self-tapping screws. If the design of the room includes non-standard angles and curved shapes, then a flexible plinth is used. It is very convenient to fasten it with “liquid nails”.
Product trimming
Proper trimming of the material used affects the final result. Therefore, when the problem arises of how to attach a larger plinth, you need to use simple tips:
What to cut with? For this process, a metal saw with a blade having small teeth is used. As an alternative, you can use an electric jigsaw, to which special files are selected. When the parts have already been fastened, but there is a need for minor adjustments, use a sharp construction knife
This device must be used very carefully so as not to damage the front side. It is advisable to cut the plinth only after careful measurements. To trim at the desired angle, use a miter box.
Trimming the plinth: outer and inner corners, arrangement of parts in the miter box
Such simple tips greatly facilitate the process and allow you to install the elements with the highest quality.
Mounting features
Depending on the material from which the plinth is made, one or more of the described methods for installing the specified elements is used.
Installation of plastic plinth
Such elements can be installed with glue, with special clips or with self-tapping screws. When installing with glue, there is no dust; before attaching the floor plastic plinth, you need to clearly measure them, keep in mind that they are glued once, and they cannot be dismantled.
It is necessary to dose the glue correctly and try not to smear the floor covering.
If you want to securely fasten, use self-tapping screws . Although this is a lengthy process, it is the most reliable.
First, holes are made in the plank at a distance of 50-60 cm, then it is placed against the wall and the places for the dowels are marked. In the marked places, holes are made into which dowels are inserted, after which a strip is applied and secured with self-tapping screws.
If the strips do not have a cable channel, then the caps of the screws are closed with special plugs, which the craftsmen recommend gluing, and if there is a cable channel, then they will be closed with a special strip.
Plastic plinth can be attached to the floor using special clips .
This installation method allows you to dismantle the baseboard, but when using it, the walls must be perfectly flat, and this is not always the case.
Do-it-yourself installation of plastic skirting boards, step-by-step instructions:
- Mounting points are marked on the wall;
- holes are made in the baseboard;
- insert dowels and, using self-tapping screws, attach special clips, the distance between which is 40-50 cm;
- Now all that remains is to apply the plinth and with the help of light blows with your fist, it is fixed.
Wooden
Installation of wooden plinths is more difficult than plastic ones, since there are no special corners. The corners are butted together and in order to cut the baseboard correctly, you will need a miter box. It's rare that a room has a 90-degree angle, so the adjustment of the planks is usually done locally, and done by hand.
Installation is carried out using self-tapping screws, with a distance between them of 70-100 mm. After marking, screw the screws into the plank so that they appear slightly on the other side, then place the plank against the wall and mark the holes for the dowels. Drill holes, insert dowels and fix the bar.
Installation on finishing nails is carried out using the same technology, but instead of plastic dowels, wooden pins are used. This method allows you to make the attachment points invisible, but it is not suitable for uneven and loose walls .
MDF skirting boards
Depending on whether you plan to remove the plinth after a while or not, you choose the method of its installation. MDF skirting boards are most often installed with glue , but in this case, the walls must be perfectly smooth.
Required tools and materials
A set of tools
To install the baseboard, a set of tools that are in the pantry of any home craftsman is enough:
- hammer drill, screwdriver, electric drill;
- hammer;
- hacksaw for metal;
- awl;
- core;
- miter box;
- stationery knife;
- marker;
- plastic dowels, screws:
- safety glasses and gloves.
Since the work will be accompanied by the formation of dust, sawdust and cuttings, you need to prepare a broom, dustpan, bucket of water and a rag.
Organizational matters
First of all, you need to plan your actions.
What is the best way to attach the plinth?
Clamp for fastening slats.
- If the floors are wooden - traditional planks, parquet, made of solid or parquet boards, and the walls are concrete, it is better to fix the baseboard to them. Driving screws or nails into concrete walls will be much more difficult.
- The opposite rule also applies: if the floors are concrete or screeded, and the walls are wooden, fixing the baseboards to the wood is much easier.
Note! Before attaching the plinth to a concrete wall, consider what it is lined with. If it is leveled with gypsum board, plaster, or soft stone, then the skirting boards can only be secured with special finishing nails (yellow) with miniature heads. Ordinary screws, dowels and nails will not hold securely in such a base.
- It is also possible to attach plastic skirting boards to a concrete wall by gluing them to “liquid nails”. However, here it is worth considering that it will not be possible to remove the strips later.
- Another modern method is to fix the slats with special clips (clasps). However, if you do not have experience working with such fasteners, it is better not to take on the job.
Wood, plastic or MDF
Now the choice of baseboard material is quite extensive. You can choose natural wood, plastic or MDF:
- If the floors are assembled with your own hands from piece, panel parquet, solid, parquet, tongue-and-groove boards, then a wooden plinth will harmonize with them.
- When the floor covering is self-leveling floors, ceramic tiles, laminate, carpet, linoleum, it is best to use plastic or MDF baseboards.
Preparation
Much attention must be paid to the preparation stage. Due to the fact that the plastic skirting board is installed on decorated surfaces, the installation site is already ready for work. But you need to select the necessary components:
On a note! Installation of each additional part occurs at a certain stage of installation. It is important to calculate their location in advance and take into account that they take up several millimeters.
Before attaching plastic skirting boards to the surface, you should also prepare the tools necessary for the job. An individual set is selected for each specific situation.
Things to remember
There were no significant differences in the principles of fastening PVC systems to walls. In any case, the plinth must be installed without distortions. Only the materials used for installation differ (described above).
Plastic skirting boards are not attached to the floor. This is partly due to the design of the molding (a kind of “foolproofing”). Even if we assume the possibility of a non-standard placement of the strip, this is where it all ends - the fittings assume an exclusively wall location.
Some difficulties arise when going around radius walls with plastic skirting boards, but by alternating small sections of strip and connecting elements you can adequately get out of the most difficult situation.
There is an opinion about the advisability of using thermal blowers when working with PVC systems in difficult areas. However, we should not forget that identical temperature effects on plastic of different thicknesses can produce different results. And the thickness of the plinth planes varies over the entire width, only based on this, it is extremely difficult to predict the final result under the influence of high temperatures.