Laying curbs for paving slabs is a fairly simple and easy-to-do-it-yourself task, which does not negate its importance. The border performs two functions at once - it serves as a decorative design, separating the covering from the rest of the area and giving it a finished look, and also protects the tiles from deformation.
Craftsmen say that you should not ignore the installation of this element, especially when it comes to limited areas (narrow garden paths, certain fragments of covering, etc.). Installing a border for paving slabs significantly extends the service life of the entire coating, protects it from external aggressive factors, and keeps it intact.
Modern manufacturers offer a large selection of curbs for paving sidewalks and garden paths - made of plastic, rubber, stone, clinker, polymer and other materials. And even if it was decided to abandon the border, it is still worth thinking about one type of edging or another - a drain, a steel corner or another option, of which there are many available today.
Types of borders
Initially, curbs were used to separate the sidewalk and road surfaces. Today, the element most often performs a decorative function, helping to form the boundaries of road and pedestrian zones.
The border holds the cladding well, preventing it from moving to the sides. As for the design, borders can be found from different materials, any shapes, configurations, colors.
What are borders made of:
- Concrete - it can be just a concrete curb or with reinforcement, which increases strength and reliability, and extends service life. For the manufacture of the element, M400 concrete is used.
- Stone - elements are cut from solid stone, ensuring the desired size and shape. Such products are especially durable, but require a high cost. True, they look very beautiful and expensive: due to the natural texture, the border turns out to be an original color, with a unique design.
- Artificial stone - border is made from concrete and stone chips. After pouring and hardening, the elements are sanded, giving a natural look. Such a border is practically no different from natural stone, but costs much less.
- Clinker differs from clinker brick in size and shape. The production technology is the same, so the border acquires a special color that cannot be confused with anything else.
- A mixture of polymer and sand is produced according to the same principle as polymer-sand tiles: the components are mixed, heated until half-ready, and molded. By adding expanded clay to the mixture, it is possible to reduce weight. Laying paving slabs and curbs of this type will cost the least. But the material has some disadvantages: it expands when heated, requires a minimal choice of colors and shapes, and is not very durable.
- Rubber - such elements are made from crumbs, which are obtained by processing car tires. Rubber curbs are not afraid of moisture and high/low temperatures, but are considered a fire hazard.
- Plastic is the newest material for the production of borders, which is gradually gaining popularity. But due to the low strength of the plastic and fading under the influence of ultraviolet radiation, it is used less often than it could be. However, the low price and huge selection in terms of size, shape, and color make this option attractive.
Sidewalk
This type of borders is usually used for edging lawns and zoning space, separating areas with flower beds and grass from paths and sidewalks. It is also important that the paving curb makes it possible to hold different layers of soil, does not allow the soil to mix with sand, crushed stone, strengthening the tiles and thus protecting them from spreading.
As a rule, sidewalk curbs are made from concrete mortar using the vibrocompression method. The length of a standard stone is 50 centimeters, the canvases are assembled from the required number of products.
Road
Such a curb is designed to separate the roadway from the sidewalk/lawn and make the roadway more durable and reliable. Another name for this element is road side stone. It is installed during the construction of the road; in some cases, the element has to be laid separately, after the installation of the road surface (if the curb was not initially included in the project).
Road side stones are produced twice as long as the sidewalk curb, and the product is also usually slightly taller and wider. They are made using the casting method, often reinforced with reinforcement from metal rods.
Regulatory standards for the installation of curbs
Installation of curb stones is regulated by the requirements of the following regulatory documents :
SP 82.13330.2016 "Improvement of territories."- SP 475.1325800.2020 “Parks. Rules for urban planning of the territory."
- TR 94.12-99 “Technical regulations. Improvement of territories near buildings and structures under construction.”
When implementing a capital construction project that involves landscaping the territory or constructing a highway of a higher category of responsibility, the GASN acceptance committee issues instructions and checks the correct installation of each stage, in strict accordance with the documents listed above.
Sidewalk without curbs
Despite the fact that laying a sidewalk curb today, as a rule, is included in the list of stages in the formation of various types of coatings, there are several technologies that do not involve the installation of this element. In this case, it is possible to reduce the cost of installing alleys and paths, and significantly speed up and simplify the construction process.
Tiles recessed into the ground
As a rule, this method is used when laying in areas with clay soils, where the tiles practically do not move apart. The option is relevant where the load on the coating is not too large - in a country house, the territory of a country house, where they do not live permanently.
Work process:
- Removing a layer of turf and a small layer of soil
- Adding a sand cushion, compacting and leveling it
- Paving slabs are laid so that the coating does not protrude above the ground surface
- The path is sprinkled with sand, which is then carefully swept away with a brush.
Using a steel angle
To perform coating using this method, through holes are created in one of the flanges of the steel angle. With this shelf, the corner must be laid on the soil in a trench specially made for this purpose. Then the corner is attached through the holes with pins to the ground so that the upper edge is flush with the ground.
After sand filling is done, paving slabs are laid on it. If you use a fastening solution of sand and cement, you can create a strong monolithic covering of the garden path.
Fixation with concrete mortar
It is possible to lay tiles without a border if, instead of the product, you use small piles of cement mortar, which are formed along the boundaries of future paths. Then they are covered with turf and become completely invisible.
The most important thing in technology is to correctly maintain the height of the solution: it should not be higher than the mounted tiles (ideally, if lower by 2-3 centimeters).
Use of concrete gutters
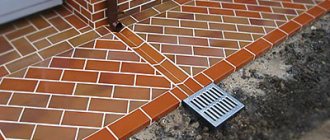
Many craftsmen, instead of making a border, install yard drainage systems using open storm drains. Special trays discharge water to the designated place. Often such trays are installed along the perimeter of garden paths, car parks, and various types of sites.
This option keeps the tiles from spreading well. It is enough to lay the trays in trenches prepared for them on a concrete solution - just like ordinary curbs. Here you need to make sure that the level of the trays is slightly lower than the upper plane of the tile being mounted. This will allow water to easily enter the drainage system.
Landscaping with paving slabs
paving slabs old city
It is no secret that paving slabs currently lead in growth rates compared to other analogues of territory improvement.
The main bias falls on the improvement of personal areas in the adjacent territory of their own home or cottage, since clients can afford the most unusual shapes and colors of the product.
Also, tiles are in great demand near sports palaces, cultural palaces and similar institutions, which have a huge territory. In such places this will be the most advantageous solution.
It is important to know that laying this product on the territory of cultural palaces has significantly different requirements compared to laying it on the territory of your country house. There are several nuances that we will touch on here.
Before choosing a tile, take care of how this tile will be used, namely: whether a car will drive over it, and how heavy it is; the quality of the structure of the tile you choose depends on this.
star shaped paving slabs
For example, when laying on the territory of a cottage, you must select a team of professionals, since you can rely on their experience, but on the experience of Vasya or Andrey from the neighboring site, who are doing something unclear, I think you should not believe their words, of which they specialize in laying .
At the beginning, of course, you will save money, but then you will begin to notice that the plane of the tile coating will begin to move to the side and fall apart on the sides.
Professionals know what needs to be followed when paving tiles; to do this, the first thing they do is take measurements and put marks near flower beds, trees and other adjacent areas.
mosaic paving slabs
Most likely you have a car, and you want the coating of your tile to withstand it, in which case you need to choose a tile that uses the vibratory casting method in its production.
To beautifully decorate your site, hire a designer , he will show you that a combination of 2 or more colors is the most acceptable option.
If you are not going to spend money on expensive paving slabs, your choice is “Old City” tiles, it has 3 main blocks with different sizes…. There are also tiles with a triangular shape available, but they are usually rarely ordered.
3D diamond paving slabs
There are several ways to install these tiles. In the first case, you need to lay it out so that there are no vertical or horizontal lines, you will get an incredibly beautiful picture. The second option is laying with horizontal lines and the third with vertical...
paving slabs old town in different colors
If you work for the owner, before you start laying, discuss in advance how the installation will take place. If you lay tiles without horizontal and vertical lines, demand double payment, since in this case the installation time will be much longer. In other cases the price is standard.
What to follow when laying paving slabs
Laying on the territory of a country house requires:
Primary requirements:
- When installing, you must take into account the exits of the house with steps and terraces
- Before installing the tiles, you must take care of the slope, thanks to which rain and waste water will flow, and also leave a space of about 10 cm wide for special pipes in the section, in which the water will accumulate and also flow down the slope into storm drains (rain drains). ) trays.
- The entire area from the entrance of the car through the gate to the garage must be laid with special tiles that can withstand the load. “Old City” can easily withstand the load of a vehicle weighing up to 3 tons.
Visual and stylistic requirements:
- If your design of the surrounding area adheres to a certain style, you need to choose the appropriate color scheme for the tiles, and even choose a combination of 2 or even more colors.
- The laying style should also highlight and emphasize the main style of the surrounding area.
Laying technology
Installing curbs for paving slabs with your own hands can be done in several ways, which are determined based on the material of the product and the tasks assigned.
Monolithic concrete
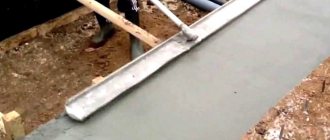
This type of border installation was used everywhere before, when there were no other types of elements and this option was the most affordable and simple. The border was poured directly into the formwork in a continuous manner.
How to make a monolithic concrete curb:
- Digging a trench corresponding in size to the required border
- Filling the hole with crushed stone
- Installation of formwork along the height and boundaries of the future border - from sheets of metal or moisture-resistant plywood, reinforced on the outside with pins
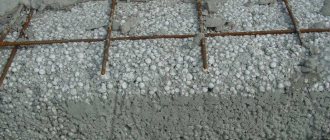
- Laying a reinforcing frame (if necessary) made of wire rod with a cross-section of 6 millimeters inside the formwork structure
- Pouring concrete solution, bayonet to remove air
- Dismantling the formwork a few days after pouring
- Laying paving slabs only after the concrete has completely dried and hardened
- Coating a concrete curb with lime or paint
Monolithic concrete curbs are still relevant in the USA and Europe. Unique technologies are used here to create road elements with the maximum level of strength and reliability. In post-Soviet countries, other options are increasingly being used.
Plastic borders
Plastic products are presented in a huge variety of colors, shapes, sizes, and configurations. There are some that are quite common, and there are those that are used less frequently. As a rule, a certain type of plastic border requires its own installation algorithm.
Installation of a “Country” type border, which is a rolled material 2 centimeters thick, 10 meters long and 11 centimeters high:
- Laying the tape along the boundaries of the prepared trench, fastening it to the soil with metal or plastic pins (supplied in the kit).
- Sprinkling the curb with crushed stone or soil from the inside.
- Next, you need to install the plastic border in the same way on the opposite side so that the tapes are on the same side.
The “Country” border is quite thin, so it acts not so much as a decoration, but as a ground limiter. The paths look like they don’t have a border - the plastic is almost invisible on the ground, and if you choose the right color for the tiles, it’s not visible at all.
Another type of popular plastic borders is made in the form of panels 3 meters long, equipped with mounting holes in the lower part. Plastic pins are driven into these holes. This type of border is flexible; it is often used when laying paving slabs with curved paths.
There are a large number of different models - a plastic product can imitate a granite, wooden, concrete curb, and be of any color and size. Often such elements are used to fence flower beds and flower beds. There are monolithic curbs with attached pins; you can also find prefabricated structures, where the system is formed from several components and the pins are supplied separately.
Dimensions
Curb blocks are usually produced in a length of 1000 mm, those designed to separate pedestrian paths from fertile soil - 850 mm in length. There are also elements with a length of 500 and 400 mm. Usually these are curbs for paths made of paving slabs. They are produced not only using cast concrete technology, but also using vibrocompression technology, which is used to produce the paving slabs themselves.
Sizes vary
The height of the curb stone can be:
- 300 mm - to separate the sidewalk from the roadway;
- 200 mm, 180 and 150 mm - for paths.
Width 200, 180 mm (road stone), 150, 100, 80 mm (curb stone).
When to install a curb stone
The question of when to install a border worries many craftsmen. And usually the opinions of professionals on this issue differ. Some say that the element needs to be installed after digging a trench for the path, others claim that it is better to do everything after the paving slab covering has already been completed. Both options have pros and cons.
Regardless of the chosen option, choosing a border should be done simultaneously with designing the covering (and not after). After all, the element must be combined both with paving slabs and with other elements of landscape design: the roof of the house, fencing, covers on fence posts, facade tiles, gutters, etc.
Installation immediately
This method is suitable for beginners. Thanks to the installation of the border before installing the covering, you can immediately design everything, set the correct geometric proportions of the site, and clearly define the boundaries. Masters advise choosing this option for those who have taken up laying tiles for the first time and have no experience in this matter.
Installation at the end
The big advantage here is that it is possible to avoid sawing individual modules and use the material as rationally as possible, saving on consumption. Often, for laying after paving slabs, a garden border is chosen, which holds the paths well and separates the zones.
To fix the curb, use a mixture of cement and sand prepared in a ratio of 1:3. The mass is used as an underlying layer between the base and the product, and it also fills the side space. Once the installation is complete, pour water over everything and wait until the mixture hardens.
How to install it yourself
To understand how to properly install curbs for paving slabs, you need to carefully study all stages of the work. The reliability, strength and durability of the edging and the coating itself, which the curb protects from destruction and erosion, will directly depend on the quality and correctness of installation.
Sidewalk curbs are easier to install than road curbs, as they are smaller in size and weight. Typically, concrete slabs made by pressing and measuring 50 centimeters are used for sidewalks (dimensions in terms of height and width are standard).
Stages of work:
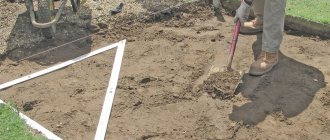
- Careful and thorough marking of the area where you plan to lay the border: first install pegs, then stretch a string between them, marking the line of the future edging.
- Digging a trench - the depth of the hole should be slightly greater than the height of the elements, the width will be enough 20 centimeters. The bottom of the trench is compacted.
- Filling the bottom with crushed stone, tamping, filling with sand, pouring water, tamping.
- Mixing concrete mortar: sand, crushed stone fraction 15, M500 cement and water are taken in a ratio of 2.5: 2: 1: 2.
- Installation of the curb in the prepared trench, alignment along the boundaries and height, pouring concrete, sealing all joints and voids with mortar.
- Eliminate all cracks with a mixture of dry sand and cement, pour with water, wait for complete drying.
Provided that the laying of paving stones with a curb was done correctly, the coating will last a long time, maintain its evenness and strength, and will be protected.
Materials and tools
There are 2 main types of tiles used for laying sidewalks:
- Stamped.
- Vibrocast.
- Granite.
The first type is more budget-friendly and does not require any special production costs, however, the quality of such tiles is often poor. But tiles made using vibration casting technology, on the contrary, are famous for their durability, however, there is a small disadvantage of this type - it is a high price. Tiles come in a variety of sizes and configurations, widths and lengths.
The height varies from 20 mm to 70-80 mm. Considering the purpose of the site, it is worth focusing on the size and height. For small paths, high strength is not required from the tiles, so even thin tiles from 20 mm will do. But for platforms and driveways it is better to use thicker tiles from 60 mm.
In addition to the tile itself, you will need:
- Crushed stone, sand. It is better to use a crushed stone fraction of no more than 40 mm.
- Cement or special plaster mixture.
- Geotextiles. It protects the tiles from sagging.
- Borders are usually sold individually.
Important! To calculate the number of curb stones, you need to know the length of the path itself. We multiply the value by two, and then divide the value by the length of one border, in the end we find out the required number of stones.
What tools are needed to lay paving slabs:
Hammer (rubber). Level (preferably more than 1 m). Grinder with a diamond wheel. Several trowels. Manual "rammer". "Meter". Shovel. Rope (for marking). Pegs.
NOTE Additionally, purchase rubberized knee pads and mittens. There is work to be done with water and electricity.
How to lay correctly without a border
Many people do not worry about how to properly install the curb for paving slabs - this element is simply ignored when laying the covering. In some cases, this choice is justified by operational requirements and lower costs. There are several options for laying tiles without a border.
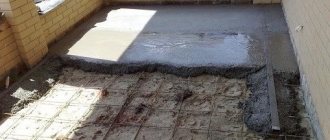
Laying on a concrete base
To lay the covering in this way, make a base of concrete. Prepare a concrete-cement mixture, lay the tiles, securely fastening them together and the soil layer. The coating is quite durable, able to last for a long time and not deform.
For geotextiles
In this case, textiles are used to strengthen the sand and gravel cushion. The work is carried out simply, but the method has certain disadvantages: the material is expensive, and the task takes a long time and is labor-intensive to complete.
On sand and gravel
The cheapest and simplest installation method, which is based on the use of a cushion of sand and cement (dry).
Laying steps without border:
- Marking the territory using pegs and twine.
- Removing a layer of soil up to 30 centimeters deep.
- Leveling the surface with a rake and shovel.
- Be sure to make a slope at the rate of 5 millimeters per 1 meter of the path to ensure unhindered drainage of water.
- Careful and thorough compaction of the soil surface, which will eliminate the risk of sagging of the tiles.
- Soil moistening.
- Filling with a layer of sand 7 centimeters thick, leveling the surface, pouring a large volume of water, tamping.
- Laying a dry sand-cement mixture (prepared in the following proportion: 1 part cement and 8 parts sand) in a layer 4 centimeters thick, leveling the surface to the building level.
- Laying out the first row of tiles, starting from yourself and going diagonally. During the process, everything is carefully compacted with a rubber hammer so that the elements are not damaged. You can pour the mixture under the tiles that are sagging.
- Correcting the installation according to the level, filling the seams, sweeping away the excess with a brush.
Work order
When installing curb stones, one of three options for laying technology is used: a device on a crushed stone base, a sand-cement base, or a concrete pad. The method you decide to choose depends only on your desire and requirements for the durability of the structure.
Each of these methods includes the following stages of work:
- preparatory, consisting of marking the future line for laying the curb and determining its depth;
- earthen, which includes work on leveling the top layer of soil on the path area and constructing trenches for installing curb stones;
- base arrangement - depending on the chosen method of installing the curb;
- laying curb stones;
- securing curbs in trenches and sealing gaps between them.
The border line is marked using a cord stretched between pegs driven into the ground. Based on the marking results, the issue of surface leveling is practically eliminated.
The depth of the trench depends on the method in which you decide to install the stones, their size and the required height above the path level. For sidewalk curbs, it is most often equal to the height of the material plus 15-20 cm.
Marking with pegs.
In the case of road edging, this is simply the height of the stone. At driveways and entrances to courtyards, the curb must be laid to a greater depth, which increases in the first case by 5-10 cm, and in the second - by 10-20 cm. The width of the trench for installing a standard sidewalk curb is equal to its width with the addition of 5-7 cm Road material requires a width of 30-40 cm.

