Currently, in private construction, purchased concrete blanks used as lintels are practically not used. Today, most owners of country houses prefer to make door and window lintels with their own hands.
To make your own lintels from poured concrete, you do not need to have any special skills. All that is required of you is to pay due attention to the materials in this article and follow all the instructions given in it.
Bar lintels: types and installation
When erecting the walls of a building, one of the most important engineering tasks is the correct design of window and door openings.
And to solve this problem we cannot do without such an element as a bar lintel. In our article we will talk about the main types of jumpers, their markings according to GOST, and also describe installation features in different situations.
Beams for covering the top edge of window and door openings
Part Information
Design and varieties
As we noted, lintels are parts of window and door openings. The main task of any such element is to cover the upper part of the opening and distribute the load from the supporting structure located above.
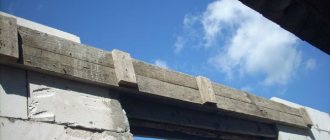
The horizontal beam will support the weight of the masonry and ceilings above the window
Note! To minimize the risk of deformation associated with different coefficients of elasticity, thermal conductivity and shrinkage, lintels are most often made from the same materials from which the structure itself is built. In this case, naturally, the load-bearing capacity of the part must be increased.
By design, this part can be either load-bearing or non-load-bearing:
- The load-bearing transverse beam located above the opening takes the load from the ceiling, which is placed above the window or door. (see also the article How to use timber floor beams)
- The non-bearing beam experiences load only from the masonry, which is placed above, i.e. within one floor.
The classification of such elements can be based both on the material from which the jumper is made and on its configuration.
Based on the material, the following groups are distinguished:
- Reinforced concrete slabs and beams are the most common type. They are beams made of reinforced concrete with high mechanical properties. They are widely used in capital construction due to their manufacturability.
- Metal ceilings - used to cover wide openings, as well as where a significant load is applied to the window or door. Most often they are assembled from a rolled profile (I-beam or channel).
Metal floor diagram
- Brick ones are quite difficult to manufacture, so they are used relatively rarely in private construction. As a rule, they are masonry made of ordinary bricks, which are assembled in installed formwork.
- Wooden - beams or boards of great thickness. They can be used both in the construction of houses and cottages made of wood, timber, and in brick buildings, as well as in structures made of gas and foam concrete.
Also, speaking about the design of industrial lintels (this primarily includes concrete products), experts divide them into slab and block:
- A block-type lintel is mounted in load-bearing walls if the wall structure takes the load from the ceiling located above. This type of jumpers is the most popular.
- The slab-type structure is installed in a self-supporting wall, onto which the weight of the floor slabs is not transferred.
Markings and sizes
As we noted above, block-type concrete parts are most often used in industrial and residential construction. According to GOST, a bar lintel must have a width of no more than 250 mm, and its length is determined by the dimensions of the opening to be blocked. As a rule, parts with a length of 1500 to 6000 mm are used.
Dimensions table
Each jumper must be marked accordingly. The marking contains information about the main characteristics of the element, and therefore, even without seeing the beam itself, we can determine by its article number whether it is suitable for use in a given situation.
Let's look at the features of marking using the example of such a part as a block lintel 2PB -16 - 2 P.
Numerical and alphabetic indices indicate the following:
- 2 – characteristics of the cross-section of the jumper.
- PB – type of part (PB – bar, PP – slab).
- 16 – length in decimeters. This element has a size of 1600 mm.
Note! The actual size may differ from the nominal size by 6 mm (for beams up to 2500 mm) to 10 mm (for slabs and bars 4000 mm long or more).
- 2 - strength class of the concrete from which the element was made.
- P – index indicating the presence of loops for carrying the unit using a truck crane.
As you can see, there is enough information to make a decision about the possibility of using the element to cover a window opening.
Key Features
Modern construction technologies provide for the possibility of using several types of lintels:
- factory reinforced concrete;
- monolithic products made directly on site;
- metal;
- brick;
- combined.
Despite the reliability of ready-made reinforced concrete products, it is much easier and cheaper to make window lintels yourself, saving time and significant money on transportation costs, materials and labor.
A lintel is a part of a wall or partition that covers the top of a door or window opening. If the weight of the ceilings or enclosing walls is transferred to the wall in which the opening is located, then it is recommended to install load-bearing lintels. In the absence of such loads, self-supporting (non-load-bearing) reinforced concrete, metal or brick lintels are used. In some cases, wedge (arched) lintels are made, which serve as an additional decoration of the exterior or interior of the building. They are also used to organize openings in rooms with vaulted ceilings (ceilings).
Note!
When planning to make window lintels, you should remember to select the correct length of the product. In load-bearing walls, the support of products on the walls must be at least 250 mm, in self-supporting structures - at least 120 mm.
Today, experts recommend giving preference to concrete lintels, finished factory products or products made on the construction site. They are more durable and reliable, take less time to install and are designed for higher loads. The production of concrete lintels can be done directly at the construction site in two ways:
- Pouring on site, with further installation of the product.
- Filling over the opening using removable, collapsible formwork.
Window opening design
Pouring into formwork
If you are building a house with your own hands, then sooner or later you will have to face the task of covering window openings. There are several ways to solve this problem, and below we will try to give a brief description of them.
The first method involves constructing a lintel made of reinforced concrete using poured technology.
The instructions in this case are as follows:
- At the first stage, we install the formwork in the window opening. For formwork we use boards, the thickness of which should be at least 25-30 mm.
- We support the formwork on vertical wooden beams, which we place inside the opening itself.
Photo of formwork during installation
- Inside the formwork we place a reinforcing mesh made of steel rods with a diameter of about 6-8 mm.
Advice! The reinforcement should be laid on small supports, which will provide a gap between the metal and the lower plane of the poured concrete beam.
- Having additionally strengthened the formwork with transverse bars, we begin pouring the concrete mixture. It is best to use crushed stone as a filler (the ratio of cement, sand and crushed stone in the solution is approximately 1: 2: 4.5).
- We carefully compact the concrete to get rid of air bubbles.
The formwork can be removed pretty soon
As practice shows, it is possible to remove the formwork and begin laying bricks on such a lintel within 48 hours.
Laying the finished part
Using ready-made concrete lintels can significantly save time and simplify work. However, it is worth noting that the price of the product in this case will be slightly higher, and to lift parts to a height it is advisable to have a crane at your disposal.
Installation in the opening: if you have a strong assistant, then you can do it without a tap!
If this does not scare you, then the work is carried out according to the following algorithm:
- First, based on the dimensions of the opening, we select the dimensions of the timber lintels so that the edges of the beam extend into the wall at least 250 mm (this parameter is called the embedment depth).
- Then we erect the masonry in such a way that support platforms are formed for laying the horizontal timber floor.
- We lay a layer of mortar about 20 mm thick under the lintel.
- We lower the concrete part to the selected location and settle it to the required level. Remove excess solution with a trowel.
- If necessary, we form a ceiling over the opening from several such parts.
Further laying of bricks or building blocks can be carried out immediately after the settling and leveling of the lintel is completed.
Marking
The support of load-bearing lintels is 250 mm, ordinary ones - 125 mm with a span of up to 1.5 m, 200 mm - up to 1.75 m, 250 mm - more than 1.75 m
In accordance with the requirements of the standard, reinforced concrete products are marked using alphanumeric groups delimited by hyphens:
- Group I is represented by Arabic numerals and a combination of letters. The marking indicates the cross-section number of the product, its type and length in decimeters;
- Group II - Arabic numbers indicate the calculated load that the jumper can withstand. The value is rounded to the nearest whole number. For prestressed products, the reinforcement class is indicated;
- Group III - indicates additional characteristics, for example, O-extra-dense concrete, P - dense; C-resistance to seismic influences; p – the presence of mounting loops in the lintels, a – the presence of anchor outlets, etc.
An example of a reinforced concrete product grade 8PP18-71 At V:
- slab lintel;
- length 1810 mm;
- cross section 380x190 mm;
- design load 71 kN/m;
- product with prestressed reinforcement of class AtV.
Conclusion
Bar lintels - according to GOST they must be made of high-strength reinforced concrete - are a mandatory structural element of almost any window opening.
Of course, as we already noted in the article, such a part can be made independently, but if finances allow, then it is better to use a factory product. At least you will be confident in its mechanical properties, and therefore in the reliability of your windows and doors. The video in this article, in addition to the above, will show some nuances on this issue, watch it!
How to avoid installation defects
Summarizing some results, we can give a number of recommendations.
Experienced builders recommend observing the following:
- with an opening width of 1.5 m, the support depth is assumed to be 125 mm or more;
- from 1.5 to 1.8 m – from 200 mm;
- from 1.8 m – from 250 mm;
- windows should be sealed with a quarter;
- if the installation of an armored belt is intended, its filling is carried out several days after the installation of the lintel.
The side edges of the formwork are dismantled after 1-7 days, the bottom - after 28 days
If the installation rules are violated, the lintel may not withstand the load after completion of construction and collapse, which will require urgent reconstruction of the structural element, since the house becomes dangerous. On the other hand, under the load of an improperly constructed lintel, the outer cladding may collapse, which will require dismantling the masonry, dismantling and replacing the element.
How to make beam lintels for aerated block walls yourself is shown in the video:
What is a reinforced concrete lintel
Most often, reinforced concrete lintels over window and door openings are divided into:
- non-load-bearing beams that can take loads from the wall above;
- load-bearing reinforced beams that take the slab load;
- large load-bearing part (purlin);
- a weakened thin bridge (pencil) used on weak partitions. Typically this type is used for doorways;
- a girder-shelf (crossbar) on which slabs or similar materials are placed.
How is the opening size calculated?
The size of the opening and the support of the lintels are calculated individually, depending on the type of materials used for the construction of the building, which can only withstand a certain load. Should be considered:
- The weight of the lintel parts, as well as the assembled structure as a whole.
- The weight of the future wall being built above the window recess.
- How exactly will the weight of the wall surface above the opening be distributed (if the masonry is being done in summer, then it is enough to use the weight of 1/3 of the upper part of the wall in the calculations; if it is being laid in winter, then you have to take into account the load exerted by the entire wall).
- The load exerted by floor slabs and beams.
There are also the following formulas for measuring the main parameters of the future jumper:
- load value = specific gravity of the material used * value of the width of the opening * value of the thickness of the masonry in the opening * height of the wall above the lintel;
- strength = resistance of the base material * resistance of a single part * coefficient 1.12.
It is advisable to take the help of professionals to determine the correct size of openings so that during future construction, unforeseen situations such as collapse of materials do not occur.
Basic production of lintels over windows
To make a reinforced concrete lintel you will need a small set of tools:
- fittings;
- metal corners, a set of nails;
- boards;
- wire;
- And also cement, sand and crushed stone for mixing concrete mortar.
Before starting work, you should correctly select the desired type of jumper.
So, for small, lightweight structures, it is recommended to use the usual simple option (as shown in the photo of the lintels above the window), which will significantly save the family budget.
And the technology for manufacturing reinforced concrete window lintels is quite simple:
- The lintel is poured directly above the desired opening. But keep in mind that you will first have to prepare the formwork.
- The work takes place on the ground and is subsequently installed in place. The second option will add a little complexity to the work, since you will have to hire a crane to install the jumper in the right place.
Photo
Jumper Installation Using U-Blocks
Scheme for manufacturing a monolithic lintel
Reinforcement frame for window lintel
Prepared formwork
Lintel after pouring concrete
Removing formwork
Did this article help you?
DIY formwork for lintels
Before making a lintel over the window directly at the opening site, you will have to tinker with the formwork, which will have to reliably withstand a large load from concrete.
There is an option to create a form from wooden boards that will serve as a shield. It is better to take a board with a maximum thickness of 25 mm, which is fastened with self-tapping screws and a screwdriver. When the formwork is no longer needed, it can be easily removed by unscrewing the screws.
The first step is to install the shield horizontally in the opening, and it should rest against the support. Then a mesh of reinforcement is placed into the shield and secured with self-tapping screws.
For greater convenience and tension stability, experts recommend attaching the shield to the reinforcing mesh with special wire. This fastening will help the shield fit tightly and be accurately attached to the window opening.
Technological characteristics
Industrially manufactured products are checked for compliance with the standard (reinforced concrete lintels GOST 948-84, 13015-2003) for each of the specified parameters:
- frost resistance – F35/F200;
- crack resistance, strength, rigidity;
- concrete strength M200 and higher;
- moisture content of concrete upon delivery – no more than 13%;
- thickness, type, quality of anti-corrosion coating;
- dimensional and quality characteristics of steel for embedded elements, hinges, fittings;
- fire resistance;
- seismic resistance;
- accuracy of geometric parameters.
We insulate a reinforced concrete lintel
It is no secret that the opening between the masonry and the lintel must be properly insulated. As a rule, insulation with a thickness of at least 100 mm is used. It is placed in the formwork opening and filled with concrete mortar.
Typically, mineral wool is used for insulation purposes. In this option, it is necessary to lay the window slopes (openings) using bricks so that the window itself rests against it. And for greater reliability, the structure should be secured using polyurethane foam.
A simpler way to insulate the lintel under the window is to use extruded polystyrene foam, which is known for its strength. It is better to take sheets 30 mm thick.
To securely fix the window in the opening, it is reasonable to pour polyurethane foam into the space formed between the frame and the insulation.
Rules for making jumpers
When creating a reinforced concrete lintel, it is necessary to strictly adhere to the described technology. There are also some nuances and rules in the work:
- For greater strength of the reinforced concrete belt, the diameter of the reinforcement mesh should be 14 mm.
- It is recommended to strictly adhere to the dimensions of the reinforced concrete lintel: the height should not be more than 1/20 of the length of the opening itself, and the width should correspond to the width of the wall (without indents).
- It is more reliable to use ready-made lintels, or to make your own formwork.
- Used formwork should be removed only after at least 25 days, for greater strength of the concrete solution.
- When pouring the solution into the formwork, you should compact it carefully to avoid voids.
- When making lintels, it is better if the window is quarter-length.
Making lintels for windows is a very simple process that you can easily do yourself. The main task is to calculate the necessary materials and prepare them.
Types of lintels made of cellular concrete
Reinforced concrete structures are cold and require additional insulation. Aerated concrete lintels have the same thermal performance indicators as wall blocks.
To cover technological openings, use:
- Factory made;
- Prefabricated from U-shaped elements;
- Prefabricated using a metal corner;
- Monolithic.
The method of overlap depends on the length of the structure. To cover more than three meters, monolithic beams are made. Widths from 3 m to 1.2 m can be covered with beams made of U-shaped elements.
For openings with a width of 1.2 m or less, they do not need to be made if at least 2/3 of the length of the opening is to the top of the wall.
What is needed to fill jumpers?
I used:
- fittings diameter Ø 12 mm;
- wire rod diameter Ø 6 mm;
- knitting wire diameter Ø 1.4-2 mm;
- edged board 25×200 mm;
- nails 70 and 100 mm;
- cement grade 400;
- river sand;
- crushed diorite stone fraction 20 mm.
I used reinforcement with a diameter of Ø 12 mm, since I plan to build a second floor or attic with a concrete floor and I was on the safe side so as not to calculate the load-bearing capacity of the structure; there will also be a seismic belt under the ceiling; I will describe how to make a seismic belt in the next article.
Materials and tools
Boards for making formwork
To successfully complete the task, you will need the following consumables:
- a set of edged boards of suitable thickness;
- set of metal corners;
- thin reinforcing mesh;
- polyethylene film;
- nails with a wide head;
- self-tapping screws of the required size;
- knitting wire.
Jigsaw for cutting wood
As for the tool, for work you will need to prepare:
- regular hammer;
- electric jigsaw (hacksaw);
- electric drill or screwdriver;
- installation tool (mount);
- “trowel” (trowel);
- small capacity bucket.
Filling jumpers
The photo shows how the formwork for the lintel is installed over a doorway measuring 800x2100 mm, the width of the interior wall is 200 mm, the minimum depth of the lintel support is 200 mm. Since the width of the board matches the width of the wall, there is no need to knock down the shields.
First, the height of the door is measured, taking into account the space for foaming and slopes. Since the board is 2.5-3 mm thick, you can immediately measure according to the height of the door. After removing the formwork, you will have a gap equal to the thickness of the timber used. Next, mark the level of the opposite side from the foundation base or from the first mark using a hydraulic level. After the marks are made, we nail pieces of boards in the shape of the letter - T, the upper edge of which passes under the mark. For this I used 100mm long nails.
Next you need to prepare 3 shields, for this I have 3 boards. Along the edges I have half a stone that will cover the ends of the formwork, the first board is 800 mm long and 2 more 1200 mm each, since the support depth is 200 mm and we must have a reserve. To extend the durability of the wood for further use, I wrapped the formwork boards with cling film, which costs $1 per roll. We lay the bottom board, 800 mm long, on already nailed T-shaped supports; there is no need to nail it to the supports. Next we install the side shields. First, we nail them along the edges to the wall, and then we knock the corners together diagonally from top to bottom. To facilitate the dismantling of the structure, 70 mm nails were driven along the top, on which a binding wire was attached to tighten the top of the lintel formwork. You can use pre-prepared timber, I used this method to save used wood, which can still be useful during the construction process.
How to reinforce lintels?
Using my door as an example, the following were prepared:
- 4 reinforcement rods with a diameter of Ø 12 mm, size 1200 mm;
- 6 wire rod quadrangles with a diameter of Ø 6 mm, size 100 by 100 mm;
- knitting wire.
The frame was knitted with a regular 100 mm nail. Since hooks must be ordered, for the convenience of tying the frame, 2 reinforcement pins, which are narrower than the size of the reinforcement, are driven into the wall.
The frame was knitted with a regular 100 mm nail. Since hooks must be ordered, for the convenience of tying the frame, 2 reinforcement pins, which are narrower than the size of the reinforcement, are driven into the wall. To start knitting, take 2 reinforcement pins and place them on the prepared pins driven into the wall, and mark a step of 200 mm with chalk or a marker. Along these marks we string prepared quadrangles from wire rod, distributing them according to the marks made with a marker, and tying the frames with knitting wire. Having tied the frames at the top, we place the remaining 2 reinforcements at the bottom and continue tying.
After our structure is ready, we immerse it in the formwork.
Let's move on to preparing the solution for the jumpers. I did this: for a bucket of cement grade 400, 3 buckets of sand and crushed stone. The mixing was carried out in a homemade trough, which was made from a galvanized standard sheet 1000x2000 mm and 4 boards, 2 boards 2.5x200x950 mm and 2 2.5x200x2000 mm. The trough was reinforced with knitting wire at the corners and boards along the bottom.
After the solution is ready, fill a couple of buckets and lift the reinforcement frame so that it does not touch the formwork from below, after which we fill it completely.
Lintels for window and door openings: calculation, DIY production
During the construction of buildings, one of the most difficult problems is installing the lintel of a window or doorway. It must meet all requirements and be strong to prevent sagging of the wall and deformation of the window frame or door frame. Despite the apparent simplicity of the work, installation of jumpers requires experience and knowledge. Learn how to properly make a lintel with your own hands in door or window openings later in the article.
Calculating the lintel load for window and door openings peremychki-svoimi-rukami-2
In construction, a lintel refers to an ordinary concrete beam that is laid on the walls and serves as the basis for laying the next row of bricks or cinder blocks. The design of the opening must meet certain requirements:
The supporting sections of the wall must normally bear the load of the support beam. The deflection of the beam (its residual deformation) must correspond to the permissible values for windows or doors that will be installed in the opening. If a wall made of brickwork is preserved entirely, the lintel is temporary. After the mortar dries, the masonry is able to support itself, forming a normal opening, so the lintel no longer performs any function. In other situations, beam parameters are calculated based on the applied load. This parameter should include:
The weight of the jumper itself. This is especially true for heavy reinforced concrete products. The weight of the wall above the opening. In this case, it is necessary to take into account the self-supporting ability of the masonry. Wall weight distribution. The load carried by the wall from the support of lintel beams and floor slabs. The width of the linear lintel must be equal to the thickness of the wall, and the height is determined depending on the load-bearing capacity of the lintel. The length of the beam used to cover the window opening depends on the material from which the masonry is made. For brick, the depth of the lintel inside the wall must be at least 100 mm, for cinder block and blocks made of other porous materials - at least 300 mm. By multiplying this figure by 2 and adding the width of the doorway, you can calculate the length of the lintel.
It is worth noting that a finished reinforced concrete product is not always used as a beam for window or door openings. The use of wooden beams or welded metal structures is quite common. Sometimes they cast a reinforced concrete lintel with their own hands “on site”. Formwork and a steel reinforcing structure are installed above the opening. Then concrete is poured into the formwork. This method is notable for the fact that it is possible to make a lintel of the required dimensions, even for non-standard opening sizes.
DIY lintel installation in brick and block buildings
The simplest solution to the issue of constructing lintels for window and door openings would be to place their dimensions directly under the floor slab. However, this option is simply not possible. The fact is that between the opening lintel and the beginning of the reinforcing belt there must be at least 7-8 rows of bricks or 2-3 rows of blocks.
The simplest task in installing the top of a window or doorway is working with walls that are not supporting the floor. If the brickwork does not meet the support requirements, then the rows of bricks are reinforced with reinforcement. Special staples are placed between each brick that covers a window or doorway. They are made from wire with a diameter of at least 4 mm. Reinforcement is placed under them and laid along the masonry. This technique will allow the bricks to stick together better.
If the building is being erected from foam blocks, installing lintels over the windows yourself is even easier. It is built from blocks on a special support. As a support, boards with a thickness of at least 40 mm are used, under which supports are installed. After the solution has set, a groove is made on top of the blocks that form the jumper. Its thickness must be at least 300 mm, and its depth must be at least 200 mm. A reinforcing structure made of reinforcement with a diameter of 10-12 mm is placed in the groove. Then the solution is poured. Recently, manufacturers of building materials have been offering ready-made U-blocks, which have the shape of a channel. Working with such blocks is much easier than with regular ones. After the concrete hardens, the blocks will serve as a monolithic structure.
Another way to install a lintel on a window or doorway is to cast a concrete lintel yourself. Unlike installing a gutter from blocks, the formwork is removable. It rests on the walls of the opening. The formwork is installed from boards or pieces of chipboard. When the structure is installed, a frame of reinforcement is laid into it and concrete is poured. The formwork is removed only after the concrete has completely dried. Although this is the most labor-intensive way to install a lintel under a window or door opening, it is more cost-effective. This process eliminates the need for special equipment to lift heavy reinforced concrete structures.
Making lintels for window and door openings with your own hands in frame houses
The structures of frame houses are less durable than brick or block ones, so correct calculation of lintel parameters for them is mandatory. The configuration of the window opening and the installation of its structural elements depend on the ratio of the opening width to the pitch with which the wall panel racks are installed.
Ideally, the width of the opening should correspond to the installation step of the racks, but often this is simply impossible. When using beams of a smaller cross-section for some reason as racks, the installation step of the structural supports may be smaller than the standard size of the window, therefore, for the construction of lintels for such openings, it is necessary to construct additional supporting elements.
If the width of the window opening is greater than the step width of the racks, but does not exceed twice the value, installation of the opening lintels is carried out as follows. Between the two outer posts along the height of the opening, two horizontal crossbars are installed. In the place where the post would be, vertical spacers are installed between the crossbars and the top and bottom beams. If the resulting opening is still too wide for installing a window, then two more vertical spacers are added to it at the same distance from the edges, creating the required width.
If the width of the window opening is more than three spans, then it is mounted in the same way. However, braces are installed to support the short vertical struts. They are placed symmetrically from the center to the edges. Thus, one brace should connect one short brace in the middle and two full posts.
If the width of the window opening is five times greater than the width of the installation step of the frame racks, the operation is performed as follows. The outer frame posts must be double. External ones have the usual height, and internal ones should be the height from the floor to the top crossbar of the opening. The lower and upper crossbars are reinforced with a diagonal mesh, similar to floor trusses.
Strengthening the opening in load-bearing walls
Often, when remodeling an apartment or house, it becomes necessary to make a doorway in a load-bearing wall. This is especially true for block houses, in which all walls are load-bearing by default. Work with such structural elements must be carried out very carefully, since the calculated loads on them did not take into account the presence of openings. If in a private household the owner can carry out redevelopment at his own peril and risk, then in apartment buildings such work must be agreed upon with the supervisory authorities.
The process of dismantling an opening in a load-bearing wall begins with strengthening its arch. To do this, you need to mark the opening itself on the wall. Then cuts are made along the arch line with a depth of at least 100 mm. If the wall is brick, then it is better to make the cut at the junction of the rows of bricks. Firstly, it is much easier to do, and secondly, it is better to leave a full brick. The cut can be made using a grinder. Its length should be 100 mm greater on each side than the width of the opening. Steel angles measuring 100x100 mm with a shelf thickness of 8 mm are inserted into the cuts.
After the corners are inserted, holes with a diameter of 8-10 mm are drilled in each of them every 250 mm. The holes on each side must match. Reinforcing bars of the appropriate diameter are inserted through them. At the exit from each hole, the rods are welded and cut flush. Now you can carefully begin dismantling the wall. After 2-3 rows of bricks have been removed, two corners at the end are welded together using steel strips. They are welded every 200 mm. After this, you can safely knock out the entire opening. To prevent its side ends from starting to collapse, they are strengthened with the help of corners. To do this, you can use corners 50X50 mm with a shelf thickness of up to 5 mm. They are also connected by steel strips. Steel embedded parts are welded to the corners from the sides and secured to the wall with anchor bolts. The threshold of the new opening is reinforced with reinforcement and filled with concrete. Now the opening will be strong enough to withstand any load that the ceiling puts on it.
Technical requirements
Reinforced concrete products must be produced in accordance with the requirements of the standard (bar lintels GOST 948 84):
- material of manufacture – heavy concrete M200;
- frost resistance is assigned depending on operating conditions;
- timber lintels with a width of 120.0 mm are reinforced with flat frames, 250.0 mm - with spatial ones (formed by flat reinforcement frames);
- hot-woven steel of class AIII and reinforcing wire of class BP1 are used as reinforcement;
- The capture of the beam jumper can be realized through slinging loops or slinging holes, d 30 mm, which is preferable, since no additional consumption of steel is required. After installation, the holes are closed with masonry mortar;
- straightness, dimensions, thickness of the protective layer, appearance and quality of products must comply with the standard.
Loads on timber lintels
A reinforced concrete product can be load-bearing, used to close openings in load-bearing walls, and non-load-bearing, mounted in partitions. For example, jumpers with a load of less than 800 kgf/m, marked 2PB (section 120*140 mm), are applicable in interior partitions. In load-bearing structures, grades with high strength are used - from 800 to 3800 kgf/m, which corresponds to the markings 3PB, 5PB, etc.
Leaning
Compliance with the standards when calculating the depth of support allows you to achieve maximum safety of the finished structure.
In the table data you can see the recommended parameters:
| Brand of bar lintel GOST | Bar lintels dimensions | Minimum support | Maximum opening width | Load, kgf/m | ||
| Height | Length | Width | ||||
| 2PB | ||||||
| 10-1 | 140.0 | 1030.0 | 120.0 | 100.0 | 830.0 | 100 |
| 13-1 | 1290.0 | 1090.0 | 150 | |||
| 16-2 | 1550.0 | 1350.0 | 250 | |||
| 17-2 | 1680.0 | 1480.0 | ||||
| 19-3 | 1940.0 | 1740.0 | 300 | |||
| 22-3 | 2200.0 | 2000.0 | 350 | |||
| 25-3 | 2460.0 | 2260.0 | ||||
| 26-4 | 2590.0 | 2390.0 | 400 | |||
| 29-4 | 2850.0 | 2650.0 | ||||
| 30-4 | 2980.0 | 150.0 | 2680.0 | |||
| 3PB | ||||||
| 13-37 | 220.0 | 1290.0 | 120.0 | 170.0 | 950.0 | 3800 |
| 16-37 | 1550.0 | 1210.0 | ||||
| 18-37 | 1810.0 | 200.0 | 1410.0 | |||
| 18-8 | 170.0 | 1470.0 | 800 | |||
| 21-8 | 2070.0 | 1730.0 | ||||
| 25-8 | 2460.0 | 2120.0 | ||||
| 27-8 | 2720.0 | 2380.0 | ||||
| 30-8 | 2980.0 | 210.0 | 2560.0 | |||
| 5PB | ||||||
| 18-27 | 220.0 | 1810.0 | 250.0 | 170.0 | 1470.0 | 2800 |
| 21-27 | 2070.0 | 1730.0 | ||||
| 25-27 | 2460.0 | 230.0 | 2000.0 | |||
| 27-27 | 2720.0 | 2260.0 | ||||
| 30-27 | 2980.0 | 2520.0 | 2800 | |||
| 25-37 | 2460.0 | 2000.0 | 3800 | |||
| 27-37 | 2720.0 | 2260.0 | ||||
| 30-37 | 2980.0 | 2520.0 | 3800 | |||
| 36-20 | 3630.0 | 3170.0 | 2000 | |||
The timber lintel can be used for arranging entrance gates, interior doors, entrance doors, windows
To build a turnkey house, other reinforced concrete products are also needed, which is especially important when constructing a roof.