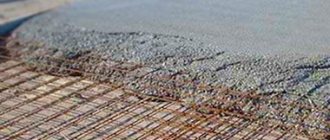
Concrete, which is a high-strength and reliable building material in terms of its technological characteristics. It is best suited as the main component in the process of pouring a garage floor because it can significantly strengthen the foundation for subsequent loads.
It should be noted that in addition to high resistance to abrasive and impact loads, the concrete floor in the garage must stably withstand vertical pressure and be wear-resistant and moisture-resistant: the floor surface should not be destroyed by exposure to humidity. The same applies to aggressive chemicals, such as gasoline, diesel fuel, auto chemicals, and motor oil.
In order to understand what brand of concrete is needed for the floor in the garage, you need to do this rather simple job with your own hands.
Note! In order for a garage floor screed to last a long time and without problems, it must be done in strict accordance with generally accepted technological construction standards. Most often, owners of garage boxes want to concrete the floor, as this is the most affordable, in terms of labor costs, way of arranging a room for a car.
Garage floor requirements
The flooring in the garage is an important element of the building, which has certain requirements:
- strength and wear resistance – the surface is actively used and is constantly exposed to shock and abrasive loads;
- moisture resistance - leakage of liquids from the car and the appearance of condensation are possible;
- chemical inertness to automobile oils, gasoline, auto chemicals;
- fire safety.
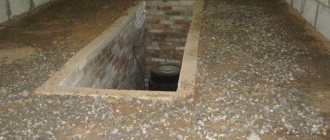
In order for the foundation of a building to last a long time, it must be equipped in accordance with generally accepted rules and in compliance with construction technology. Many owners choose to install a concrete floor in the garage - a coating like the one in the photo has a number of advantages.
Floor screed type
The floor screed can be monolithic, sectional or floating.
- Monolithic floor screed . Filled with one layer without the use of sound, heat, or waterproofing materials.
- Sectional filling method. The concrete screed must be poured in a single layer, but there are situations when this is not possible due to the large volume. In such cases, the floor area is divided into sections and poured sectionally.
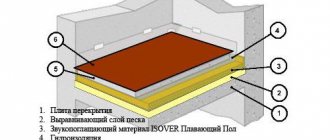
- Floating floor screed. This type of screed does not come into contact with the walls and subfloors. A small distance between the screed and the walls serves as an expansion joint and is filled with any insulating tapes. Between the floating and rough screed, as a rule, sound, heat, and waterproofing materials are laid.
Pros and cons of concrete coating
Before you make the flooring yourself, you need to study information on how to make a concrete floor in a garage, taking into account its advantages and disadvantages.
Concrete as a material is characterized by:
- durability;
- strength;
- affordable price.
Among the disadvantages it should be noted that:
- at low temperatures, such a coating can cause many problems, so waterproofing the concrete floor in the garage is imperative;
- concrete quickly wears out and begins to emit grayish dust, which can cause allergies, and stains of dirt appear on its surface;
- the material has the property of absorbing various mixtures, as a result of which an unpleasant and difficult to eliminate odor appears in the room;
- the coating for the concrete floor in the garage should be done in accordance with the technology, otherwise its surface will begin to crack.
Concrete M 200 - 250 - characteristics
If you know that in 5-10 years the coating will need to be changed, then it is worth purchasing M 200 or M250. It has average water permeability – W6. It is not recommended to use without waterproofing. Designed mainly for statistical loads. And the garage floor is also dynamic - when vehicles enter and exit. However, many people prefer it due to its lower cost.
Preparatory activities
There is a quick way to make a concrete floor in a garage - this is to lay factory-made reinforced concrete products (slabs), but then you will need to carefully level the soil and treat it with special means. The slightest unevenness of the base can lead to displacement of the coating.
For this reason, experts consider a concrete floor on the ground in the garage to be the optimal solution.
To properly perform this work, you need the following building materials:
- reinforced mesh;
- cement;
- crushed stone;
- sand without impurities;
- bitumen;
- roofing felt or roofing felt, or water-repellent film (polyethylene), or glass roofing felt, or waterproofing;
- thermal insulation material.
To speed up the work of preparing the solution, it is best to have a concrete mixer at your disposal. If there is no such construction machine and it cannot be rented, you can mix all the components in a large container to the desired consistency using a shovel.
Proportions of concrete for screed in buckets
At construction sites of private and country houses, as a rule, there are no scales with large measurement limits. Therefore, it is customary to count and measure the components of mortars and concretes in universal “measuring units” - a bucket. Considering that in order to make a high-quality concrete screed, cement and sand should be measured as accurately as possible, it is worth telling how to do this in “buckets” of popular volumes: 10, 12 and 15 liters.
As an example, consider the proportion of composts for preparing 1 m3 of solution based on Portland cement CEM I 32.5N PC: 420 kg of cement and 1470 kg of sand. To calculate the number of buckets, you should convert the volumes of buckets, and “kilograms” of materials to “volumes” in cubic meters.
First, let's convert the volumes of buckets to m3. Assuming that 1 liter = 1 dm3, and 1 m3 = 1000 dm3, we obtain:
- 10 liters=0.01 m3.
- 12 liters=0.012 m3.
- 15 liters = 0.015 m3.
We reduce the amount of cement to m3:
- It is generally accepted that on average 1 m3 contains 1,300 kg of cement. We determine the percentage ratio of 420 kg per 1 m3: 420x100/1300 = 32.3% (0.323).
- We determine the amount of cement in m3: 1x0.323 = 0.323 m3.
We calculate the “buckets” of cement:
- Bucket 10 liters, pcs.: 0.323/0.01=32.3.
- Bucket 12 liters, pcs.: 0.323/0.012=26.9.
- Bucket 15 liters, pcs.: 0.323/0.015=21.5.
We reduce the amount of sand to m3:
- On average, 1 m3 contains 1,750 kg of river sand. As in the previous case, we determine the percentage ratio in 1 m3: 1470x100/1,750 = 84% (0.84).
- We determine the amount of sand in m3: 1x0.84 = 0.84 m3.
We calculate the “buckets” of sand:
- Bucket 10 liters, pcs.: 0.84/0.01=84.
- Bucket 12 liters, pcs.: 0.84/0.012=70.
- Bucket 15 liters, pcs.: 0.84/0.015=56.
Preparing the base
Work on preparing the base for a concrete floor is carried out in a certain sequence.
- Dig a pit of the required size with a depth of about 0.5 meters. Crushed stone is placed at its bottom, which is compacted in any available way.
- The next layer (of sand) should be 15 centimeters. If necessary, arrange a slope. Then they are determined with the floor level relative to the horizontal line.
- If concrete is to be poured onto an old base, it is advisable to remove its coating and pour the solution again. Cracks and crevices existing on such a base are eliminated using a mixture of cement and sand.
- Layers of waterproofing material are laid overlapping with an overlap of 10-15 centimeters. If the waterproofing of the base is done correctly, then the coating will last a long time because it will be durable.
- The concrete solution for the floor should be poured onto the sand evenly, avoiding the formation of folds, so that cracks do not appear on the surface. The garage screed must be of uniform thickness in order for it to last for many years. The joining place is taped with special moisture-resistant tape. The amount of mixture used depends on the thickness of the concrete floor in the garage that is designed.
Curing
Concrete pavement will last longer if you follow the following care rules:
- The sun's rays should not fall on the concrete , so if there is a window in the garage, it must be covered.
- Concrete is covered with damp burlap in hot and dry weather. The burlap is moistened with water every day for 7 days. The moisture contained in it will saturate the concrete.
- If polyethylene is used as a covering material, then it is removed, watered on the surface, then covered again. For watering, use a nozzle with many small holes.
A dark gray tint to the surface means that the concrete is sufficiently saturated with moisture and watering can be stopped. Do not allow puddles to form.
Concrete floor reinforcement
After waterproofing the subfloor is completed, reinforcement begins. It is necessary due to the significant weight of the car - the base may not withstand such a load.
For this, a special mesh is used with cells measuring 10x10 or 15x15 centimeters and an edge diameter of no more than 5 millimeters. It is placed using special clamps.
Factors to note
Before you start pouring the floor with concrete yourself, you need to consider several factors:
- depth of groundwater;
- is there a possibility of flooding of the floor in the garage;
- What is the slope of the area under the garage?
If conditions are favorable for pouring, then concreting can begin. In order to start work, you will have to prepare the following materials and tools:
- concrete solution;
- gravel, sand;
- cord for marking;
- waterproofing membrane;
- polyvinyl chloride tape;
- metal mesh for reinforcement;
- wooden rule (ordinary smooth edged board).
The concrete pouring itself is carried out according to the following scheme:
- gravel layer;
- layer of sand;
- subfloor, that is, a reinforced layer of concrete;
- cake made from waterproofing, insulation, film. If the floor will not be insulated, you can use cement laitance as a layer;
- finishing concrete screed.
So, let's start pouring concrete on the garage floor:
Before pouring the floor, it is necessary to take into account several factors: the depth of groundwater, whether there is a possibility of flooding of the floor in the garage, and whether there is a slope of the area under the garage.
- The first step is to compact the soil. After this, the surface is lubricated with liquid clay (the best waterproofing for a garage!). After this, you need to wait until the clay dries, then you can apply markings using a cord;
- Next, we backfill with a layer of gravel up to 80 cm thick; if all conditions are favorable, then 30-45 cm may be enough. To adjust the height of the backfill, it is necessary to make markings on the walls using a regular building level;
- the gravel is pressed, all sharp and too large elements are removed. Now a 10 cm layer of sand is poured, which is also carefully pressed. Care must be taken to ensure that the surface is level; deviations of up to 20 mm are allowed.
Waterproofing is laid on a gravel-sand mixture. For this purpose, polyethylene film is used, laid overlapping. All its joints are sealed using special tape. Along the edges of the walls, the film should rise slightly above the level of the future floor; after the final finishing fill, the excess is carefully cut off. The film itself should not have defects.
Rough pouring of concrete is carried out after waterproofing. To do this, first a metal reinforcing mesh with a rod diameter of 5 mm and cell dimensions of 100x100 mm is laid on the surface. The entire surface is covered with a mesh, after which concrete is poured, that is, the first subfloor. The surface of the concrete is carefully leveled, after which it is necessary to leave it for a time sufficient for the concrete to dry. This may take approximately four weeks.
Preparation of concrete mixture
Then you need to prepare the concrete mixture. To do this, you need to know the proportions of concrete for the floor in the garage, as well as how much sand and water is required for the solution. If you are not sure that the mixture will be selected correctly, you can buy ready-made dry components at a building materials store. They contain additives that improve the quality of concrete flooring. The packaging with ready-made components contains detailed instructions.
When preparing the solution yourself, you usually take cement, sand and water in the following proportion: 1:4:1/2. This raises the question: “What grade of concrete is needed for a garage floor?” M150 is recommended for use when arranging parking lots, so it is suitable for the floor surface in such buildings, but provided there are no increased loads.
Medium-strength materials include M200 products - the service life of the floor reaches several decades. The leader in deciding what kind of concrete is needed for a garage floor is considered to be the M300 material, since it sets quickly, is wear-resistant and has increased moisture and frost resistance.
Water is poured into the concrete mixer, then cement is poured and finally sand. When implementing the manual method, cement is mixed with sand, preventing the formation of lumps, and only then water is added.
M 100-150
The cheapest option, which promises trouble for the builder if the room is not heated and the humidity level is not regulated. The water resistance of W2 means that it cannot be used without waterproofing - it will absorb too much water. Strength is 131–164 kgf/cm². It can be used for pre-filling, if provided. But during use, ruts quickly form, and falling wrenches will leave chips. And the service life will be minimal.
Frost resistance F 100-150 is a sign that, without cracking, it can only be used for pouring a garage floor in the southern regions of the country. Where there is no significant drop in temperature throughout the year.
Note! If technology is violated and low-quality materials are used, there is a high probability of cracking and swelling of the garage floor.
Pouring the floor in the garage
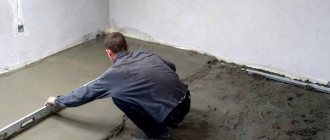
After preparing the mixture, begin pouring concrete. As a result of a rather painstaking process, a flat surface should be obtained (read: “How to level the floor in a garage - leveling options”). To level the concrete along the upper edges relative to the previously installed beacons, you can use a wooden lath. There are certain rules for leveling a concrete floor in a garage - you should move exclusively in a back-and-forth direction. Before pouring the floor in the garage, you need to study the tips and tricks for performing such work.
If the poured surface has become smooth, you should make sure that there are no holes. When they are available, they are filled with concrete mortar. At least 2 times a day, water the surface of the coating with water from a watering can. It will take about a month for it to harden well.
Floor screed thickness
There are several options for the thickness of the floor screed.
- Screed up to 2 cm . This is basically a self-leveling mixture, or concrete for final leveling of the surface. Poured without the use of reinforcing materials.
- Not less than 4 cm. It is believed that the minimum thickness of the rough screed should be no thinner than 4 cm, regardless of whether reinforcing material is used or not.
- Screed up to 7 cm. In this version of the screed, reinforcement or reinforcing mesh must be provided.
- Screed up to 30 cm. This screed thickness is used in production workshops and industrial premises. Pouring more than 30 cm of screed is not economically profitable; there will be no benefit from a thickness of more than 30 cm, but the material consumption and cost of work will increase significantly. It is advisable to use bedding to reach a screed thickness of up to 30 cm.
The final stage of arranging the floor in the garage
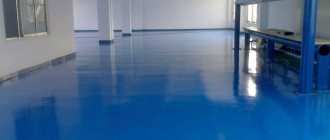
After pouring the floor surface in garage buildings, many owners use various finishing and cladding methods to strengthen the coating. When choosing how to treat a concrete floor in a garage, you may prefer to cover it with several layers of paint or lay universal clinker tiles (read: “How to treat a concrete floor from dust - simple options”).
If, after completing the work of pouring the flooring, there is still concrete mortar left, it can be laid before entering. The flooring will make it more convenient to enter the garage building by car.
When a month has passed, they begin to check the surface of the floor in the garage for defects. If deficiencies are found, they are eliminated - the cracks are filled with concrete. High-quality work done in accordance with technology allows the floor to be used for decades.
Concrete M 300-350 – characteristics
Withstands up to 300 freezing cycles, has plasticity P2 - P3 and water resistance from W8. High-quality material for a solid garage floor. It makes no sense to take brands of higher strength - the quality will not improve.
It will practically not allow water to pass through and will not crumble on the surface; the garage will not be dusty.
Please note: the more water in the mass when kneading, the more elastic the material will be. However, it will lose strength.
Concrete grades less than M 300 are more difficult to apply protective coatings to and are less durable.
Concrete floor repair
They repair the concrete floor in the garage when the existing damage is partially encountered. The fact is that defects do not appear on it by chance. They arise due to violations in the process of arranging the floor covering. Read also: “Do-it-yourself installation and repair of a garage floor.”
Among the defects you can find chips, cracks, peeling of the top coating, height differences, dusty surface, potholes, etc. The most common of these are cracks. It will be enough to eliminate the defect and treat the surface with special compounds that will strengthen the floor. When the shortcomings are widespread, experts advise dismantling the old covering and making a major overhaul of the garage floor.
About concrete hardening
When working with all types of concrete, we remember the following:
- The technological strength of concrete is achieved within 28-30 days from the moment it is poured;
- Strength of 60% is achieved after 7-8 days;
- Durability sufficient for walking comes after three days.
The maximum strength of high grade concrete is achieved after 6 months. That is why it is better to build private houses a season after pouring the foundation.
It is important to ensure uniform, natural drying of the concrete, and at elevated temperatures it is necessary to pour (wet) the drying concrete for a week and cover the concrete with polyethylene for the entire time it gains strength.
Articles on the topic
- About the site
- Marking the screed level: three ways to mark the floor level
- Screed care
- Installation of wet and semi-dry cement-sand screed
- Mixing the screed mortar
- Beacons for screed: types of beacons for screed
- Damper connection for screed
- Types of floor screed for apartments and houses
- Checking the floor for clearance
- Preparing the floor for cement-sand screed
Reinforcement and installation of guides
The floor covering will take constant loads from the vehicle. To make it as rigid as possible, it is recommended to carry out reinforcement. For work, you can use a road mesh of class B-I, cell size 100*100, 150*150 mm. The diameter of the stiffening ribs is 5 mm .
The reinforcement must be placed in the thickness of the screed, for which special clamps are used. It is best to choose products of the “sand support” or “ground fixation” type. A more democratic option is to use broken bricks. The supports are laid out in increments of 40-60 cm. The mesh is fixed strictly horizontally, which is controlled by the level .
Placing beacons will allow you to create a flat surface. You can use perforated aluminum strips, which are available at any hardware store.
The guides are placed in rows on the floor in increments of 40-50 cm . The distance between them is chosen in such a way that working with the construction tool is convenient. The beacons are placed on the alabaster solution, controlling the work with a level and focusing on the zero point.
