When getting acquainted with materials about floor construction, many visitors to construction sites for the first time encounter the recommendation to reinforce the screed. The editors of the StroyGuru website decided to clarify this issue and introduce home craftsmen to types of reinforcement, materials for its implementation, features of the process, as well as cases when reinforcement is required.
First, let us briefly recall what a screed is and what functions it performs. This will allow you to understand the meaning of reinforcement.
What is a screed
A screed, in simple words, is a layer between the ceiling (subfloor) and the external final finish (floor). At the same time, its structure must be monolithic so that the floor covering does not sag or deform. You can obtain a monolith using the DSP. However, concrete is brittle under high bending loads. To ensure that the screed does not crack or crumble over time, reinforcement is used.
What is reinforcement
Reinforcement refers to a method of increasing the strength characteristics of a product by introducing high-strength materials into the structure. Two types of reinforcement are used for screeds:
- using mesh reinforcement, which is filled with mortar;
- dispersive - fiber made of metal, propylene, glass or basalt fibers is mixed in the CPR.
The latter type of reinforcement successfully replaces the traditional one, and in some cases surpasses it. Difficulties arise only when introducing fiber into the composition of a dry mixture - it is time-consuming and labor-intensive. You can't do it with your hands. Small mechanization is needed. For those who are interested in the method, we recommend watching the work “Floor screed with fiberglass.”
Functions of screed reinforcement
Reinforcing the screed with mesh allows you to:
- increase the strength of concrete;
- increase the service life of the leveling layer, and with it the floor covering;
- Preserve the surface of the screed from cracking as the concrete gains strength;
- prevent deflections and subsidence of the floor base, as well as the appearance of bulges;
- protect concrete from the expansion of cracks that appear during the operation of the floor;
- reduce shrinkage.
Installation technology
When constructing a heated floor with laying reinforcing mesh, it is important to install it correctly.
For your information! Regardless of the type of reinforcement chosen, reinforcement is carried out throughout the floor, with a small indentation from the walls.
When pouring a large area, overlapping laying is permissible, and the products are connected with wire. For a non-standard surface with steps or transitions, it is necessary to repeat the base topography.
The mesh is mounted suspended on fasteners, at a distance of 2 cm from the rough base.
Video
Foundation reinforcement USHP / Mesh for water heated floors. Part 18
Preparatory work
If there is a ready-made base, it needs to be leveled and unevenness repaired. Then lay a polyethylene film for waterproofing and a thermal insulation layer. Along the perimeter, the room must be taped with damper tape to compensate for temperature deformations.
Before starting the process of pouring the screed on the ground, it is necessary to prepare a “pie” - gravel and sand, a layer of thermal insulation and waterproofing. And only then, install the masonry network and pour the mortar.
If reinforcement is carried out on a fill base, then two layers of reinforcement should be made.
Laying the mesh
An important point when reinforcing is the correct placement of the mesh. It is placed at a small height from the base. This height is determined taking into account the thickness of the screed of a warm electric or water floor, and the diameter of the mesh rods.
To create a gap between the base and the reinforcement, you can place wooden blocks, pieces of brick or a metal profile under it. It is necessary that these supports allow the solution to penetrate under the heating elements.
Reinforcement should be placed in the lower third part of the concrete layer. The supports should be placed in places where the rods intersect.
To facilitate the installation process, you can buy ready-made accessories for the stand, which are shaped like crowns, stands or chairs. The strips of the product are laid with an overlap of 10 cm, with a distance from the walls of about 2 - 3 cm.
Important! The distance between the supports depends on the thickness of the planned screed.
The process of laying a composite or plastic structure, other:
- after arranging the “pie”, 1/3 of the solution is poured and leveled;
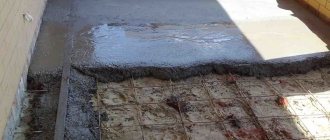
- then a mesh is placed on top and pressed into the screed layer;
- The cable or pipes of the water heated floor are laid on top, and filled with the remaining solution, the surface is leveled according to the beacons installed in advance.
Plastic and composite types of mesh can be placed directly on the pipes of the water system, but there is a risk of voids during pouring.
Attaching heating elements
The easiest way to secure a water-heated floor circuit or cable to the mesh is to use clamps.
For your information! When the clamps interact with hot water, they become softer and more convenient to fix. To do this, place the clamps in hot water for 10 minutes.
You can fix it using fastening tape or wire, but the option with clamps is more convenient and practical.
Features of reinforcement
There are uniform rules that must be followed when reinforcing warm water or cable floors:
- regardless of the type of reinforcing material, in order to increase the strength and elasticity of a solution of cement and sand, it is recommended to add plasticizers to it;
- It is prohibited to touch the product with a rough coating; it must be inside the mortar layer;
- It is unacceptable for the mesh to be dirty;
- It is impossible for reinforcement elements to protrude on the surface of the screed.
In addition, before starting work, you should read the accompanying documentation attached to the reinforcing products.
Popular manufacturers
Mesh for screed reinforcement is produced at many enterprises. The most popular among them:
Armplast produces fiberglass reinforcement for heated floors. The light weight of the mesh and the size of the cells allow it to be used for plastering work. Product advantages:
- does not corrode in the alkaline environment of the CPR;
- long service life;
- high strength - twice as strong as steel reinforcement of the same diameter;
- has almost the same coefficient of expansion as concrete;
- does not conduct electric current.
Tenax specializes in the production of polypropylene fittings. The product is characterized by increased strength and flexibility. It does not deform when the screed shrinks, has high resistance to aggressive chemicals, and is easy to cut. According to experts, plastic mesh is the best option for a 7-8 cm thick screed when installing electric or water floor heating systems.
"Gridex". The company supplies construction organizations and retail chains with basalt reinforcing materials. Product Features:
- impregnated with acrylate - improves adhesion to the central fiber board;
- standard cell size 25 x 25 mm;
- ideal for various “warm floor” systems;
- not afraid of the alkaline environment of concrete;
- does not conduct heat, unlike metal.
"LenStroyDetal". The company welds metal mesh for the screed (mesh size 100x100 mm) from galvanized rods with a diameter of 4 mm. Galvanizing steel significantly increases the service life of the metal inside the alkaline environment of concrete, and with it the screed.
Reinforcing elements: what strengthens the screed?
The following materials can be used to reinforce the screed:
- metal mesh (including road mesh, originally intended to strengthen the road surface);
- polymer mesh - made of plastic;
- fiberglass mesh;
- fiber – microfibers made of polypropylene, glass, basalt, metal (steel).
The most durable and reliable reinforcement is performed using metal mesh, which distributes the loads in screed structures and protects them from damage during bending. Metal mesh is capable of maintaining the shape of thick screeds subjected to significant loads - in workshops, warehouses, shopping centers, offices. In individual construction, reinforcement with metal mesh is a guarantee of trouble-free operation of the screed for many decades.
Polymer and fiberglass meshes are weaker in tensile strength than metal ones, so they are used for screeds subject to light loads. As a rule, these are floors in apartments and private houses.
To strengthen screeds, fiber is also used - bulk fibers from various materials that are mixed into the composition of the solution. The use of fiber reduces the risk of shrinkage microcracks, makes the screed monolithic and increases its impact strength. But fiber is not able to replace “power” reinforcement with mesh. In other words, a fiber screed will be able to dry perfectly without cracks or shrinkage, but will not be able to resist large tensile and bending stresses.
Let's look at each type of reinforcing elements in more detail.
Option #1 - metal mesh
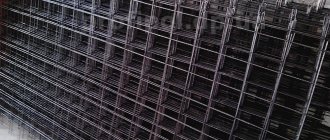
Special metal mesh for reinforcement is made from VR-1 steel wire connected by spot welding. The diameter of the wire used is 2.5-6 mm.
The wire in the reinforcing mesh forms square or rectangular cells of different sizes - from 50 mm to 200 mm. The smaller the cells, the more metal used in the mesh, and accordingly, the higher the strength of the reinforcement. The most popular meshes are made from wire with a diameter of 3 mm, with square cells with sides of 100 mm, 150 mm, 200 mm.
Nets are supplied in rolls or cards (sheets). Rolls are easier to transport, but only a mesh of thin wire no more than 2-3 mm thick can be “twisted” in this way. The standard width of such rolls is 1-1.5 m, the length reaches 25 m. The main part of the reinforcing mesh is produced in cards with dimensions of 0.5x2 m, 1x2 m, 2x3 m, 2x4 m, etc.
The main advantages of metal mesh for reinforcement:
- high tensile strength, which is transferred to the screed during reinforcement;
- resistance to temperature changes, heating, freezing;
- binding ability, which allows the screed to maintain its shape even under high loads;
- unlimited service life.
The main purpose of the metal mesh is to distribute the load throughout the screed, increase its strength and thereby reduce the risk of subsidence, cracks, potholes and any other deformations. The mesh wire rods absorb tensile stresses and protect the floor structure from damage during bending and tension. Accordingly, the load-bearing capacity of the screed increases.
When reinforcing, the mesh is placed inside the screed - in the lower third of its thickness. In this case, the mesh must be raised above the subfloor in order to “work” in the body of the screed, and not outside it. You can raise the mesh above the base by installing it on special plastic stands of the required height (pieces of drywall or other similar material are also used).
To lay a screed reinforced with metal mesh, do the following:
- Clean the floor surface from debris, loose pieces of concrete, and dust.
- All detected cracks and cracks are filled with mortar or putty.
- Prime the surface.
- If necessary, hydro-, heat- or sound-insulating material is laid on the primed base.
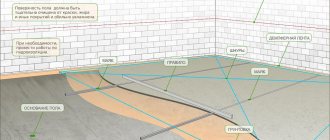
- Determine the height of the screed. To do this, using a hydraulic level or laser level, marks are made along the walls of the room (at the same height). When connecting all the resulting points, an absolutely flat line relative to the horizon is obtained. From this line, measure the distance to the existing floor level - at several points. Where the distance is minimal is the highest point of the floor, from it you can “count” the desired thickness of the screed (here the thickness of the screed will be the thinnest). From the highest point upward, measure the thickness of the screed (minimum thickness 2.5 mm), mark this level on the wall. A new horizontal line is drawn along the found point - the surface of the future screed will pass along it.
- Install the mesh, laying its sheets overlapping by at least one cell.
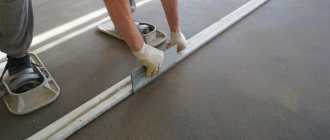
- Guide beacons (metal profiles, slats, boards) are installed on the mesh, securing them to cement-sand mortar or using screws. Beacons are set strictly level, so that their upper part is flush with the surface of the future screed (along a line previously marked on the wall). The distance between the beacons is about 1 m, but not more than the length of the rule used to pull the tie.
- The solution is poured into the spaces between the beacons and leveled, pulling it out using the rule.
- After a few hours, when a supporting surface appears on the screed (marks will no longer form), remove the beacons and seal their recesses with fresh mortar.
- To avoid rapid drying of the solution and the formation of cracks, the surface of the screed is moistened with water for 5-7 days. On hot days, it is additionally recommended to cover the screed with plastic film or other moisture-retaining material.
Thus, the reinforcement procedure does not significantly complicate the screed creation technology. At the same time, it significantly increases its performance characteristics.
Option #2 - plastic mesh
When reinforcing unloaded screeds up to 80 mm thick, the metal mesh can be replaced with a polymer analogue - a mesh made of polypropylene (plastic).
Plastic mesh, unlike metal mesh, is lighter and more elastic. This allows it to stretch without deforming and retaining all its qualities. This property can be very useful when shrinking a building. The resulting shrinkage deformations will simply stretch the mesh and the screed will retain its integrity. In the same situation (with significant shrinkage), the metal mesh may “lead” and it will break the screed.
Most often, general construction plastic mesh – OSS – is used for reinforcement. It is supplied in rolls with dimensions: width – 1-4 m, length – 10-50 m. The weight of such a mesh is very small, thanks to which it can be easily transported and then mounted in a screed of any configuration. The simple cutting of polypropylene cells into pieces also helps reduce labor costs during reinforcement.
Plastic mesh is not subject to corrosion and is not affected by aggressive environments. The appearance of rust in the cement mortar and, as a consequence, the appearance of red spots on the surface of the screed are excluded.
Advantages of polymer mesh as a material for screed reinforcement:
- increased elasticity;
- exceptional tensile strength;
- chemical inertness (does not rust, does not interact with chemical media);
- the ability not to shield communications (plastic does not interfere with radios, televisions, telephones, walkie-talkies);
- high geometric stability;
- light weight;
- easy installation, which allows you to save on labor costs;
- low cost.
Reinforcement of the screed using plastic mesh is carried out according to the same scheme as with metal mesh.
Option #3 - fiberglass mesh
Another option for screed reinforcement involves the use of fiberglass mesh. These are meshes with square cells (usually 4-6 mm), made of aluminoborosilicate glass by openwork weaving.
Several brands of fiberglass mesh are produced, some of them are impregnated with alkali-resistant polymer dispersions to improve performance characteristics. You need to pay attention to this when purchasing. The SSP-95 and SSDor-330 (road mesh) grades are coated with impregnation, but their closest “relatives” SSM-85 and SSDor-300 are not. Alkali-resistant impregnations play an important role. The fact is that the cement screed mortar in which the mesh will be located has an alkaline reaction. Exposed fiberglass in an aggressive alkaline environment can be “eaten” (usually within 5 years). To prevent this from happening, the meshes are coated with a polymer composition that is neutral to alkali.
Fiberglass is very light and does not create unnecessary loads on the floor. Due to its light weight and the ability to roll into rolls, the material is easy to transport even by non-truck transport or carried manually.
In a screed, fiberglass performs the same functions as plastic mesh. That is, it prevents the occurrence of shrinkage cracks and local destruction, and increases the strength of the screed.
Advantages of fiberglass mesh:
- light weight;
- high tensile strength;
- resistance to temperature changes;
- resistance to aquatic environments;
- chemical neutrality (in case of using alkali-resistant impregnations);
- easy installation.
Installation of fiberglass mesh is carried out in the same way as when using other types of mesh.
How to use it correctly
The screed reinforcement technology step by step is as follows.
Step 1. Determine which mesh to use for floor screed: its type, thickness of wire or fiber, cell dimensions. We remind you that with heavy loads on the floor or screed on the ground, the thickness of the reinforcement should be greater and the cell size smaller.
Step 2. Choose quality fittings. The wire should not have areas damaged by corrosion, no oil stains, welding should firmly grip the rods together. The mesh made of propylene and composites should not contain cuts or damage to the protective layer.
Step 3. The base for pouring the screed is prepared: the surface of the ceiling is repaired, hydro- and thermal insulation work is carried out, and a damper tape is attached to the wall. Details of the process can be found in the article “Preparing the floor for pouring screed.”
Step 4. A reinforcing mesh is placed over the prepared surface. It must be laid in strictly parallel strips, overlapping, but not more than 15 cm. The mesh should not reach the entire perimeter of the wall. The gap is 3-4 cm.
Step 5. The laid mesh rises 1-2 cm - it should be placed in the lower third of the concrete. To hold the reinforcement in a suspended state, improvised materials can be used: pieces of brick, pipe cuttings or factory-made stands. The options are shown in the photo below.
Step 6. Using a level, the horizon of the laid mesh is checked. If necessary, adjustments are made.
Step 7. The solution is prepared and the screed is poured.
There is a nuance when reinforcing with polypropylene mesh. Here they carry out preparatory work, pour a small layer of mortar over the entire surface of the floor, after which they spread the mesh and press it into the screed. After gaining strength, the first layer is poured with a second, finishing layer.
Kinds
Floor screed mesh is sold in stores:
- steel with galvanization;
- plastic polypropylene;
- fiberglass (fiberglass);
- basalt.
In the first and second cases, meshes for floor reinforcement are made of steel or polypropylene. And the last two options are composite materials based on glass or basalt, which are supplemented with a binder plastic.
Reinforcing screed makes the floor stronger and more durable
Steel
Steel mesh should only be galvanized, otherwise its service life in the screed will be short. The main advantage of the metal version is fire resistance. All other analogues consist entirely or partially of plastics and are susceptible to high temperatures. If there is a fire on the floor, only the steel in the concrete will retain its properties.
Despite all its strength and reliability, steel reinforcing mesh is susceptible to corrosion. Even after galvanizing, it begins to rust over time. If the screed is done on the floor in a bathroom, bathhouse, shower or near a swimming pool, then it is better to choose a different material.
Advantages of steel mesh for reinforcement
Polypropylene mesh for screed
The polypropylene screed mesh is resistant to moisture and alkalis, which are characteristic of concrete mortar. It is slightly inferior in strength to steel, but weighs 6–7 times less. If the floor has to be reinforced in an old house with wooden floors, then this point is extremely important. Plus it has much better tensile strength.
Polypropylene mesh options
Another advantage of this plastic mesh is elasticity. With strong pressure from above on the screed, it stretches without breaking, and then returns to its original state. Steel and fiberglass with similar loads on the floor often simply break at the junction of the rods with each other.
Advantages of using plastic mesh
Fiberglass
Fiberglass (fiberglass) is contraindicated in high temperatures and alkalis. But it is not afraid of water and is cheap. And to withstand alkaline effects, meshes made from this material are coated with polymers during manufacturing. Without such protection, fiberglass is “eaten up” in a concrete screed within literally five years. And with it, the leveling layer of the floor lasts for 40–50 years without any problems.
Fiberglass mesh
Fiberglass is lightweight and easy to install. In terms of strength, fiberglass reinforcement is not inferior to other options. But, like all non-metallic analogues, fiberglass is superior to steel in thermal conductivity by almost two orders of magnitude. If the floor is poured onto the ground, then preference should be given to fiberglass reinforcing mesh.
Basalt
The basalt version is similar in characteristics to fiberglass. Only here in production a different supporting material is used - basalt fiber. This mesh has a bronze tint, is resistant to corrosion and can easily withstand the effects of alkalis.
Application of basalt mesh
In addition to the lack of susceptibility to rust, basalt, fiberglass and polypropylene reinforcement of floor screeds do not conduct electricity and do not shield communication signals. In this regard, it greatly outperforms its steel counterpart.
Advantages of using basalt mesh
In some cases you can’t do without a mesh
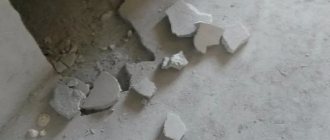
Reinforcing screeds is a somewhat labor-intensive and financially expensive process. It is better to fill the screed without a mesh. But there are situations when it is impossible to obtain a concrete layer leveling the base with a long service life - it will crumble a few years after the installation of the floor.
Among them:
- flooring on the ground (garage, private house). In this case, layers of crushed stone, gravel or expanded clay, which are not stable, are poured under the screed. Any slight movement of the soil under the influence of frost, water and other natural factors will inevitably lead to the destruction of the floor pie;
- absence of direct contact of the screed solution with the concrete base, i.e. a so-called floating screed is made - a waterproofing film (bitumen), a layer of insulation or noise-proofing material is laid between it and the ceiling;
- pouring a rough screed;
- the thickness of the poured layer of mortar is more than 5 cm. It takes a long time to dry, as a result of which a network of small cracks appears on the surface. The reinforcing mesh for the screed prevents their further growth;
- “warm floor” device - under sudden temperature changes, concrete is constantly in motion: it either expands or returns to its original linear dimensions. And these are more and more cracks;
- Excessive load on the floor is planned: oak furniture, stove, fireplace.
Attention: when pouring a 3-4 cm thick screed onto a reinforced concrete floor, no tensile loads leading to deformation occur in the leveling layer. Therefore, reinforcement is not performed in such cases.
Purpose of the grid
Is reinforcing mesh needed when pouring heated floors? Laying is not mandatory, but experts advise using it. After all, with its help, you can get a number of positive effects, such as:
- Increased strength and durability - it will protect the structure from deformation when the system heats up, and therefore from the formation of cracks.
- Uniform distribution of load across the base from furniture and finishing coating.
- Reducing cement consumption when preparing the mixture.
- Reducing the thickness of the screed, but this does not affect the strength properties of the device.
- Possibility of fixing heating elements to it.
- Increased system performance. Does not allow the heating cable or pipes through which the coolant circulates to lie close to the base. After all, cement mortar must penetrate into the space between them, this increases the heat transfer of the floor.
In addition, the use of a reinforced structure allows you to obtain the most even surface.
Reinforcing mesh laying technology
We will describe the technology of screed reinforcement using the example of laying welded mesh.
- Preparing the rough coating. For greater convenience of work, you must first thoroughly prepare the base for laying concrete. It is necessary to dismantle the old covering and then clean the subfloor from dirt.
- Laying the rough covering. Most often, foam or mineral wool is used for additional sound and heat insulation. Also, in some cases, expanded clay can act as a rough coating, which makes it possible to save mortar and make the screed lighter.
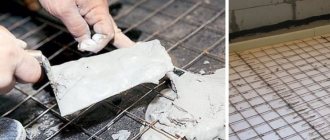
- Laying the mesh. After preparing the rough coating, it is the turn of the reinforcing material. First of all, it is necessary to lay a vapor barrier film. Then you need to lay out the prepared mesh on it. Please note that it cannot be laid directly on the subfloor. To ensure that the mesh is located at a height of 2-3 cm, either ready-made stands or pieces of drywall or insulation are placed under it. You need to retreat a couple of centimeters from the wall, and the overlap of the mesh between each other should be one cell.
- Arrangement of beacons. If you want to get a perfectly even screed, use beacons. Most often they are made from metal profiles. First you need to determine the highest point of your rough surface. In this place, your screed must have a thickness of at least 4 centimeters. Then you need to use an assembly or professional laser level to make marks along which the upper border of the finished screed will pass.
As a rule, the standard distance between beacons is 1.5 meters. They should extend from the walls by a maximum of 30 cm. If you do not adhere to these rules, the coating may turn out crooked. Beacons are laid out parallel to the longest wall of the room. To maintain strict horizontality, experts advise stretching thin threads of nylon between the walls exactly at the level of the markings. This will help workers orient themselves correctly and raise the profile to the correct height. The beacons can be fixed at a given height using gypsum mortar.
- Pouring concrete. When the beacons are set, you can begin mixing the cement mortar. It shouldn't be very thick. Next, the solution must be carefully poured onto the mesh.
- Composition distribution. When all the solution has been poured out, it must be carefully leveled using a special rule, focusing on the beacons.
- Removing beacons (optional). Professionals have different opinions about whether it is necessary to remove the beacons. Some builders convince that they do not need to be removed. To make the surface of the screed ideal, it can be filled with a self-leveling mixture (about 3-5 mm). This will help hide the metal profiles.
If you need to remove them, then you need to do this as soon as a supporting surface is formed. This usually happens 3-5 hours after pouring. When the beacons are removed, the voids must be filled with cement mortar and leveled using the rule.
When everything is finished, you need to let the screed dry thoroughly. To avoid the formation of cracks on its surface, for the first three days it must be shed with water and high humidity in the room must be maintained. To do this, keep the balcony and windows tightly closed. The screed will be completely ready in 3 or 4 weeks.
Warm floor
When installing heated floors, reinforcement with cement-sand or concrete screed is mandatory . This is required by SNiPs, and even an individual developer must understand the need for the operation.
The fact is that for a heated floor to work effectively, you need reliable thermal insulation. Most often these are polystyrene foam boards. Heating elements are placed on this layer and filled with solution. Such floors are susceptible to temperature changes, and the reinforcing elements prevent the appearance of cracks on the surface.
A heated floor screed without reinforcement will not last long. The best option for strengthening heated floors would be combined reinforcement - metal or polypropylene mesh and fiber.
A flat floor is a prerequisite for high-quality installation of all modern coatings - laminate, parquet boards, linoleum, ceramic tiles. The concrete finishing coating is excellent for leveling the base. But concrete and mortar are considered fragile building materials and can be destroyed under the influence of mechanical loads and temperature changes. The last one is an important question. Modern technologies make it possible to install heated floors by introducing heating elements into the thickness of concrete and “hiding” utility lines.
Reinforcing the screed with metal, plastic, fiber improves the performance of the concrete floor, it becomes resistant to various types of influences. The reinforcement prevents the formation of cracks, the surface is smooth and even, and resists thermal loads.
Sequencing
To increase the service life of the floor, it is necessary to carry out reinforcement work correctly. For convenience, professionals have divided the filling technology into several stages. Let us analyze in detail the algorithm of actions when reinforcing the base.
Surface marking
Before you start creating the screed, you need to correctly mark the floor. The procedure is easier to carry out using a laser level, although a hydraulic level can also be used. The equipment is placed on a flat surface and the beam is projected onto the wall.
Working with a laser level Source kraski-net.ru
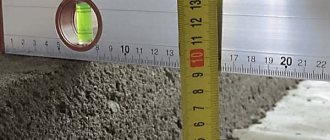
After making the marks, draw a horizontal line. The distance from the floor is measured from the element, calculating the minimum. The found point is the zero marking, from which the thickness of the screed is determined. The parameter depends on the required strength of the base. The characteristic varies between 2.5-8 cm. In residential premises, the data must be the same in all rooms except the bathroom and loggia (balcony).
Preparatory work
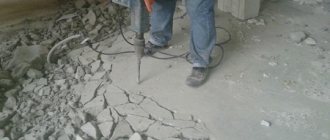
Reinforcement of concrete floors is carried out on cleaned surfaces. The old screed is removed from the base, the remaining debris is taken out, and the dust is removed with a construction vacuum cleaner. The space around the perimeter is primed with a roller or paint brush. If the area is not treated, the cement will draw liquid out of the solution. Due to a violation of the technology, hardening occurs unevenly, which will lead to the appearance of cracks.
Removing debris before reinforcement Source stroisovety.org
Fiber reinforcement
Fiber protects against microcracks, but will not protect against the appearance of significant defects.
Reinforcing a screed with fiber fiber is somewhat different from using mesh. The reinforcement material is a mixture of special fibers (basalt, fiberglass, steel, polypropylene), which are added to the screed solution. When hardened, they form a single durable monolithic coating. Fiber protects against microcracks, but does not protect against the appearance of significant defects.
The choice of fiber type depends on the characteristics of the floor and its purpose. For example, to obtain a light screed, glass or polypropylene fiber is used. Metal fiber is suitable for high traffic floors. If the screed will be performed outdoors or in difficult aggressive conditions, then choose basalt fiber.
To use fiber, it is poured into a dry composition in a concrete mixer. Once mixed with cement, water can be added. The prepared mixture is placed on the base and leveled along the beacons. Fiber can be used in combination with any reinforcing mesh to increase the strength of the screed.
Some tips and tricks
To ensure that the installation of the screed goes as smoothly as possible and the quality of work is at its best, it is recommended to take into account several installation rules.
- The thickness of the reinforced screed should not be less than 6 cm.
- The complete drying time for the concrete mixture is about 28 days. There is no need to disturb the material or lay down the finishing before.
- A layer of expanded clay or cement mortar is laid before pouring the screed so that the mesh remains directly in the screed layer itself.
- If the weather is hot, then the screed should be covered with plastic film during the drying period.
- All oil stains, as well as traces of paint, are removed from both the subfloor and the mesh. This will ensure maximum adhesion of the concrete mixture to other materials.
- The reinforcing mesh must be completely covered with mortar.
Laying reinforcing mesh for screed
Reinforced screed is an excellent way to create a durable and reliable subfloor, on which a finishing layer can subsequently be safely laid. The cost of this type of base is no higher than a regular one, so you can easily afford to spend money on a reinforcing mesh, which will provide peace of mind for the integrity and quality of the screed layer.
What can replace the mesh?
When constructing a warm water or electric floor, the mesh is often replaced with special bosses, which can be separate or mounted on polystyrene insulation, and heating elements are attached to them.
If time permits, you can make a reinforcing product with your own hands from reinforcing bars or a metal profile. To do this, the rods are placed on top of each other to form a lattice and connected by spot welding or wire.
To strengthen the screed of heated floors of a small area, it is allowed to use panser mesh from beds.
To obtain a flat surface when constructing a heated floor structure, it is recommended to reinforce the concrete screed. Indeed, during the heating process, the surface may crack, and the presence of a mesh in the “pie” prevents this. In addition, this product makes the floor smoother and significantly increases its service life.
Reinforcement of floor screed - when necessary
Reinforcing the concrete mixture with reinforcement is done to create a strong structure that is resistant to tension, compression or bending. For this technology, different working methods, materials and tools are used, based on operating conditions and the characteristics of the building. The finishing coating is laid after pouring the rough base.
This method performs the following function:
- increases the strength of the floor;
- protects against microcracks during drying;
- prevents shrinkage of concrete and the occurrence of deformation, cracks during increased pressure and vibration loads;
- increases the service life of the structure.
In residential premises, a similar measure is not used, since the slabs are covered with a 30-40 mm layer of mortar, which levels them. In this case, reinforced concrete floors account for a significant portion of all overloads.
Reinforced cement-sand screed is required for:
- using thermal insulation (mineral sheets, polystyrene foam, polystyrene);
- strengthening the base under fireplaces, stove equipment, in offices where more than 500 people pass per day;
- working on soil that swells (especially if there is a layer of expanded clay);
- installation of flooring in garages, industrial workshops, and warehouses. In these places, the floor is subject to heavy loads, so it requires increased strength;
- concrete mixture thickness 5 cm and above;
- creating a heated floor system for resistance to temperature changes;
- floating screed, forming a slab that is not chemically connected to the walls and lies on a dense thermal insulator - this is indicated in the project.
Important! The moving base must be reinforced, as it is prone to bending and stretching, compromising the integrity of the coating.
Reinforcement is more often used when installing rough and multi-layer structures, when pouring self-leveling floors and to reduce mortar consumption. In construction work, meshes made of metal, fiberglass, polymers, and fiberglass are used. When choosing an option, the requirements of design documentation and operating conditions are taken into account. Calculations are made according to GOST and SNiP.
Advantages, what is the difference from a conventional screed
A subfloor made without reinforcement and a reinforced one differ not in appearance, but in the presence of an additional layer in the form of a mesh made of different materials.
Screed reinforcement affects:
- improving the operational and installation characteristics of the cement mixture;
- saving solution;
- resistance to cracks;
- structural strength;
- reducing the thickness of the screed;
- elimination of base irregularities.
Additional Information! All requirements for the composition of solutions and stages of work are specified in regulatory documents (SNiP, VSN, MDS).
How to calculate the thickness of the screed?
In each individual case, the thickness of the finished screed is calculated individually. First of all, it depends on the quality of the base itself and its type. The thickness is also affected by the need to install underfloor heating. Builders have developed several basic rules for determining the thickness of the screed:
- The screed is at least 3 cm if the base is relatively flat and strong.
- If there is a heated floor system in the floor, the thickness is about 5 cm (for an electrical system). For a water heated floor, the thickness of the screed will be 7-10 cm.
- When planning to make an expanded clay or sand cushion, count on at least 5 cm of screed.
